Project #12: Robotics – Laser Diode – Mk03
——
——
——
——
——
——
Laser Diode
A laser diode is a semiconductor device similar to a light-emitting diode in which a diode pumped directly with electrical current can create lasing conditions at the diode’s junction. Laser diodes can directly convert electrical energy into light. Due to the drop of the electron from a higher energy level to a lower one, radiation, in the form of an emitted photon is generated. This is spontaneous emission. Stimulated emission can be produced when the process is continued and further generate light with the same phase, coherence and wavelength.
The choice of the semiconductor material determines the wavelength of the emitted beam, which in today’s laser diodes range from infra-red to the UV spectrum. Laser diodes are the most common type of lasers produced, with a wide range of uses that include fiber optic communications, barcode readers, laser pointers, CD/DVD/Blu-ray disc reading/recording, laser printing, laser scanning and light beam illumination. With the use of a phosphor like that found on white LEDs, Laser diodes can be used for general illumination.
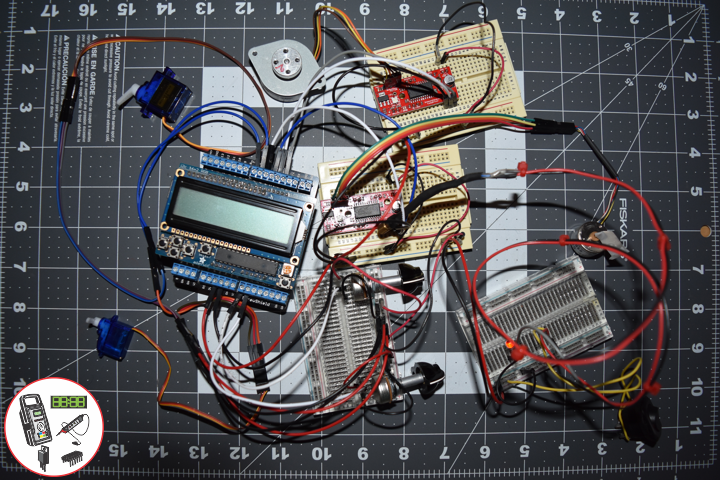
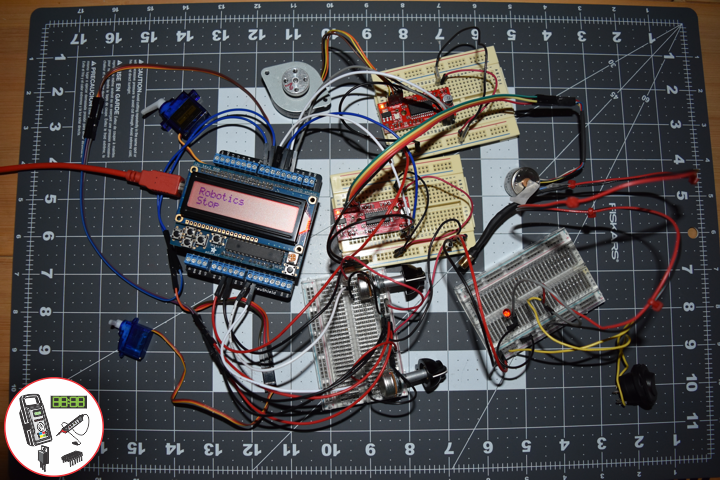
DL1912Mk02
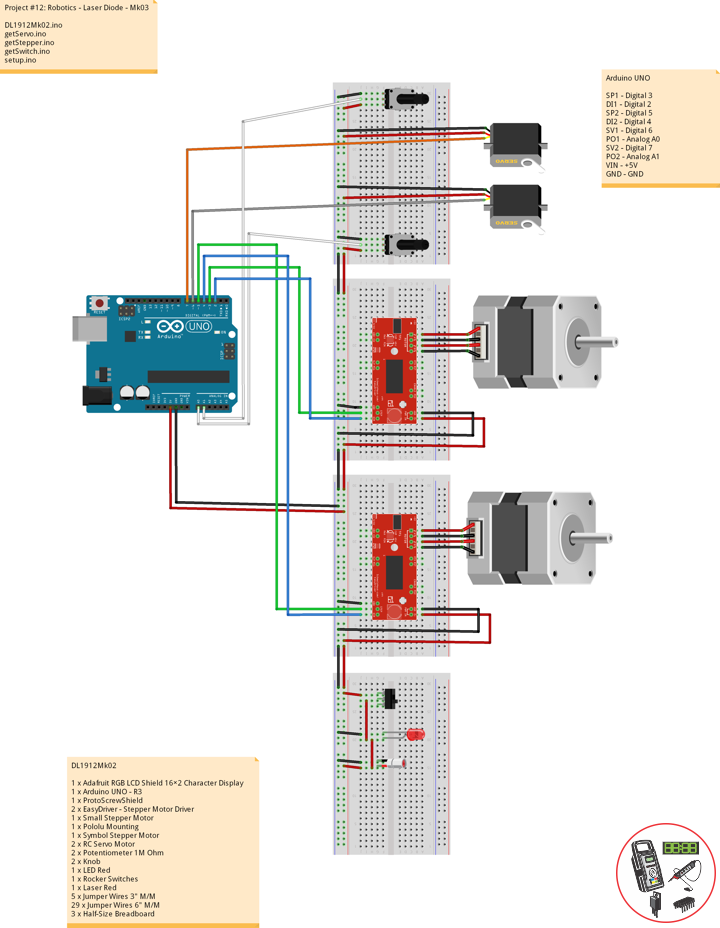
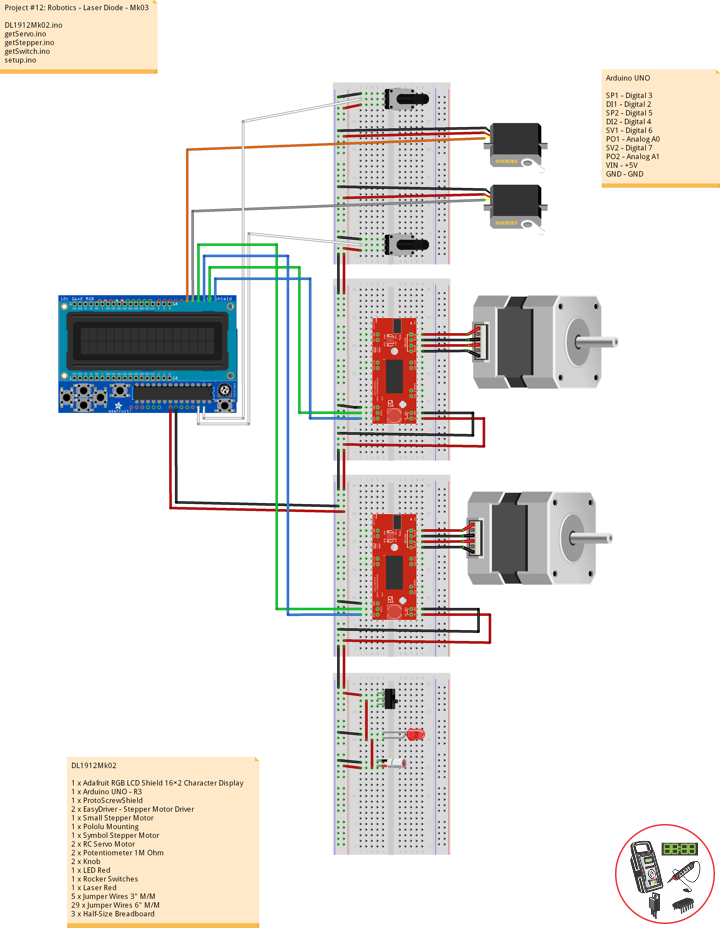
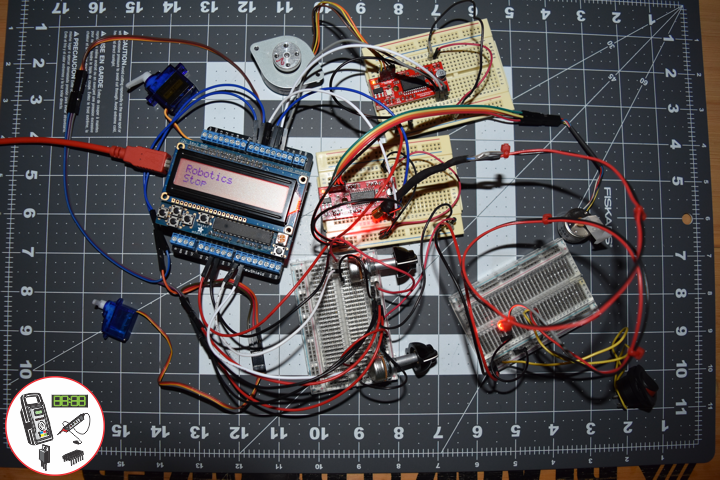
1 x Adafruit RGB LCD Shield 16×2 Character Display
1 x Arduino UNO – R3
1 x ProtoScrewShield
2 x EasyDriver – Stepper Motor Driver
1 x Small Stepper Motor
1 x Pololu Mounting
1 x Symbol Stepper Motor
2 x RC Servo Motor
2 x Potentiometer 1M Ohm
2 x Knob
1 x LED Red
1 x Rocker Switches
1 x Laser Red
5 x Jumper Wires 3″ M/M
29 x Jumper Wires 6″ M/M
3 x Half-Size Breadboard
Arduino UNO
SP1 – Digital 3
DI1 – Digital 2
SP2 – Digital 5
DI2 – Digital 4
SV1 – Digital 6
PO1 – Analog A0
SV2 – Digital 7
PO2 – Analog A1
VIN – +5V
GND – GND
DL1912Mk02.ino
// ***** Don Luc Electronics © *****
// Software Version Information
// Project #12: Robotics - Laser Diode - Mk03
// 12-02
// DL1912Mk02p.ino 12-03
// Arduino UNO
// Screw Shield
// Adafruit RGB LCD Shield
// 1 x Small Stepper Motor
// 1 x Symbol Stepper Motor
// 2 x EasyDriver
// 2 x RC Servo Motor
// 2 x Potentiometer
// 1 x LED Red
// 1 x Rocker Switches
// 1 x Laser Red

// include the library code:
#include <Adafruit_RGBLCDShield.h>
#include <Servo.h>

// Adafruit RGB LCD Shield
Adafruit_RGBLCDShield RGBLCDShield = Adafruit_RGBLCDShield();

// These #defines make it easy to set the backlight color
#define OFF 0x0
#define RED 0x1
#define YELLOW 0x3
#define GREEN 0x2
#define TEAL 0x6
#define BLUE 0x4
#define VIOLET 0x5
#define WHITE 0x7

// Momentary Button
int yy = 0;
uint8_t momentaryButton = 0;

// 2 x EasyDriver
int dirPinR = 2;                           // EasyDriver Right
int stepPinR = 3;                          // stepPin Right
int dirPinL = 4;                           // EasyDriver Left
int stepPinL = 5;                          // stepPin Left
int i = 0;

// 2 x RC Servo Motor
// 2 x Potentiometer
Servo isRCServo1;                          // Create servo object to control a RCServo1
int servo1 = 6;                            // Servo 1
int iPot1 = A0;                            // Analog Potentiometer 1
int iVal1;                                 // Variable - Analog Potentiometer 1
Servo isRCServo2;                          // Create servo object to control a RCServo2
int servo2 = 7;                            // Servo 2
int iPot2 = A1;                            // Analog Potentiometer 2
int iVal2;                                 // Variable - Analog Potentiometer 2

void loop() {

  // Clear
  RGBLCDShield.clear();

  // Momentary Button
  momentaryButton = RGBLCDShield.readButtons();

  switch ( yy ) {
    case 1:

      // Up
      isSwitch1();

      break;
    case 2:

      // Down
      isSwitch2();

      break;
    case 3:

      // Right
      isSwitch3();

      break;
    case 4:

      // Left
      isSwitch4();

      break;
    case 5:

      // Stop
      isSwitch5();

      break;
    default:

      // Stop
      yy = 5;
      RGBLCDShield.setBacklight(RED);
      isSwitch5();

   }

   if ( momentaryButton ) {

    if ( momentaryButton & BUTTON_UP ) {

      yy = 1;
      // Up
      RGBLCDShield.setBacklight(GREEN);

    }

    if ( momentaryButton & BUTTON_DOWN ) {

      yy = 2;
      // Down
      RGBLCDShield.setBacklight(VIOLET);

    }

    if ( momentaryButton & BUTTON_LEFT ) {

      yy = 3;
      // Right
      RGBLCDShield.setBacklight(TEAL);

    }

    if ( momentaryButton & BUTTON_RIGHT ) {

      yy = 4;
      // Left
      RGBLCDShield.setBacklight(YELLOW);
    }

    if ( momentaryButton & BUTTON_SELECT ) {

      yy = 5;
      // Stop
      RGBLCDShield.setBacklight(RED);

    }

  }

}
getServo.ino
// Servo
// isServoSetup
void isServoSetup() {

  // 2 x RC Servo Motor
  isRCServo1.attach( servo1 );
  isRCServo2.attach( servo2 );

}
// isServo1
void isServo1() {

  // EasyDriver
  isStepperStop();

  // Potentiometer RC Servo Motor 1
  iVal1 = analogRead( iPot1 );              // Reads the value of the iPot1 (Value between 0 and 1023)
  iVal1 = map(iVal1, 0, 1023, 0, 180);      // Scale it to use it with the isRCServo1 (Value between 0 and 180)
  isRCServo1.write( iVal1 );                // isRCServo1 sets the servo position according to the scaled value
  delay(15);

  // Display
  // Set the cursor to column 0, line 0
  RGBLCDShield.setCursor(0,0);
  RGBLCDShield.print("RC Servo 1");         // RC Servo 1
  // Set the cursor to column 0, line 1
  RGBLCDShield.setCursor(0, 1);
  RGBLCDShield.print( iVal1 );              // Reads the value iVal1

  delay(500);

}
// isServo2
void isServo2() {

  // EasyDriver
  isStepperStop();

  // Potentiometer RC Servo Motor 1
  iVal2 = analogRead( iPot2 );              // Reads the value of the iPot2 (Value between 0 and 1023)
  iVal2 = map(iVal2, 0, 1023, 0, 180);      // Scale it to use it with the isRCServo2 (Value between 0 and 180)
  isRCServo2.write( iVal2 );                // isRCServo2 sets the servo position according to the scaled value
  delay(15);

  // Display
  // Set the cursor to column 0, line 0
  RGBLCDShield.setCursor(0,0);
  RGBLCDShield.print("RC Servo 2");         // RC Servo 2
  // Set the cursor to column 0, line 1
  RGBLCDShield.setCursor(0, 1);
  RGBLCDShield.print( iVal2 );              // Reads the value iVal2

  delay(500);

}
getStepper.ino
// Stepper
// isStepperSetup
void isStepperSetup() {

  // 2 x EasyDriver
  pinMode(dirPinR, OUTPUT);
  pinMode(stepPinR, OUTPUT);
  pinMode(dirPinL, OUTPUT);
  pinMode(stepPinL, OUTPUT);

}
// isStepper1
void isStepper1(){

   // set the cursor to column 0, line 0
   RGBLCDShield.setCursor(0,0);
   RGBLCDShield.print("EasyDriver");        // EasyDriver
   RGBLCDShield.setCursor(0,1);
   RGBLCDShield.print("Small Stepper");     // Small Stepper
   delay(500);

   // EasyDriver
   digitalWrite(dirPinR, LOW);              // Set the direction.
   delay(100);

   for (i = 0; i<300; i++)                 // Iterate for 1000 microsteps.
   {

     digitalWrite(stepPinR, LOW);           // This LOW to HIGH change is what creates the
     digitalWrite(stepPinR, HIGH);          // "Rising Edge" so the easydriver knows to when to step.
     delayMicroseconds(170);                // This delay time is close to top speed.

   }

}
// isStepper2
void isStepper2(){

   // set the cursor to column 0, line 0
   RGBLCDShield.setCursor(0,0);
   RGBLCDShield.print("EasyDriver");        // EasyDriver
   RGBLCDShield.setCursor(0,1);
   RGBLCDShield.print("Symbol Stepper");    // Symbol Stepper
   delay(500);

   // EasyDriver
   digitalWrite(dirPinL, HIGH);              // Set the direction.
   delay(100);

   for (i = 0; i<300; i++)                 // Iterate for 1000 microsteps.
   {

     digitalWrite(stepPinL, LOW);           // This LOW to HIGH change is what creates the
     digitalWrite(stepPinL, HIGH);          // "Rising Edge" so the easydriver knows to when to step.
     delayMicroseconds(170);                // This delay time is close to top speed.

   }

}
// isStepperStop
void isStepperStop() {

   // 2 x EasyDriver
   digitalWrite(dirPinR, LOW);              // Set the direction.
   delay(100);
   digitalWrite(dirPinL, LOW);              // Set the direction.
   delay(100);
   digitalWrite(stepPinR, LOW);             // This LOW to HIGH change is what creates the
   digitalWrite(stepPinL, LOW);             // This LOW to HIGH change is what creates the

}
getSwitch.ino
// Switch
// Switch 1
void isSwitch1(){

   // Small Stepper
   yy = 1;

   // EasyDriver
   isStepper1();

}
// Switch 2
void isSwitch2(){

   // Symbol Stepper
   yy = 2;

   // EasyDriver
   isStepper2();

}
// Switch 3
void isSwitch3(){

   // RC Servo Motor 1
   yy = 3;

   // Potentiometer RC Servo Motor 1
   isServo1();

}
// Switch 4
void isSwitch4(){

   // RC Servo Motor 2
   yy = 4;

   // Potentiometer RC Servo Motor 2
   isServo2();

}
// Switch 5
void isSwitch5(){

   // Stop
   yy = 5;

   // set the cursor to column 0, line 0
   RGBLCDShield.setCursor(0,0);
   RGBLCDShield.print("Robotics");         // Robotics
   RGBLCDShield.setCursor(0,1);
   RGBLCDShield.print("Stop");

   delay( 500 );

   // EasyDriver
   isStepperStop();

}
setup.ino
// Setup
void setup() {

  // Adafruit RGB LCD Shield
  // Set up the LCD's number of columns and rows:
  RGBLCDShield.begin(16, 2);
  RGBLCDShield.setBacklight(GREEN);

  // Display
  // Set the cursor to column 0, line 0
  RGBLCDShield.setCursor(0,0);
  RGBLCDShield.print("Don Luc Electron");         // Don luc Electron
  // Set the cursor to column 0, line 1
  RGBLCDShield.setCursor(0, 1);
  RGBLCDShield.print("Robotics");                // EasyDriver

  delay(5000);

  // Clear
  RGBLCDShield.clear();

  // 2 x EasyDriver
  isStepperSetup();

  // 2 x RC Servo Motor
  isServoSetup();

}
Follow Us
Web: https://www.donluc.com/
Web: http://neosteamlabs.com/
Web: http://www.jlpconsultants.com/
YouTube: https://www.youtube.com/channel/UC5eRjrGn1CqkkGfZy0jxEdA
Facebook: https://www.facebook.com/neosteam.labs.9/
Instagram: https://www.instagram.com/neosteamlabs/
Pinterest: https://www.pinterest.com/NeoSteamLabs/
Twitter: https://twitter.com/labs_steam
Etsy: https://www.etsy.com/shop/NeoSteamLabs
Don Luc
Leave a Reply