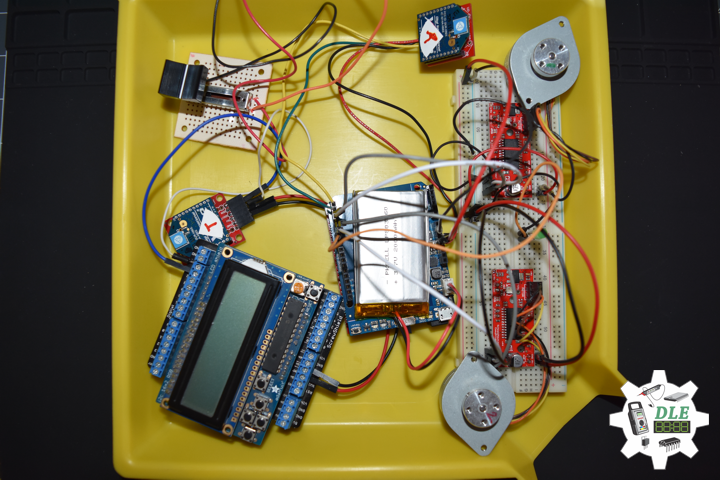
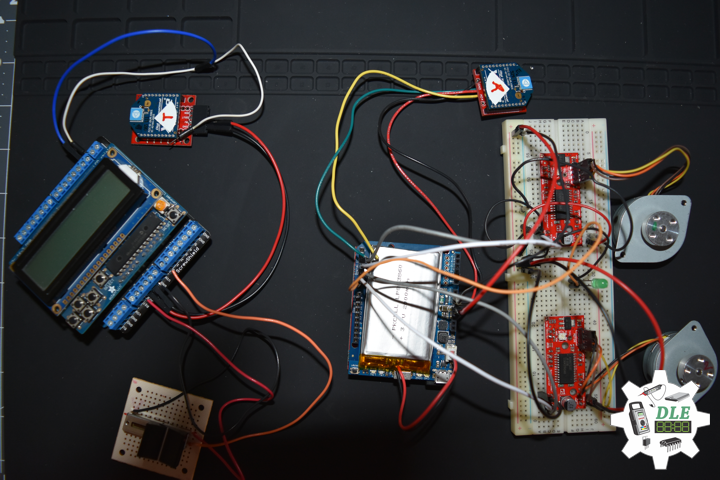
The Alpha Geek – Geeking Out

Stepper

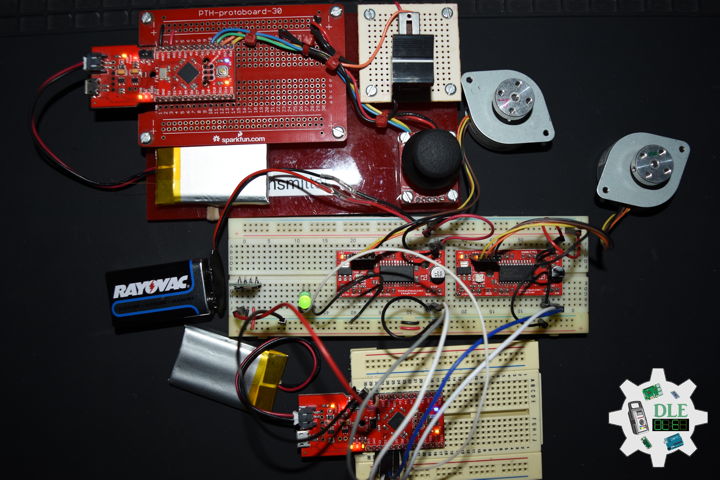
Project #12: Robotics – 9DOF – Mk27

——

#DonLucElectronics #DonLuc #Robotics #Magnetometer #Accelerometer #Gyroscope #MicroOLED # #Arduino #Project #Fritzing #Programming #Electronics #Microcontrollers #Consultant

——

9DOF

——

9DOF

——

9DOF

——

SparkFun 9 Degrees of Freedom – Sensor Stick

The SparkFun 9DOF Sensor Stick is a very small sensor board with 9 degrees of freedom. It includes the ADXL345 accelerometer, the HMC5883L magnetometer, and the ITG-3200 MEMS gyro. The “Stick” has a simple I2C interface and a mounting hole for attaching it to your project. Also, the board is a mere allowing it to be easily mounted in just about any application.

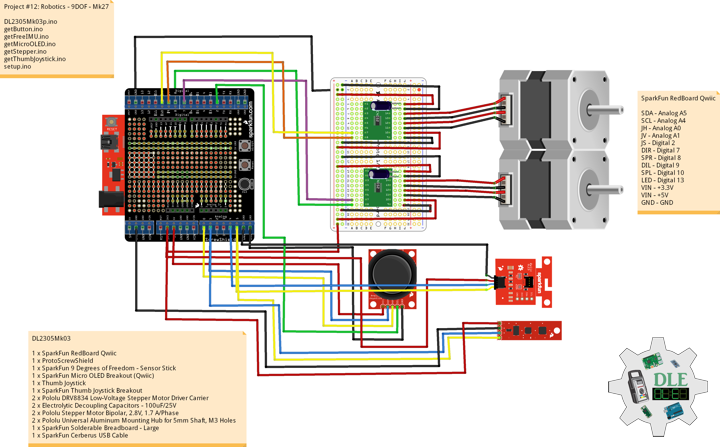
DL2305Mk03

1 x SparkFun RedBoard Qwiic
1 x ProtoScrewShield
1 x SparkFun 9 Degrees of Freedom – Sensor Stick
1 x SparkFun Micro OLED Breakout (Qwiic)
1 x Thumb Joystick
1 x SparkFun Thumb Joystick Breakout
2 x Pololu DRV8834 Low-Voltage Stepper Motor Driver Carrier
2 x Electrolytic Decoupling Capacitors – 100uF/25V
2 x Pololu Stepper Motor Bipolar, 2.8V, 1.7 A/Phase
2 x Pololu Universal Aluminum Mounting Hub for 5mm Shaft, M3 Holes
1 x SparkFun Solderable Breadboard – Large
1 x SparkFun Cerberus USB Cable

SparkFun RedBoard Qwiic

SDA – Analog A5
SCL – Analog A4
JH – Analog A0
JV – Analog A1
JS – Digital 2
DIR – Digital 7
SPR – Digital 8
DIL – Digital 9
SPL – Digital 10
LED – Digital 13
VIN – +3.3V
VIN – +5V
GND – GND

——

DL2305Mk03p.ino

/* ***** Don Luc Electronics © *****
Software Version Information
Project #12: Robotics - 9DOF - Mk27
12-27
DL2305Mk03p.ino
1 x SparkFun RedBoard Qwiic
1 x ProtoScrewShield
1 x SparkFun 9 Degrees of Freedom - Sensor Stick
1 x SparkFun Micro OLED Breakout (Qwiic)
1 x Thumb Joystick
1 x SparkFun Thumb Joystick Breakout
2 x Pololu DRV8834 Low-Voltage Stepper Motor Driver Carrier
2 x Electrolytic Decoupling Capacitors - 100uF/25V
2 x Pololu Stepper Motor Bipolar, 2.8V, 1.7 A/Phase
2 x Pololu Universal Aluminum Mounting Hub for 5mm Shaft, M3 Holes
1 x SparkFun Solderable Breadboard - Large
1 x SparkFun Cerberus USB Cable
*/

// Include the Library Code
// Arduino
#include <Arduino.h>
// DRV8834 Stepper Motor Driver
#include <BasicStepperDriver.h>
#include <MultiDriver.h>
// Wire communicate with I2C / TWI devices
#include <Wire.h>
// SparkFun Micro OLED
#include <SFE_MicroOLED.h>
// Accelerometer
#include <ADXL345.h>
// Magnetometer
#include <HMC58X3.h>
// MEMS Gyroscope
#include <ITG3200.h>
// Debug
#include "DebugUtils.h"
// FreeIMU
#include <CommunicationUtils.h>
#include <FreeIMU.h>

// DRV8834 Stepper Motor Driver
// Stepper motor steps per revolution.
// Most steppers are 200 steps or 1.8 degrees/step
#define MOTOR_STEPS 200
// Target RPM for X axis stepper motor
#define MOTOR_X_RPM 800
// Target RPM for Y axis stepper motor
#define MOTOR_Y_RPM 800
// Since microstepping is set externally,
// make sure this matches the selected mode
// If it doesn't, the motor will move at a
// different RPM than chosen
// 1=full step, 2=half step etc.
#define MICROSTEPS 1
// X Stepper motor
#define DIR_X 7
#define STEP_X 8
// Y Stepper motor
#define DIR_Y 9
#define STEP_Y 10
// BasicStepperDriver
BasicStepperDriver stepperX(MOTOR_STEPS, DIR_X, STEP_X);
BasicStepperDriver stepperY(MOTOR_STEPS, DIR_Y, STEP_Y);
// Pick one of the two controllers below
// each motor moves independently
MultiDriver controller(stepperX, stepperY);

// Joystick
#define JH A0
#define JV A1
#define JS 2

// Variable for reading the button
int JSState = 0;
// Adjusted Value
int adjustedValue = 0;
int adjustedValue2 = 0;

// LED Yellow
int iLED = 13;

// SparkFun Micro OLED
#define PIN_RESET 9
#define DC_JUMPER 1
// I2C declaration
MicroOLED oled(PIN_RESET, DC_JUMPER);

// Set the FreeIMU object
FreeIMU my3IMU = FreeIMU();

// Yaw Pitch Roll
float ypr[3];
float Yaw = 0;
float Pitch = 0;
float Roll = 0;

// Software Version Information
String sver = "12-27";

void loop() {
  
  // Button
  isButton();

  // Joystick
  isThumbJoystick();
  
  // Stepper
  isStepper();

  // isFreeIMU
  isFreeIMU();

  // Micro OLED
  isMicroOLED();
 
}

getButton.ino

// Button
// Button Setup
void isButtonSetup() {
  
  // Make the button line an input
  pinMode(JS, INPUT_PULLUP);
  // Initialize digital pin iLED as an output
  pinMode(iLED, OUTPUT);
  
}

// Button
void isButton(){

  // Read the state of the button
  JSState = digitalRead(JS);

  // Check if the button is pressed.
  // If it is, the JSState is HIGH:
  if (JSState == HIGH) {
    
    // Button
    // Turn the LED on HIGH 
    digitalWrite(iLED, HIGH);
    
  } else {
    
    // Button
    // Turn the LED on LOW 
    digitalWrite(iLED, LOW);
    
  }

}

getFreeIMU.ino

// FreeIMU
// isFreeIMUSetup
void isFreeIMUSetup(){

  // Pause
  delay(5);
  // Initialize IMU
  my3IMU.init();
  // Pause
  delay(5);
  
}
// isFreeIMU
void isFreeIMU(){

  // FreeIMU
  // Yaw Pitch Roll
  my3IMU.getYawPitchRoll(ypr);
  // Yaw
  Yaw = ypr[0];
  // Pitch
  Pitch = ypr[1];
  // Roll
  Roll = ypr[2];

}

getMicroOLED.ino

// SparkFun Micro OLED
// Micro OLED Setup
void isMicroOLEDSetup() {

  // Initialize the OLED
  oled.begin();
  // Clear the display's internal memory
  oled.clear(ALL);
  // Display what's in the buffer (Splash Screen SparkFun)
  oled.display();

  // Delay 1000 ms
  delay(1000);

  // Clear the buffer.
  oled.clear(PAGE);
  
}
// Micro OLED
void isMicroOLED() {

  // Text Display FreeIMU
  // Clear the display
  oled.clear(PAGE);
  // Set cursor to top-left
  oled.setCursor(0, 0);
  // Set font to type 0
  oled.setFontType(0);
  // Horizontal
  oled.print("H: ");
  oled.print( adjustedValue );
  // Vertical
  oled.setCursor(0, 11);
  oled.print("V: ");
  oled.print( adjustedValue2 );
  // Yaw
  oled.setCursor(0, 21);
  oled.print("Y: ");
  oled.print(Yaw);
  // Pitch
  oled.setCursor(0, 31);
  oled.print("P: ");
  oled.print(Pitch);
  // Roll
  oled.setCursor(0, 41);
  oled.print("R: ");
  oled.print(Roll);
  oled.display();

}

getStepper.ino

// Stepper
// isStepperSetup
void isStepperSetup() {    
  
  // Set stepper target motors RPM.
  stepperX.begin(MOTOR_X_RPM, MICROSTEPS);
  stepperY.begin(MOTOR_Y_RPM, MICROSTEPS);

}
// Stepper
void isStepper() {

  // Stepper => Controller rotate
  controller.rotate(adjustedValue, adjustedValue2);
  
}

getThumbJoystick.ino

// Thumb Joystick
void isThumbJoystick() {

  // Joystick JH
  // Horizontal
  // Joystick Pot Values JH
  int potValue = analogRead(JH);
  int potValues = 0;
  // Adjusted Value
  potValues = map(potValue, 0, 1023, 1000, -1000);
  if (potValues > 300) {

    adjustedValue = potValues;

  } else if (potValues < -300) {

    adjustedValue = potValues;

  } else {

    adjustedValue = 0;

  }

  // Joystick JV
  // Vertical
  // Joystick Pot Values JV
  int potValue2 = analogRead(JV);
  int potValues2 = 0;
  // Adjusted Value2
  potValues2 = map(potValue2, 0, 1023, 1000, -1000);
  if (potValues2 > 300) {

    adjustedValue2 = potValues2;

  } else if (potValues2 < -300) {

    adjustedValue2 = potValues2;

  } else {

    adjustedValue2 = 0;

  }

}

setup.ino

// Setup
void setup()
{
  
  // Wire communicate with I2C / TWI devices
  Wire.begin();

  // Setup Micro OLED
  isMicroOLEDSetup();

  // isFreeIMUSetup
  isFreeIMUSetup();
   
  // Button Setup
  isButtonSetup();
  
  // DRV8834 Stepper Motor Driver
  isStepperSetup();

}

——

People can contact us: https://www.donluc.com/?page_id=1927

Technology Experience

  • Programming Language
  • Single-Board Microcontrollers (PIC, Arduino, Raspberry Pi,Espressif, etc…)
  • IoT
  • Wireless (Radio Frequency, Bluetooth, WiFi, Etc…)
  • Robotics
  • Camera and Video Capture Receiver Stationary, Wheel/Tank and Underwater Vehicle
  • Unmanned Vehicles Terrestrial and Marine
  • Machine Learning
  • RTOS
  • Research & Development (R & D)

Instructor, E-Mentor, STEAM, and Arts-Based Training

  • Programming Language
  • IoT
  • PIC Microcontrollers
  • Arduino
  • Raspberry Pi
  • Espressif
  • Robotics

Follow Us

Luc Paquin – Curriculum Vitae – 2023
https://www.donluc.com/luc/

Web: https://www.donluc.com/
Facebook: https://www.facebook.com/neosteam.labs.9/
YouTube: https://www.youtube.com/@thesass2063
Twitter: https://twitter.com/labs_steam
Pinterest: https://www.pinterest.com/NeoSteamLabs/
Instagram: https://www.instagram.com/neosteamlabs/

Don Luc

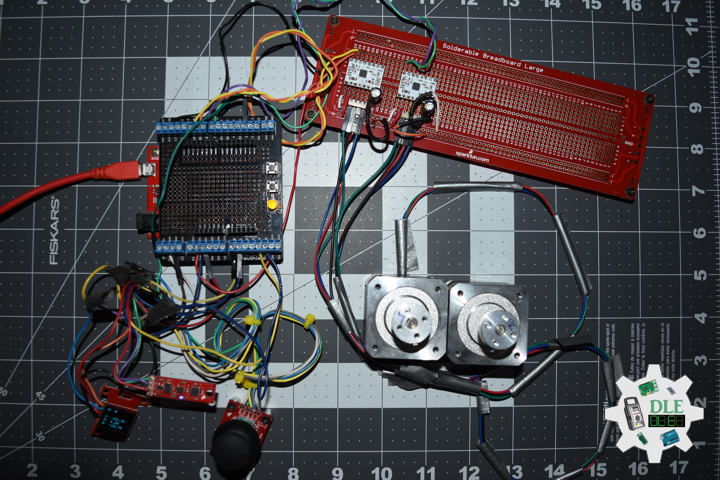
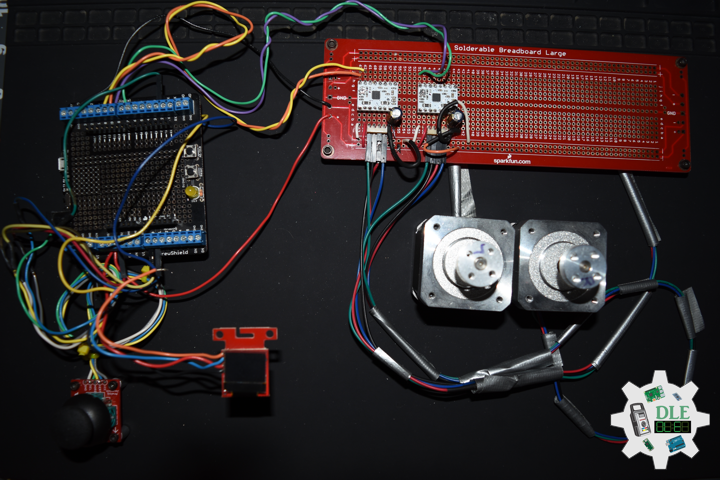
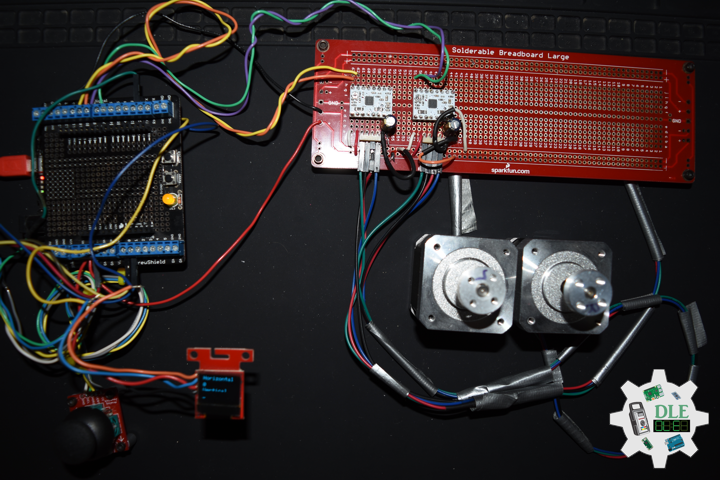
Project #12: Robotics – Micro OLED – Mk26

——

#DonLucElectronics #DonLuc #Robotics #MicroOLED #AdafruitMETROM0Express #Arduino #Project #Fritzing #Programming #Electronics #Microcontrollers #Consultant

——

Micro OLED

——

Micro OLED

——

Micro OLED

——-

Micro OLED

Micro OLED displays are silicon-based OLED display that use a monocrystalline silicon wafer as the actively driven backplane, so it is easier to achieve high PPI (Pixel Density), a high degree of integration, and small size. This ensures they are easy to carry, have good anti-seismic performance, and have ultra-low power consumption.

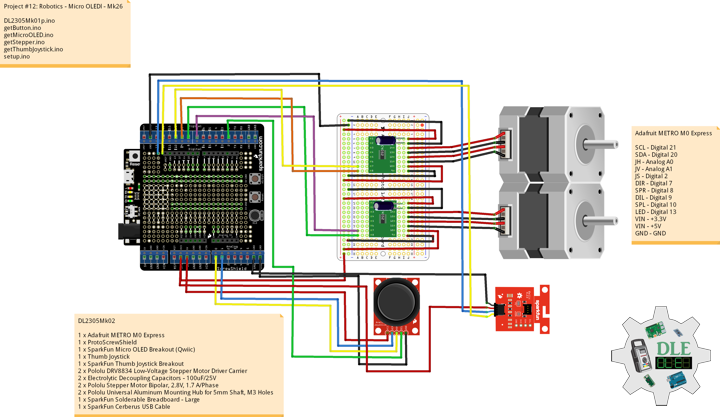
DL2305Mk02

1 x Adafruit METRO M0 Express
1 x ProtoScrewShield
1 x SparkFun Micro OLED Breakout (Qwiic)
1 x Thumb Joystick
1 x SparkFun Thumb Joystick Breakout
2 x Pololu DRV8834 Low-Voltage Stepper Motor Driver Carrier
2 x Electrolytic Decoupling Capacitors – 100uF/25V
2 x Pololu Stepper Motor Bipolar, 2.8V, 1.7 A/Phase
2 x Pololu Universal Aluminum Mounting Hub for 5mm Shaft, M3 Holes
1 x SparkFun Solderable Breadboard – Large
1 x SparkFun Cerberus USB Cable

Adafruit METRO M0 Express

SCL – Digital 21
SDA – Digital 20
JH – Analog A0
JV – Analog A1
JS – Digital 2
DIR – Digital 7
SPR – Digital 8
DIL – Digital 9
SPL – Digital 10
LED – Digital 13
VIN – +3.3V
VIN – +5V
GND – GND

——

DL2305Mk02p.ino

/* ***** Don Luc Electronics © *****
Software Version Information
Project #12: Robotics - Micro OLED - Mk26
12-26
DL2305Mk02p.ino
1 x Adafruit METRO M0 Express
1 x ProtoScrewShield
1 x SparkFun Micro OLED Breakout (Qwiic)
1 x Thumb Joystick
1 x SparkFun Thumb Joystick Breakout
2 x Pololu DRV8834 Low-Voltage Stepper Motor Driver Carrier
2 x Electrolytic Decoupling Capacitors - 100uF/25V
2 x Pololu Stepper Motor Bipolar, 2.8V, 1.7 A/Phase
2 x Pololu Universal Aluminum Mounting Hub for 5mm Shaft, M3 Holes
1 x SparkFun Solderable Breadboard - Large
1 x SparkFun Cerberus USB Cable
*/

// Include the Library Code
// Arduino
#include <Arduino.h>
// DRV8834 Stepper Motor Driver
#include <BasicStepperDriver.h>
#include <MultiDriver.h>
// Wire communicate with I2C / TWI devices
#include <Wire.h>
// SparkFun Micro OLED
#include <SFE_MicroOLED.h>

// DRV8834 Stepper Motor Driver
// Stepper motor steps per revolution.
// Most steppers are 200 steps or 1.8 degrees/step
#define MOTOR_STEPS 200
// Target RPM for X axis stepper motor
#define MOTOR_X_RPM 800
// Target RPM for Y axis stepper motor
#define MOTOR_Y_RPM 800
// Since microstepping is set externally,
// make sure this matches the selected mode
// If it doesn't, the motor will move at a
// different RPM than chosen
// 1=full step, 2=half step etc.
#define MICROSTEPS 1
// X Stepper motor
#define DIR_X 7
#define STEP_X 8
// Y Stepper motor
#define DIR_Y 9
#define STEP_Y 10
// BasicStepperDriver
BasicStepperDriver stepperX(MOTOR_STEPS, DIR_X, STEP_X);
BasicStepperDriver stepperY(MOTOR_STEPS, DIR_Y, STEP_Y);
// Pick one of the two controllers below
// each motor moves independently
MultiDriver controller(stepperX, stepperY);

// Joystick
#define JH A0
#define JV A1
#define JS 2

// Variable for reading the button
int JSState = 0;
// Adjusted Value
int adjustedValue = 0;
int adjustedValue2 = 0;

// LED Yellow
int iLED = 13;

// SparkFun Micro OLED
#define PIN_RESET 9
#define DC_JUMPER 1
// I2C declaration
MicroOLED oled(PIN_RESET, DC_JUMPER);

// Software Version Information
String sver = "12-26";

void loop() {
  
  // Button
  isButton();

  // Joystick
  isThumbJoystick();
  
  // Stepper
  isStepper();

  // Micro OLED
  isMicroOLED();
 
}

getButton.ino

// Button
// Button Setup
void isButtonSetup() {
  
  // Make the button line an input
  pinMode(JS, INPUT_PULLUP);
  // Initialize digital pin iLED as an output
  pinMode(iLED, OUTPUT);
  
}

// Button
void isButton(){

  // Read the state of the button
  JSState = digitalRead(JS);

  // Check if the button is pressed.
  // If it is, the JSState is HIGH:
  if (JSState == HIGH) {
    
    // Button
    // Turn the LED on HIGH 
    digitalWrite(iLED, HIGH);
    
  } else {
    
    // Button
    // Turn the LED on LOW 
    digitalWrite(iLED, LOW);
    
  }

}

getMicroOLED.ino

// SparkFun Micro OLED
// Setup Micro OLED
void isMicroOLEDSetup() {

  // Initialize the OLED
  oled.begin();
  // Clear the display's internal memory
  oled.clear(ALL);
  // Display what's in the buffer (Splash Screen SparkFun)
  oled.display();

  // Delay 1000 ms
  delay(1000);

  // Clear the buffer.
  oled.clear(PAGE);
  
}
// Micro OLED
void isMicroOLED() {

  // Text Display FreeIMU
  // Clear the display
  oled.clear(PAGE);
  // Set cursor to top-left
  oled.setCursor(0, 0);
  // Set font to type 0
  oled.setFontType(0);
  // Horizontal
  oled.print("Horizontal");
  // Horizontal
  oled.setCursor(0, 13);
  oled.print( adjustedValue );
  // Vertical
  oled.setCursor(0, 24);
  oled.print("Vertical");
  // Vertical
  oled.setCursor(0, 37);
  oled.print( adjustedValue2 );
  oled.display();

}

getStepper.ino

// Stepper
// isStepperSetup
void isStepperSetup() {    
  
  // Set stepper target motors RPM.
  stepperX.begin(MOTOR_X_RPM, MICROSTEPS);
  stepperY.begin(MOTOR_Y_RPM, MICROSTEPS);

}
// Stepper
void isStepper() {

  // Stepper => Controller rotate
  controller.rotate(adjustedValue, adjustedValue2);
  
}

getThumbJoystick.ino

// Thumb Joystick
void isThumbJoystick() {

  // Joystick JH
  // Horizontal
  // Joystick Pot Values JH
  int potValue = analogRead(JH);
  int potValues = 0;
  // Adjusted Value
  potValues = map(potValue, 0, 1023, 1000, -1000);
  if (potValues > 300) {

    adjustedValue = potValues;

  } else if (potValues < -300) {

    adjustedValue = potValues;

  } else {

    adjustedValue = 0;

  }

  // Joystick JV
  // Vertical
  // Joystick Pot Values JV
  int potValue2 = analogRead(JV);
  int potValues2 = 0;
  // Adjusted Value2
  potValues2 = map(potValue2, 0, 1023, 1000, -1000);
  if (potValues2 > 300) {

    adjustedValue2 = potValues2;

  } else if (potValues2 < -300) {

    adjustedValue2 = potValues2;

  } else {

    adjustedValue2 = 0;

  }

}

setup.ino

// Setup
void setup()
{
  
  // Wire communicate with I2C / TWI devices
  Wire.begin();

  // Setup Micro OLED
  isMicroOLEDSetup();
   
  // Button Setup
  isButtonSetup();
  
  // DRV8834 Stepper Motor Driver
  isStepperSetup();

}

——

People can contact us: https://www.donluc.com/?page_id=1927

Technology Experience

  • Programming Language
  • Single-Board Microcontrollers (PIC, Arduino, Raspberry Pi,Espressif, etc…)
  • IoT
  • Wireless (Radio Frequency, Bluetooth, WiFi, Etc…)
  • Robotics
  • Camera and Video Capture Receiver Stationary, Wheel/Tank and Underwater Vehicle
  • Unmanned Vehicles Terrestrial and Marine
  • Machine Learning
  • RTOS
  • Research & Development (R & D)

Instructor, E-Mentor, STEAM, and Arts-Based Training

  • Programming Language
  • IoT
  • PIC Microcontrollers
  • Arduino
  • Raspberry Pi
  • Espressif
  • Robotics

Follow Us

Luc Paquin – Curriculum Vitae – 2023
https://www.donluc.com/luc/

Web: https://www.donluc.com/
Facebook: https://www.facebook.com/neosteam.labs.9/
YouTube: https://www.youtube.com/@thesass2063
Twitter: https://twitter.com/labs_steam
Pinterest: https://www.pinterest.com/NeoSteamLabs/
Instagram: https://www.instagram.com/neosteamlabs/

Don Luc
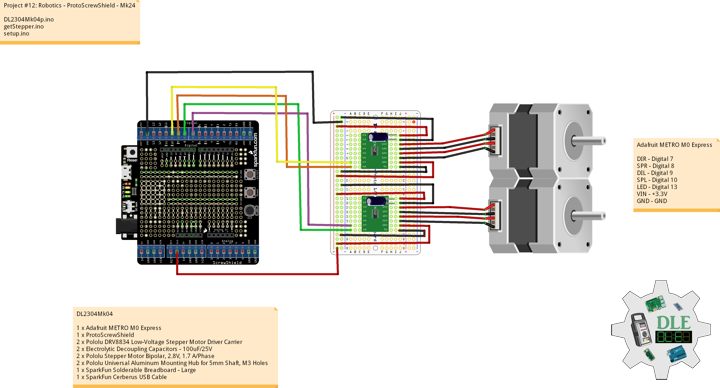
Project #12: Robotics – ProtoScrewShield – Mk24

——

#DonLucElectronics #DonLuc #Robotics #AdafruitMETROM0Express #Arduino #Project #Fritzing #Programming #Electronics #Microcontrollers #Consultant

——

ProtoScrewShield

——

ProtoScrewShield

——

ProtoScrewShield

——

ProtoScrewShield

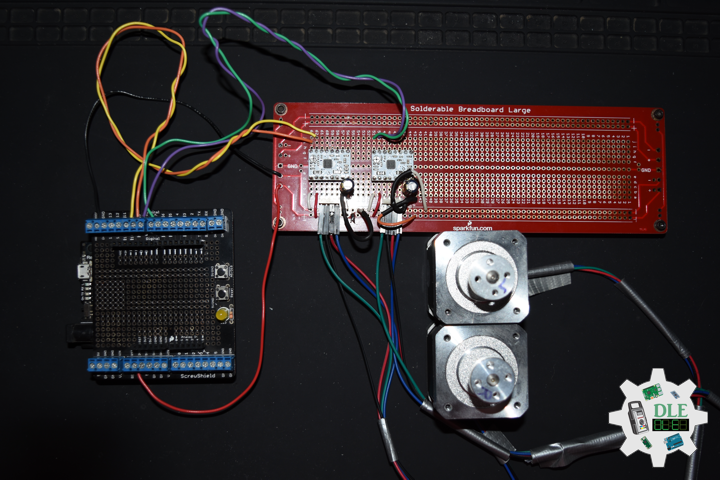
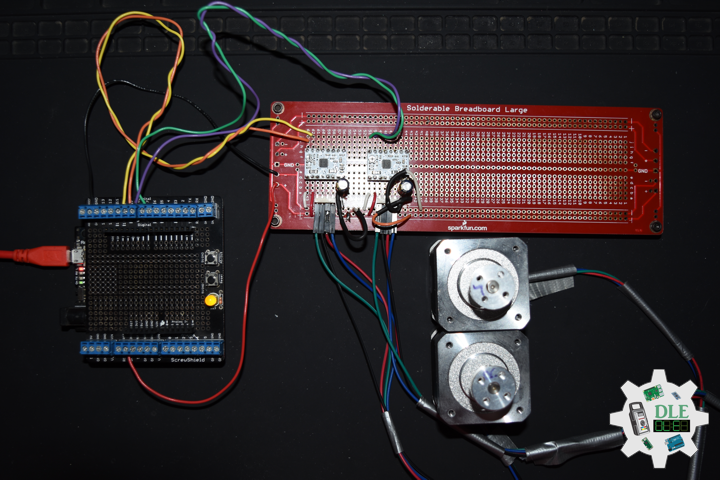
The ProtoScrewShield extends all pins of the Arduino out to 3.5mm pitch screw terminals. It also has a lot of the utility provided including: a large prototyping space of both connected and unconnected 0.1″ spaced through-holes, a couple 5V and GND busses, a reset button, general use push button, and a 5mm yellow LED. This product includes all the parts shown and comes in kit form and must be soldered together by the end user.

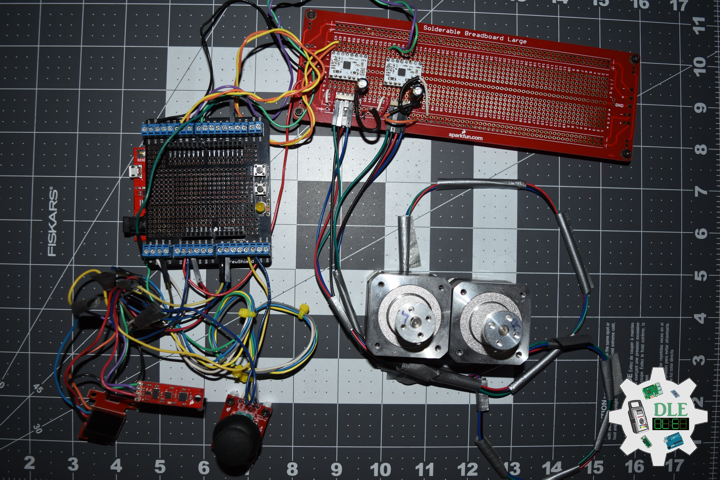
DL2304Mk04

1 x Adafruit METRO M0 Express
1 x ProtoScrewShield
2 x Pololu DRV8834 Low-Voltage Stepper Motor Driver Carrier
2 x Electrolytic Decoupling Capacitors – 100uF/25V
2 x Pololu Stepper Motor Bipolar, 2.8V, 1.7 A/Phase
2 x Pololu Universal Aluminum Mounting Hub for 5mm Shaft, M3 Holes
1 x SparkFun Solderable Breadboard – Large
1 x SparkFun Cerberus USB Cable

Adafruit METRO M0 Express

DIR – Digital 7
SPR – Digital 8
DIL – Digital 9
SPL – Digital 10
LED – LED_BUILTIN
VIN – +3.3V
GND – GND

——

DL2304Mk04p.ino

/* ***** Don Luc Electronics © *****
Software Version Information
Project #12: Robotics - ProtoScrewShield - Mk24
12-24
DL2304Mk04p.ino
1 x Adafruit METRO M0 Express
1 x ProtoScrewShield
2 x Pololu DRV8834 Low-Voltage Stepper Motor Driver Carrier
2 x Electrolytic Decoupling Capacitors - 100uF/25V
2 x Pololu Stepper Motor Bipolar, 2.8V, 1.7 A/Phase
2 x Pololu Universal Aluminum Mounting Hub for 5mm Shaft, M3 Holes
1 x SparkFun Solderable Breadboard - Large
1 x SparkFun Cerberus USB Cable
*/

// Include the Library Code
// Arduino
#include <Arduino.h>
// DRV8834 Stepper Motor Driver
#include <BasicStepperDriver.h>
#include <MultiDriver.h>

// DRV8834 Stepper Motor Driver
// Stepper motor steps per revolution.
// Most steppers are 200 steps or 1.8 degrees/step
#define MOTOR_STEPS 200
// Target RPM for X axis stepper motor
#define MOTOR_X_RPM 800
// Target RPM for Y axis stepper motor
#define MOTOR_Y_RPM 800
// Since microstepping is set externally,
// make sure this matches the selected mode
// If it doesn't, the motor will move at a
// different RPM than chosen
// 1=full step, 2=half step etc.
#define MICROSTEPS 1
// X Stepper motor
#define DIR_X 7
#define STEP_X 8
// Y Stepper motor
#define DIR_Y 9
#define STEP_Y 10
// BasicStepperDriver
BasicStepperDriver stepperX(MOTOR_STEPS, DIR_X, STEP_X);
BasicStepperDriver stepperY(MOTOR_STEPS, DIR_Y, STEP_Y);
// Pick one of the two controllers below
// each motor moves independently
MultiDriver controller(stepperX, stepperY);

// LED Yellow
int iLED = 13;

// Software Version Information
String sver = "12-24";

void loop() {
  
  // Stepper
  isStepper();

}

getStepper.ino

// Stepper
// isStepperSetup
void isStepperSetup() {    
  
  // Set stepper target motors RPM.
  stepperX.begin(MOTOR_X_RPM, MICROSTEPS);
  stepperY.begin(MOTOR_Y_RPM, MICROSTEPS);

}
// Stepper
void isStepper() {

  // Stepper => Controller rotate
  controller.rotate(360, 360);
  
}

setup.ino

// Setup
void setup()
{

  // Initialize digital pin iLED as an output.
  pinMode(iLED, OUTPUT);
  // Turn the LED on HIGH 
  digitalWrite(iLED, HIGH);
  
  // DRV8834 Stepper Motor Driver
  isStepperSetup();

}

——

People can contact us: https://www.donluc.com/?page_id=1927

Technology Experience

  • Programming Language
  • Single-Board Microcontrollers (PIC, Arduino, Raspberry Pi,Espressif, etc…)
  • IoT
  • Wireless (Radio Frequency, Bluetooth, WiFi, Etc…)
  • Robotics
  • Camera and Video Capture Receiver Stationary, Wheel/Tank and Underwater Vehicle
  • Unmanned Vehicles Terrestrial and Marine
  • Machine Learning
  • RTOS
  • Research & Development (R & D)

Instructor, E-Mentor, STEAM, and Arts-Based Training

  • Programming Language
  • IoT
  • PIC Microcontrollers
  • Arduino
  • Raspberry Pi
  • Espressif
  • Robotics

Follow Us

Luc Paquin – Curriculum Vitae – 2023
https://www.donluc.com/luc/

Web: https://www.donluc.com/
Facebook: https://www.facebook.com/neosteam.labs.9/
YouTube: https://www.youtube.com/@thesass2063
Twitter: https://twitter.com/labs_steam
Pinterest: https://www.pinterest.com/NeoSteamLabs/
Instagram: https://www.instagram.com/neosteamlabs/

Don Luc
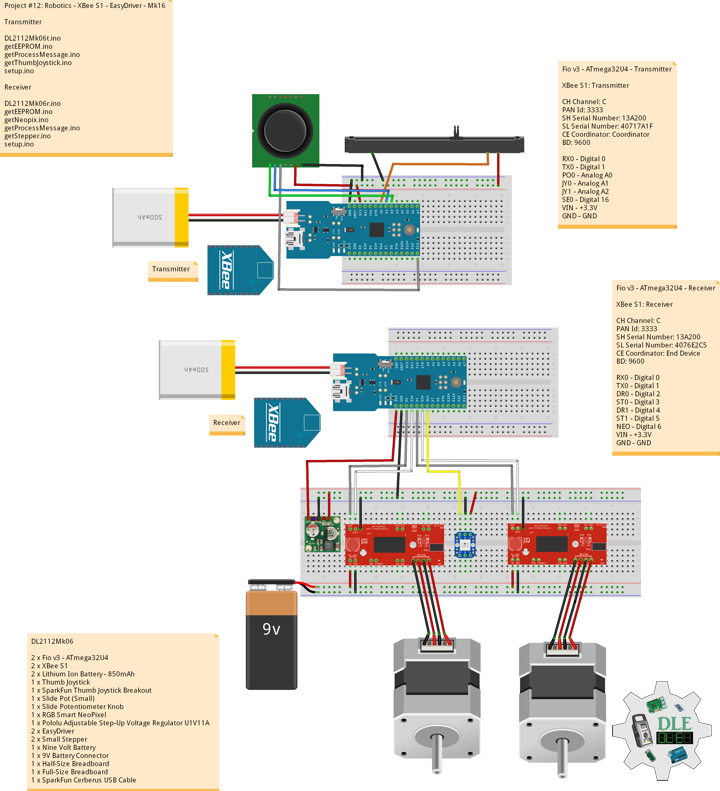
Project #12: Robotics – EasyDriver – Mk16

——

#DonLucElectronics #DonLuc #Robotics #Arduino #Fio #XBee #Stepper #EasyDriver #Project #Fritzing #Programming #Electronics #Microcontrollers #Consultant

——

EasyDriver

——

EasyDriver

——

EasyDriver

——

Stepper Motor

A stepper motor, also known as step motor or stepping motor, is a brushless DC electric motor that divides a full rotation into a number of equal steps. The motor’s position can be commanded to move and hold at one of these steps without any position sensor for feedback, as long as the motor is correctly sized to the application in respect to torque and speed. Switched reluctance motors are very large stepping motors with a reduced pole count, and generally are closed-loop commutated.

EasyDriver – Stepper Motor Driver

The EasyDriver is a simple to use stepper motor driver, compatible with anything that can output a digital 0 to 5V pulse. The EasyDriver requires a 6V to 30V supply to power the motor and can power any voltage of stepper motor. The EasyDriver has an on board voltage regulator for the digital interface that can be set to 5V. Connect a 4-wire stepper motor and a microcontroller and you’ve got precision motor control! EasyDriver drives bi-polar motors, and motors wired as bi-polar.

DL2112Mk06

2 x Fio v3 – ATmega32U4
2 x XBee S1
2 x Lithium Ion Battery – 850mAh
1 x Thumb Joystick
1 x SparkFun Thumb Joystick Breakout
1 x Slide Pot (Small)
1 x Slide Potentiometer Knob
1 x RGB Smart NeoPixel
1 x Pololu Adjustable Step-Up Voltage Regulator U1V11A
2 x EasyDriver
2 x Small Stepper
1 x Nine Volt Battery
1 x 9V Battery Connector
1 x Half-Size Breadboard
1 x Full-Size Breadboard
1 x SparkFun Cerberus USB Cable

Fio v3 – ATmega32U4 – Transmitter

XBee S1: Transmitter

CH Channel: C
PAN Id: 3333
SH Serial Number: 13A200
SL Serial Number: 40717A1F
CE Coordinator: Coordinator
BD: 9600

RX0 – Digital 0
TX0 – Digital 1
PO0 – Analog A0
JY0 – Analog A1
JY1 – Analog A2
SE0 – Digital 16
VIN – +3.3V
GND – GND

DL2112Mk06t.ino

/* ***** Don Luc Electronics © *****
Software Version Information
Project #12: Robotics - XBee S1 - Transmitter - Mk16
12-06
DL2112Mk06t.ino
1 x Fio v3 - ATmega32U4
1 x XBee S1
1 x Lithium Ion Battery - 850mAh
1 x Thumb Joystick
1 x SparkFun Thumb Joystick Breakout
1 x Slide Pot (Small)
1 x Slide Potentiometer Knob
1 x SparkFun Cerberus USB Cable
*/

// Include the Library Code
// EEPROM library to read and write EEPROM with unique ID for unit
#include <EEPROM.h>

// Communication
unsigned long dTime = 200;

// Slide Pot (Small)
// Select the input pin for the slide pot
// Power
const int iSP1 = A0;
// Power to store the value
int iPower = 0;

// Connections to joystick
// Vertical
const int VERT = A1;
// Horizontal
const int HORIZ = A2;
// Pushbutton
const int SEL = 16;
// Initialize variables for analog and digital values
int vertical;
int horizontal;
int select;

// Software Version Information
// Version
String sver = "12-16t";
// Unit ID Information
// UID
String uid = "";

void loop()
{

  // Thumb Joystick
  isThumbJoystick();
    
  // Process Message
  isProcessMessage();

  delay( dTime );
  
}

getEEPROM.ino

// EEPROM
// is UID
void isUID()
{
  
  // Is Unit ID
  // UID
  uid = "";
  for (int x = 0; x < 5; x++)
  {
    uid = uid + char(EEPROM.read(x));
  }
  
}

getProcessMessage.ino

// Process Message
// isProcessMessage
void isProcessMessage() {
  
   // Loop through serial buffer
   // Print = "<" + vertical + "|" + horizontal + "|" + select + "|" + iValue + "|" + sver + "|" + uid + "*"
      
   Serial1.print( '<'  );
   Serial1.print( vertical );
   Serial1.print( '|' );
   Serial1.print( horizontal );
   Serial1.print( '|' );
   Serial1.print( select );
   Serial1.print( '|' );
   Serial1.print( iPower );
   Serial1.print( '|' );
   Serial1.print( sver );
   Serial1.print( '|' );
   Serial1.print( uid );
   Serial1.println( '*' );

}

getThumbJoystick.ino

// Thumb Joystick
void isThumbJoystick() {

  // Read all values from the joystick
  // Joystick was sitting around 520 for the vertical and horizontal values
  // Will be 0-1023
  vertical = analogRead(VERT);
  // Will be 0-1023
  horizontal = analogRead(HORIZ);
  // Will be HIGH (1) if not pressed, and LOW (0) if pressed
  select = digitalRead(SEL);
  // Read the value
  // Power be 0-1023
  iPower = analogRead( iSP1 );
 
}

setup.ino

// Setup
void setup()
{

  // EEPROM Unit ID
  isUID();
  
  // Pause
  delay(5);
  
  // Make the SEL line an input
  pinMode(SEL, INPUT_PULLUP);
  
  // Open Serial1 port at 9600 baud
  Serial1.begin( 9600 );

  // Pause
  delay(5);

}

——

Fio v3 – ATmega32U4 – Receiver

XBee S1: Receiver

CH Channel: C
PAN Id: 3333
SH Serial Number: 13A200
SL Serial Number:
4076E2C5
CE Coordinator: End Device
BD: 9600

RX0 – Digital 0
TX0 – Digital 1
DR0 – Digital 2
ST0 – Digital 3
DR1 – Digital 4
ST1 – Digital 5
NEO – Digital 6
VIN – +3.3V
GND – GND

DL2112Mk06r.ino

/* ***** Don Luc Electronics © *****
Software Version Information
Project #12: Robotics - EasyDriver - Mk16
12-06
DL2112Mk06r.ino
1 x Fio v3 - ATmega32U4
1 x XBee S1
1 x Lithium Ion Battery - 850mAh
1 x RGB Smart NeoPixel
1 x Pololu Adjustable Step-Up Voltage Regulator U1V11A
2 x EasyDriver
2 x Small Stepper
1 x Nine Volt Battery
1 x 9V Battery Connector
1 x Half-Size Breadboard
1 x Full-Size Breadboard
1 x SparkFun Cerberus USB Cable
*/

// Include the library code:
// EEPROM library to read and write EEPROM with unique ID for unit
#include <EEPROM.h>
// NeoPixels
#include <Adafruit_NeoPixel.h>

// 2 x EasyDriver - 2 x Stepper
// EasyDriver Right
int dirPinR = 2;
// stepPin Right
int stepPinR = 3;
// EasyDriver Left
int dirPinL = 4;
// stepPin Left
int stepPinL = 5;
// Microsteps
int i = 0;
// Power be 0-1023
int iPower = 0;
String POW = "";
// Joystick was sitting around 520 for the vertical and horizontal values
// Will be 0-1023
// Vertical
int vertical;
String VER = "";
// Horizontal
// Will be 0-1023
int horizontal;
String HOR = "";
// Select
// Will be HIGH (1) if not pressed, and LOW (0) if pressed
int select;
String SEL = "";
int firstClosingBracket = 0;
// Map Vertical and Horizontal
int mapVer = 0;
int mapHor = 0;
int iVer = 0;
int iHor = 0;

// NeoPixels
// On digital pin 6
#define PIN 6
// NeoPixels NUMPIXELS = 1
#define NUMPIXELS 1
// Pixels
Adafruit_NeoPixel pixels = Adafruit_NeoPixel(NUMPIXELS, PIN, NEO_GRB + NEO_KHZ800);
// Red
int red = 0;
// Green
int green = 0;
// Blue
int blue = 0;
// Neopix
int iNeo = 0;
// Value
int zz = 0;

// Process Message
// Start
bool bStart = false;
// End
bool bEnd   = false;
// Variable to store the incoming byte
int incb = 0;
// Message
String msg = "";
// Index
byte in = 0;
int x = 0;

// Software Version Information
String sver = "12-16r";
// Unit ID information
String uid = "";

void loop() {

  // Check for serial messages
  isProcessMessage();

}

getEEPROM.ino

// EEPROM
// isUID
void isUID()
{
  
  // Is Unit ID
  uid = "";
  for (int x = 0; x < 5; x++)
  {
    uid = uid + char(EEPROM.read(x));
  }
  
}

getNeopix.ino

// NeoPixels
// Neopix
void isNeopix() 
{ 

    // Pixels
    pixels.setBrightness( 130 );
    // Pixels color takes RGB values, from 0,0,0 up to 255,255,255
    pixels.setPixelColor( iNeo, pixels.Color(red,green,blue) ); 
    // This sends the updated pixel color to the hardware
    pixels.show(); 
    // Delay for a period of time (in milliseconds)
    delay(50);     
  
}
// isNUMPIXELS
void isNUMPIXELS()
{

  // Neopix Value
  switch ( zz ) {  
    case 0:
      // NeoPixels Green
      // Red
      red = 0;
      // Green
      green = 255;
      // Blue
      blue = 0;
      // Neopix
      iNeo = 0;   
      isNeopix();
      break;  
    case 1:
      // NeoPixels Blue
      // Red
      red = 0;
      // Green
      green = 0;
      // Blue
      blue = 255;
      // Neopix
      iNeo = 0;
      isNeopix();
      break;
    case 2:
      // NeoPixels Red
      // Red
      red = 255;
      // Green
      green = 0;
      // Blue
      blue = 0;
      // Neopix
      iNeo = 0;   
      isNeopix();
      break;
    case 3:
      // NeoPixels Yellow
      // Red
      red = 255;
      // Green
      green = 255;
      // Blue
      blue = 0;
      // Neopix
      iNeo = 0;
      isNeopix();
      break;
    case 4:
      // NeoPixels Magenta
      // Red
      red = 255;
      // Green
      green = 0;
      // Blue
      blue = 255;
      // Neopix
      iNeo = 0;
      isNeopix();
      break;
    case 5:
      // NeoPixels Cyan
      // Red
      red = 0;
      // Green
      green = 255;
      // Blue
      blue = 255;
      // Neopix
      iNeo = 0;
      isNeopix();
      break;
    case 6:
      // NeoPixels White
      // Red
      red = 255;
      // Green
      green = 255;
      // Blue
      blue = 255;
      // Neopix
      iNeo = 0;
      isNeopix();    
      break;
  }
  
}
// isNUMPIXELSoff
void isNUMPIXELSoff()
{

   // Black Off
   // NeoPixels
   // Red
   red = 0;
   // Green
   green = 0;
   // Blue
   blue = 0;
   isNeopix();
 
}

getProcessMessage.ino

// ProcessMessage
// isProcessMessage
void isProcessMessage() {

  // Loop through serial buffer one byte at a time until you reach * which will be end of message
  while ( Serial1.available() > 0 ) 
  {
      
      // Read the incoming byte:
      incb = Serial1.read();
      
      // Start the message when the '<' symbol is received
      if(incb == '<')
      {

        // Start
        bStart = true;
        in = 0;
        msg = "";
        
      }
      // End the message when the '*' symbol is received
      else if(incb == '*')
      {
        
        // End
        bEnd = true;
        x = msg.length();
        msg.remove( x , 1);
        // Done reading
        
        break;
      }
      // Read the message
      else
      {
        
        // Message
        msg = msg + char(incb);
        in++;

      }
      
   }

   // Start - End
   if( bStart && bEnd)
   {

      // isStepper => Message
      isStepper();
      
      // Start - End
      in = 0;
      msg = "";
      bStart = false;
      bEnd = false;
      vertical;
      horizontal;
      iPower;
      
   }

}

getStepper.ino

// Stepper
// isStepperSetup
void isStepperSetup() {

  // 2 x EasyDriver
  pinMode(dirPinR, OUTPUT);
  pinMode(stepPinR, OUTPUT);
  pinMode(dirPinL, OUTPUT);
  pinMode(stepPinL, OUTPUT);

}
// isStepper
void isStepper() {

  // msg = vertical + "|" + horizontal + "|" + select + "|" + iValue + "|" + sver + "|" + uid
  firstClosingBracket = 0;
  // Vertical
  firstClosingBracket = msg.indexOf('|');
  VER = msg;
  VER.remove(firstClosingBracket);
  vertical = VER.toInt();
  // Horizontal
  firstClosingBracket = firstClosingBracket + 1;
  msg.remove(0, firstClosingBracket );
  firstClosingBracket = msg.indexOf('|');
  HOR = msg;
  HOR.remove(firstClosingBracket);
  horizontal = HOR.toInt();
  // Select
  firstClosingBracket = firstClosingBracket + 1;
  msg.remove(0, firstClosingBracket );  
  firstClosingBracket = msg.indexOf('|');
  SEL = msg;
  SEL.remove(firstClosingBracket);
  select = SEL.toInt();
  // Power
  firstClosingBracket = firstClosingBracket + 1;
  msg.remove(0, firstClosingBracket );    
  firstClosingBracket = msg.indexOf('|');
  POW = msg;
  POW.remove(firstClosingBracket);
  iPower = POW.toInt();

  // EasyDriver Right
  // Set the direction
  // Joystick was sitting around 520 for the vertical and horizontal values
  // Will be 0-1023
  mapVer = map(vertical, 0, 1023, -512, 512);
  mapHor = map(horizontal, 0, 1023, -512, 512);
  
  // Vertical and Horizontal 
  if ( mapVer == -512 ) {

    // Horizontal 
    if ( mapHor == -512 ) {

      // Left
      // NeoPixels Yellow
      zz = 3;
      isNUMPIXELS();
      iVer = 3;
    
    } else if ( mapHor == 512 ) {

      // Right
      // NeoPixels Magenta
      zz = 4;
      isNUMPIXELS();
      iVer = 4;
 
    } else {

      // Down
      // NeoPixels Blue
      zz = 1;
      isNUMPIXELS();
      iVer = 1;
    
    }
    
  } else if ( mapVer == 512 ) {

    // Horizontal 
    if ( mapHor == -512 ) {

      // Left
      // NeoPixels Yellow
      zz = 3;
      isNUMPIXELS();
      iVer = 3;
    
    } else if ( mapHor == 512 ) {

      // Right
      // NeoPixels Magenta
      zz = 4;
      isNUMPIXELS();
      iVer = 4;
 
    } else {

      // Up
      // NeoPixels Green
      zz = 0;
      isNUMPIXELS();
      iVer = 4;
      iVer = 2;
    
    }
 
  } else if ( mapHor == -512 ) {

      // Left
      // NeoPixels Yellow
      zz = 3;
      isNUMPIXELS();
      iVer = 3;
    
  } else if ( mapHor == 512 ) {

      // Right
      // NeoPixels Magenta
      zz = 4;
      isNUMPIXELS();
      iVer = 4;
 
  } else {

    // Stop
    // NeoPixels Red
    zz = 2;
    isNUMPIXELS();
    iVer = 5;
    
  }

  // XBee Car
  switch ( iVer ) {
    case 1:

      // 2 x EasyDriver - Up
      // Set the direction LOW
      digitalWrite(dirPinR, LOW);
      delay(5);
      digitalWrite(dirPinL, LOW);
      delay(5);

      break;
    case 2:

      // Stepper 2 - Back
      // Set the direction HIGH
      digitalWrite(dirPinR, HIGH);
      delay(5);
      digitalWrite(dirPinL, HIGH);
      delay(5);

      break;
    case 3:

      // Stepper 3 - Right
      digitalWrite(dirPinR, LOW);
      delay(5);
      digitalWrite(dirPinL, HIGH);
      delay(5);

      break;
    case 4:

      // Stepper 4 - Left
      digitalWrite(dirPinR, HIGH);
      delay(5);
      digitalWrite(dirPinL, LOW);
      delay(5);
      break;
    case 5:

      // Stop
      // NeoPixels Red
      zz = 2;
      isNUMPIXELS();
      iVer = 5;
      break;
    default:
    
      // Stop
      // NeoPixels Red
      zz = 2;
      isNUMPIXELS();
      iVer = 5;
      
  }

  if ( iVer == 5 ) {

    // Stepper Stop
    // 2 x EasyDriver
    // Set the direction
    digitalWrite(dirPinR, LOW);
    delay(5);
    // Set the direction
    digitalWrite(dirPinL, LOW);
    delay(5);
    // This LOW
    digitalWrite(stepPinR, LOW);
    digitalWrite(stepPinL, LOW);
    
  } else {

     // Iterate for 200 microsteps
     for (i = 0; i<200; i++)
     { 

        // This LOW to HIGH change is what creates the
        digitalWrite(stepPinR, LOW);
        // "Rising Edge" so the easydriver knows to when to step.
        digitalWrite(stepPinR, HIGH);
        // This delay time is close to top speed.
        delayMicroseconds(iPower);
        // This LOW to HIGH change is what creates the
        digitalWrite(stepPinL, LOW);
        // "Rising Edge" so the easydriver knows to when to step.
        digitalWrite(stepPinL, HIGH);
        // This delay time is close to top speed.
        delayMicroseconds(iPower);

     }
    
  }
 
}

setup.ino

// Setup
void setup() {

  // Open the serial port at 9600 bps:
  Serial1.begin( 9600 );

  // Pause
  delay(5);

  // EEPROM Unit ID
  isUID();
  
  // Pause
  delay(5);

  // 2 x EasyDriver
  isStepperSetup();

  // Pause
  delay(5);
  
  // NeoPixels
  // This initializes the NeoPixel library
  pixels.begin();
  // Delay for a period of time (in milliseconds)
  delay(50);
  // isNUMPIXELS Off
  isNUMPIXELSoff();

}

——

People can contact us: https://www.donluc.com/?page_id=1927

Technology Experience

  • Single-Board Microcontrollers (PIC, Arduino, Raspberry Pi,Espressif, etc…)
  • IoT
  • Robotics
  • Camera and Video Capture Receiver Stationary, Wheel/Tank and Underwater Vehicle
  • Unmanned Vehicles Terrestrial and Marine
  • Research & Development (R & D)
  • Desktop Applications (Windows, OSX, Linux, Multi-OS, Multi-Tier, etc…)
  • Mobile Applications (Android, iOS, Blackberry, Windows Mobile, Windows CE, etc…)
  • Web Applications (LAMP, Scripting, Java, ASP, ASP.NET, RoR, Wakanda, etc…)
  • Social Media Programming & Integration (Facebook, Twitter, YouTube, Pinterest, etc…)
  • Content Management Systems (WordPress, Drupal, Joomla, Moodle, etc…)
  • Bulletin Boards (phpBB, SMF, Vanilla, jobberBase, etc…)
  • eCommerce (WooCommerce, OSCommerce, ZenCart, PayPal Shopping Cart, etc…)

Instructor and E-Mentor

  • IoT
  • PIC Microcontrollers
  • Arduino
  • Raspberry Pi
  • Espressif
  • Robotics
  • DOS, Windows, OSX, Linux, iOS, Android, Multi-OS
  • Linux-Apache-PHP-MySQL

Follow Us

J. Luc Paquin – Curriculum Vitae – 2021 English & Español
https://www.jlpconsultants.com/luc/

Web: https://www.donluc.com/
Web: https://www.jlpconsultants.com/
Facebook: https://www.facebook.com/neosteam.labs.9/
YouTube: https://www.youtube.com/channel/UC5eRjrGn1CqkkGfZy0jxEdA
Twitter: https://twitter.com/labs_steam
Pinterest: https://www.pinterest.com/NeoSteamLabs/
Instagram: https://www.instagram.com/neosteamlabs/

Don Luc
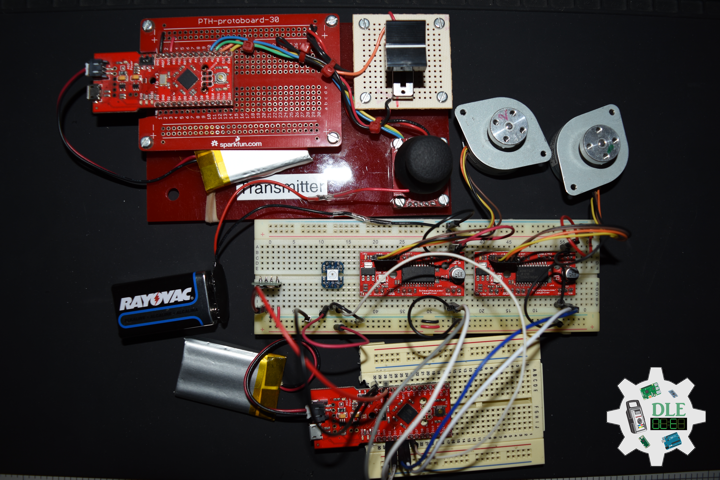
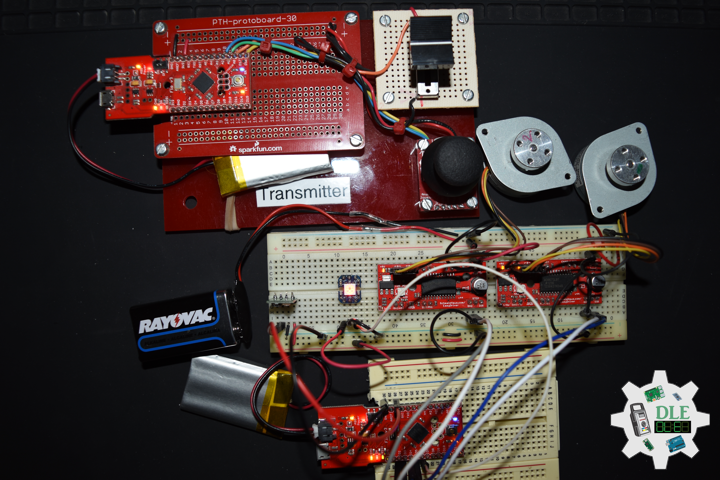
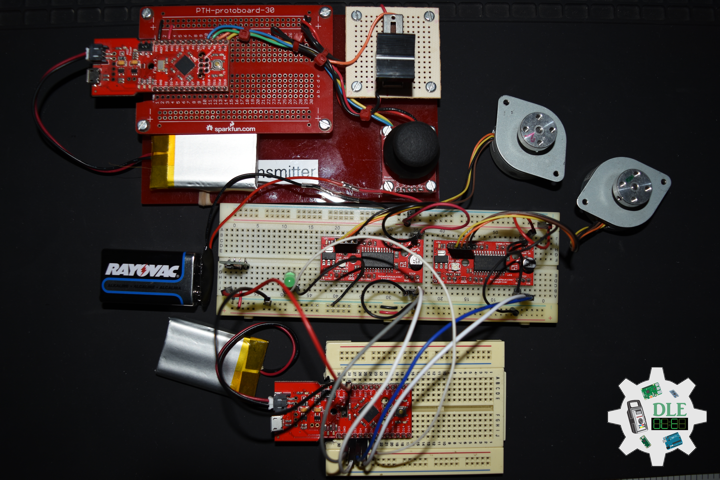
Project #12: Robotics – Vertical – Mk15

——

#DonLucElectronics #DonLuc #Robotics #Arduino #Fio #XBee #Stepper #EasyDriver #Project #Fritzing #Programming #Electronics #Microcontrollers #Consultant

——

Vertical

——

Vertical

——

Vertical

——

Joystick

A joystick is an input device consisting of a stick that pivots on a base and reports its angle or direction to the device it is controlling. A joystick, also known as the control column, is the principal control device in the cockpit of many civilian and military aircraft, either as a centre stick or side-stick. It often has supplementary switches to control various aspects of the aircraft’s flight.

Pololu Adjustable Step-Up Voltage Regulator U1V11A

This compact U1V11A switching step-up voltage regulator efficiently boosts input voltages as low as 0.5 V to an adjustable output voltage between 2 V and 5.25 V. Unlike most boost regulators, the U1V11A offers a true shutdown option that turns off power to the load, and it automatically switches to a linear down-regulation mode when the input voltage exceeds the output.

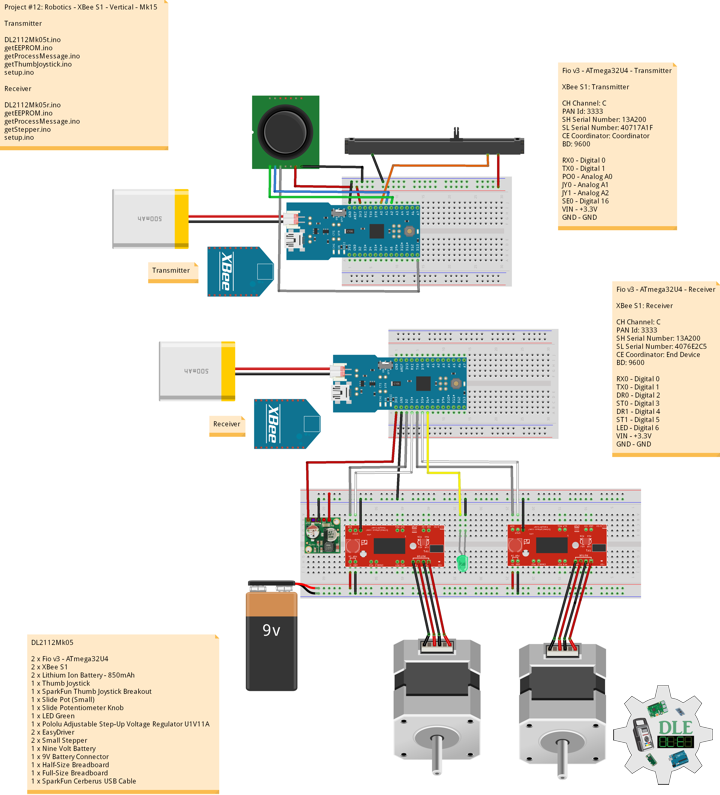
DL2112Mk05

2 x Fio v3 – ATmega32U4
2 x XBee S1
2 x Lithium Ion Battery – 850mAh
1 x Thumb Joystick
1 x SparkFun Thumb Joystick Breakout
1 x Slide Pot (Small)
1 x Slide Potentiometer Knob
1 x LED Green
1 x Pololu Adjustable Step-Up Voltage Regulator U1V11A
2 x EasyDriver
2 x Small Stepper
1 x Nine Volt Battery
1 x 9V Battery Connector
1 x Half-Size Breadboard
1 x Full-Size Breadboard
1 x SparkFun Cerberus USB Cable

Fio v3 – ATmega32U4 – Transmitter

XBee S1: Transmitter

CH Channel: C
PAN Id: 3333
SH Serial Number: 13A200
SL Serial Number: 40717A1F
CE Coordinator: Coordinator
BD: 9600

RX0 – Digital 0
TX0 – Digital 1
PO0 – Analog A0
JY0 – Analog A1
JY1 – Analog A2
SE0 – Digital 16
VIN – +3.3V
GND – GND

——

DL2112Mk05t.ino

/* ***** Don Luc Electronics © *****
Software Version Information
Project #12: Robotics - XBee S1 - Transmitter - Mk15
12-05
DL2112Mk05t.ino
1 x Fio v3 - ATmega32U4
1 x XBee S1
1 x Lithium Ion Battery - 850mAh
1 x Thumb Joystick
1 x SparkFun Thumb Joystick Breakout
1 x Slide Pot (Small)
1 x Slide Potentiometer Knob
1 x SparkFun Cerberus USB Cable
*/

// Include the Library Code
// EEPROM library to read and write EEPROM with unique ID for unit
#include <EEPROM.h>

// Communication
unsigned long dTime = 50;

// Slide Pot (Small)
// Select the input pin for the slide pot
// Power
const int iSP1 = A0;
// Power to store the value
int iPower = 0;

// Connections to joystick
// Vertical
const int VERT = A1;
// Horizontal
const int HORIZ = A2;
// Pushbutton
const int SEL = 16;
// Initialize variables for analog and digital values
int vertical;
int horizontal;
int select;

// Software Version Information
// Version
String sver = "12-15t";
// Unit ID Information
// UID
String uid = "";

void loop()
{

  // Thumb Joystick
  isThumbJoystick();
    
  // Process Message
  isProcessMessage();

  delay( dTime );
  
}

getEEPROM.ino

// EEPROM
// is UID
void isUID()
{
  
  // Is Unit ID
  // UID
  uid = "";
  for (int x = 0; x < 5; x++)
  {
    uid = uid + char(EEPROM.read(x));
  }
  
}

getProcessMessage.ino

// Process Message
// isProcessMessage
void isProcessMessage() {
  
   // Loop through serial buffer
   // Print = "<" + vertical + "|" + horizontal + "|" + select + "|" + iValue + "|" + sver + "|" + uid + "*"
      
   Serial1.print( '<'  );
   Serial1.print( vertical );
   Serial1.print( '|' );
   Serial1.print( horizontal );
   Serial1.print( '|' );
   Serial1.print( select );
   Serial1.print( '|' );
   Serial1.print( iPower );
   Serial1.print( '|' );
   Serial1.print( sver );
   Serial1.print( '|' );
   Serial1.print( uid );
   Serial1.println( '*' );

}

getThumbJoystick.ino

// Thumb Joystick
void isThumbJoystick() {

  // Read all values from the joystick
  // Joystick was sitting around 520 for the vertical and horizontal values
  // Will be 0-1023
  vertical = analogRead(VERT);
  // Will be 0-1023
  horizontal = analogRead(HORIZ);
  // Will be HIGH (1) if not pressed, and LOW (0) if pressed
  select = digitalRead(SEL);
  // Read the value
  // Power be 0-1023
  iPower = analogRead( iSP1 );
 
}

setup.ino

// Setup
void setup()
{

  // EEPROM Unit ID
  isUID();
  
  // Pause
  delay(5);
  
  // Make the SEL line an input
  pinMode(SEL, INPUT_PULLUP);
  
  // Open Serial1 port at 9600 baud
  Serial1.begin( 9600 );

  // Pause
  delay(5);

}

——

Fio v3 – ATmega32U4 – Receiver

XBee S1: Receiver

CH Channel: C
PAN Id: 3333
SH Serial Number: 13A200
SL Serial Number: 4076E2C5
CE Coordinator: End Device
BD: 9600

RX0 – Digital 0
TX0 – Digital 1
DR0 – Digital 2
ST0 – Digital 3
DR1 – Digital 4
ST1 – Digital 5
LED – Digital 6
VIN – +3.3V
GND – GND

——

DL2112Mk05r.ino

/* ***** Don Luc Electronics © *****
Software Version Information
Project #12: Robotics - Vertical - Mk15
12-05
DL2112Mk04r.ino
1 x Fio v3 - ATmega32U4
1 x XBee S1
1 x Lithium Ion Battery - 850mAh
1 x LED Green
1 x Pololu Adjustable Step-Up Voltage Regulator U1V11A
2 x EasyDriver
2 x Small Stepper
1 x Nine Volt Battery
1 x 9V Battery Connector
1 x Half-Size Breadboard
1 x Full-Size Breadboard
1 x SparkFun Cerberus USB Cable
*/

// Include the library code:
// EEPROM library to read and write EEPROM with unique ID for unit
#include <EEPROM.h>

// LED Green
int iLEDGreen = 6;

// 2 x EasyDriver - 2 x Stepper
// EasyDriver Right
int dirPinR = 2;
// stepPin Right
int stepPinR = 3;
// EasyDriver Left
int dirPinL = 4;
// stepPin Left
int stepPinL = 5;
// Microsteps
int i = 0;
// Power be 0-1023
int iPower = 0;
String POW = "";
// Joystick was sitting around 520 for the vertical and horizontal values
// Will be 0-1023
// Vertical
int vertical;
String VER = "";
// Horizontal
// Will be 0-1023
int horizontal;
String HOR = "";
// Select
// Will be HIGH (1) if not pressed, and LOW (0) if pressed
int select;
String SEL = "";
int firstClosingBracket = 0;
// Map Vertical and Horizontal
int mapVer = 0;
int mapHor = 0;

// Process Message
// Start
bool bStart = false;
// End
bool bEnd   = false;
// Variable to store the incoming byte
int incb = 0;
// Message
String msg = "";
// Index
byte in = 0;
int x = 0;

// Software Version Information
String sver = "12-15r";
// Unit ID information
String uid = "";

void loop() {

  // Check for serial messages
  isProcessMessage();

}

getEEPROM.ino

// EEPROM
// isUID
void isUID()
{
  
  // Is Unit ID
  uid = "";
  for (int x = 0; x < 5; x++)
  {
    uid = uid + char(EEPROM.read(x));
  }
  
}

getProcessMessage.ino

// ProcessMessage
// isProcessMessage
void isProcessMessage() {

  // Loop through serial buffer one byte at a time until you reach * which will be end of message
  while ( Serial1.available() > 0 ) 
  {
      
      // Read the incoming byte:
      incb = Serial1.read();
      
      // Start the message when the '<' symbol is received
      if(incb == '<')
      {
        
        bStart = true;
        in = 0;
        msg = "";
        
      }
      // End the message when the '*' symbol is received
      else if(incb == '*')
      {
        
        bEnd = true;
        x = msg.length();
        msg.remove( x , 1);
        // Done reading
        
        break;
      }
      // Read the message
      else
      {
        
        msg = msg + char(incb);
        in++;
        //Serial.println( msg );

      }
      
   }

   // Start - End
   if( bStart && bEnd)
   {

      // isStepper => msg
      isStepper();
      
      digitalWrite(iLEDGreen, HIGH);
      in = 0;
      msg = "";
      bStart = false;
      bEnd = false;
      vertical;
      horizontal;
      iPower;
      
   }

}

getStepper.ino

// Stepper
// isStepperSetup
void isStepperSetup() {

  // 2 x EasyDriver
  pinMode(dirPinR, OUTPUT);
  pinMode(stepPinR, OUTPUT);
  pinMode(dirPinL, OUTPUT);
  pinMode(stepPinL, OUTPUT);

}
// isStepper
void isStepper() {

  // msg = vertical + "|" + horizontal + "|" + select + "|" + iValue + "|" + sver + "|" + uid
  firstClosingBracket = 0;
  // Vertical
  firstClosingBracket = msg.indexOf('|');
  VER = msg;
  VER.remove(firstClosingBracket);
  vertical = VER.toInt();
  // Horizontal
  firstClosingBracket = firstClosingBracket + 1;
  msg.remove(0, firstClosingBracket );
  firstClosingBracket = msg.indexOf('|');
  HOR = msg;
  HOR.remove(firstClosingBracket);
  horizontal = HOR.toInt();
  // Select
  firstClosingBracket = firstClosingBracket + 1;
  msg.remove(0, firstClosingBracket );  
  firstClosingBracket = msg.indexOf('|');
  SEL = msg;
  SEL.remove(firstClosingBracket);
  // Power
  firstClosingBracket = firstClosingBracket + 1;
  msg.remove(0, firstClosingBracket );    
  firstClosingBracket = msg.indexOf('|');
  POW = msg;
  POW.remove(firstClosingBracket);
  iPower = POW.toInt();

  // EasyDriver Right
  // Set the direction
  // Joystick was sitting around 520 for the vertical and horizontal values
  // Will be 0-1023
  mapVer = map(vertical, 0, 1023, -512, 512);
  mapHor = map(horizontal, 0, 1023, -512, 512);
  
  // Vertical
  if ( mapVer <= 12 ) {

    // Set the direction HIGH
    digitalWrite(dirPinR, HIGH);
    delay(5);
    digitalWrite(dirPinL, HIGH);
    delay(5);
    
  } else {

    // Set the direction LOW
    digitalWrite(dirPinR, LOW);
    delay(5);
    digitalWrite(dirPinL, LOW);
    delay(5);
    
  }

  // Iterate for 200 microsteps
  for (i = 0; i<200; i++)
  { 

     // This LOW to HIGH change is what creates the
     digitalWrite(stepPinR, LOW);
     // "Rising Edge" so the easydriver knows to when to step.
     digitalWrite(stepPinR, HIGH);
     // This delay time is close to top speed.
     delayMicroseconds(iPower);
     // This LOW to HIGH change is what creates the
     digitalWrite(stepPinL, LOW);
     // "Rising Edge" so the easydriver knows to when to step.
     digitalWrite(stepPinL, HIGH);
     // This delay time is close to top speed.
     delayMicroseconds(iPower);

 }
   
}

setup.ino

// Setup
void setup() {

  // Open the serial port at 9600 bps:
  Serial1.begin( 9600 );

  // Pause
  delay(5);

  // EEPROM Unit ID
  isUID();
  
  // Pause
  delay(5);

  // 2 x EasyDriver
  isStepperSetup();

  // Pause
  delay(5);
  
  // LED Green
  pinMode(iLEDGreen, OUTPUT);
  digitalWrite(iLEDGreen, LOW);

}

——

People can contact us: https://www.donluc.com/?page_id=1927

Technology Experience

  • Single-Board Microcontrollers (PIC, Arduino, Raspberry Pi,Espressif, etc…)
  • IoT
  • Robotics
  • Camera and Video Capture Receiver Stationary, Wheel/Tank and Underwater Vehicle
  • Unmanned Vehicles Terrestrial and Marine
  • Research & Development (R & D)
  • Desktop Applications (Windows, OSX, Linux, Multi-OS, Multi-Tier, etc…)
  • Mobile Applications (Android, iOS, Blackberry, Windows Mobile, Windows CE, etc…)
  • Web Applications (LAMP, Scripting, Java, ASP, ASP.NET, RoR, Wakanda, etc…)
  • Social Media Programming & Integration (Facebook, Twitter, YouTube, Pinterest, etc…)
  • Content Management Systems (WordPress, Drupal, Joomla, Moodle, etc…)
  • Bulletin Boards (phpBB, SMF, Vanilla, jobberBase, etc…)
  • eCommerce (WooCommerce, OSCommerce, ZenCart, PayPal Shopping Cart, etc…)

Instructor and E-Mentor

  • IoT
  • PIC Microcontrollers
  • Arduino
  • Raspberry Pi
  • Espressif
  • Robotics
  • DOS, Windows, OSX, Linux, iOS, Android, Multi-OS
  • Linux-Apache-PHP-MySQL

Follow Us

J. Luc Paquin – Curriculum Vitae – 2021 English & Español
https://www.jlpconsultants.com/luc/

Web: https://www.donluc.com/
Web: https://www.jlpconsultants.com/
Facebook: https://www.facebook.com/neosteam.labs.9/
YouTube: https://www.youtube.com/channel/UC5eRjrGn1CqkkGfZy0jxEdA
Twitter: https://twitter.com/labs_steam
Pinterest: https://www.pinterest.com/NeoSteamLabs/
Instagram: https://www.instagram.com/neosteamlabs/

Don Luc
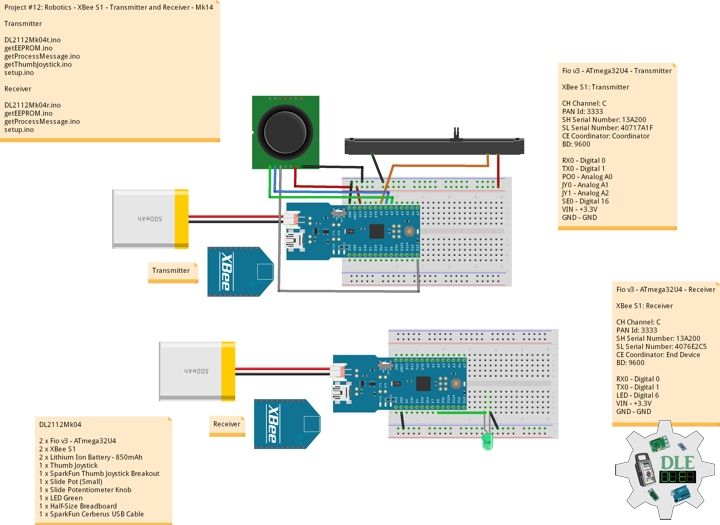
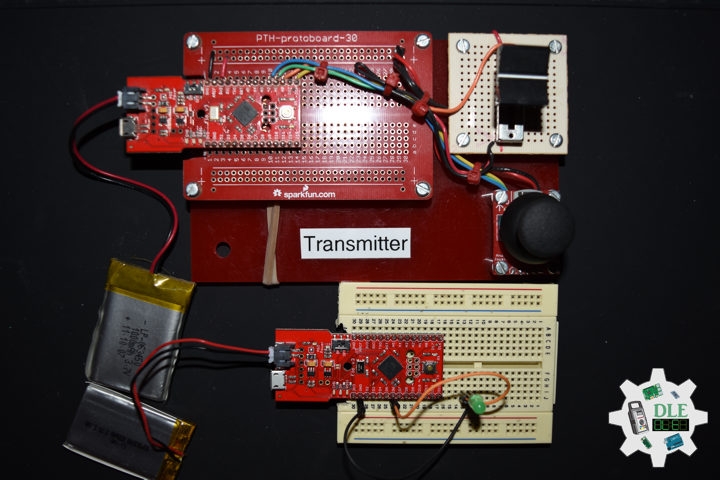
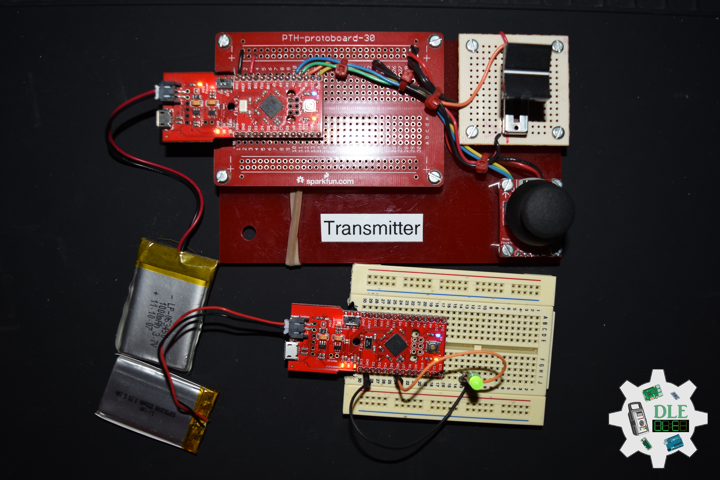
Project #12: Robotics – Transmitter and Receiver – Mk14

——

#DonLucElectronics #DonLuc #Robotics #Arduino #Fio #XBee #XBeeS1 #Transmitter #Project #Fritzing #Programming #Electronics #Microcontrollers #Consultant

——

Transmitter and Receiver

——

Transmitter and Receiver

——

Transmitter and Receiver

——

Serial

Used for communication between the Arduino board and a computer or other devices. All Arduino boards have at least one serial port, and some have several. Fio v3 ATmega32U4 board, Serial1 pins, 0(RX), 1(TX). On Fio v3 ATmega32U4, pins 0 and 1 are used for communication with the computer. Connecting anything to these pins can interfere with that communication, including causing failed uploads to the board. You can use the Arduino environment’s built-in serial monitor to communicate with an Arduino board. Click the serial monitor button in the toolbar and select the same baud rate used in the call to begin(). Serial communication on pins TX/RX uses TTL logic levels 3.3V . Don’t connect these pins directly to an RS232 serial port, they operate at +/- 12V and can damage your Arduino board.

DL2112Mk04

2 x Fio v3 – ATmega32U4
2 x XBee S1
2 x Lithium Ion Battery – 850mAh
1 x Thumb Joystick
1 x SparkFun Thumb Joystick Breakout
1 x Slide Pot (Small)
1 x Slide Potentiometer Knob
1 x LED Green
1 x Half-Size Breadboard
1 x SparkFun Cerberus USB Cable

Fio v3 – ATmega32U4 – Transmitter

XBee S1: Transmitter

CH Channel: C
PAN Id: 3333
SH Serial Number: 13A200
SL Serial Number: 40717A1F
CE Coordinator: Coordinator
BD: 9600

RX0 – Digital 0
TX0 – Digital 1
PO0 – Analog A0
JY0 – Analog A1
JY1 – Analog A2
SE0 – Digital 16
VIN – +3.3V
GND – GND

DL2112Mk04t.ino

/* ***** Don Luc Electronics © *****
Software Version Information
Project #12: Robotics - XBee S1 - Transmitter - Mk14
12-04
DL2112Mk04t.ino
1 x Fio v3 - ATmega32U4
1 x XBee S1
1 x Lithium Ion Battery - 850mAh
1 x Thumb Joystick
1 x SparkFun Thumb Joystick Breakout
1 x Slide Pot (Small)
1 x Slide Potentiometer Knob
1 x SparkFun Cerberus USB Cable
*/

// Include the Library Code
// EEPROM library to read and write EEPROM with unique ID for unit
#include <EEPROM.h>

// Communication
unsigned long dTime = 50;

// Slide Pot (Small)
// Select the input pin for the slide pot
// Power
const int iSP1 = A0;
// Power to store the value
int iPower = 0;

// Connections to joystick
// Vertical
const int VERT = A1;
// Horizontal
const int HORIZ = A2;
// Pushbutton
const int SEL = 16;
// Initialize variables for analog and digital values
int vertical;
int horizontal;
int select;

// Software Version Information
// Version
String sver = "12-14t";
// Unit ID Information
// UID
String uid = "";

void loop()
{

  // Thumb Joystick
  isThumbJoystick();
    
  // Process Message
  isProcessMessage();

  delay( dTime );
  
}

getEEPROM.ino

// EEPROM
// is UID
void isUID()
{
  
  // Is Unit ID
  // UID
  uid = "";
  for (int x = 0; x < 5; x++)
  {
    uid = uid + char(EEPROM.read(x));
  }
  
}

getProcessMessage.ino

// Process Message
// isProcessMessage
void isProcessMessage() {
  
   // Loop through serial buffer
   // Print = "<" + vertical + "|" + horizontal + "|" + select + "|" + iValue + "|" + sver + "|" + uid + "*"
      
   Serial1.print( '<'  );
   Serial1.print( vertical );
   Serial1.print( '|' );
   Serial1.print( horizontal );
   Serial1.print( '|' );
   Serial1.print( select );
   Serial1.print( '|' );
   Serial1.print( iPower );
   Serial1.print( '|' );
   Serial1.print( sver );
   Serial1.print( '|' );
   Serial1.print( uid );
   Serial1.println( '*' );

}

getThumbJoystick.ino

// Thumb Joystick
void isThumbJoystick() {

  // Read all values from the joystick
  // Joystick was sitting around 520 for the vertical and horizontal values
  // Will be 0-1023
  vertical = analogRead(VERT);
  // Will be 0-1023
  horizontal = analogRead(HORIZ);
  // Will be HIGH (1) if not pressed, and LOW (0) if pressed
  select = digitalRead(SEL);
  // Read the value
  // Power be 0-1023
  iPower = analogRead( iSP1 );
 
}

setup.ino

// Setup
void setup()
{

  // EEPROM Unit ID
  isUID();
  
  // Pause
  delay(5);
  
  // Make the SEL line an input
  pinMode(SEL, INPUT_PULLUP);
  
  // Open Serial1 port at 9600 baud
  Serial1.begin( 9600 );

  // Pause
  delay(5);

}

——

Fio v3 – ATmega32U4 – Receiver

XBee S1: Receiver

CH Channel: C
PAN Id: 3333
SH Serial Number: 13A200
SL Serial Number: 4076E2C5
CE Coordinator: End Device
BD: 9600

RX0 – Digital 0
TX0 – Digital 1
LED – Digital 6
VIN – +3.3V
GND – GND

DL2112Mk04r.ino

/* ***** Don Luc Electronics © *****
Software Version Information
Project #12: Robotics - Receiver - Mk14
12-04
DL2112Mk04r.ino
1 x Fio v3 - ATmega32U4
1 x XBee S1
1 x Lithium Ion Battery - 850mAh
1 x LED Green
1 x Half-Size Breadboard
1 x SparkFun Cerberus USB Cable
*/

// Include the library code:
// EEPROM library to read and write EEPROM with unique ID for unit
#include <EEPROM.h>

// LED Green
int iLEDGreen = 6;

// Process Message
// Start
bool bStart = false;
// End
bool bEnd   = false;
// Variable to store the incoming byte
int incb = 0;
// Message
String msg = "";
// Index
byte in = 0;
int x = 0;

// Software Version Information
String sver = "12-14r";
// Unit ID information
String uid = "";

void loop() {

  // Check for serial messages
  isProcessMessage();

}

getEEPROM.ino

// EEPROM
// isUID
void isUID()
{
  
  // Is Unit ID
  uid = "";
  for (int x = 0; x < 5; x++)
  {
    uid = uid + char(EEPROM.read(x));
  }
  
}

getProcessMessage.ino

// ProcessMessage
// isProcessMessage
void isProcessMessage() {
   
  // Loop through serial buffer one byte at a time until you reach * which will be end of message
  while ( Serial1.available() > 0 ) 
  {
      
      // Read the incoming byte:
      incb = Serial1.read();
      
      // Start the message when the '<' symbol is received
      if(incb == '<')
      {
        
        bStart = true;
        in = 0;
        msg = "";
        // Done reading
        
      }
      // End the message when the '*' symbol is received
      else if(incb == '*')
      {
        
        bEnd = true;
        x = msg.length();
        msg.remove( x , 1);
        // Done reading
        
        break;
      }
      // Read the message
      else
      {
        
        msg = msg + char(incb);
        in++;

      }
      
   }

   // Start - End
   if( bStart && bEnd)
   {
    
      digitalWrite(iLEDGreen, HIGH);
      in = 0;
      msg = "";
      bStart = false;
      bEnd = false;
      
   }

}

setup.ino

// Setup
void setup() {

  // Open the serial port at 9600 bps:
  Serial1.begin( 9600 );

  // Pause
  delay(5);

  // EEPROM Unit ID
  isUID();
  
  // Pause
  delay(5);
  
  // LED Green
  pinMode(iLEDGreen, OUTPUT);
  digitalWrite(iLEDGreen, LOW);

}

——

People can contact us: https://www.donluc.com/?page_id=1927

Technology Experience

  • Single-Board Microcontrollers (PIC, Arduino, Raspberry Pi,Espressif, etc…)
  • IoT
  • Robotics
  • Camera and Video Capture Receiver Stationary, Wheel/Tank and Underwater Vehicle
  • Unmanned Vehicles Terrestrial and Marine
  • Research & Development (R & D)
  • Desktop Applications (Windows, OSX, Linux, Multi-OS, Multi-Tier, etc…)
  • Mobile Applications (Android, iOS, Blackberry, Windows Mobile, Windows CE, etc…)
  • Web Applications (LAMP, Scripting, Java, ASP, ASP.NET, RoR, Wakanda, etc…)
  • Social Media Programming & Integration (Facebook, Twitter, YouTube, Pinterest, etc…)
  • Content Management Systems (WordPress, Drupal, Joomla, Moodle, etc…)
  • Bulletin Boards (phpBB, SMF, Vanilla, jobberBase, etc…)
  • eCommerce (WooCommerce, OSCommerce, ZenCart, PayPal Shopping Cart, etc…)

Instructor and E-Mentor

  • IoT
  • PIC Microcontrollers
  • Arduino
  • Raspberry Pi
  • Espressif
  • Robotics
  • DOS, Windows, OSX, Linux, iOS, Android, Multi-OS
  • Linux-Apache-PHP-MySQL

Follow Us

J. Luc Paquin – Curriculum Vitae – 2021 English & Español
https://www.jlpconsultants.com/luc/

Web: https://www.donluc.com/
Web: https://www.jlpconsultants.com/
Facebook: https://www.facebook.com/neosteam.labs.9/
YouTube: https://www.youtube.com/channel/UC5eRjrGn1CqkkGfZy0jxEdA
Twitter: https://twitter.com/labs_steam
Pinterest: https://www.pinterest.com/NeoSteamLabs/
Instagram: https://www.instagram.com/neosteamlabs/

Don Luc
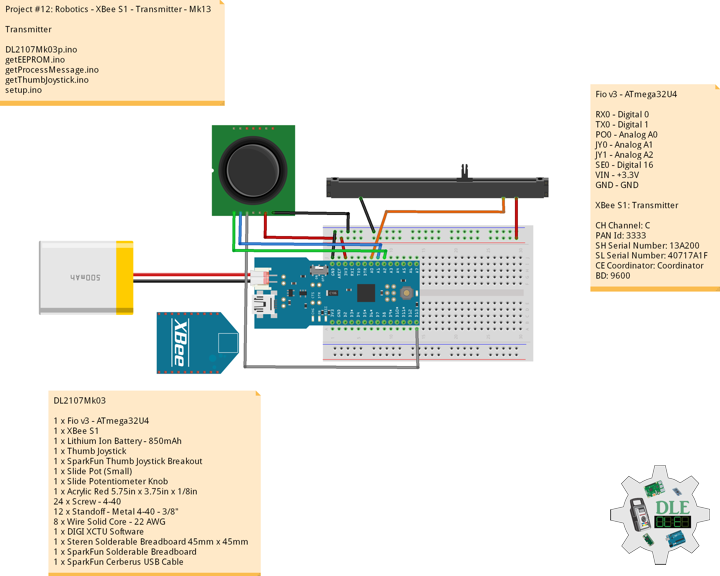
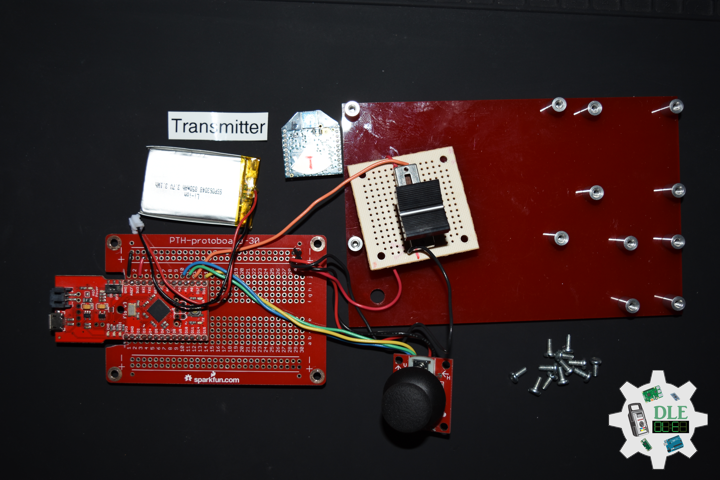
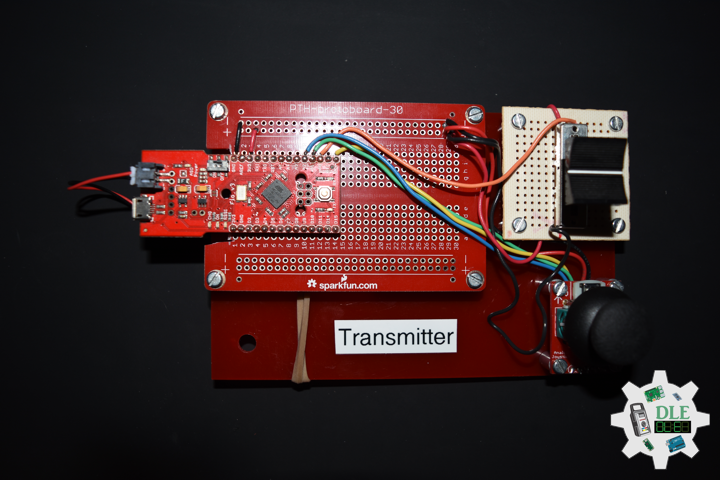
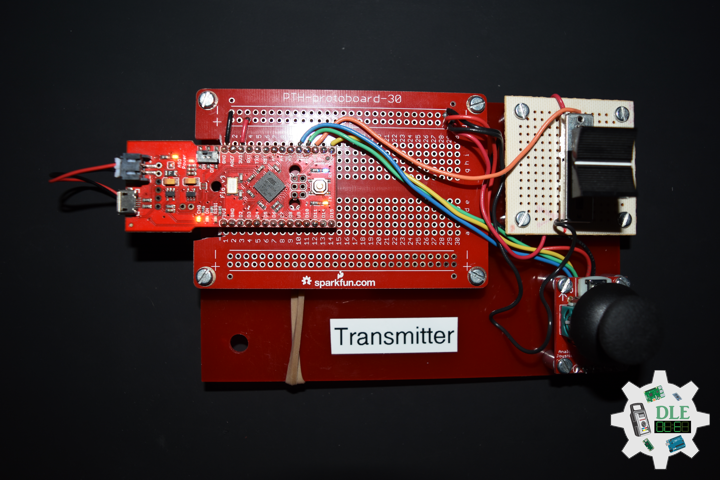
Project #12: Robotics – XBee S1 – Transmitter – Mk13

——

#DonLucElectronics #DonLuc #Robotics #Arduino #Fio #FioV3ATmega32U4 #XBeeS1 #Transmitter #ThumbJoystick #SlidePot #Project #Programming #Electronics #Microcontrollers #Consultant #VideoBlog

——

Fio v3 - ATmega32U4

——

Fio v3 - ATmega32U4

——

Fio v3 - ATmega32U4

——

Fio v3 - ATmega32U4

——

Fio v3 – ATmega32U4

The Fio v3 is a new spin on the Arduino Fio hardware powered by the ATmega32U4.Not only is it small and LiPo-ready, it’s a very capable XBee-ready development board. The JST-connector and 3.3v system voltage make this a great development tool for portable devices, simply plug in a Li-Poly battery and you’re ready to go. Wireless sensor networks and communication are made easy by the on-board XBee socket.

The ATmega32U4, running at 8MHz, makes it possible for you to use the on-board USB jack not only to charge a connected Li-Poly battery but to actually program the device. Because this board uses a similar bootloader to the one on the Pro Micro, you will need to download and install the special software driver below. There’s also a board definition add-on for the Arduino IDE which will add support for this board.

Transmitter

XBee S1: Transmitter

CH Channel: C
PAN Id: 3333
SH Serial Number: 13A200
SL Serial Number: 40717A1F
CE Coordinator: Coordinator
BD: 9600

DL2107Mk03

1 x Fio v3 – ATmega32U4
1 x XBee S1
1 x Lithium Ion Battery – 850mAh
1 x Thumb Joystick
1 x SparkFun Thumb Joystick Breakout
1 x Slide Pot (Small)
1 x Slide Potentiometer Knob
1 x Acrylic Red 5.75in x 3.75in x 1/8in
24 x Screw – 4-40
12 x Standoff – Metal 4-40 – 3/8″
8 x Wire Solid Core – 22 AWG
1 x DIGI XCTU Software
1 x Steren Solderable Breadboard 45mm x 45mm
1 x SparkFun Solderable Breadboard
1 x SparkFun Cerberus USB Cable

Fio v3 – ATmega32U4

RX0 – Digital 0
TX0 – Digital 1
PO0 – Analog A0
JY0 – Analog A1
JY1 – Analog A2
SE0 – Digital 16
VIN – +3.3V
GND – GND

DL2107Mk03p.ino

/* ***** Don Luc Electronics © *****
Software Version Information
Project #12: Robotics - XBee S1 - Transmitter - Mk13
07-03
DL2107Mk03p.ino
1 x Fio v3 - ATmega32U4
1 x XBee S1
1 x Lithium Ion Battery - 850mAh
1 x Thumb Joystick
1 x SparkFun Thumb Joystick Breakout
1 x Slide Pot (Small)
1 x Slide Potentiometer Knob
1 x Acrylic Red 5.75in x 3.75in x 1/8in
24 x Screw - 4-40
12 x Standoff - Metal 4-40 - 3/8"
8 x Wire Solid Core - 22 AWG
1 x DIGI XCTU Software
1 x Steren Solderable Breadboard 45mm x 45mm
1 x SparkFun Solderable Breadboard
1 x SparkFun Cerberus USB Cable
*/

// Include the Library Code
// EEPROM library to read and write EEPROM with unique ID for unit
#include <EEPROM.h>

// Communication
unsigned long dTime = 50;

// Slide Pot (Small)
// Select the input pin for the slide pot
// Power
const int iSP1 = A0;
// Power to store the value
int iPower = 0;

// Connections to joystick
// Vertical
const int VERT = A1;
// Horizontal
const int HORIZ = A2;
// Pushbutton
const int SEL = 16;
// Initialize variables for analog and digital values
int vertical;
int horizontal;
int select;

// Software Version Information
// Version
String sver = "12-13";
// Unit ID Information
// UID
String uid = "";

void loop()
{

  // Thumb Joystick
  isThumbJoystick();
    
  // Process Message
  isProcessMessage();

  delay( dTime );
  
}

getEEPROM.ino

// EEPROM
// is UID
void isUID()
{
  
  // Is Unit ID
  // UID
  uid = "";
  for (int x = 0; x < 5; x++)
  {
    uid = uid + char(EEPROM.read(x));
  }
  
}

getProcessMessage.ino

// Process Message
// isProcessMessage
void isProcessMessage() {
  
   // Loop through serial buffer
   while ( Serial.available() ) 
   {

      // Print = "<" + vertical + "|" + horizontal + "|" + select + "|" + iValue + "|" + sver + "|" + uid + "*"
      
      Serial.print( '<'  );
      Serial.print( vertical );
      Serial.print( '|' );
      Serial.print( horizontal );
      Serial.print( '|' );
      Serial.print( select );
      Serial.print( '|' );
      Serial.print( iPower );
      Serial.print( '|' );
      Serial.print( sver );
      Serial.print( '|' );
      Serial.print( uid );
      Serial.println( '*' );
         
   }
     
}

getThumbJoystick.ino

// Thumb Joystick
void isThumbJoystick() {

  // Read all values from the joystick
  // Joystick was sitting around 520 for the vertical and horizontal values
  // Will be 0-1023
  vertical = analogRead(VERT);
  // Will be 0-1023
  horizontal = analogRead(HORIZ);
  // Will be HIGH (1) if not pressed, and LOW (0) if pressed
  select = digitalRead(SEL);
  // Read the value
  // Power be 0-1023
  iPower = analogRead( iSP1 );
 
}

setup.ino

// Setup
void setup()
{

  // EEPROM Unit ID
  isUID();
  
  // Pause
  delay(5);
  
  // Make the SEL line an input
  pinMode(SEL, INPUT_PULLUP);
  
  // Open serial port at 9600 baud
  Serial.begin( 9600 );

  // Pause
  delay(5);

}

——

People can contact us: https://www.donluc.com/?page_id=1927

Technology Experience

  • Single-Board Microcontrollers (PIC, Arduino, Raspberry Pi,Espressif, etc…)
  • Robotics
  • Research & Development (R & D)
  • Desktop Applications (Windows, OSX, Linux, Multi-OS, Multi-Tier, etc…)
  • Mobile Applications (Android, iOS, Blackberry, Windows Mobile, Windows CE, etc…)
  • Web Applications (LAMP, Scripting, Java, ASP, ASP.NET, RoR, Wakanda, etc…)
  • Social Media Programming & Integration (Facebook, Twitter, YouTube, Pinterest, etc…)
  • Content Management Systems (WordPress, Drupal, Joomla, Moodle, etc…)
  • Bulletin Boards (phpBB, SMF, Vanilla, jobberBase, etc…)
  • eCommerce (WooCommerce, OSCommerce, ZenCart, PayPal Shopping Cart, etc…)

Instructor

  • PIC Microcontrollers
  • Arduino
  • Raspberry Pi
  • Espressif
  • Robotics
  • DOS, Windows, OSX, Linux, iOS, Android, Multi-OS
  • Linux-Apache-PHP-MySQL

Follow Us

J. Luc Paquin – Curriculum Vitae – 2021 English & Español
https://www.jlpconsultants.com/CV/LucPaquinCVEngMk2021c.pdf
https://www.jlpconsultants.com/CV/LucPaquinCVEspMk2021c.pdf

Web: https://www.donluc.com/
Web: https://www.jlpconsultants.com/
Web: https://www.donluc.com/DLE/
Web: https://www.donluc.com/DLHackster/
Web: https://www.hackster.io/neosteam-labs
Web: https://zoom.us/
Patreon: https://www.patreon.com/DonLucElectronics
Facebook: https://www.facebook.com/neosteam.labs.9/
YouTube: https://www.youtube.com/channel/UC5eRjrGn1CqkkGfZy0jxEdA
Twitter: https://twitter.com/labs_steam
Pinterest: https://www.pinterest.com/NeoSteamLabs/
Instagram: https://www.instagram.com/neosteamlabs/

Don Luc
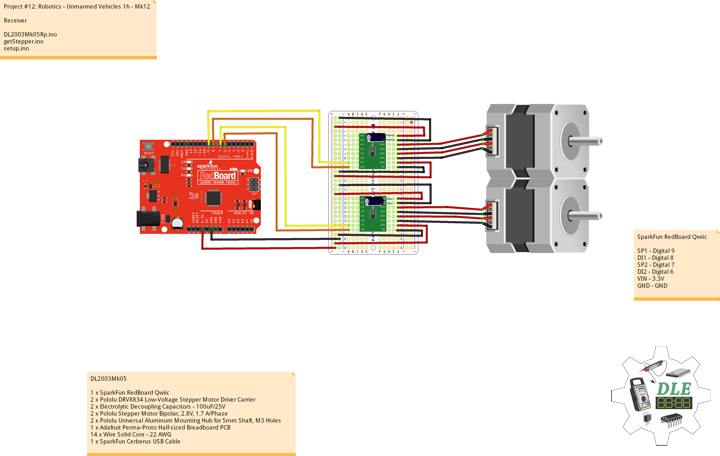
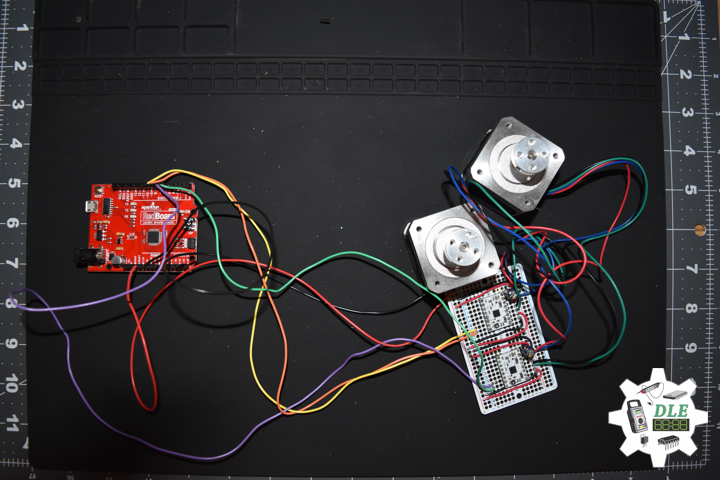
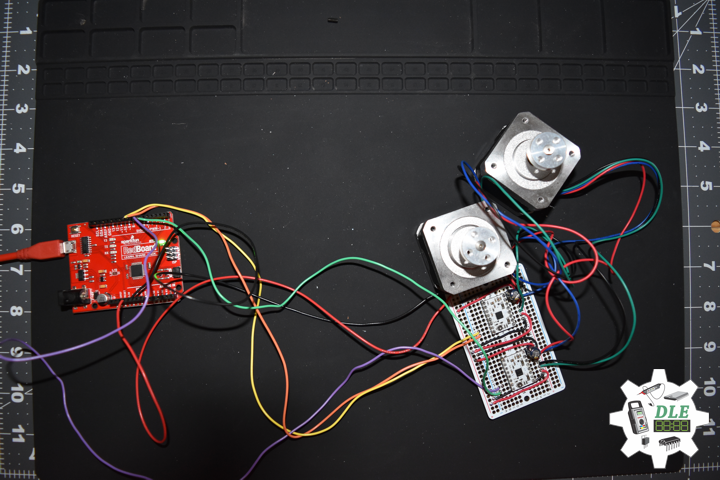
Project #12: Robotics – Unmanned Vehicles 1h – Mk12

——

Robotics

——

Robotics

——

Robotics

——

Robotics

——

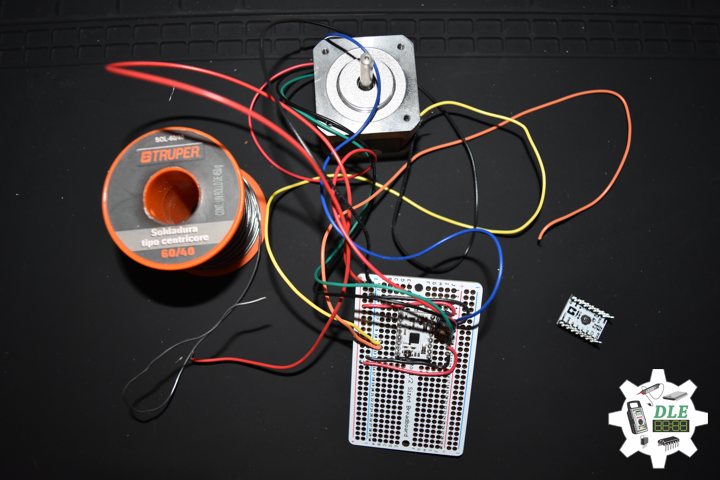
Pololu Stepper Motor Bipolar, 200 Steps/Rev, 2.8V, 1.7 A/Phase

This hybrid bipolar stepping motor has a 1.8° step angle (200 steps/revolution). Each phase draws 1.7 A at 2.8 V, allowing for a holding torque of 3.7 kg-cm. The motor has four color-coded wires terminated with bare leads: black and green connect to one coil; red and blue connect to the other.

DL2003Mk05

1 x SparkFun RedBoard Qwiic
2 x Pololu DRV8834 Low-Voltage Stepper Motor Driver Carrier
2 x Electrolytic Decoupling Capacitors – 100uF/25V
2 x Pololu Stepper Motor Bipolar, 2.8V, 1.7 A/Phase
2 x Pololu Universal Aluminum Mounting Hub for 5mm Shaft, M3 Holes
1 x Adafruit Perma-Proto Half-sized Breadboard PCB
14 x Wire Solid Core – 22 AWG
1 x SparkFun Cerberus USB Cable

SparkFun RedBoard Qwiic

SP1 – Digital 9
DI1 – Digital 8
SP2 – Digital 7
DI2 – Digital 6
VIN – 3.3V
GND – GND

DL2003Mk05Rp.ino

// ***** Don Luc Electronics © *****
// Software Version Information
// Project #12: Robotics - Unmanned Vehicles 1h - Mk12
// 03-05
// DL2003Mk05Rp.ino 12-12
// Receiver
// 1 x SparkFun RedBoard Qwiic
// 2 x Pololu DRV8834 Low-Voltage Stepper Motor Driver Carrier
// 2 x Electrolytic Decoupling Capacitors - 100uF/25V
// 2 x Pololu Stepper Motor Bipolar, 2.8V, 1.7 A/Phase
// 2 x Pololu Universal Aluminum Mounting Hub for 5mm Shaft, M3 Holes
// 1 x Adafruit Perma-Proto Half-sized Breadboard PCB

// Include the library code:
// DRV8834 Stepper Motor Driver
#include <BasicStepperDriver.h>
#include <MultiDriver.h>

// DRV8834 Stepper Motor Driver
// Stepper motor steps per revolution. Most steppers are 200 steps or 1.8 degrees/step
#define MOTOR_STEPS 200
// Target RPM for X axis stepper motor
#define MOTOR_X_RPM 800
// Target RPM for Y axis stepper motor
#define MOTOR_Y_RPM 800
// Since microstepping is set externally, make sure this matches the selected mode
// If it doesn't, the motor will move at a different RPM than chosen
// 1=full step, 2=half step etc.
#define MICROSTEPS 1
// X Stepper motor
#define DIR_X 8
#define STEP_X 9
// Y Stepper motor
#define DIR_Y 6
#define STEP_Y 7
// BasicStepperDriver
BasicStepperDriver stepperX(MOTOR_STEPS, DIR_X, STEP_X);
BasicStepperDriver stepperY(MOTOR_STEPS, DIR_Y, STEP_Y);
// Pick one of the two controllers below each motor moves independently
MultiDriver controller(stepperX, stepperY);

// Software Version Information
String sver = "12-12";
// Unit ID information
String uid = "";

void loop() {

   controller.rotate(360, 360);
   
}

getStepper.ino

// Stepper
// isStepperSetup
void isStepperSetup() {    
  
  // Set stepper target motors RPM.
  stepperX.begin(MOTOR_X_RPM, MICROSTEPS);
  stepperY.begin(MOTOR_Y_RPM, MICROSTEPS);

}

setup.ino

// Setup
void setup() {

  // DRV8834 Stepper Motor Driver
  isStepperSetup();

}

Technology Experience

  • Research & Development (R & D)
  • Desktop Applications (Windows, OSX, Linux, Multi-OS, Multi-Tier, etc…)
  • Mobile Applications (Android, iOS, Blackberry, Windows Mobile, Windows CE, etc…)
  • Web Applications (LAMP, Scripting, Java, ASP, ASP.NET, RoR, Wakanda, etc…)
  • Social Media Programming & Integration (Facebook, Twitter, YouTube, Pinterest, etc…)
  • Content Management Systems (WordPress, Drupal, Joomla, Moodle, etc…)
  • Bulletin Boards (phpBB, SMF, Vanilla, jobberBase, etc…)
  • eCommerce (WooCommerce, OSCommerce, ZenCart, PayPal Shopping Cart, etc…)

Instructor

  • DOS, Windows, OSX, Linux, iOS, Android, Multi-OS
  • Linux-Apache-PHP-MySQL
  • Robotics
  • Arduino
  • Raspberry Pi
  • Espressif

Follow Us

The Alpha Geek

Why “The Alpha Geek”?

Aphasia
https://www.donluc.com/?page_id=2149

J. Luc Paquin – Curriculum Vitae
https://www.donluc.com/DLHackster/LucPaquinCVEngMk2020a.pdf

Web: https://www.donluc.com/
Web: http://www.jlpconsultants.com/
Web: https://www.donluc.com/DLHackster/
Web: https://www.hackster.io/neosteam-labs
Facebook: https://www.facebook.com/neosteam.labs.9/
YouTube: https://www.youtube.com/channel/UC5eRjrGn1CqkkGfZy0jxEdA
Twitter: https://twitter.com/labs_steam
Pinterest: https://www.pinterest.com/NeoSteamLabs/

Don Luc
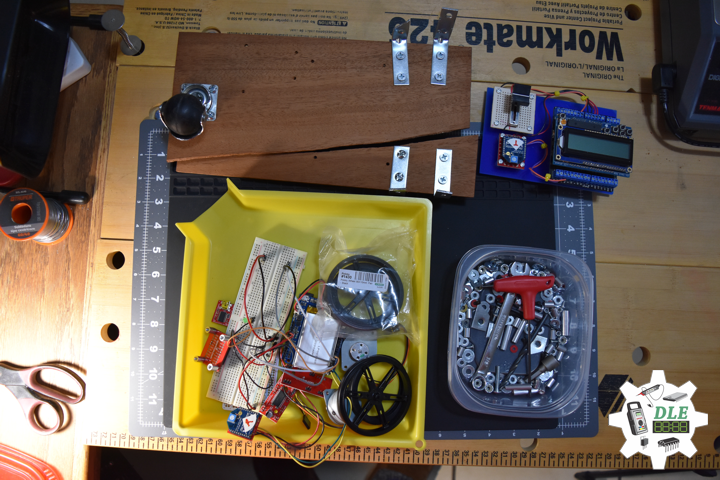
Project #12: Robotics – Unmanned Vehicles 1g – Mk11

——

Robotics

——

Receiver – Rain – Etc…

Technology Experience

  • Research & Development (R & D)
  • Desktop Applications (Windows, OSX, Linux, Multi-OS, Multi-Tier, etc…)
  • Mobile Applications (Android, iOS, Blackberry, Windows Mobile, Windows CE, etc…)
  • Web Applications (LAMP, Scripting, Java, ASP, ASP.NET, RoR, Wakanda, etc…)
  • Social Media Programming & Integration (Facebook, Twitter, YouTube, Pinterest, etc…)
  • Content Management Systems (WordPress, Drupal, Joomla, Moodle, etc…)
  • Bulletin Boards (phpBB, SMF, Vanilla, jobberBase, etc…)
  • eCommerce (WooCommerce, OSCommerce, ZenCart, PayPal Shopping Cart, etc…)

Instructor

  • DOS, Windows, OSX, Linux, iOS, Android, Multi-OS
  • Linux-Apache-PHP-MySQL
  • Robotics
  • Arduino
  • Raspberry Pi
  • Espressif

Follow Us

The Alpha Geek

Why “The Alpha Geek”?

Aphasia
https://www.donluc.com/?page_id=2149

J. Luc Paquin – Curriculum Vitae
https://www.donluc.com/DLHackster/LucPaquinCVEngMk2020a.pdf

Web: https://www.donluc.com/
Web: http://www.jlpconsultants.com/
Web: https://www.donluc.com/DLHackster/
Web: https://www.hackster.io/neosteam-labs
Facebook: https://www.facebook.com/neosteam.labs.9/
YouTube: https://www.youtube.com/channel/UC5eRjrGn1CqkkGfZy0jxEdA
Twitter: https://twitter.com/labs_steam
Pinterest: https://www.pinterest.com/NeoSteamLabs/

Don Luc
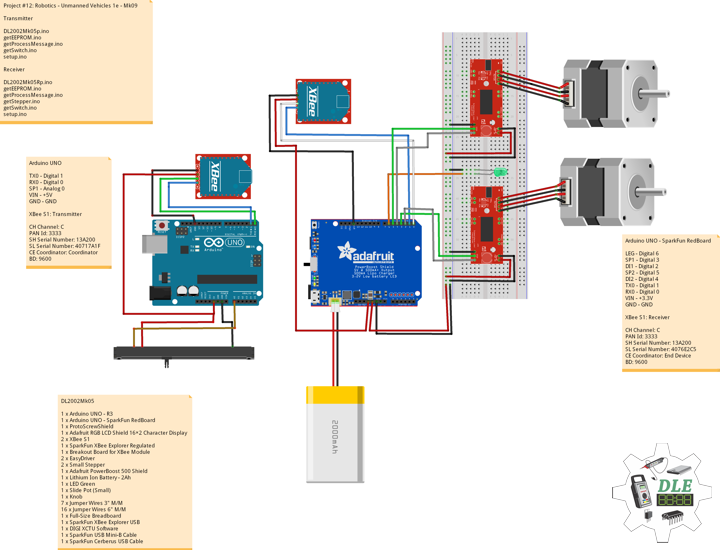
Project #12: Robotics – Unmanned Vehicles 1e – Mk09

——

Robotics

——

Robotics

——

Robotics

——

Robotics

——

Robotics

——

DL2002Mk05

1 x Arduino UNO – R3
1 x Arduino UNO – SparkFun RedBoard
1 x ProtoScrewShield
1 x Adafruit RGB LCD Shield 16×2 Character Display
2 x XBee S1
1 x SparkFun XBee Explorer Regulated
1 x Breakout Board for XBee Module
2 x EasyDriver
2 x Small Stepper
1 x Adafruit PowerBoost 500 Shield
1 x Lithium Ion Battery – 2Ah
1 x LED Green
1 x Slide Pot (Small)
1 x Knob
7 x Jumper Wires 3″ M/M
16 x Jumper Wires 6″ M/M
1 x Full-Size Breadboard
1 x SparkFun XBee Explorer USB
1 x DIGI XCTU Software
1 x SparkFun USB Mini-B Cable
1 x SparkFun Cerberus USB Cable

Arduino UNO

TX0 – Digital 1
RX0 – Digital 0
LP1 – Analog A0
VIN – +5V
GND – GND

XBee S1: Transmitter

CH Channel: C
PAN Id: 3333
SH Serial Number: 13A200
SL Serial Number: 40717A1F
CE Coordinator: Coordinator
BD: 9600

DL2002Mk05p.ino

// ***** Don Luc Electronics © *****
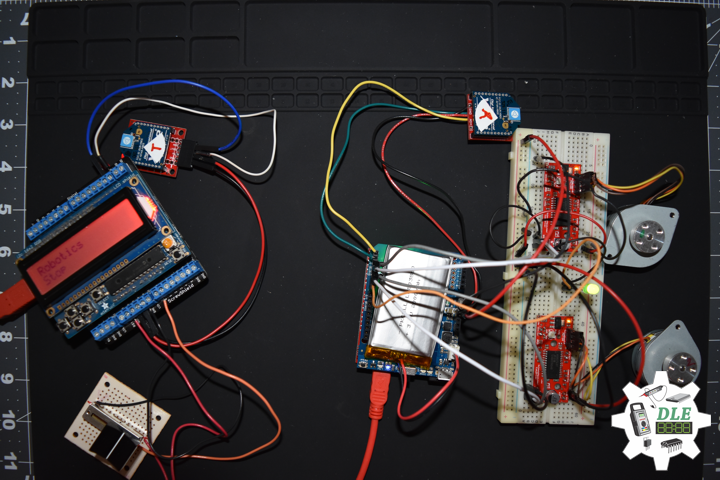
// Software Version Information
// Project #12: Robotics - Unmanned Vehicles 1d - Mk09
// 02-05
// DL2002Mk01p.ino 12-09
// Arduino UNO - R3
// ProtoScrewShield
// Adafruit RGB LCD Shield 16×2 Character Display
// EEPROM with Unique ID
// Transmitter
// XBee S1
// Stepper
// Slide Pot (Small)
// Knob

// Include the library code:
// EEPROM library to read and write EEPROM with unique ID for unit
#include <EEPROM.h>
// Adafruit RGB LCD Shield
#include <Adafruit_RGBLCDShield.h>

// Adafruit RGB LCD Shield
Adafruit_RGBLCDShield RGBLCDShield = Adafruit_RGBLCDShield();

// These #defines make it easy to set the backlight color
#define OFF 0x0
#define RED 0x1
#define YELLOW 0x3
#define GREEN 0x2
#define TEAL 0x6
#define BLUE 0x4
#define VIOLET 0x5
#define WHITE 0x7

// Momentary Button
int yy = 0;
uint8_t momentaryButton = 0;

// Communication
unsigned long dTime = 50;

// Slide Pot (Small)
int iSP1 = A0;                           // Select the input pin for the slide pot
int iValue = 0;                          // Variable to store the value

// The current address in the EEPROM (i.e. which byte we're going to  read to next)
// Version
String sver = "12-9.p";
// Unit ID Information
String uid = "";

void loop() {

  // Clear
  RGBLCDShield.clear();

  // set the cursor to column 0, line 0
  RGBLCDShield.setCursor(0,0);
  RGBLCDShield.print("Robotics");         // Robotics 

  // Momentary Button
  momentaryButton = RGBLCDShield.readButtons();

  switch ( yy ) {
    case 1:
    
      // Up
      isSwitch1();
      
      break;
    case 2:
    
      // Down
      isSwitch2();
      
      break;
    case 3:

      // Right
      isSwitch3();
      
      break;
    case 4:

      // Left
      isSwitch4();
      
      break;
    case 5:

      // Stop
      isSwitch5();
      
      break;
    default:

      // Stop
      yy = 5;
      RGBLCDShield.setBacklight(RED);
      isSwitch5();

   }
   
   if ( momentaryButton ) {
    
    if ( momentaryButton & BUTTON_UP ) {
      
      yy = 1;
      // Up
      RGBLCDShield.setBacklight(GREEN);
      
    }
    
    if ( momentaryButton & BUTTON_DOWN ) {
      
      yy = 2;
      // Down
      RGBLCDShield.setBacklight(VIOLET);
      
    }
    
    if ( momentaryButton & BUTTON_LEFT ) {
      
      yy = 3;
      // Right
      RGBLCDShield.setBacklight(TEAL);
      
    }
    
    if ( momentaryButton & BUTTON_RIGHT ) {

      yy = 4;
      // Left
      RGBLCDShield.setBacklight(YELLOW);
    }
    
    if ( momentaryButton & BUTTON_SELECT ) {

      yy = 5;
      // Stop
      RGBLCDShield.setBacklight(RED);
   
    }
    
  }

  // Read the value
  iValue = analogRead( iSP1 );

  // Process Message
  isProcessMessage();

  delay( dTime );
   
}

getEEPROM.ino

// EEPROM
// isUID
void isUID()
{
  
  // Is Unit ID
  uid = "";
  for (int x = 0; x < 5; x++)
  {
    uid = uid + char(EEPROM.read(x));
  }
  
}

getProcessMessage.ino

// ProcessMessage
// isProcessMessage
void isProcessMessage() {

   // String msg = "";
  
   /// Loop through serial buffer one byte at a time until you reach * which will be end of message
   //while ( Serial.available() ) 
  // {

      // Print => XBEE + Unit ID + Version + *
      // msg = "XBEE|" + uid + "|" + sver + "|" + yy + "|*";
      
      Serial.print( '<'  );
      Serial.print( yy );
      Serial.print( '|' );
      Serial.print( iValue );
      Serial.println( '*' );
         
  // }
     
}

getSwitch.ino

// Switch
// Switch 1
void isSwitch1(){

   yy = 1;

   // Stepper 
   // Up
   RGBLCDShield.setCursor(0,1);    
   RGBLCDShield.print("Up");  
   
}
// Switch 2
void isSwitch2(){

   yy = 2;

   // Stepper 
   // Down
   RGBLCDShield.setCursor(0,1);    
   RGBLCDShield.print("Down");    
      
}
// Switch 3
void isSwitch3(){

   yy = 3;

   // Stepper 
   // Right
   RGBLCDShield.setCursor(0,1);    
   RGBLCDShield.print("Right");    
      
}
// Switch 4
void isSwitch4(){

   yy = 4;

   // Stepper 
   // Left
   RGBLCDShield.setCursor(0,1);    
   RGBLCDShield.print("Left"); 
      
}
// Switch 5
void isSwitch5(){

   yy = 5;
   
   // Stepper 
   // Stop
   RGBLCDShield.setCursor(0,1);    
   RGBLCDShield.print("Stop");
       
}

setup.ino

// Setup
void setup() {
  
  // Open serial port at 9600 baud
  Serial.begin( 9600 );

  // Pause
  delay(5);

  // EEPROM Unit ID
  isUID();
  
  // Pause
  delay(5);
  
  // Adafruit RGB LCD Shield
  // Set up the LCD's number of columns and rows: 
  RGBLCDShield.begin(16, 2);
  RGBLCDShield.setBacklight(GREEN);
  
  // Display
  // Set the cursor to column 0, line 0  
  RGBLCDShield.setCursor(0,0);  
  RGBLCDShield.print("Don Luc Electron");         // Don luc Electron
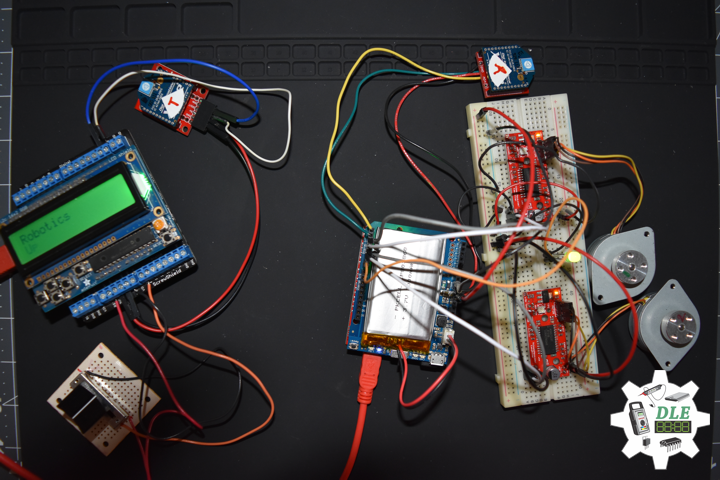
  // Set the cursor to column 0, line 1
  RGBLCDShield.setCursor(0, 1);
  RGBLCDShield.print("Robotics");                 // Robotics

  // Serial
  // Serial.println( "Don Luc Electronics");
  // Serial.println( "Robotics");

  delay(5000);

  // Clear
  RGBLCDShield.clear();

  // Display
  // Set the cursor to column 0, line 0  
  RGBLCDShield.setCursor(0,0);  
  RGBLCDShield.print("Version: ");                // Version
  RGBLCDShield.print( sver );
  // Set the cursor to column 0, line 1
  RGBLCDShield.setCursor(0, 1);
  RGBLCDShield.print("UID: ");                    // Unit ID Information
  RGBLCDShield.print( uid );

  // Serial
  // Serial.print( "Software Version Information: ");
  // Serial.println( sver );
  // Serial.print( "Unit ID Information: ");
  // Serial.println( uid );

  delay(5000);

  // Clear
  RGBLCDShield.clear();

}

Arduino UNO – SparkFun RedBoard

LEG – Digital 6
SP1 – Digital 3
DI1 – Digital 2
SP2 – Digital 5
DI2 – Digital 4
TX0 – Digital 1
RX0 – Digital 0
VIN – +5V
GND – GND

XBee S1: Receiver

CH Channel: C
PAN Id: 3333
SH Serial Number: 13A200
SL Serial Number: 4076E2C5
CE Coordinator: End Device
BD: 9600

DL2002Mk05Rp.ino

// ***** Don Luc Electronics © *****
// Software Version Information
// Project #12: Robotics - Unmanned Vehicles 1e - Mk09
// 02-05
// DL2002Mk05Rp.ino 12-09
// Arduino UNO - SparkFun RedBoard
// EEPROM with Unique ID
// Receiver
// Breakout Board for XBee Module
// XBee S1
// 2 x EasyDriver
// 2 x Small Stepper
// Adafruit PowerBoost 500 Shield
// Lithium Ion Battery - 2Ah
// LED Green
// delayMicroseconds

// Include the library code:
// EEPROM library to read and write EEPROM with unique ID for unit
#include <EEPROM.h>

// Momentary Button
int yy = "";

// 2 x EasyDriver - 2 x Stepper
int dirPinR = 2;                           // EasyDriver Right
int stepPinR = 3;                          // stepPin Right
int dirPinL = 4;                           // EasyDriver Left
int stepPinL = 5;                          // stepPin Left
int i = 0;

// LED Green
int iLEDGreen = 6;

// Process Message
bool bStart = false;                       // Start
bool bEnd   = false;                       // End
int incb = 0;                              // Variable to store the incoming byte
String msg = "";                           // Message 
String zzz = "";                          
byte in = 0;                               // Index
int x = 0;

// delayMicroseconds
int dMicro = 0;

// Software Version Information
String sver = "12-09";
// Unit ID information
String uid = "";

void loop() {

  // Check for serial messages
  if ( Serial.available() ) 
  {
    
    isProcessMessage();
    
  }

  // Switch
  isSwitch();
  
}

getEEPROM.ino

// EEPROM
// isUID
void isUID()
{
  
  // Is Unit ID
  uid = "";
  for (int x = 0; x < 5; x++)
  {
    uid = uid + char(EEPROM.read(x));
  }
  
}

getProcessMessage.ino

// ProcessMessage
// isProcessMessage
void isProcessMessage() {
   
  // Loop through serial buffer one byte at a time until you reach * which will be end of message
  while ( Serial.available() ) 
  {
      
      // Read the incoming byte:
      incb = Serial.read();
      
      // Start the message when the '<' symbol is received
      if(incb == '<')
      {
        
        bStart = true;
        in = 0;
        msg = "";
        
      }
      // End the message when the '*' symbol is received
      else if(incb == '*')
      {
        bEnd = true;
        x = msg.length();
        msg.remove( x , 1);
        break;                                  // Done reading
      }
      // Read the message
      else
      {
        if(in < 8)                              // Make sure there is room
        {

           msg = msg + char(incb);
           in++;
          
        }
      }
      
   }

   if( bStart && bEnd)
   {
    
      // Stepper
      zzz = msg.charAt( 0 );
      yy = zzz.toInt();
      
      msg.remove( 0 , 2);
      
      // delayMicroseconds
      dMicro = msg.toInt() + 300;

      in = 0;
      zzz = "";
      msg = "";
      bStart = false;
      bEnd = false;
      
   }

}

getStepper.ino

// Stepper
// isStepperSetup
void isStepperSetup() {

  // 2 x EasyDriver
  pinMode(dirPinR, OUTPUT);
  pinMode(stepPinR, OUTPUT);
  pinMode(dirPinL, OUTPUT);
  pinMode(stepPinL, OUTPUT);

}
// isStepper1
void isStepper1(){

   // 2 x EasyDriver - Up
   digitalWrite(dirPinR, LOW);              // Set the direction.
   digitalWrite(dirPinL, LOW);              // Set the direction.

   digitalWrite(stepPinR, LOW);             // This LOW to HIGH change is what creates the
   digitalWrite(stepPinR, HIGH);            // "Rising Edge" so the easydriver knows to when to step.
   delayMicroseconds(dMicro);               // This delay time is close to top speed.
   digitalWrite(stepPinL, LOW);             // This LOW to HIGH change is what creates the
   digitalWrite(stepPinL, HIGH);            // "Rising Edge" so the easydriver knows to when to step.
   delayMicroseconds(dMicro);               // This delay time is close to top speed.
 
}
// isStepper2
void isStepper2(){

   // 2 x EasyDriver
   digitalWrite(dirPinR, HIGH);              // Set the direction.
   digitalWrite(dirPinL, HIGH);              // Set the direction.

   digitalWrite(stepPinR, LOW);             // This LOW to HIGH change is what creates the
   digitalWrite(stepPinR, HIGH);            // "Rising Edge" so the easydriver knows to when to step.
   delayMicroseconds(dMicro);               // This delay time is close to top speed.
   digitalWrite(stepPinL, LOW);             // This LOW to HIGH change is what creates the
   digitalWrite(stepPinL, HIGH);            // "Rising Edge" so the easydriver knows to when to step.
   delayMicroseconds(dMicro);               // This delay time is close to top speed.
   
}
// Switch 3
void isStepper3(){

   // Right

   // 2 x EasyDriver
   digitalWrite(dirPinR, LOW);              // Set the direction.
   digitalWrite(dirPinL, HIGH);             // Set the direction.   delay(5);

   digitalWrite(stepPinR, LOW);             // This LOW to HIGH change is what creates the
   digitalWrite(stepPinR, HIGH);            // "Rising Edge" so the easydriver knows to when to step.
   delayMicroseconds(dMicro);               // This delay time is close to top speed.
   digitalWrite(stepPinL, LOW);             // This LOW to HIGH change is what creates the
   digitalWrite(stepPinL, HIGH);            // "Rising Edge" so the easydriver knows to when to step.
   delayMicroseconds(dMicro);               // This delay time is close to top speed.

}
// Switch 4
void isStepper4(){

   // Left
   // 2 x EasyDriver
   digitalWrite(dirPinR, HIGH);             // Set the direction.
   digitalWrite(dirPinL, LOW);              // Set the direction.

   digitalWrite(stepPinR, LOW);             // This LOW to HIGH change is what creates the
   digitalWrite(stepPinR, HIGH);            // "Rising Edge" so the easydriver knows to when to step.
   delayMicroseconds(dMicro);               // This delay time is close to top speed.
   digitalWrite(stepPinL, LOW);             // This LOW to HIGH change is what creates the
   digitalWrite(stepPinL, HIGH);            // "Rising Edge" so the easydriver knows to when to step.
   delayMicroseconds(dMicro);               // This delay time is close to top speed.
  
}
// isStepperStop
void isStepperStop() {

   // 2 x EasyDriver
   digitalWrite(dirPinR, LOW);              // Set the direction.
   delay(5);
   digitalWrite(dirPinL, LOW);              // Set the direction.
   delay(5);
   digitalWrite(stepPinR, LOW);             // This LOW to HIGH change is what creates the
   digitalWrite(stepPinL, LOW);             // This LOW to HIGH change is what creates the 

}

getSwitch.ino

// Switch
// isSwitch
void isSwitch(){
  
  switch ( yy ) {
    case 1:

      // Stepper 1 - Up
      isStepper1();

      break;
    case 2:
      
      // Stepper 2 - Back
      isStepper2();
      
      break;
    case 3:

      // Stepper 3 - Right
      isStepper3();
      
      break;
    case 4:
      
      // Stepper 4 - Left
      isStepper4();
      
      break;
    case 5:
      
      // Stepper Stop
      isStepperStop();
       
      break;
    default:

     // Stepper Stop
     isStepperStop();

   }
  
}

setup.ino

// Setup
void setup() {

  // Open the serial port at 9600 bps:
  Serial.begin( 9600 );

  // Pause
  delay(5);

  // EEPROM Unit ID
  isUID();
  
  // Pause
  delay(5);
  
  // 2 x EasyDriver
  isStepperSetup();

  // LED Green
  pinMode(iLEDGreen, OUTPUT);
  digitalWrite(iLEDGreen, HIGH);

}

Follow Us

J. Luc Paquin – Curriculum Vitae
https://www.donluc.com/DLHackster/LucPaquinCVEngMk2020a.pdf

Web: https://www.donluc.com/
Web: http://www.jlpconsultants.com/
Web: https://www.donluc.com/DLHackster/
Web: https://www.hackster.io/neosteam-labs
Web: http://neosteamlabs.com/
YouTube: https://www.youtube.com/channel/UC5eRjrGn1CqkkGfZy0jxEdA
Facebook: https://www.facebook.com/neosteam.labs.9/
Instagram: https://www.instagram.com/neosteamlabs/
Pinterest: https://www.pinterest.com/NeoSteamLabs/
Twitter: https://twitter.com/labs_steam
Etsy: https://www.etsy.com/shop/NeoSteamLabs

Don Luc

Categories
Archives