The Alpha Geek – Geeking Out

Gravity Analog Ambient Light Sensor

Project #30 – UNIHIKER – Gravity: Analog Ambient Light Sensor – Mk03

——

#DonLucElectronics #DonLuc #UNIHIKER #AmbientLight #Display #IoT #Project #Debian #Python #Thonny #Programming #Electronics #Microcontrollers #Consultant

——

Gravity: Analog Ambient Light Sensor

——

Gravity: Analog Ambient Light Sensor

——

Gravity: Analog Ambient Light Sensor

——

Gravity: Analog Ambient Light Sensor

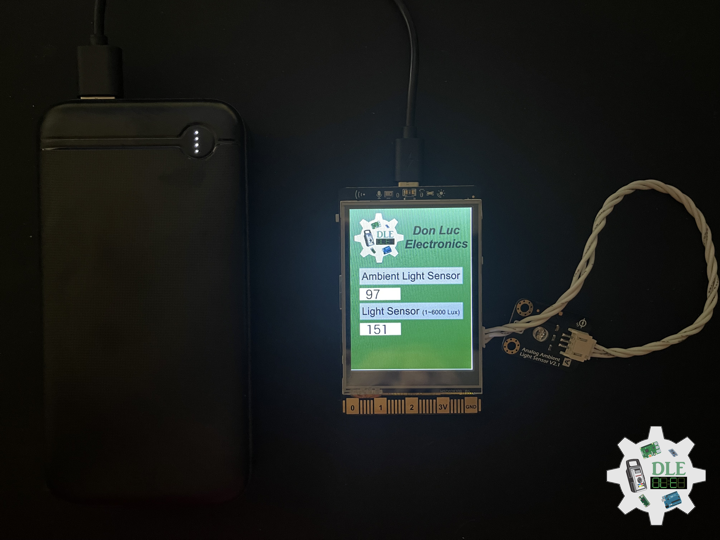
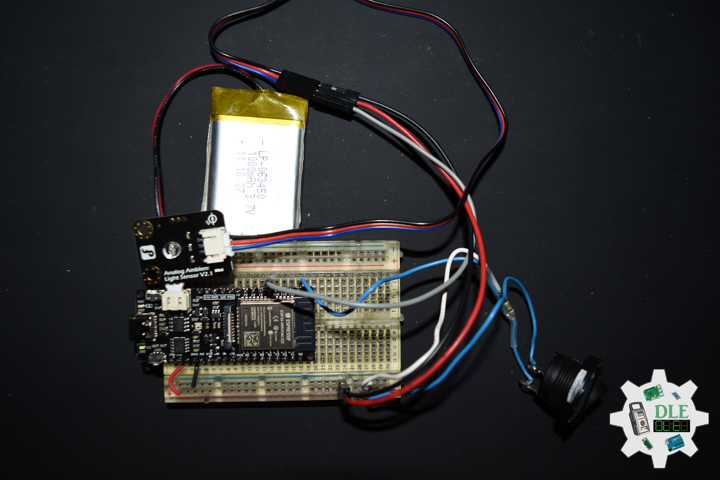
This Gravity: Analog ambient light sensor can assist you in detecting light density and provide an analog voltage signal to the controller as feedback. Additionally, you have the ability to trigger other components within your project by setting voltage thresholds. To facilitate easier usage of the ambient light sensor, this product is designed with a universal Gravity interface that can be plugged in without requiring soldering. Two screw holes allow you to fasten it to any desired location. Making messy DuPont wires and complex connections a thing of the past and enabling you to focus your energy on your creative designs.

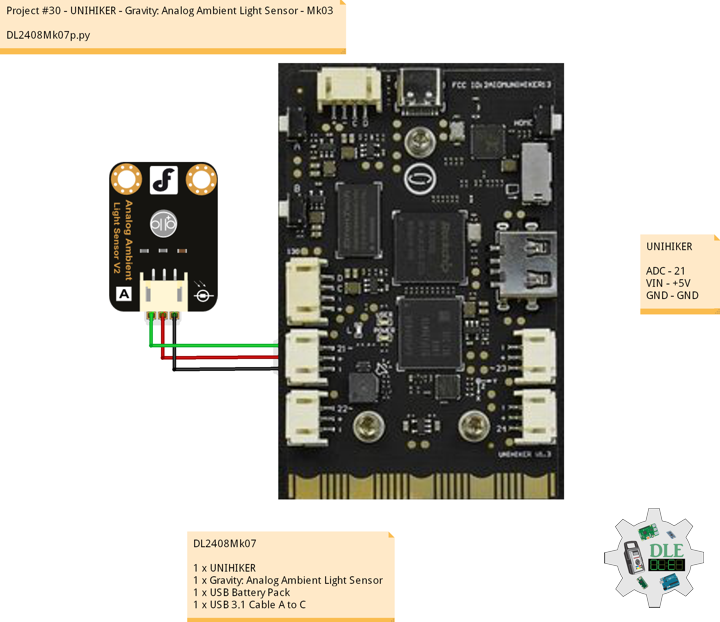
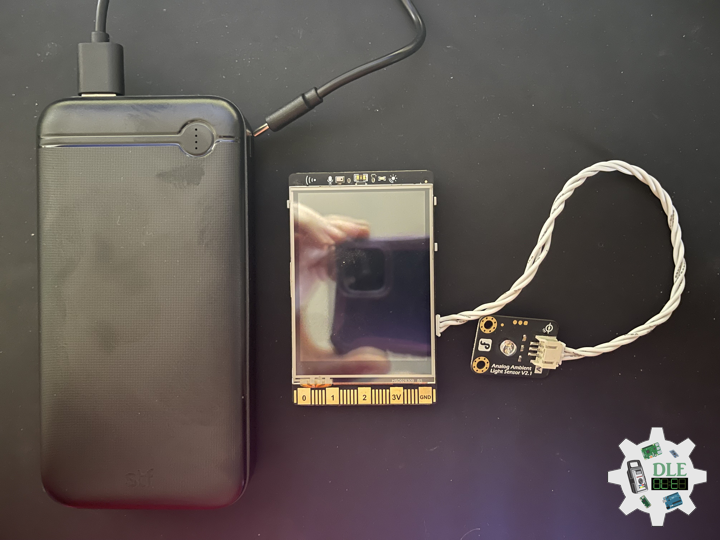
DL2408Mk07

1 x UNIHIKER
1 x Gravity: Analog Ambient Light Sensor
1 x USB Battery Pack
1 x USB 3.1 Cable A to C

UNIHIKER

ADC – 21
VIN – +5V
GND – GND

DL2408Mk07p

DL2408Mk07p.py

"""
****** Don Luc Electronics © ******
Software Version Information
Project #30 - UNIHIKER - Gravity: Analog Ambient Light Sensor - Mk03
30-03
DL2408Mk07.py
DL2408Mk07
1 x UNIHIKER
1 x Gravity: Analog Ambient Light Sensor
1 x USB Battery Pack
1 x USB 3.1 Cable A to C

-*- coding: utf-8 -*-
"""
# Import the unihiker library
from unihiker import GUI

# Import the time library
import time

# Import the Board module from the pinpong.board package 
from pinpong.board import Board

# Import all modules from the pinpong.extension.unihiker package
from pinpong.extension.unihiker import *

# Initialize the board by selecting the board type and port number;
# if not specified, the program will automatically detect it
Board().begin()

# Initialize pin 21 as analog input mode
# Gravity: Analog Ambient Light Sensor
adc0 = Pin(Pin.P21, Pin.ANALOG)

# Instantiate the GUI class and create a gui object
gui = GUI()

# Display the initial background image 'DL2408Mk07p'
img = gui.draw_image(x=0, y=0, w=240, h=320, image='DL2408Mk07p.png')

# Ambient Light Sensor
# Display the initial Ambient Light Sensor valueLight
valueLight = gui.draw_text(x=30, y=151, text='0', font_size=18)

# Gravity: Analog Ambient Light Sensor
# Display the initial Gravity: Analog Ambient Light Sensor valueAnalogLight
valueAnalogLight = gui.draw_text(x=30, y=221, text='0', font_size=18)

while True:
    
    # Ambient Light Sensor
    # Read the light value
    AmbientLightSensor = light.read()
    # Update the displayed light value
    valueLight.config(text=AmbientLightSensor)
    
    # Gravity: Analog Ambient Light Sensor
    # Read analog value
    AnalogAmbientLightSensor = adc0.read_analog()
    valueAnalogLight.config(text=AnalogAmbientLightSensor)

    # Delay for 1 second to keep the screen content displayed for a longer time
    time.sleep(1)

People can contact us: https://www.donluc.com/?page_id=1927

Teacher, Instructor, E-Mentor, R&D and Consulting

  • Programming Language
  • Single-Board Microcontrollers (PIC, Arduino, Raspberry Pi, Arm, Silicon Labs, Espressif, Etc…)
  • IoT
  • Wireless (Radio Frequency, Bluetooth, WiFi, Etc…)
  • Robotics
  • Automation
  • Camera and Video Capture Receiver Stationary, Wheel/Tank and Underwater Vehicle
  • Unmanned Vehicles Terrestrial and Marine
  • Machine Learning
  • Artificial Intelligence (AI)
  • RTOS
  • Sensors, eHealth Sensors, Biosensor, and Biometric
  • Research & Development (R & D)
  • Consulting

Follow Us

Luc Paquin – Curriculum Vitae – 2024
https://www.donluc.com/luc/

Web: https://www.donluc.com/
Facebook: https://www.facebook.com/neosteam.labs.9/
YouTube: https://www.youtube.com/@thesass2063
Twitter: https://twitter.com/labs_steam
Pinterest: https://www.pinterest.com/NeoSteamLabs/
Instagram: https://www.instagram.com/neosteamlabs/
DFRobot Luc.Paquin: https://edu.dfrobot.com/dashboard/makelogs
Hackster.io: https://www.hackster.io/neosteam-labs
LinkedIn: https://www.linkedin.com/in/jlucpaquin/

Don Luc

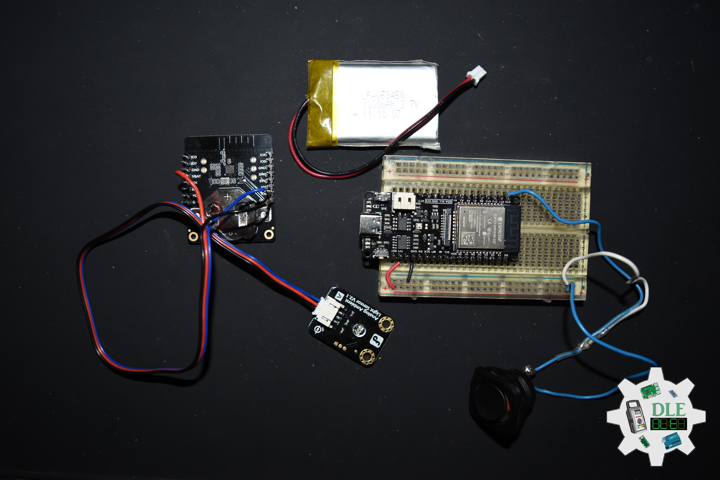
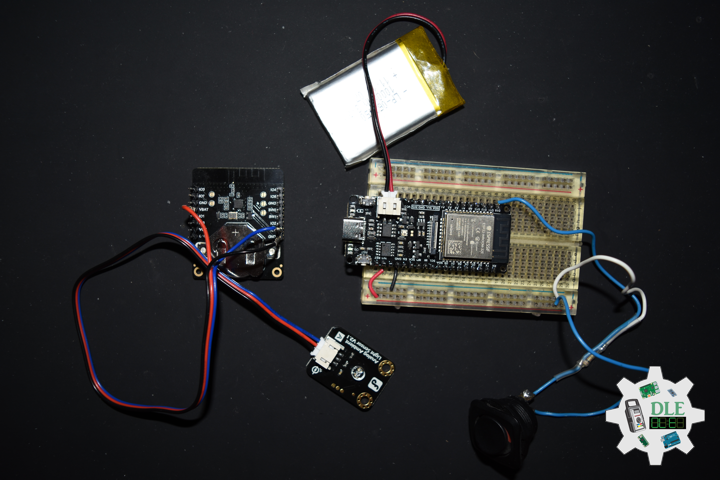
Project #29 – DFRobot – Fermion BLE Sensor Beacon – Mk03

——

#DonLucElectronics #DonLuc #DFRobot #FermionBLESensorBeacon #AmbientLight #FireBeetle2ESP32E #ESP32 #IoT #Arduino #Project #Fritzing #Programming #Electronics #Microcontrollers #Consultant

——

Fermion BLE Sensor Beacon

——

Fermion BLE Sensor Beacon

——

Fermion BLE Sensor Beacon

——

Fermion: BLE Sensor Beacon

BLE Beacon, also known as Low Energy Bluetooth Beacon, is a small wireless device that broadcasts signals using BLE technology. Due to its broadcast nature, pairing is not required between the beacon and receiving devices. Each beacon contains a unique identifier, detectable by nearby devices equipped with Bluetooth technology, such as ESP32 and smartphones supporting BLE scanning.

This Bluetooth beacon has a built-in 11-bit ADC, Fermion version, and multiple I/Os that can be multiplexed to SDA/SCL while broadcasting over Bluetooth. Users can access sensor data within broadcast range on a Bluetooth-equipped device such as a Smartphone or ESP32. This BLE beacon has a built-in 11-bit ADC and an I2C interface, allowing it to real-time collect and broadcast data from various types of sensors, including analog, digital, and I2C sensors.

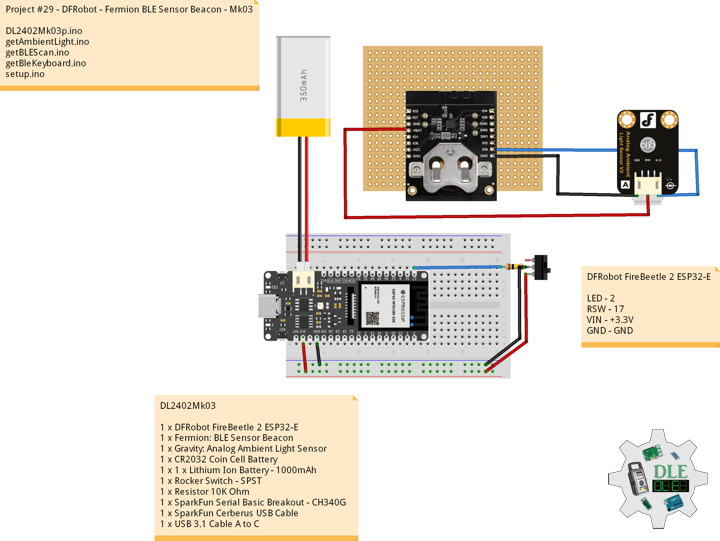
DL2402Mk03

1 x DFRobot FireBeetle 2 ESP32-E
1 x Fermion: BLE Sensor Beacon
1 x Gravity: Analog Ambient Light Sensor
1 x CR2032 Coin Cell Battery
1 x 1 x Lithium Ion Battery – 1000mAh
1 x Rocker Switch – SPST
1 x Resistor 10K Ohm
1 x SparkFun Serial Basic Breakout – CH340G
1 x SparkFun Cerberus USB Cable
1 x USB 3.1 Cable A to C

DFRobot FireBeetle 2 ESP32-E

LED – 2
RSW – 17
VIN – +3.3V
GND – GND

——

DL2402Mk03p.ino

/****** Don Luc Electronics © ******
Software Version Information
Project #29 - DFRobot -  - Mk03
29-03
DL2402Mk03p.ino
1 x DFRobot FireBeetle 2 ESP32-E
1 x Fermion: BLE Sensor Beacon
1 x Gravity: Analog Ambient Light Sensor
1 x CR2032 Coin Cell Battery
1 x 1 x Lithium Ion Battery - 1000mAh
1 x Rocker Switch - SPST
1 x Resistor 10K Ohm
1 x SparkFun Serial Basic Breakout - CH340G
1 x SparkFun Cerberus USB Cable
1 x USB 3.1 Cable A to C
*/

// Include the Library Code
// Bluetooth LE keyboard
#include <BleKeyboard.h>
// Arduino
#include <Arduino.h>
// BLE Device
#include <BLEDevice.h>
// BLE Utils
#include <BLEUtils.h>
// BLEScan
#include <BLEScan.h>
// BLE Advertised Device
#include <BLEAdvertisedDevice.h>
// BLE Eddystone URL
#include <BLEEddystoneURL.h>
// BLE Eddystone TLM
#include <BLEEddystoneTLM.h>
// BLE Beacon
#include <BLEBeacon.h>

// ENDIAN_CHANGE
#define ENDIAN_CHANGE_U16(x) ((((x)&0xFF00) >> 8) + (((x)&0xFF) << 8))

// Bluetooth LE Keyboard
BleKeyboard bleKeyboard;
String sKeyboard = "";
// Send Size
byte sendSize = 0;

// Gravity: Analog Ambient Light Sensor
float Sensor_Data;
// In seconds
int scanTime = 5;
// BLE Scan
BLEScan *pBLEScan;

// My Advertised Device Callbacks
class MyAdvertisedDeviceCallbacks : public BLEAdvertisedDeviceCallbacks
{

    // onResult
    void onResult(BLEAdvertisedDevice advertisedDevice)
    {
      // Advertised Device
      if (advertisedDevice.haveName())
      {
        // Name: Fermion: Sensor Beacon
        if(String(advertisedDevice.getName().c_str()) == "Fermion: Sensor Beacon"){
          
          // strManufacturerData
          std::string strManufacturerData = advertisedDevice.getManufacturerData();
          uint8_t cManufacturerData[100];
          strManufacturerData.copy((char *)cManufacturerData, strManufacturerData.length(), 0);
          
          // strManufacturerData.length
          for (int i = 0; i < strManufacturerData.length(); i++)
          {

             // cManufacturerData[i]
             cManufacturerData[i];
             
          }

          // Sensor_Data
          Sensor_Data = int(cManufacturerData[2]<<8 | cManufacturerData[3]);
   
        }        
      }
    }
};

// The number of the Rocker Switch pin
int iSwitch = 17;
// Variable for reading the button status
int SwitchState = 0;

// Define LED
int iLED = 2;

// Software Version Information
String sver = "29-03";

void loop() {

  // ScanResults
  isBLEScanResults();

  // Gravity: Analog Ambient Light Sensor
  isAmbientLight();

  // Read the state of the Switch value:
  SwitchState = digitalRead(iSwitch);

  // Check if the button is pressed. If it is, the SwitchState is HIGH:
  if (SwitchState == HIGH) {

    // Bluetooth LE Keyboard
    isBluetooth();

  }
  
  // Delay 2 Second
  delay(2000);

}

getAmbientLight.ino

// Gravity: Analog Ambient Light Sensor
// Ambient Light
void isAmbientLight(){

  // bleKeyboard
  // DFR|Version|Lux|*
  // SData => 1~6000 Lux
  float SData = map(Sensor_Data, 1, 3000, 1, 6000);
  sKeyboard = "DFR|" + sver + "|" + String(SData) + "|*";

}

getBLEScan.ino

// getBLEScan
// Setup BLE Scan
void isSetupBLEScan(){

  // BLE Device
  BLEDevice::init("");
  // Create new scan
  pBLEScan = BLEDevice::getScan();
  // Set Advertised Device Callbacks
  pBLEScan->setAdvertisedDeviceCallbacks(new MyAdvertisedDeviceCallbacks());
  // Active scan uses more power, but get results faster
  pBLEScan->setActiveScan(true);
  // Set Interval
  pBLEScan->setInterval(100);
  // Less or equal setInterval value
  pBLEScan->setWindow(99);
  
}
// BLE Scan Results
void isBLEScanResults(){

  // Put your main code here, to run repeatedly:
  BLEScanResults foundDevices = pBLEScan->start(scanTime, false);
  // Delete results fromBLEScan buffer to release memory
  pBLEScan->clearResults();
  
}

getBleKeyboard.ino

// Ble Keyboard
// Bluetooth
// isBluetooth
void isBluetooth() {

  // ESP32 BLE Keyboard
  if(bleKeyboard.isConnected()) {

    // Send Size Length
    sendSize = sKeyboard.length();

    // Send Size, charAt
    for(byte i = 0; i < sendSize+1; i++){

       // Write
       bleKeyboard.write(sKeyboard.charAt(i));
       delay(50);
    
    }
    bleKeyboard.write(KEY_RETURN);

  }

}

setup.ino

// Setup
void setup()
{

  // Give display time to power on
  delay(100);

  // Bluetooth LE keyboard
  bleKeyboard.begin();

  // Give display time to power on
  delay(100);

  // Setup BLE Scan
  isSetupBLEScan();
  
  // Initialize the Switch pin as an input
  pinMode(iSwitch, INPUT);
  
  // Initialize digital pin iLED as an output
  pinMode(iLED, OUTPUT);
  // Outputting high, the LED turns on
  digitalWrite(iLED, HIGH);

  // Delay 5 Second
  delay( 5000 );

}

——

People can contact us: https://www.donluc.com/?page_id=1927

Teacher, Instructor, E-Mentor, R&D and Consulting

  • Programming Language
  • Single-Board Microcontrollers (PIC, Arduino, Raspberry Pi, Arm, Silicon Labs, Espressif, Etc…)
  • IoT
  • Wireless (Radio Frequency, Bluetooth, WiFi, Etc…)
  • Robotics
  • Automation
  • Camera and Video Capture Receiver Stationary, Wheel/Tank and Underwater Vehicle
  • Unmanned Vehicles Terrestrial and Marine
  • Machine Learning
  • Artificial Intelligence (AI)
  • RTOS
  • eHealth Sensors, Biosensor, and Biometric
  • Research & Development (R & D)
  • Consulting

Follow Us

Luc Paquin – Curriculum Vitae – 2024
https://www.donluc.com/luc/

Web: https://www.donluc.com/
Facebook: https://www.facebook.com/neosteam.labs.9/
YouTube: https://www.youtube.com/@thesass2063
Twitter: https://twitter.com/labs_steam
Pinterest: https://www.pinterest.com/NeoSteamLabs/
Instagram: https://www.instagram.com/neosteamlabs/

Don Luc

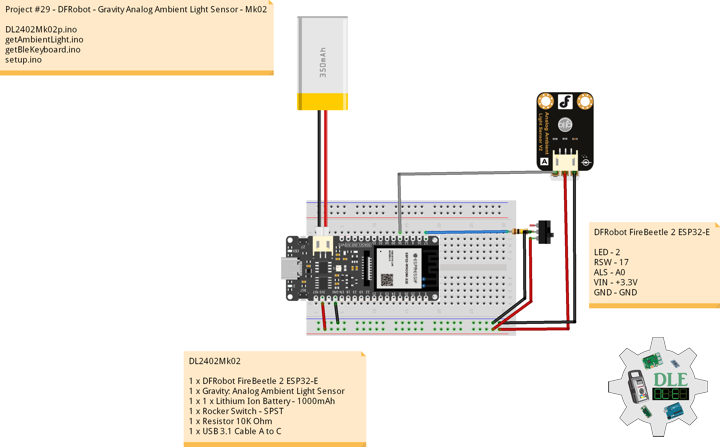
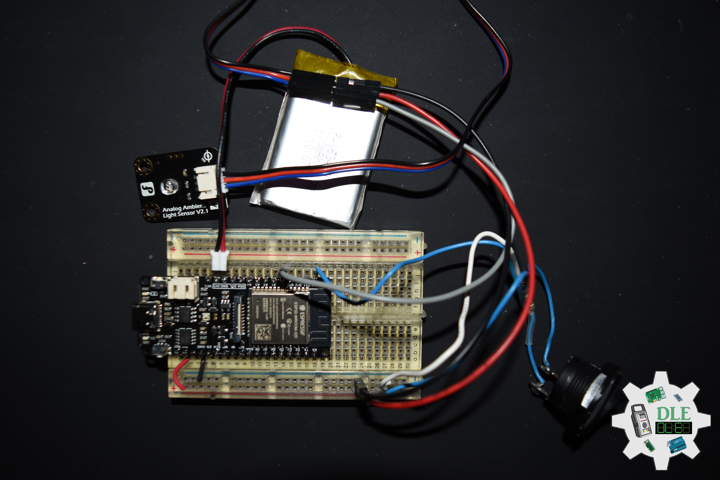
Project #29 – DFRobot – Gravity Analog Ambient Light Sensor – Mk02

——

#DonLucElectronics #DonLuc #DFRobot #AmbientLight #FireBeetle2ESP32E #ESP32 #IoT #Arduino #Project #Fritzing #Programming #Electronics #Microcontrollers #Consultant

——

Gravity Analog Ambient Light Sensor

——

Gravity Analog Ambient Light Sensor

——

Gravity Analog Ambient Light Sensor

——

Gravity: Analog Ambient Light Sensor

This Gravity: Analog ambient light sensor can assist you in detecting light density and provide an analog voltage signal to the controller as feedback. Additionally, you have the ability to trigger other components within your project by setting voltage thresholds. This ambient light sensor is operational within the voltage range of 3.3 to 5 volts.

DL2402Mk02

1 x DFRobot FireBeetle 2 ESP32-E
1 x Gravity: Analog Ambient Light Sensor
1 x 1 x Lithium Ion Battery – 1000mAh
1 x Rocker Switch – SPST
1 x Resistor 10K Ohm
1 x USB 3.1 Cable A to C

DFRobot FireBeetle 2 ESP32-E

LED – 2
RSW – 17
ALS – A0
VIN – +3.3V
GND – GND

——

DL2402Mk02p.ino

/****** Don Luc Electronics © ******
Software Version Information
Project #29 - DFRobot - FireBeetle 2 ESP32-E - Mk02
29-02
DL2402Mk02p.ino
1 x DFRobot FireBeetle 2 ESP32-E
1 x Gravity: Analog Ambient Light Sensor
1 x Rocker Switch - SPST
1 x Resistor 10K Ohm
1 x 1 x Lithium Ion Battery - 1000mAh
1 x USB 3.1 Cable A to C
*/

// Include the Library Code
// Bluetooth LE keyboard
#include <BleKeyboard.h>

// Bluetooth LE Keyboard
BleKeyboard bleKeyboard;
String sKeyboard = "";
// Send Size
byte sendSize = 0;

// Gravity: Analog Ambient Light Sensor
int iAmbientLight = A0;
int iAmbientLightVal = 0;

// The number of the Rocker Switch pin
int iSwitch = 17;
// Variable for reading the button status
int SwitchState = 0;

// Define LED
int iLED = 2;

// Software Version Information
String sver = "29-02";

void loop() {

  // Gravity: Analog Ambient Light Sensor
  isAmbientLight();

  // Read the state of the Switch value:
  SwitchState = digitalRead(iSwitch);

  // Check if the button is pressed. If it is, the SwitchState is HIGH:
  if (SwitchState == HIGH) {

    // Bluetooth LE Keyboard
    isBluetooth();

  }
  
  // Delay 1 Second
  delay(1000);

}

getAmbientLight.ino

// Gravity: Analog Ambient Light Sensor
// Ambient Light
void isAmbientLight(){

  // Connect Ambient Light Sensor to Analog 0
  iAmbientLightVal = analogRead( iAmbientLight );

  // bleKeyboard
  // DFR|Version|Lux|*
  sKeyboard = "DFR|" + sver + "|" + String(iAmbientLightVal) + "|*";
 
}

getBleKeyboard.ino

// Ble Keyboard
// Bluetooth
// isBluetooth
void isBluetooth() {

  // ESP32 BLE Keyboard
  if(bleKeyboard.isConnected()) {

    // Send Size Length
    sendSize = sKeyboard.length();

    // Send Size, charAt
    for(byte i = 0; i < sendSize+1; i++){

       // Write
       bleKeyboard.write(sKeyboard.charAt(i));
       delay(50);
    
    }
    bleKeyboard.write(KEY_RETURN);

  }

}

setup.ino

// Setup
void setup()
{
  
  // Give display time to power on
  delay(100);

  // Bluetooth LE keyboard
  bleKeyboard.begin();

  // Give display time to power on
  delay(100);
  
  // Initialize the Switch pin as an input
  pinMode(iSwitch, INPUT);
  
  // Initialize digital pin iLED as an output
  pinMode(iLED, OUTPUT);
  // Outputting high, the LED turns on
  digitalWrite(iLED, HIGH);

  // Delay 5 Second
  delay( 5000 );

}

——

People can contact us: https://www.donluc.com/?page_id=1927

Teacher, Instructor, E-Mentor, R&D and Consulting

  • Programming Language
  • Single-Board Microcontrollers (PIC, Arduino, Raspberry Pi, Arm, Silicon Labs, Espressif, Etc…)
  • IoT
  • Wireless (Radio Frequency, Bluetooth, WiFi, Etc…)
  • Robotics
  • Automation
  • Camera and Video Capture Receiver Stationary, Wheel/Tank and Underwater Vehicle
  • Unmanned Vehicles Terrestrial and Marine
  • Machine Learning
  • Artificial Intelligence (AI)
  • RTOS
  • eHealth Sensors, Biosensor, and Biometric
  • Research & Development (R & D)
  • Consulting

Follow Us

Luc Paquin – Curriculum Vitae – 2024
https://www.donluc.com/luc/

Web: https://www.donluc.com/
Facebook: https://www.facebook.com/neosteam.labs.9/
YouTube: https://www.youtube.com/@thesass2063
Twitter: https://twitter.com/labs_steam
Pinterest: https://www.pinterest.com/NeoSteamLabs/
Instagram: https://www.instagram.com/neosteamlabs/

Don Luc

Categories
Archives