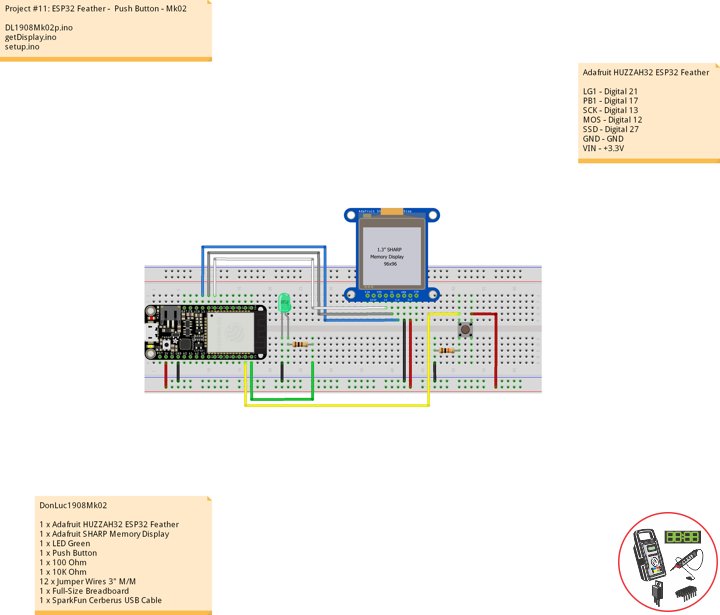
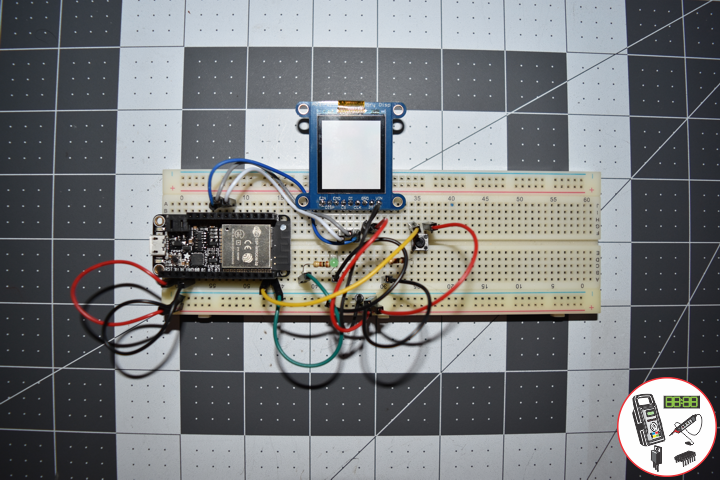
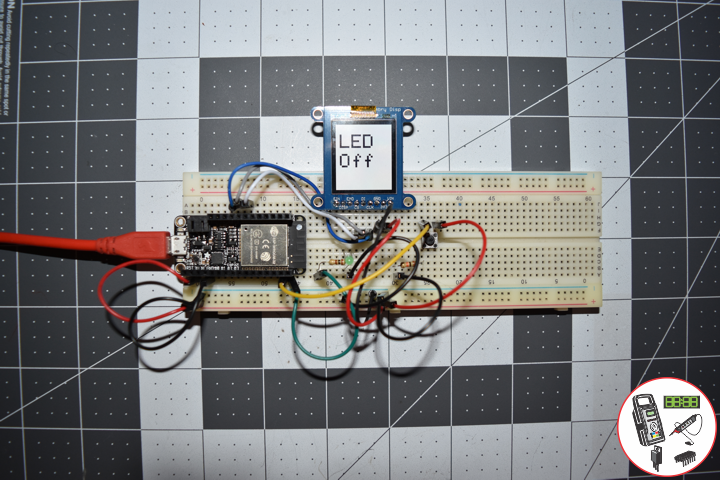
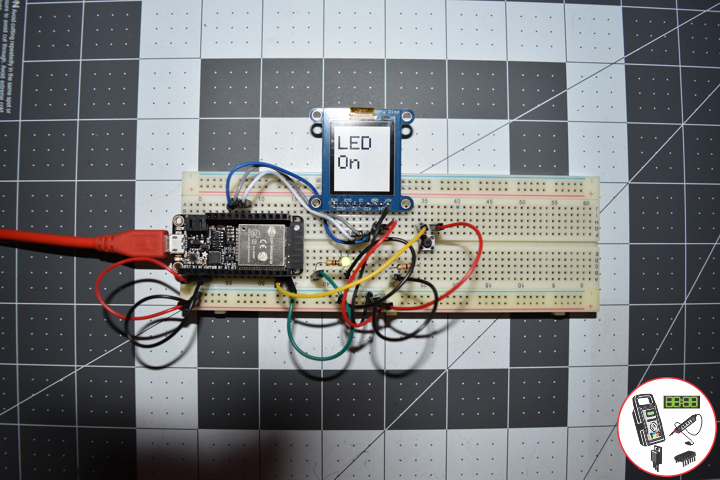
Project #11: ESP32 Feather – Push Button – Mk02
ESP32 Feather – Push Button – Mk02
——
——
——
——
——
——
Momentary Pushbutton Switch
This is a standard 12mm square momentary button. What we really like is the large button head and good tactile feel (it ‘clicks’ really well). This button is great for user input on a PCB or a good, big reset button on a breadboard. Breadboard friendly!
DonLuc1908Mk02
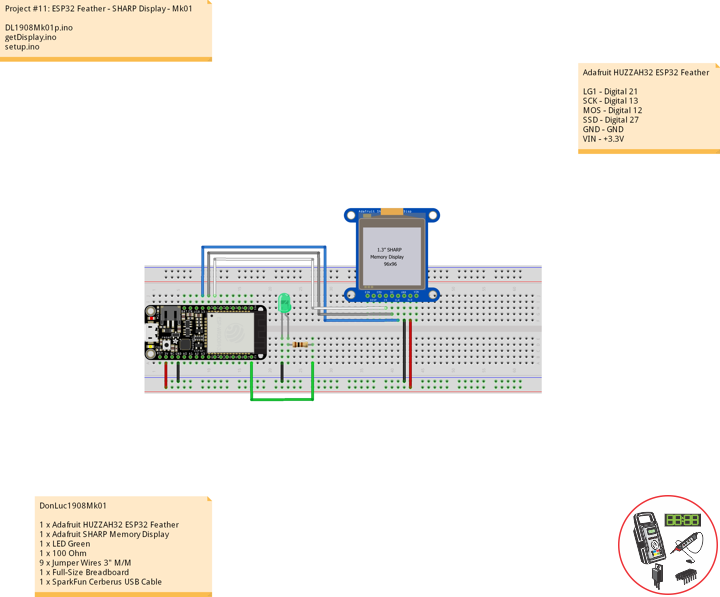
1 x Adafruit HUZZAH32 ESP32 Feather
1 x Adafruit SHARP Memory Display
1 x LED Green
1 x Push Button
1 x 100 Ohm
1 x 10K Ohm
12 x Jumper Wires 3″ M/M
1 x Full-Size Breadboard
1 x SparkFun Cerberus USB Cable
Adafruit HUZZAH32 ESP32 Feather
LG1 – Digital 21
PB1 – Digital 17
SCK – Digital 13
MOS – Digital 12
SSD – Digital 27
GND – GND
VIN – +3.3V
Follow Us
Web: http://neosteamlabs.com/
Web: https://www.donluc.com/
Web: http://www.jlpconsultants.com/
YouTube: https://www.youtube.com/channel/UC5eRjrGn1CqkkGfZy0jxEdA
Facebook: https://www.facebook.com/neosteam.labs.9/
Instagram: https://www.instagram.com/neosteamlabs/
Pinterest: https://www.pinterest.com/NeoSteamLabs/
Twitter: https://twitter.com/labs_steam
Etsy: https://www.etsy.com/shop/NeoSteamLabs
DL1908Mk02p.ino
// ***** Don Luc Electronics *****
// Software Version Information
// Project #11: HUZZAH32 ESP32 Feather - Push Button - Mk02
// 08-02
// DonLuc1908Mk02p.ino 08-02
// Adafruit HUZZAH32 ESP32 Feather Board
// SHARP Display
// LED Green
// Push Button

// include Library Code
#include <Adafruit_SharpMem.h>
#include <Adafruit_GFX.h>

// SHARP Memory Display
// any pins can be used
#define SHARP_SCK  13
#define SHARP_MOSI 12
#define SHARP_SS   27
// Set the size of the display here, e.g. 144x168!
Adafruit_SharpMem display(SHARP_SCK, SHARP_MOSI, SHARP_SS, 144, 168);
// The currently-available SHARP Memory Display (144x168 pixels)
// requires > 4K of microcontroller RAM; it WILL NOT WORK on Arduino Uno
// or other <4K "classic" devices!
#define BLACK 0
#define WHITE 1
int minorHalfSize; // 1/2 of lesser of display width or height

// LED Green
int iLEDGreen =  21;                 // LED Green
int stateLEDGreen = LOW;             // stateLEDGreen

// Button
int iBut1 = 17;                      // Button 1
int ButState1;                       // Variable for reading the button status
int previous = LOW;                  // previous
long lTime = 0;                      // lTime
long debounce = 500;                 // debounce

void loop() {

  // Read the state of the button value
  ButState1 = digitalRead(iBut1);

  // Check if the button is pressed
  if (ButState1 == HIGH && previous == LOW && millis() - lTime > debounce)
  {

     if(stateLEDGreen == HIGH)
     {

        // stateLEDGreen = LOW
        stateLEDGreen = LOW;
        // SHARP Memory Display Off
        isDisplayOff();

     } else
     {

        // stateLEDGreen = HIGH
        stateLEDGreen = HIGH;
        // SHARP Memory Display On
        isDisplayOn();

    }
    lTime = millis();

  }

  // iLEDGreen
  digitalWrite(iLEDGreen, stateLEDGreen);
  previous == ButState1;

}
getDisplay.ino
// SHARP Memory Display On
void isDisplayOn() {

    // Clear Display
    display.clearDisplay();
    // text display tests
    display.setRotation(4);
    //display.clearDisplay();
    display.setTextSize(5);
    display.setTextColor(BLACK);
    display.setCursor(10,25);
    display.println("LED");
    display.setCursor(10,75);
    display.println("On");
    display.refresh();

}
// SHARP Memory Display Off
void isDisplayOff() {

    // Clear Display
    display.clearDisplay();
    // text display tests
    display.setRotation(4);
    //display.clearDisplay();
    display.setTextSize(5);
    display.setTextColor(BLACK);
    display.setCursor(10,25);
    display.println("LED");
    display.setCursor(10,75);
    display.println("Off");
    display.refresh();

}
setup.ino
// Setup
void setup() {

  // SHARP Display start & clear the display
  display.begin();
  display.clearDisplay();

  // Button 1
  // Initialize the button as an input
  pinMode(iBut1, INPUT);

  // Initialize the LED Green
  pinMode(iLEDGreen, OUTPUT);

}
Don Luc
Project #11: ESP32 Feather – SHARP Display – Mk01
ESP32 Feather – SHARP Display
——
——
——
——
——
——
Adafruit HUZZAH32 ESP32 Feather Board
The HUZZAH32 is our ESP32-based Feather, made with the official WROOM32 module. We packed everything you love about Feathers: built in USB-to-Serial converter, automatic bootloader reset, Lithium Ion/Polymer charger, and just about all of the GPIOs brought out so you can use it with any of our Feather Wings.
That module nestled in at the end of this Feather contains a dual-core ESP32 chip, 4 MB of SPI Flash, tuned antenna, and all the passives you need to take advantage of this powerful new processor. The ESP32 has both WiFi and Bluetooth Classic/LE support. That means it’s perfect for just about any wireless or Internet-connected project.
Adafruit SHARP Memory Display Breakout – 1.3″ 168×144 Monochrome
The 1.3″ 168×144 SHARP Memory LCD display is a cross between an eInk (e-paper) display and an LCD. It has the ultra-low power usage of eInk and the fast-refresh rates of an LCD. This model has a gray background, and pixels show up as black-on-gray for a nice e-reader type display. It does not have a backlight, but it is daylight readable. For dark/night reading you may need to illuminate the LCD area with external LEDs.
DonLuc1908Mk01
1 x Adafruit HUZZAH32 ESP32 Feather
1 x Adafruit SHARP Memory Display
1 x LED Green
1 x 100 Ohm
9 x Jumper Wires 3″ M/M
1 x Full-Size Breadboard
1 x SparkFun Cerberus USB Cable
Adafruit HUZZAH32 ESP32 Feather
LG1 – Digital 21
SCK – Digital 13
MOS – Digital 12
SSD – Digital 27
GND – GND
VIN – +3.3V
DL1908Mk01p.ino
// ***** Don Luc Electronics *****
// Software Version Information
// Project #11: HUZZAH32 ESP32 Feather - SHARP Display - Mk01
// 08-01
// DonLuc1908Mk01p.ino 08-01
// Adafruit HUZZAH32 ESP32 Feather Board
// SHARP Display
// LED Green

// include Library Code
#include <Adafruit_SharpMem.h>
#include <Adafruit_GFX.h>

// SHARP Memory Display
// any pins can be used
#define SHARP_SCK  13
#define SHARP_MOSI 12
#define SHARP_SS   27
// Set the size of the display here, e.g. 144x168!
Adafruit_SharpMem display(SHARP_SCK, SHARP_MOSI, SHARP_SS, 144, 168);
// The currently-available SHARP Memory Display (144x168 pixels)
// requires > 4K of microcontroller RAM; it WILL NOT WORK on Arduino Uno
// or other <4K "classic" devices!
#define BLACK 0
#define WHITE 1
int minorHalfSize; // 1/2 of lesser of display width or height

// LED Green
int iLEDGreen =  21;          // LED Green

void loop() {

  // iLEDGreen Off
  digitalWrite(iLEDGreen, LOW);
  // SHARP Memory Display Off
  isDisplayOff();
  delay(2000);
  // iLEDGreen On
  digitalWrite(iLEDGreen, HIGH);
  // SHARP Memory Display On
  isDisplayOn();
  delay(2000);

}
getDisplay.ino
// SHARP Memory Display On
void isDisplayOn() {

    // Clear Display
    display.clearDisplay();
    // text display tests
    display.setRotation(4);
    //display.clearDisplay();
    display.setTextSize(5);
    display.setTextColor(BLACK);
    display.setCursor(10,25);
    display.println("LED");
    display.setCursor(10,75);
    display.println("On");
    display.refresh();

}
// SHARP Memory Display Off
void isDisplayOff() {

    // Clear Display
    display.clearDisplay();
    // text display tests
    display.setRotation(4);
    //display.clearDisplay();
    display.setTextSize(5);
    display.setTextColor(BLACK);
    display.setCursor(10,25);
    display.println("LED");
    display.setCursor(10,75);
    display.println("Off");
    display.refresh();

}
setup.ino
// Setup
void setup() {

  // SHARP Display start & clear the display
  display.begin();
  display.clearDisplay();

  // Initialize the LED Green
  pinMode(iLEDGreen, OUTPUT);

}
Don Luc
Project #10: ESP8266 Thing – Precision RTC – Mk04
DS3231 Precision RTC FeatherWing
A Feather board without ambition is a Feather board without FeatherWings! This is the DS3231 Precision RTC FeatherWing: it adds an extremely accurate I2C-integrated Real Time Clock (RTC) with a Temperature Compensated Crystal Oscillator to any Feather main board. This RTC is the most precise you can get in a small, low power package. Most RTCs use an external 32kHz timing crystal that is used to keep time with low current draw.
With a CR1220 12mm lithium battery plugged into the top of the FeatherWing, you can get years of precision timekeeping, even when main power is lost. Great for datalogging and clocks, or anything where you need to really know the time.
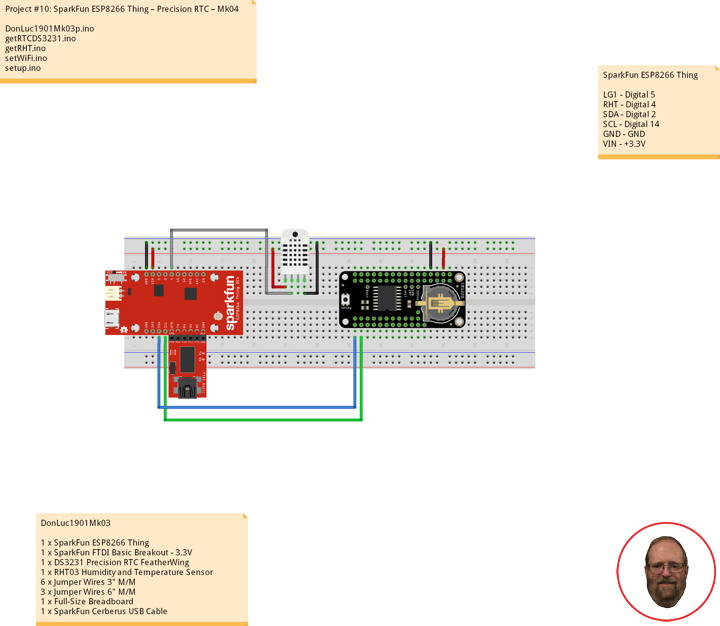
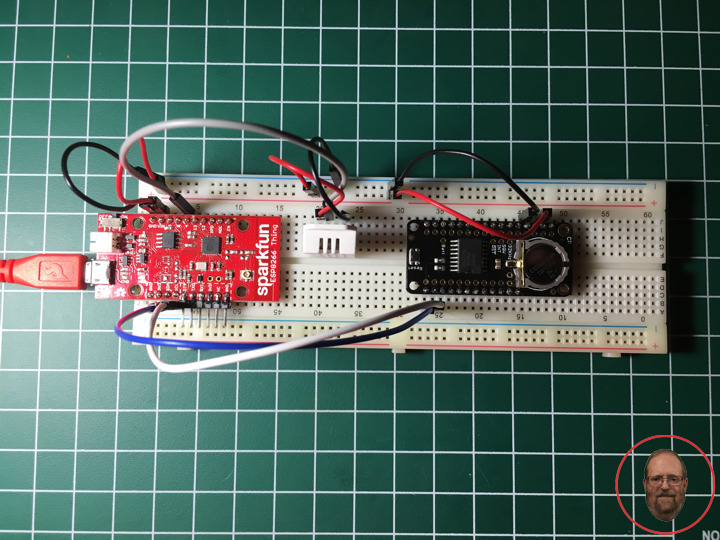
DonLuc1901Mk03
1 x SparkFun ESP8266 Thing
1 x SparkFun FTDI Basic Breakout – 3.3V
1 x DS3231 Precision RTC FeatherWing
1 x RHT03 Humidity and Temperature Sensor
6 x Jumper Wires 3″ M/M
3 x Jumper Wires 6″ M/M
1 x Full-Size Breadboard
1 x SparkFun Cerberus USB Cable
SparkFun ESP8266 Thing
LG1 – Digital 5
RHT – Digital 4
SDA – Digital 2
SCL – Digital 14
GND – GND
VIN – +3.3V
DonLuc1901Mk03p.ino
// ***** Don Luc Electronics *****
// Software Version Information
// Project #10: SparkFun ESP8266 Thing – DS3231 Precision RTC  - Mk04
// 01-03
// DonLuc1901Mk03p.ino 01-03
// SparkFun ESP8266 Thing
// DS3231 Precision RTC
// RHT03 Humidity and Temperature Sensor

// Include Library Code
// WiFi
#include <ESP8266WiFi.h>
// RHT Humidity and Temperature Sensor
#include <SparkFun_RHT03.h>
// DS3231 Precision RTC
#include <RTClib.h>
#include <Wire.h>

// WiFi Definitions
const char WiFiAPPSK[] = "donlucmk01";

// Pin Definitions
const int LED_PIN = 5;                  // Thing's onboard, green LED
const int ANALOG_PIN = A0;              // The only analog pin on the Thing
const int DIGITAL_PIN = 12;             // Digital pin to be read

// WiFi
WiFiServer server(80);

// RHT Humidity and Temperature Sensor
const int RHT03_DATA_PIN = 4;           // RHT03 data pin Digital 4
RHT03 rht;                              // This creates a RTH03 object, which we'll use to interact with the sensor
float latestHumidity;
float latestTempC;
float latestTempF;

// DS3231 Precision RTC
RTC_DS3231 RTC;
String sDate;
String sTime;

void loop()
{

  // RHT03 Humidity and Temperature Sensor
  isRHT03();

  // DS3231 Precision RTC
  timeRTC();

  // Check if a client has connected
  WiFiClient client = server.available();
  if (!client) {
    return;
  }

  // Read the first line of the request
  String req = client.readStringUntil('\r');
  Serial.println(req);
  client.flush();

  // Match the request
  int val = -1; // We'll use 'val' to keep track of both the request type (read/set) and value if set.
  if (req.indexOf("/led/0") != -1)
    val = 0; // Will write LED low
  else if (req.indexOf("/led/1") != -1)
    val = 1; // Will write LED high
  else if (req.indexOf("/read") != -1)
    val = -2; // Will print pin reads
  // Otherwise request will be invalid. We'll say as much in HTML
  // Set GPIO5 according to the request
  if (val >= 0)
    digitalWrite(LED_PIN, val);

  client.flush();

  // Prepare the response. Start with the common header:
  String s = "HTTP/1.1 200 OK\r\n";
  s += "Content-Type: text/html\r\n\r\n";
  s += "<!DOCTYPE HTML>\r\n<html>\r\n";
  // If we're setting the LED, print out a message saying we did
  if (val >= 0)
  {
    s += "LED is now ";
    s += (val)?"on":"off";
  }
  else if (val == -2)
  { // If we're reading pins, print out those values:
    s += "Date = ";
    s += sDate;
    s += "<br>";
    s += "Time = ";
    s += sTime;
    s += "<br>";
    s += "Analog Pin = ";
    s += String(analogRead(ANALOG_PIN));
    s += "<br>";                                       // Go to the next line.
    s += "Digital Pin 12 = ";
    s += String(digitalRead(DIGITAL_PIN));
    s += "<br>";                                       // Go to the next line.
    s += "Humidity and Temperature";
    s += "<br>";                                       // Go to the next line.
    s += "Humidity : ";
    s += String(latestHumidity);                       // Humidity
    s += "%";
    s += "<br>"; // Go to the next line.
    s += "Celsius: ";
    s += String(latestTempC);                          //  Temperature *C
    s += "*C";
    s += "<br>"; // Go to the next line.
    s += "Fahrenheit: ";
    s += String(latestTempF);                          // Temperature *F
    s += "*F";
  }
  else
  {
    s += "Invalid Request.<br> Try /led/1, /led/0, or /read.";
  }
  s += "</html>\n";

  // Send the response to the client
  client.print(s);
  delay(1);
  Serial.println("Client disonnected");

  // The client will actually be disconnected when the function returns and 'client' object is detroyed

}
getRHT.ino
// RHT03 Humidity and Temperature Sensor
void isRHT03(){

  // Call rht.update() to get new humidity and temperature values from the sensor.
  int updateRet = rht.update();

  // The humidity(), tempC(), and tempF() functions can be called -- after
  // a successful update() -- to get the last humidity and temperature value
  latestHumidity = rht.humidity();
  latestTempC = rht.tempC();
  latestTempF = rht.tempF();

}
getRTCDS3231.ino
// DS3231 Precision RTC
void setupRTC() {

  // DS3231 Precision RTC
  RTC.begin();
  if (! RTC.begin()) {
    while (1);
  }

  DateTime now = RTC.now();

  if (RTC.lostPower()) {
    // Following line sets the RTC to the date & time this sketch was compiled
    RTC.adjust(DateTime(F(__DATE__), F(__TIME__)));
  }

}
// timeRTC
void timeRTC() {

    // DS3231 Precision RTC
    sDate = "";
    sTime = "";

    DateTime now = RTC.now();

    // sData
    sDate += String(now.year(), DEC);
    sDate += "/";
    sDate += String(now.month(), DEC);
    sDate += "/";
    sDate += String(now.day(), DEC);

    // sTime
    sTime += String(now.hour(), DEC);
    sTime += ":";
    sTime += String(now.minute(), DEC);
    sTime += ":";
    sTime += String(now.second(), DEC);

}
setWiFi.ino
// WiFi
void setupWiFi()
{

  // WiFi mode WIFI_AP
  WiFi.mode(WIFI_AP);

  // Append the last two bytes of the MAC (HEX'd) to "Thing-":
  uint8_t mac[WL_MAC_ADDR_LENGTH];
  WiFi.softAPmacAddress(mac);
  String macID = String(mac[WL_MAC_ADDR_LENGTH - 2], HEX) +
                 String(mac[WL_MAC_ADDR_LENGTH - 1], HEX);
  macID.toUpperCase();
  String AP_NameString = "ESP8266 Thing " + macID;

  char AP_NameChar[AP_NameString.length() + 1];
  memset(AP_NameChar, 0, AP_NameString.length() + 1);

  for (int i=0; i<AP_NameString.length(); i++)
    AP_NameChar[i] = AP_NameString.charAt(i);

  WiFi.softAP(AP_NameChar, WiFiAPPSK);

}
// init Hardware
void initHardware()
{

  // Serial
  Serial.begin(115200);
  // LED Green
  pinMode(DIGITAL_PIN, INPUT_PULLUP);
  pinMode(LED_PIN, OUTPUT);
  digitalWrite(LED_PIN, LOW);
  // RHT03 Humidity and Temperature Sensor
  // Call rht.begin() to initialize the sensor and our data pin
  rht.begin(RHT03_DATA_PIN);
  // DS3231 Precision RTC
  setupRTC();

}
setup.ino
// Setup
void setup()
{

  // Hardware
  initHardware();
  // WiFi
  setupWiFi();
  server.begin();

}
Don Luc
Project #10: ESP8266 Thing – Web Server – Mk03
AP Web Server
Not only can the ESP8266 connect to a WiFi network and interact with the Internet, but it can also set up a network of its own, allowing other devices to connect directly to it. This example demonstrates how to turn the ESP8266 into an access point (AP), and serve up web pages to any connected client.
After uploading this sketch, find another device that you can connect to a WiFi network – phone, laptop, etc. Look for a network called “Thing-XXXX”, where XXXX is the last 2 bytes of the Thing’s MAC address.
WiFi => Yes
ESP8266 Thing XXXX
He sketch sets the network’s password to “donlucmk01”.
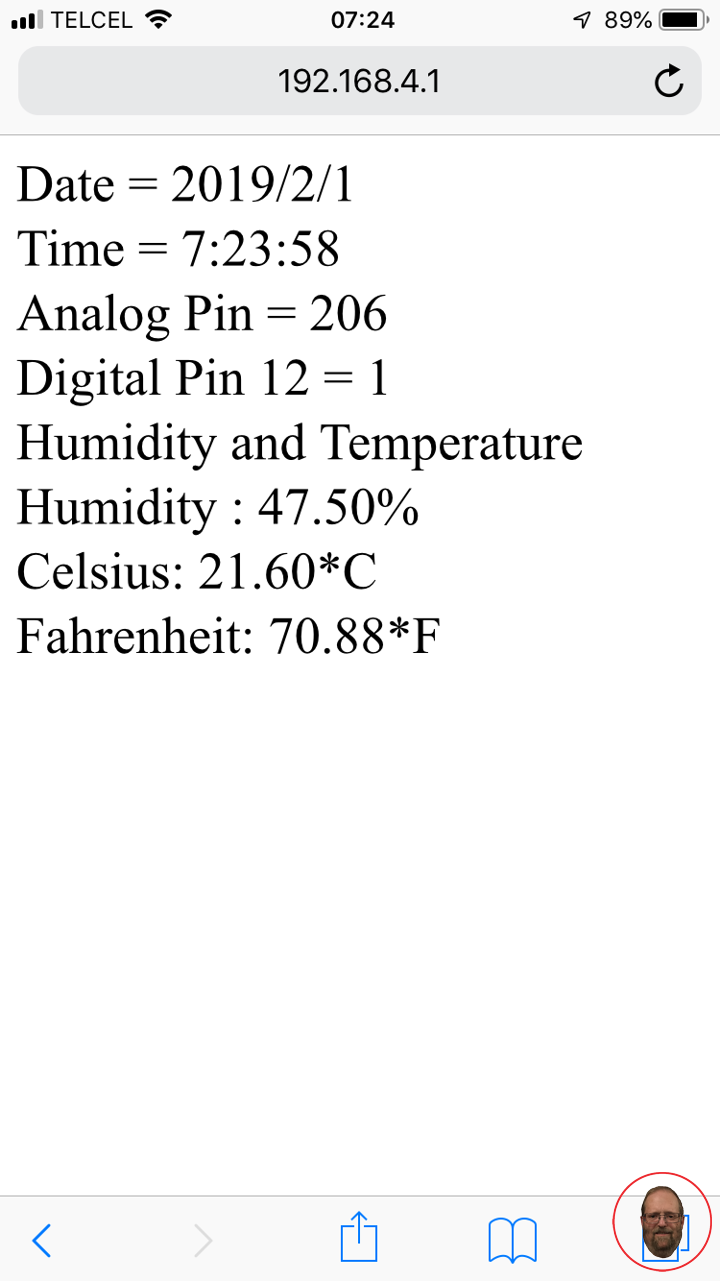
After connecting to your Thing’s AP network, load up a browser and point it to 192.168.4.1/read. The Thing should serve up a web page showing you its ADC and digital pin 12 readings:
Analog Pin = XXX
Digital Pin: XXX
Humidity and Temperature
Humidity: XX.XX%
Celsius: XX.XX*C
Fahrenheit: XX.XX*F
LED Green
After that, give 192.168.4.1/led/0 (No) and 192.168.4.1/led/1 (Yes) a try, and keep an eye on the Thing’s green LED while you do.
RHT03 Humidity and Temperature Sensor
The RHT03 is a low cost humidity and temperature sensor with a single wire digital interface. The sensor is calibrated and doesn’t require extra components so you can get right to measuring relative humidity and temperature.
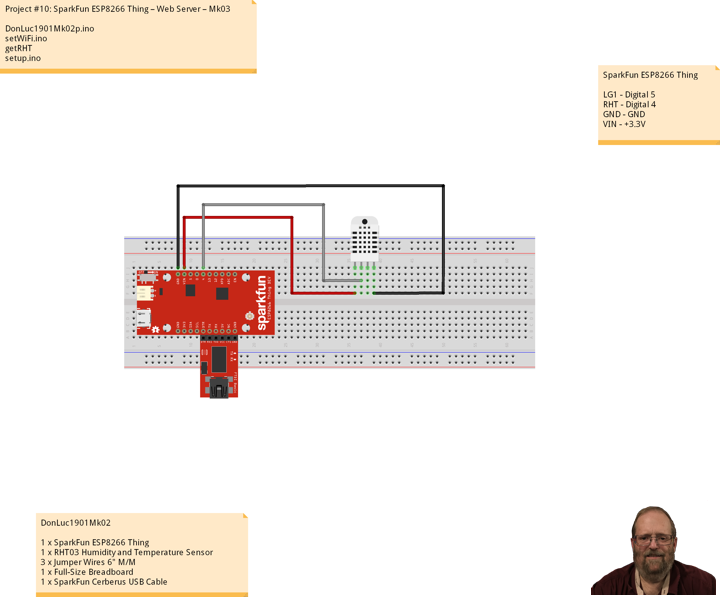
DonLuc1901Mk02
1 x SparkFun ESP8266 Thing
1 x SparkFun FTDI Basic Breakout – 3.3V
1 x RHT03 Humidity and Temperature Sensor
3 x Jumper Wires 6″ M/M
1 x Full-Size Breadboard
1 x SparkFun Cerberus USB Cable
SparkFun ESP8266 Thing
LG1 – Digital 5
RHT – Digital 4
GND – GND
VIN – +3.3V
DonLuc1901Mk02p.ino
// ***** Don Luc Electronics *****
// Software Version Information
// Project #10: SparkFun ESP8266 Thing – AP Web Server - Mk02
// 01-02
// DonLuc1901Mk01p.ino 01-02
// SparkFun ESP8266 Thing
// AP Web Server
// RHT03 Humidity and Temperature Sensor

// Include Library Code
#include <ESP8266WiFi.h>
#include <SparkFun_RHT03.h>

// WiFi Definitions
const char WiFiAPPSK[] = "donlucmk01";

// Pin Definitions
const int LED_PIN = 5;                  // Thing's onboard, green LED
const int ANALOG_PIN = A0;              // The only analog pin on the Thing
const int DIGITAL_PIN = 12;             // Digital pin to be read

// WiFi
WiFiServer server(80);

// RHT Humidity and Temperature Sensor
const int RHT03_DATA_PIN = 4;           // RHT03 data pin Digital 4
RHT03 rht;                              // This creates a RTH03 object, which we'll use to interact with the sensor
float latestHumidity;
float latestTempC;
float latestTempF;

void loop()
{

  // RHT03 Humidity and Temperature Sensor
  isRHT03();

  // Check if a client has connected
  WiFiClient client = server.available();
  if (!client) {
    return;
  }

  // Read the first line of the request
  String req = client.readStringUntil('\r');
  Serial.println(req);
  client.flush();

  // Match the request
  int val = -1; // We'll use 'val' to keep track of both the request type (read/set) and value if set.
  if (req.indexOf("/led/0") != -1)
    val = 0; // Will write LED low
  else if (req.indexOf("/led/1") != -1)
    val = 1; // Will write LED high
  else if (req.indexOf("/read") != -1)
    val = -2; // Will print pin reads
  // Otherwise request will be invalid. We'll say as much in HTML
  // Set GPIO5 according to the request
  if (val >= 0)
    digitalWrite(LED_PIN, val);

  client.flush();

  // Prepare the response. Start with the common header:
  String s = "HTTP/1.1 200 OK\r\n";
  s += "Content-Type: text/html\r\n\r\n";
  s += "<!DOCTYPE HTML>\r\n<html>\r\n";
  // If we're setting the LED, print out a message saying we did
  if (val >= 0)
  {
    s += "LED is now ";
    s += (val)?"on":"off";
  }
  else if (val == -2)
  { // If we're reading pins, print out those values:
    s += "Analog Pin = ";
    s += String(analogRead(ANALOG_PIN));
    s += "<br>";                                       // Go to the next line.
    s += "Digital Pin 12 = ";
    s += String(digitalRead(DIGITAL_PIN));
    s += "<br>";                                       // Go to the next line.
    s += "Humidity and Temperature";
    s += "<br>";                                       // Go to the next line.
    s += "Humidity : ";
    s += String(latestHumidity);                       // Humidity
    s += "%";
    s += "<br>"; // Go to the next line.
    s += "Celsius: ";
    s += String(latestTempC);                          //  Temperature *C
    s += "*C";
    s += "<br>"; // Go to the next line.
    s += "Fahrenheit: ";
    s += String(latestTempF);                          // Temperature *F
    s += "*F";
  }
  else
  {
    s += "Invalid Request.<br> Try /led/1, /led/0, or /read.";
  }
  s += "</html>\n";

  // Send the response to the client
  client.print(s);
  delay(1);
  Serial.println("Client disonnected");

  // The client will actually be disconnected when the function returns and 'client' object is detroyed

}
getRHT.ino
// RHT03 Humidity and Temperature Sensor
void isRHT03(){

  // Call rht.update() to get new humidity and temperature values from the sensor.
  int updateRet = rht.update();

  // The humidity(), tempC(), and tempF() functions can be called -- after
  // a successful update() -- to get the last humidity and temperature value
  latestHumidity = rht.humidity();
  latestTempC = rht.tempC();
  latestTempF = rht.tempF();

}
setWiFi.ino
// WiFi
void setupWiFi()
{

  // WiFi mode WIFI_AP
  WiFi.mode(WIFI_AP);

  // Append the last two bytes of the MAC (HEX'd) to "Thing-":
  uint8_t mac[WL_MAC_ADDR_LENGTH];
  WiFi.softAPmacAddress(mac);
  String macID = String(mac[WL_MAC_ADDR_LENGTH - 2], HEX) +
                 String(mac[WL_MAC_ADDR_LENGTH - 1], HEX);
  macID.toUpperCase();
  String AP_NameString = "ESP8266 Thing " + macID;

  char AP_NameChar[AP_NameString.length() + 1];
  memset(AP_NameChar, 0, AP_NameString.length() + 1);

  for (int i=0; i<AP_NameString.length(); i++)
    AP_NameChar[i] = AP_NameString.charAt(i);

  WiFi.softAP(AP_NameChar, WiFiAPPSK);

}
// init Hardware
void initHardware()
{

  // Serial
  Serial.begin(115200);
  // LED Green
  pinMode(DIGITAL_PIN, INPUT_PULLUP);
  pinMode(LED_PIN, OUTPUT);
  digitalWrite(LED_PIN, LOW);
  // RHT03 Humidity and Temperature Sensor
  // Call rht.begin() to initialize the sensor and our data pin
  rht.begin(RHT03_DATA_PIN);

}
setup.ino
// Setup
void setup()
{

  // Hardware
  initHardware();
  // WiFi
  setupWiFi();
  server.begin();

}
Don Luc
Project #10: ESP8266 Thing – Blink – Mk02
Soldering
Plated through-hole soldering (PTH), flux-core solder alloys commonly used for electrical soldering are 60/40 Sn-Pb used principally in electrical/electronic work and TENMA soldering station temperature controlled digital.
Hardware Assembly
We’re getting ahead of ourselves. To connect the FTDI programmer to your Thing you’ll need to solder something to the Thing. What, exactly, you solder to the board depends both on how you’ll use it in your project, and how you’ll interface it with the programmer. When it comes to selecting a header (or wire) to solder, there are a variety of options. We’ve tried a lot of them with the Thing:
Or you can mix and match headers to best fit your needs. Right-angle male headers may help to interface between the FTDI and the Thing. Straight male headers are a good choice for low-profile connections. Straight female headers may help with connecting to I2C sensors. And, of course, wire can be soldered to any of the pins that have a long way to connect to something.
10 pin – Break Away Headers – Straight
4 pin – Break Away Headers – Straight
6 pin – Break Away Male Headers – Right Angle
Once you’ve soldered up at least the programming port, you’re ready to load some code onto the Thing.
Programming the Thing
The ESP8266 has a built-in serial bootloader, which allows for easy programming and re-programming. You don’t need a specialized, expensive programmer – just a simple, USB-to-Serial converter. The FTDI Basic’s 6-pin header matches up exactly to the Thing’s 6-pin serial port header. To set up for programming, simply connect the FTDI directly to this port – take care to match up the DTR and GND pins.
Blink
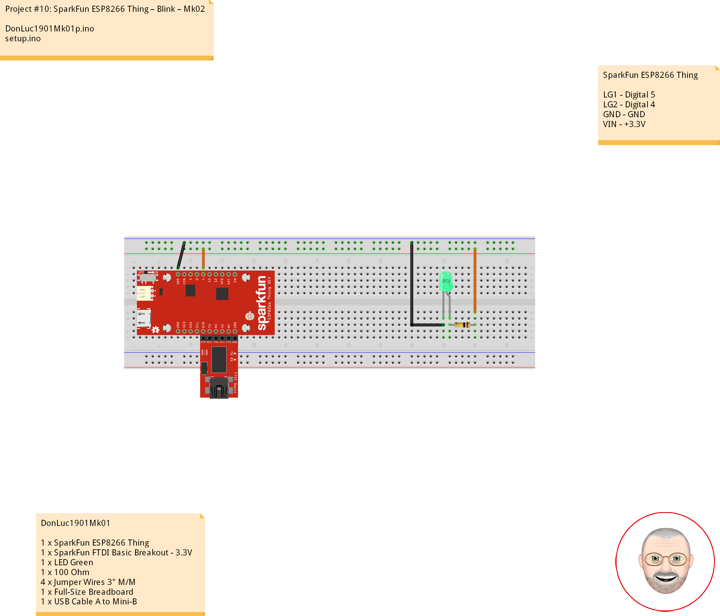
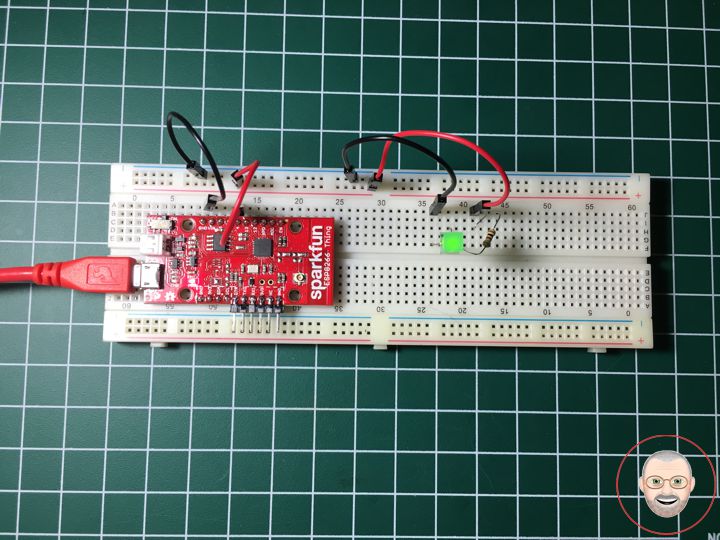
Let’s blink some LEDs and IoT (Internet our Thing). To verify that everything works Blink: toggle pin 5, which is attached to the onboard LED Green, toggle pin 4 which is LED Green.
DonLuc1901Mk01
1 x SparkFun ESP8266 Thing
1 x SparkFun FTDI Basic Breakout – 3.3V
1 x LED Green
1 x 100 Ohm
4 x Jumper Wires 3″ M/M
1 x Full-Size Breadboard
1 x USB Cable A to Mini-B
SparkFun ESP8266 Thing
LG1 – Digital 5
LG2 – Digital 4
GND – GND
VIN – +3.3V
DonLuc1901Mk01p.ino
// ***** Don Luc Electronics *****
// Software Version Information
// Project #10: SparkFun ESP8266 Thing – Blink - Mk02
// 01-01
// DonLuc1901Mk01p.ino 01-01
// SparkFun ESP8266 Thing
// Blink

// Include Library Code

#define ESP8266_LED 5      // LED Green
int iLEDGreen = 4;         // LED Green

void loop()
{

  // ESP8266_LED, iLEDGreen
  digitalWrite(ESP8266_LED, LOW);
  digitalWrite(iLEDGreen, LOW);
  delay(2000);
  digitalWrite(ESP8266_LED, HIGH);
  delay(2000);
  digitalWrite(ESP8266_LED, LOW);
  delay(2000);
  digitalWrite(iLEDGreen, HIGH);
  delay(2000);

}
setup.ino
// Setup
void setup()
{

  // LED
  pinMode(ESP8266_LED, OUTPUT);                 // ESP8266_LED Green
  pinMode(iLEDGreen, OUTPUT);                   // LED Green

}
Don Luc
Project #10: SparkFun ESP8266 Thing – Mk01
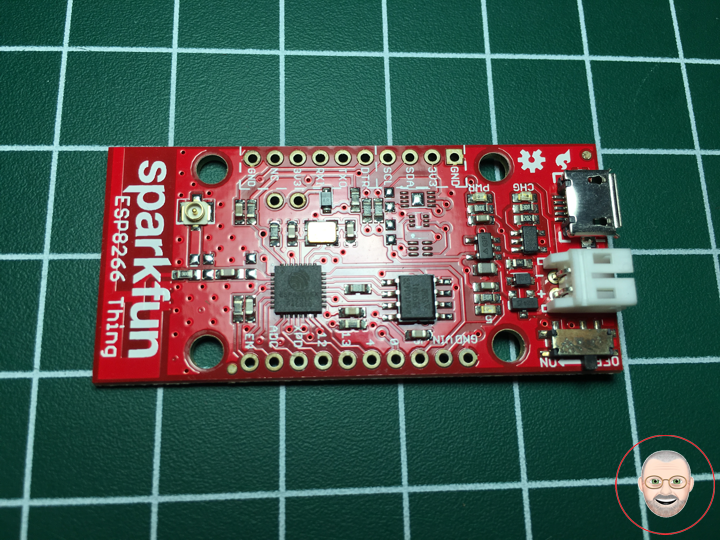
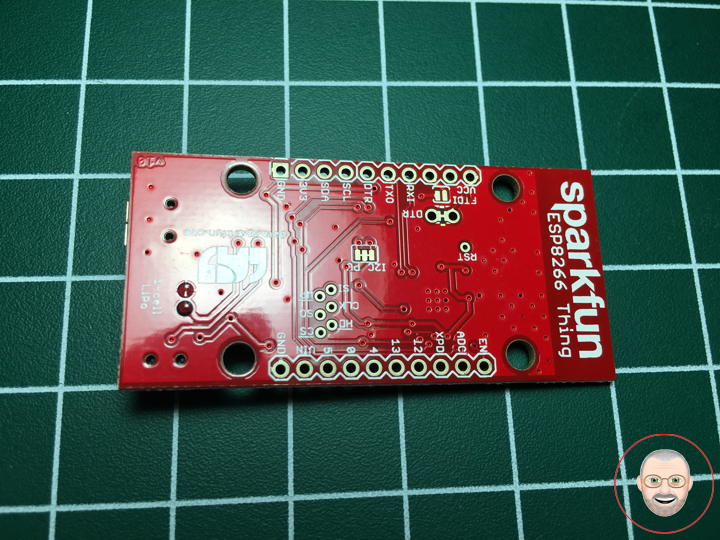
Description
The SparkFun ESP8266 Thing is a breakout and development board for the ESP8266 WiFi SoC – a leading platform for Internet of Things (IoT) or WiFi-related projects. The Thing is low-cost and easy to use, and Arduino IDE integration can be achieved in just a few steps. We’ve made the ESP8266 easy to use by breaking out all of the module’s pins, adding a LiPo charger, power supply, and all of the other supporting circuitry it requires.
Why the name? We lovingly call it the “Thing” due to it being the perfect foundation for your Internet of Things project. The Thing does everything from turning on an LED to posting data with datastream, and can be programmed just like any microcontroller. You can even program the Thing through the Arduino IDE by installing the ESP8266 Arduino addon.
The SparkFun ESP8266 Thing is a relatively simple board. The pins are broken out to two parallel, breadboard-compatible rows. USB and LiPo connectors at the top of the board provide power – controlled by the nearby ON/OFF switch. LEDs towards the inside of the board indicate power, charge, and status of the IC. The ESP8266’s maximum voltage is 3.6V, so the Thing has an onboard 3.3V regulator to deliver a safe, consistent voltage to the IC. That means the ESP8266’s I/O pins also run at 3.3V, you’ll need to level shift any 5V signals running into the IC. A 3.3V FTDI Basic is required to program the SparkFun ESP8266 Thing, but other serial converters with 3.3V I/O levels should work just fine as well. The converter does need a DTR line in addition to the RX and TX pins.
Features
- All module pins broken out
- On-board LiPo charger/power supply
- 802.11 b/g/n
- Wi-Fi Direct (P2P), soft-AP
- Integrated TCP/IP protocol stack
- Integrated TR switch, balun, LNA, power amplifier and matching network
- Integrated PLLs, regulators, DCXO and power management units
- Integrated low power 32-bit CPU could be used as application processor
- +19.5dBm output power in 802.11b mode
Don Luc
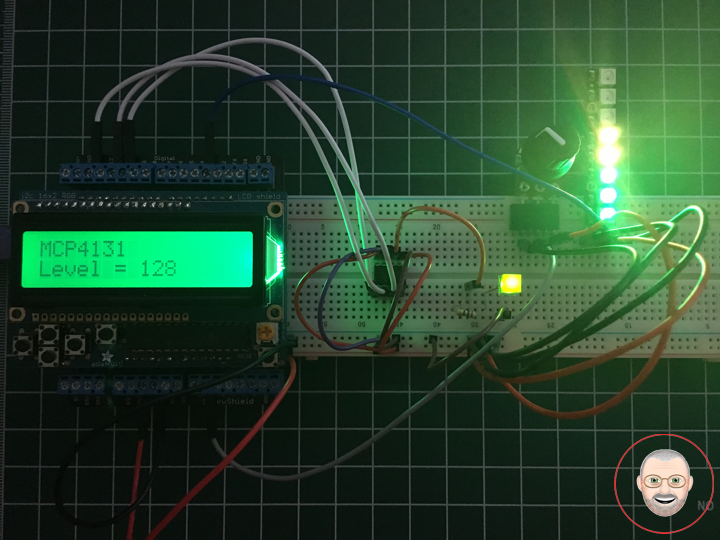
Project #7: RGB LCD Shield – MCP4131 – Mk10
Microchip Technology Inc – MCP4131
Features:
-7-bit: 128 Resistors with 129 Taps to VSS and VDD
-SPI compatible interface
-Automatic Recall of Potentiometer Wiper Settings Resistance Values: 5k Ohm, 10k Ohm, 50k Ohm, 100k Ohm
-Absolute (Rheostat): <100 ppm (typ.)
-Ratiometric (Potentiometer): <10 ppm (typ.)
Device Overview – Summary
The MCP41/423X devices are volatile, 7-bit (129 wiper steps) digital potentiometers with an SPI compatible interface. The MCP41/42XX family is available with end-to-end resistor values of 5K Ohm, 10K Ohm, 50k Ohm and 100K Ohm. These devices offer a variety of configurations simplifying design while minimizing cost, package size and pin count.
Additional Features
-7-bit: 128 Resistors with 129 Taps to VSS and VDD
-SPI compatible interface
-Automatic Recall of Potentiometer Wiper Settings Resistance Values: 5k Ohm, 10k Ohm, 50k Ohm, 100k Ohm
-Low Tempco: Absolute (Rheostat): <100 ppm (typ.)
-Ratiometric (Potentiometer): <10 ppm (typ.)
-Low Wiper Resistance: 100 Ohm (typ.)
-Low-Power Operation: 1µA Max Static Current
-Wide Operating Voltage: 1.8V to 5.5V
-Extended Temperature Range: -40°C to +125°C
MCP4131 – Digital Potentiometer – 10K
Potentiometers are incredibly useful, whether you’re controlling the volume on your stereo or the ‘mood lighting’ in your room. The problem with traditional potentiometers is the fact that your microcontroller doesn’t have an easy way to interface with them. Digital potentiometers solve that problem by allowing you to control a voltage splitter with digital signals.
Wire it up just like a potentiometer and use serial signals to ‘turn the knob’. Another handy feature of digital potentiometers is that because they aren’t controlled mechanically, they don’t have a pre-determined sweep profile. In other words, depending on the way you write your code the potentiometer can ‘sweep’ in a linear fashion, a logarithmic fashion, or according to any other profile you like. Digital potentiometers can also be used in conjunction with rotary encoders to consolidate large banks of potentiometers into one ‘smart’ rotary control.
Digital Potentiometer MCP41131 and Arduino
We know the analog potentiometer, is a three-terminal resistor with a sliding contact that forms an adjustable voltage divider. Potentiometers many application such like:
1- Volume controls on audio equipment
2- Control the amplifier gain and offset
3- Transducer displacement transducers
Many other application, but did you want to control the resistance value by Arduino instead of using analog one. Analog potentiometers have some problem with Arduino doesn’t have an easy way to interface with them. The digital potentiometer, give you an ability to adjust the resistance, allowing you to control a voltage splitter with digital signals. This IC using SPI Protocol to communicate with Arduino.
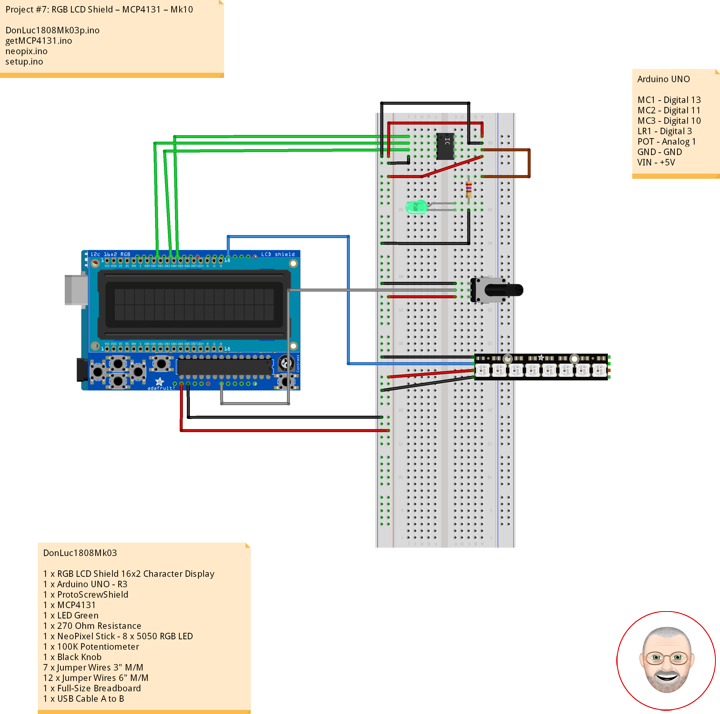
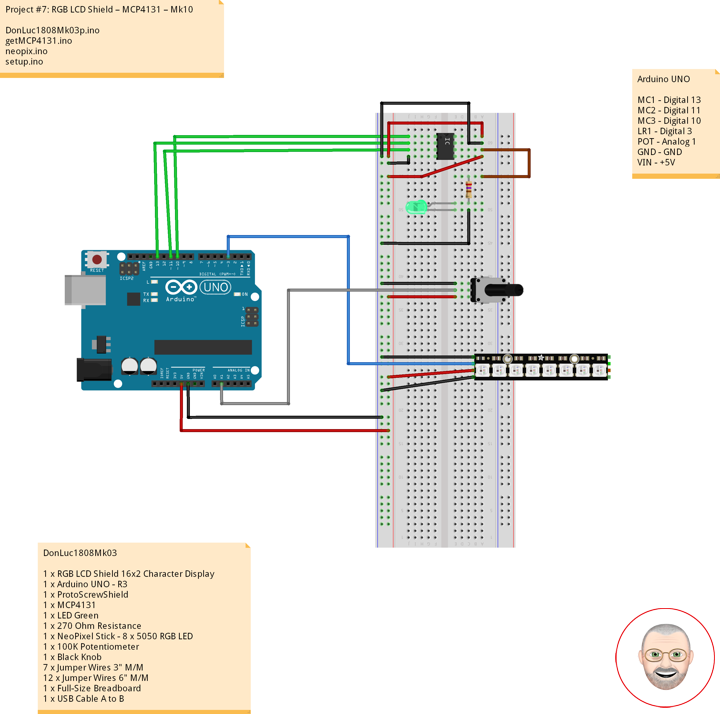
DonLuc1808Mk03
1 x RGB LCD Shield 16×2 Character Display
1 x Arduino UNO – R3
1 x ProtoScrewShield
1 x MCP4131
1 x LED Green
1 x 270 Ohm Resistance
1 x NeoPixel Stick – 8 x 5050 RGB LED
1 x 100K Potentiometer
1 x Black Knob
7 x Jumper Wires 3″ M/M
12 x Jumper Wires 6″ M/M
1 x Full-Size Breadboard
1 x USB Cable A to B
Arduino UNO
MC1 – Digital 13
MC2 – Digital 11
MC3 – Digital 10
LR1 – Digital 3
POT – Analog 1
GND – GND
VIN – +5V
DonLuc1808Mk03p.ino
// ***** Don Luc Electronics *****
// Software Version Information
// Project #7: RGB LCD Shield – MCP4131 – Mk10
// 8-03
// DonLuc1808Mk03p 8-03
// RGB LCD Shield
// MCP4131

// Include Library Code
#include <Adafruit_MCP23017.h>
#include <Adafruit_RGBLCDShield.h>
#include <Adafruit_NeoPixel.h>
#include <SPI.h>

// RGB LCD Shield
Adafruit_RGBLCDShield RGBLCDShield = Adafruit_RGBLCDShield();
#define GREEN 0x2

// NeoPixels
#define PIN 3                             // On digital pin 3
#define NUMPIXELS 8                       // NeoPixels NUMPIXELS = 8
Adafruit_NeoPixel pixels = Adafruit_NeoPixel(NUMPIXELS, PIN, NEO_GRB + NEO_KHZ800);
int red = 0;                              // Red
int green = 0;                            // Green
int blue = 0;                             // Blue
int iNeo = 0;                             // Neopix
const int iBriPin = A1;                   // Panel Mount 1K potentiometer Brightneed
int iBri = 0;                             // Neopix Brightness
int iBriMin = 1023;                       // Brightneed minimum sensor value
int iBriMax = 0;                          // Brightneed maximun sensor value
int z = 0;                                // Value

// MCP4131
int pinCS = 10;                           // MCP4131
byte address = 0x00;                      // Address
int i = 0;                                // Value

void loop()
{

  // MCP4131
  isMCP4131();

  delay(1000);

  // Clear
  RGBLCDShield.clear();

}
getMCP4131.ino
// MCP4131
void isMCP4131()
{

  // NeoPixels
  isNUMPIXELSoff();                             // isNUMPIXELSoff

  // Display
  // Set the cursor to column 0, line 0
  RGBLCDShield.setCursor(0,0);
  RGBLCDShield.print("MCP4131");                // MCP4131

  // MCP4131
  // Move the potentiometer in one direction
  for ( i = 0; i <= 128; i++)
  {

    isNUMPIXELSoff();                           // isNUMPIXELSoff

    MCP4131PotWrite(i);

    isNUMPIXELS();                              // isNUMPIXELS

    delay(100);

    // Set the cursor to column 0, line 1
    RGBLCDShield.setCursor(0, 1);
    RGBLCDShield.print("Level = ");             // MCP4131
    RGBLCDShield.print(i);                      // MCP4131

  }

  delay(2000);  // wait a couple seconds

  // Now mover potentiometer in other directions
  for ( i = 128; i >= 0; i--)
  {

    isNUMPIXELSoff();                            // isNUMPIXELSoff

    MCP4131PotWrite(i);

    isNUMPIXELS();                               // isNUMPIXELS

    delay(100);

    RGBLCDShield.setCursor(0, 1);
    RGBLCDShield.print("                ");
    RGBLCDShield.setCursor(0, 1);
    RGBLCDShield.print("Level =  ");             // MCP4131
    RGBLCDShield.print(i);                       // MCP4131

  }

  delay(2000);

}
// MCP4131PotWrite
int MCP4131PotWrite(int value)
{

  digitalWrite(pinCS, LOW);                      // pinCS Off
  SPI.transfer(address);                         // SPI Address
  SPI.transfer(value);                           // SPI Value
  digitalWrite(pinCS, HIGH);                     // pinCS On

}
neopix.ino
// NeoPixels
void neopix()
{

    // Brightness
    iBri = analogRead(iBriPin);

    // iBri apply the calibration to the sensor reading
    iBri = map(iBri, iBriMin, iBriMax, 0, 255);

    // iBri in case the sensor value is outside the range seen during calibration
    iBri = constrain(iBri, 0, 255);

    pixels.setBrightness( iBri );
    // Pixels.Color takes RGB values, from 0,0,0 up to 255,255,255
    pixels.setPixelColor( iNeo, pixels.Color(red,green,blue) );
    // This sends the updated pixel color to the hardware
    pixels.show();
    // Delay for a period of time (in milliseconds)
    delay(50);

}
// isNUMPIXELS
void isNUMPIXELS()
{

  // Neopix Value
  z = ( i / 16 );                             // Value

  // Neopix Value
  switch ( z ) {
    case 0:
      // NeoPixels
      // Green
      for(int y=0; y<=0; y++)
      {
         red = 0;                             // Red
         green = 255;                         // Green
         blue = 0;                            // Blue
         iNeo = y;                            // Neopix
         neopix();
      }
      break;
    case 1:
      // Green
      // NeoPixels
      for(int y=0; y<=1; y++){
         red = 0;                             // Red
         green = 255;                         // Green
         blue = 0;                            // Blue
         iNeo = y;                            // Neopix
         neopix();
      }
      break;
    case 2:
      // NeoPixels
      // Green
      for(int y=0; y<=2; y++){
         red = 0;                             // Red
         green = 255;                         // Green
         blue = 0;                            // Blue
         iNeo = y;                            // Neopix
         neopix();
      }
      break;
    case 3:
      // NeoPixels
      // Green
      for(int y=0; y<=2; y++){
         red = 0;                             // Red
         green = 255;                         // Green
         blue = 0;                            // Blue
         iNeo = y;                            // Neopix
         neopix();
      }
      // Yellow
      for(int y=3; y<=3; y++){
         red = 255;                           // Red
         green = 255;                         // Green
         blue = 0;                            // Blue
         iNeo = y;                            // Neopix
         neopix();
      }
      break;
    case 4:
      // NeoPixels
      // Green
      for(int y=0; y<=2; y++){
         red = 0;                             // Red
         green = 255;                         // Green
         blue = 0;                            // Blue
         iNeo = y;                            // Neopix
         neopix();
      }
      // Yellow
      for(int y=3; y<=4; y++){
         red = 255;                           // Red
         green = 255;                         // Green
         blue = 0;                            // Blue
         iNeo = y;                            // Neopix
         neopix();
      }
      break;
    case 5:
      // NeoPixels
      // Green
      for(int y=0; y<=2; y++){
         red = 0;                             // Red
         green = 255;                         // Green
         blue = 0;                            // Blue
         iNeo = y;                            // Neopix
         neopix();
      }
      // Yellow
      for(int y=3; y<=5; y++){
         red = 255;                           // Red
         green = 255;                         // Green
         blue = 0;                            // Blue
         iNeo = y;                            // Neopix
         neopix();
      }
      break;
    case 6:
      // NeoPixels
      // Green
      for(int y=0; y<=2; y++){
         red = 0;                             // Red
         green = 255;                         // Green
         blue = 0;                            // Blue
         iNeo = y;                            // Neopix
         neopix();
      }
      // Yellow
      for(int y=3; y<=5; y++){
         red = 255;                           // Red
         green = 255;                         // Green
         blue = 0;                            // Blue
         iNeo = y;                            // Neopix
         neopix();
      }
      // Red
      for(int y=6; y<=6; y++){
         red = 255;                           // Red
         green = 0;                           // Green
         blue = 0;                            // Blue
         iNeo = y;                            // Neopix
         neopix();
      }
      break;
    case 7:
      // NeoPixels
      // Green
      for(int y=0; y<=2; y++){
         red = 0;                             // Red
         green = 255;                         // Green
         blue = 0;                            // Blue
         iNeo = y;                            // Neopix
         neopix();
      }
      // Yellow
      for(int y=3; y<=5; y++){
         red = 255;                           // Red
         green = 255;                         // Green
         blue = 0;                            // Blue
         iNeo = y;                            // Neopix
         neopix();
      }
      // Red
      for(int y=6; y<=7; y++){
         red = 255;                           // Red
         green = 0;                           // Green
         blue = 0;                            // Blue
         iNeo = y;                            // Neopix
         neopix();
      }
      break;
    case 8:
      // NeoPixels
      // Green
      for(int y=0; y<=2; y++){
         red = 0;                             // Red
         green = 255;                         // Green
         blue = 0;                            // Blue
         iNeo = y;                            // Neopix
         neopix();
      }
      // Yellow
      for(int y=3; y<=5; y++){
         red = 255;                           // Red
         green = 255;                         // Green
         blue = 0;                            // Blue
         iNeo = y;                            // Neopix
         neopix();
      }
      // Red
      for(int y=6; y<=7; y++){
         red = 255;                           // Red
         green = 0;                           // Green
         blue = 0;                            // Blue
         iNeo = y;                            // Neopix
         neopix();
      }
      break;
  }

}
// isNUMPIXELSoff
void isNUMPIXELSoff()
{

   // Black
   // NeoPixels
   for(int y=0; y < NUMPIXELS; y++)
   {
      red = 0;                                 // Red
      green = 0;                               // Green
      blue = 0;                                // Blue
      iNeo = y;                                // Neopix
      neopix();
   }

}
setup.ino
// Setup
void setup()
{

  // set up the LCD's number of columns and rows:
  RGBLCDShield.begin(16, 2);
  RGBLCDShield.setBacklight(GREEN);

  // Display
  // Set the cursor to column 0, line 0
  RGBLCDShield.setCursor(0,0);
  RGBLCDShield.print("Don Luc");           // Don luc
  // Set the cursor to column 0, line 1
  RGBLCDShield.setCursor(0, 1);
  RGBLCDShield.print("MCP4131");           // MCP4131
  delay(5000);

  // Clear
  RGBLCDShield.clear();

  // NeoPixels
  pixels.begin();                          // This initializes the NeoPixel library
  // NeoPixels
  isNUMPIXELSoff();                        // isNUMPIXELSoff

  // MCP4131
  pinMode(pinCS, OUTPUT);                  // MCP4131 OUTPUT

  SPI.begin();                             // SPI

}
Don Luc
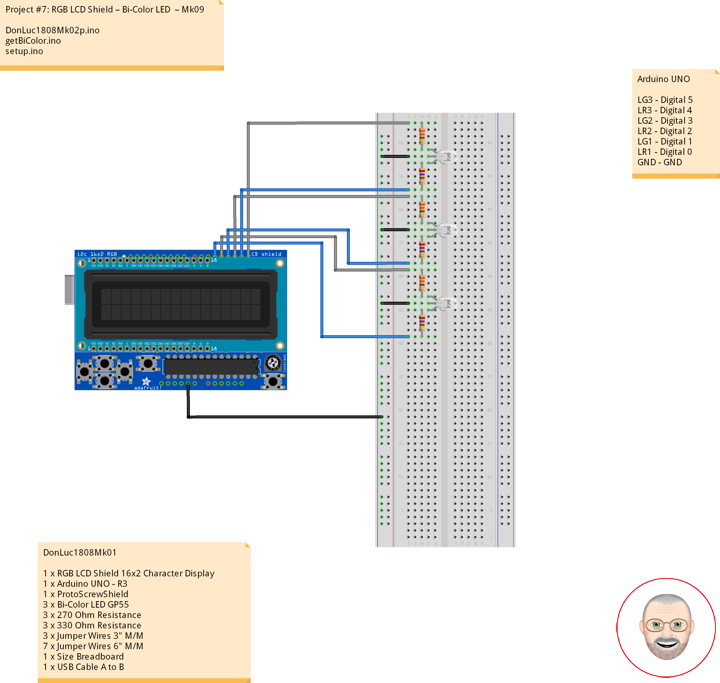
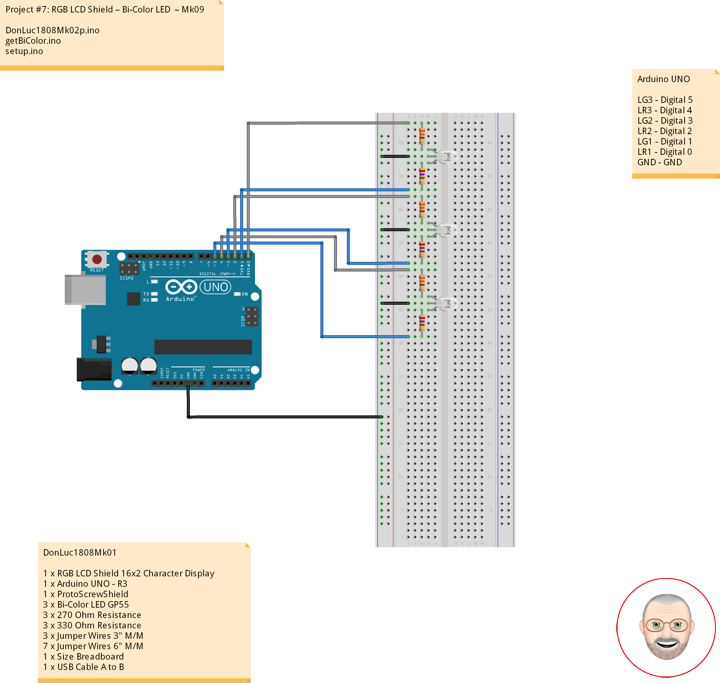
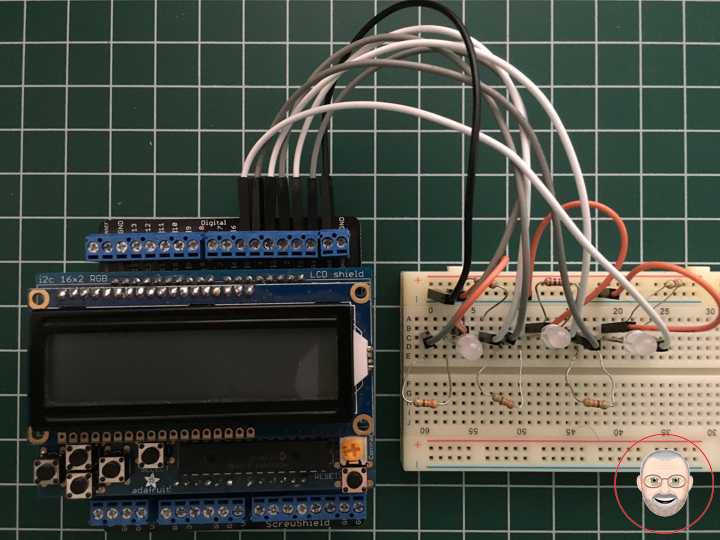
Project #7: RGB LCD Shield – Bi-Color LED – Mk09
Bi-Color LED
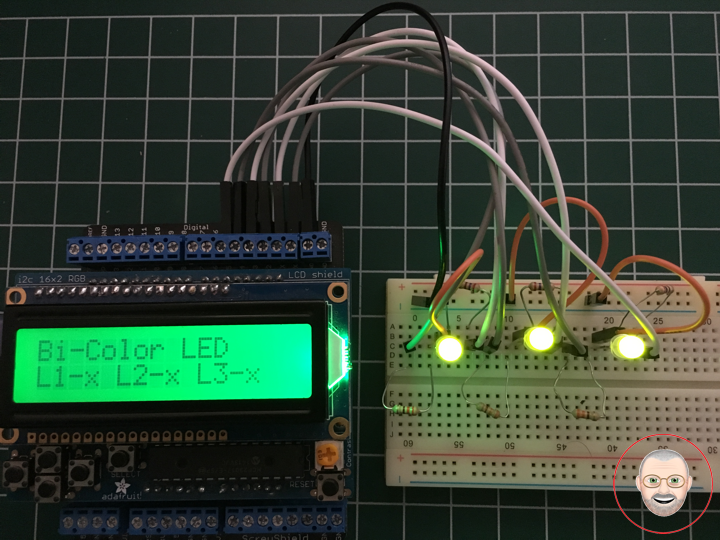
Bi-color LEDs contain two different LED emitters in one case. There are two types of these. One type consists of two dies connected to the same two leads antiparallel to each other. Current flow in one direction emits one color, and current in the opposite direction emits the other color. The other type consists of two dies with separate leads for both dies and another lead for common anode or cathode so that they can be controlled independently. The most common bi-color combination is red/traditional green, however, other available combinations include amber/traditional green, red/pure green, red/blue, and blue/pure green.
Super Bright BiPolar LEDs
Package of 12 super bright Red/Green jumbo T1 3/4 5mm LEDs. These have a diffused frosted lens and 3 long leads. Prime 100% perfect and bright. CODE 7: 100% Prime Parts. Stock # GP55
DonLuc1808Mk02
1 x RGB LCD Shield 16×2 Character Display
1 x Arduino UNO – R3
1 x ProtoScrewShield
3 x Bi-Color LED GP55
3 x 270 Ohm Resistance
3 x 330 Ohm Resistance
3 x Jumper Wires 3″ M/M
7 x Jumper Wires 6″ M/M
1 x Size Breadboard
1 x USB Cable A to B
Arduino UNO
LG3 – Digital 5
LR3 – Digital 4
LG2 – Digital 3
LR2 – Digital 2
LG1 – Digital 1
LR1 – Digital 0
GND – GND
DonLuc1808Mk02p.ino
// ***** Don Luc *****
// Software Version Information
// Project #7: RGB LCD Shield – Bi-Color LED  – Mk09
// 8-02
// DonLuc1808Mk02p 8-02
// RGB LCD Shield
// Bi-Color LED

// Include Library Code
#include <Adafruit_MCP23017.h>
#include <Adafruit_RGBLCDShield.h>

// RGB LCD Shield
Adafruit_RGBLCDShield RGBLCDShield = Adafruit_RGBLCDShield();
#define GREEN 0x2

// Bi-Color LED
int iLR1 = 0;      // LED Red 1
int iLG1 = 1;      // LED Green 1
int iLR2 = 2;      // LED Red 2
int iLG2 = 3;      // LED Green 2
int iLR3 = 4;      // LED Red 3
int iLG3 = 5;      // LED Green 3

void loop()
{

  // Bi-Color LED
  isBiColor();

  delay(1000);

  // Clear
  RGBLCDShield.clear();

}
getBiColor.ino
// Bi-Color LED
void isBiColor()
{

  // Display
  // Set the cursor to column 0, line 0
  RGBLCDShield.setCursor(0,0);
  RGBLCDShield.print("Bi-Color LED");         // Bi-Color LED

  // Bi-Color LED

  // Set the cursor to column 0, line 1
  RGBLCDShield.setCursor(0, 1);
  RGBLCDShield.print("L1x- L2x- L3x-");      // Bi-Color LED Red

  digitalWrite(iLR1, HIGH);                  // LED Red 1
  digitalWrite(iLG1, LOW);                   // LED Green 1
  digitalWrite(iLR2, HIGH);                  // LED Red 2
  digitalWrite(iLG2, LOW);                   // LED Green 2
  digitalWrite(iLR3, HIGH);                  // LED Red 3
  digitalWrite(iLG3, LOW);                   // LED Green 3

  delay( 2000 );

  // Set the cursor to column 0, line 1
  RGBLCDShield.setCursor(0, 1);
  RGBLCDShield.print("L1-x L2-x L3-x");      // Bi-Color LED Green

  digitalWrite(iLR1, LOW);                   // LED Red 1
  digitalWrite(iLG1, HIGH);                  // LED Green 1
  digitalWrite(iLR2, LOW);                   // LED Red 2
  digitalWrite(iLG2, HIGH);                  // LED Green 2
  digitalWrite(iLR3, LOW);                   // LED Red 3
  digitalWrite(iLG3, HIGH);                  // LED Green 3

  delay( 2000 );

  // Set the cursor to column 0, line 1
  RGBLCDShield.setCursor(0, 1);
  RGBLCDShield.print("L1xx L2xx L3xx");      // Bi-Color LED Red-Green

  digitalWrite(iLR1, HIGH);                  // LED Red 1
  digitalWrite(iLG1, HIGH);                  // LED Green 1
  digitalWrite(iLR2, HIGH);                  // LED Red 2
  digitalWrite(iLG2, HIGH);                  // LED Green 2
  digitalWrite(iLR3, HIGH);                  // LED Red 3
  digitalWrite(iLG3, HIGH);                  // LED Green 3

  delay( 2000 );

}
setup.ino
// Setup
void setup()
{

  // set up the LCD's number of columns and rows:
  RGBLCDShield.begin(16, 2);
  RGBLCDShield.setBacklight(GREEN);

  // Display
  // Set the cursor to column 0, line 0
  RGBLCDShield.setCursor(0,0);
  RGBLCDShield.print("Don Luc");           // Don luc
  // Set the cursor to column 0, line 1
  RGBLCDShield.setCursor(0, 1);
  RGBLCDShield.print("Bi-Color LED");      // Bi-Color LED
  delay(5000);

  // Clear
  RGBLCDShield.clear();

  // Bi-Color LED
  pinMode(iLR1, OUTPUT);                   // LED Red 1
  pinMode(iLG1, OUTPUT);                   // LED Green 1
  pinMode(iLR2, OUTPUT);                   // LED Red 2
  pinMode(iLG2, OUTPUT);                   // LED Green 2
  pinMode(iLR3, OUTPUT);                   // LED Red 3
  pinMode(iLG3, OUTPUT);                   // LED Green 3

}
Don Luc
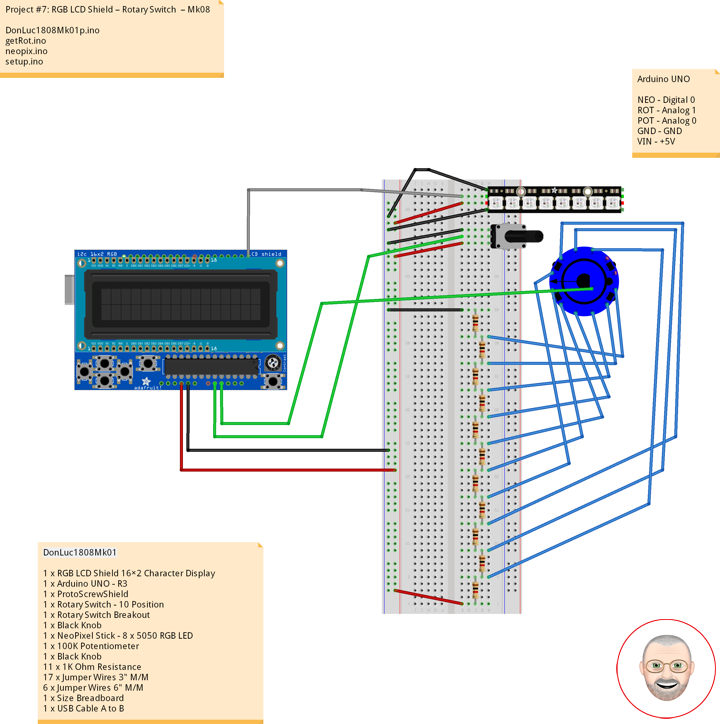
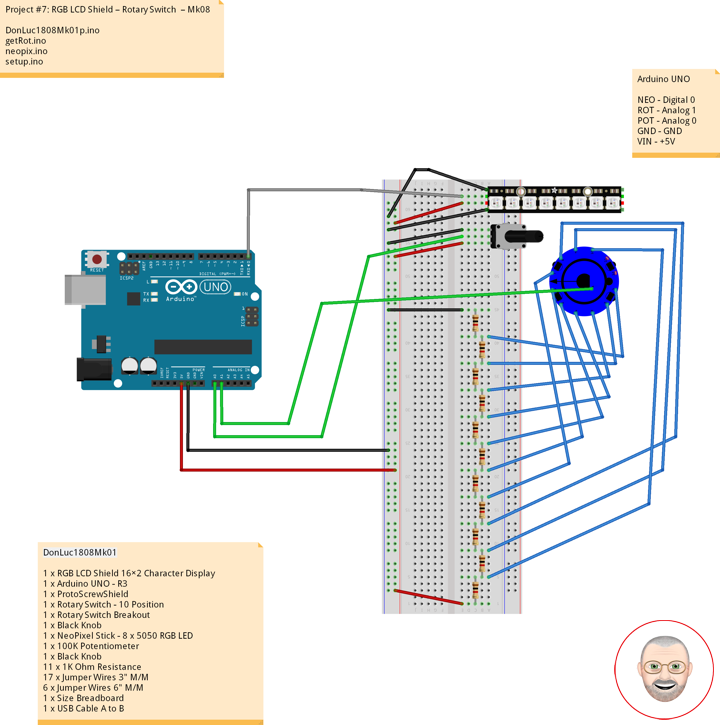
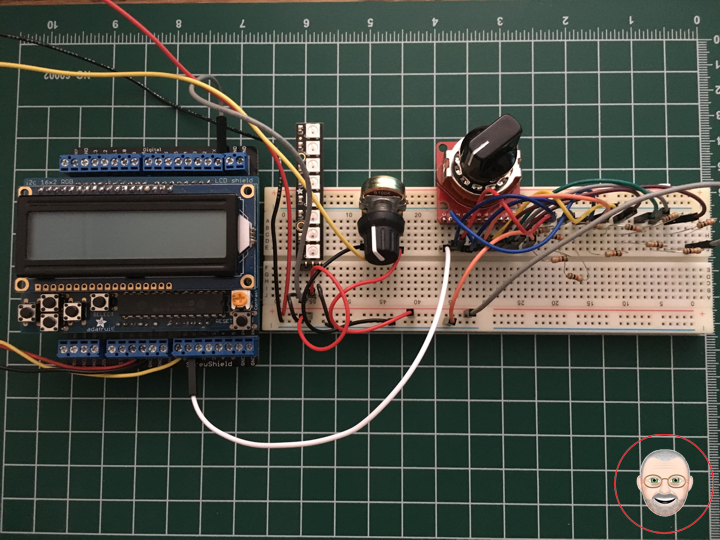
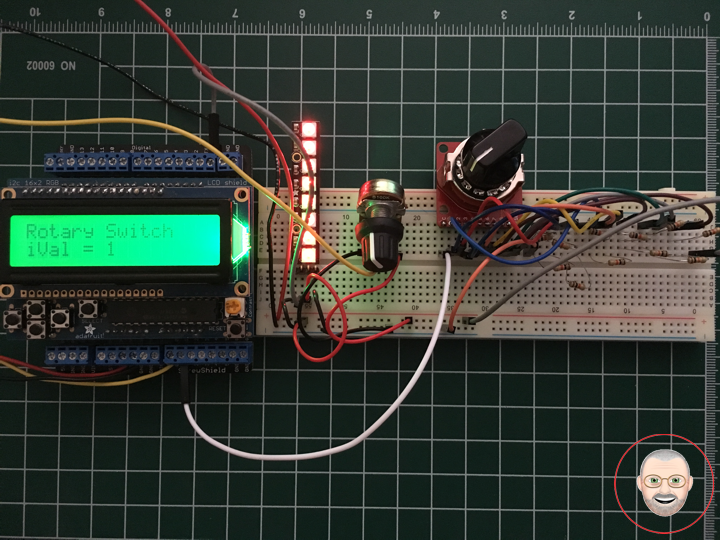
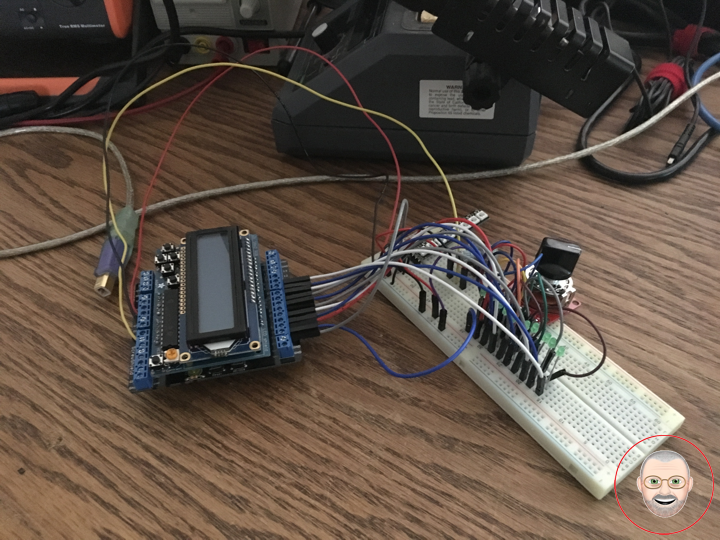
Project #7: RGB LCD Shield – Rotary Switch – Mk08
Rotary Switch – 10 Position
This is a single pole, 10 position rotary switch able to select up to 10 different states in a durable package. Unlike our other rotary switch, this model is much more robust and capable of handling larger currents and voltages.
With a max voltage rating of 125VAC at 0.3A and a dielectric strength of 250VAC for 1 minute this is a serious little rotary switch capable of working with some of your bigger projects. Though this switch requires you to use 11 pins and is not breadboard friendly we do offer a breakout board (found in the Recommended Products section below) to provide easier access to its capabilities.
1 x Rotary Switch – 10 Position
1 x Hex Nut
2 x Washer
Rating: 0.3A/125VAC
Contact Resistance: 50M Ohm max
Insulation Resistance: 100M Ohm @ 500VDC min
Dielectric Strength: 250VAC for 1 minute
Rotation torque: 1.0+0.5KG/cm
Shaft: 3/8″
Rotary Switch Breakout
This is the SparkFun Rotary Switch Breakout, a very simple board designed to easily provide you access to each pin on our 10-position rotary switches. This breakout allows you to easily add a rotary switch to your next project without having to worry about attaching its unique footprint to a custom board or solderless breadboard. All you need to do is solder the 10-position rotary switch into the breakout (using the silkscreen on the board as a guide) and each pin will become available for breadboard or hookup wire compatibility.
Each one of these boards breaks out the common ( C ), 1, 2, 3, 4, 5, 6, 7, 8, 9, and 10 positions on the board into 0.1″ spaced pins.
NeoPixel Stick – 8 x 5050 RGB LED
Make your own little LED strip arrangement with this stick of NeoPixel LEDs. We crammed 8 of the tiny 5050 (5mm x 5mm) smart RGB LEDs onto a PCB with mounting holes and a chainable design. Use only one microcontroller pin to control as many as you can chain together! Each LED is addressable as the driver chip is inside the LED. Each one has ~18mA constant current drive so the color will be very consistent even if the voltage varies, and no external choke resistors are required making the design slim. Power the whole thing with 5VDC (4-7V works) and you’re ready to rock.
DonLuc1808Mk01
1 x RGB LCD Shield 16×2 Character Display
1 x Arduino UNO – R3
1 x ProtoScrewShield
1 x Rotary Switch – 10 Position
1 x Rotary Switch Breakout
1 x Black Knob
1 x NeoPixel Stick – 8 x 5050 RGB LED
1 x 100K Potentiometer
1 x Black Knob
11 x 1K Ohm Resistance
17 x Jumper Wires 3″ M/M
6 x Jumper Wires 6″ M/M
1 x Size Breadboard
1 x USB Cable A to B
Arduino UNO
NEO – Digital 0
ROT – Analog 1
POT – Analog 0
GND – GND
VIN – +5V
DonLuc1808Mk01p.ino
// ***** Don Luc *****
// Software Version Information
// Project #7: RGB LCD Shield – Rotary Switch – Mk08
// 8-01
// DonLuc1808Mk01p 8-01
// RGB LCD Shield
// Rotary Switch

// Include Library Code
#include <Adafruit_MCP23017.h>
#include <Adafruit_RGBLCDShield.h>
#include <Adafruit_NeoPixel.h>

// RGB LCD Shield
Adafruit_RGBLCDShield RGBLCDShield = Adafruit_RGBLCDShield();
#define GREEN 0x2

// NeoPixels
#define PIN 0                             // On digital pin 3
#define NUMPIXELS 8                       // NeoPixels NUMPIXELS = 8
Adafruit_NeoPixel pixels = Adafruit_NeoPixel(NUMPIXELS, PIN, NEO_GRB + NEO_KHZ800);
int red = 0;                              // Red
int green = 0;                            // Green
int blue = 0;                             // Blue
int iNeo = 0;                             // Neopix
const int iBriPin = A0;                   // Panel Mount 1K potentiometer Brightneed
int iBri = 0;                             // Neopix Brightness
int iBriMin = 1023;                       // Brightneed minimum sensor value
int iBriMax = 0;                          // Brightneed maximun sensor value

// Rotary Switch
// Rotary Switch - 10 Position
// Number = 1 => 10
int iRotNum = A1;                         // Rotary Switch
int iVal = 0;                             // iVal - Value
int z = 0;                                // Number

void loop()
{

  // Rotary Switch
  isRot();

  delay(1000);

  // Clear
  RGBLCDShield.clear();

}
getRot.ino
// Rotary Switch
void isRot()
{

  // NeoPixels
  for(int y=0; y < NUMPIXELS; y++)
  {
     // Black
     red = 0;                                 // Red
     green = 0;                               // Green
     blue = 0;                                // Blue
     iNeo = y;                                // Neopix
     neopix();
  }

  // Display
  // Set the cursor to column 0, line 0
  RGBLCDShield.setCursor(0,0);
  RGBLCDShield.print("Rotary Switch");        // Rotary Switch

  // Rotary Switch
  z = analogRead( iRotNum );                  // Rotary Switch
  iVal = ( z / 100 );                         // Rotary Value

  // Set the cursor to column 0, line 1
  RGBLCDShield.setCursor(0, 1);
  RGBLCDShield.print("iVal = ");              // Rotary Value
  RGBLCDShield.print( iVal + 1 );

  // Range Value
  switch ( iVal ) {
    case  0:
      // Red
      // NeoPixels
      for(int y=0; y<NUMPIXELS; y++){
         red = 255;                           // Red
         green = 0;                           // Green
         blue = 0;                            // Blue
         iNeo = y;                            // Neopix
         neopix();
      }
      break;
    case 1:
      // Green
      // NeoPixels
      for(int y=0; y<NUMPIXELS; y++){
         red = 0;                             // Red
         green = 255;                         // Green
         blue = 0;                            // Blue
         iNeo = y;                            // Neopix
         neopix();
      }
      break;
    case 2:
      // Blue
      // NeoPixels
      for(int y=0; y<NUMPIXELS; y++){
         red = 0;                             // Red
         green = 0;                           // Green
         blue = 255;                          // Blue
         iNeo = y;                            // Neopix
         neopix();
      }
      break;
    case 3:
      // White
      // NeoPixels
      for(int y=0; y<NUMPIXELS; y++){
         red = 255;                           // Red
         green = 255;                         // Green
         blue = 255;                          // Blue
         iNeo = y;                            // Neopix
         neopix();
      }
      break;
    case 4:
      // NeoPixels
      // Red
      for(int y=0; y<NUMPIXELS; y++){
         red = 255;                           // Red
         green = 0;                           // Green
         blue = 0;                            // Blue
         iNeo = y;                            // Neopix
         neopix();
      }
      delay( 2000 );
      // Green
      for(int y=0; y<NUMPIXELS; y++){
         red = 0;                             // Red
         green = 255;                         // Green
         blue = 0;                            // Blue
         iNeo = y;                            // Neopix
         neopix();
      }
      delay( 2000 );
      // Blue
      for(int y=0; y<NUMPIXELS; y++){
         red = 0;                             // Red
         green = 0;                           // Green
         blue = 255;                          // Blue
         iNeo = y;                            // Neopix
         neopix();
      }
      break;
    case 5:
      // NeoPixels
      // Yellow
      for(int y=0; y<NUMPIXELS; y++){
         red = 255;                           // Red
         green = 255;                         // Green
         blue = 0;                            // Blue
         iNeo = y;                            // Neopix
         neopix();
      }
      break;
    case 6:
      // NeoPixels
      // Orange
      for(int y=0; y<NUMPIXELS; y++){
         red = 255;                           // Red
         green = 102;                         // Green
         blue = 0;                            // Blue
         iNeo = y;                            // Neopix
         neopix();
      }
      break;
    case 7:
      // NeoPixels
      // Violet
      for(int y=0; y<NUMPIXELS; y++){
         red = 204;                           // Red
         green = 102;                         // Green
         blue = 204;                          // Blue
         iNeo = y;                            // Neopix
         neopix();
      }
      break;
    case 8:
      // NeoPixels
      // Red
      red = 255;                           // Red
      green = 0;                           // Green
      blue = 0;                            // Blue
      iNeo = 0;                            // Neopix
      neopix();
      delay( 1000 );
      // Green
      red = 0;                             // Red
      green = 255;                         // Green
      blue = 0;                            // Blue
      iNeo = 1;                            // Neopix
      neopix();
      delay( 1000 );
      // Blue
      red = 0;                             // Red
      green = 0;                           // Green
      blue = 255;                          // Blue
      iNeo = 2;                            // Neopix
      neopix();
      delay( 1000 );
      // White
      red = 255;                           // Red
      green = 255;                         // Green
      blue = 255;                          // Blue
      iNeo = 3;                            // Neopix
      neopix();
      delay( 1000 );
      // Pink
      red = 255;                           // Red
      green = 153;                         // Green
      blue = 203;                          // Blue
      iNeo = 4;                            // Neopix
      neopix();
      delay( 1000 );
      // Orange
      red = 255;                           // Red
      green = 102;                         // Green
      blue = 0;                            // Blue
      iNeo = 5;                            // Neopix
      neopix();
      delay( 1000 );
      // Violet
      red = 204;                           // Red
      green = 102;                         // Green
      blue = 204;                          // Blue
      iNeo = 6;                            // Neopix
      neopix();
      delay( 1000 );
      // Yellow
      red = 255;                           // Red
      green = 255;                         // Green
      blue = 0;                            // Blue
      iNeo = 7;                            // Neopix
      neopix();
      delay( 1000 );
      break;
    case 9:
      // NeoPixels
      // Red
      red = 255;                           // Red
      green = 0;                           // Green
      blue = 0;                            // Blue
      iNeo = 7;                            // Neopix
      neopix();
      delay( 1000 );
      // Green
      red = 0;                             // Red
      green = 255;                         // Green
      blue = 0;                            // Blue
      iNeo = 6;                            // Neopix
      neopix();
      delay( 1000 );
      // Blue
      red = 0;                             // Red
      green = 0;                           // Green
      blue = 255;                          // Blue
      iNeo = 5;                            // Neopix
      neopix();
      delay( 1000 );
      // White
      red = 255;                           // Red
      green = 255;                         // Green
      blue = 255;                          // Blue
      iNeo = 4;                            // Neopix
      neopix();
      delay( 1000 );
      // Pink
      red = 255;                           // Red
      green = 153;                         // Green
      blue = 203;                          // Blue
      iNeo = 3;                            // Neopix
      neopix();
      delay( 1000 );
      // Orange
      red = 255;                           // Red
      green = 102;                         // Green
      blue = 0;                            // Blue
      iNeo = 2;                            // Neopix
      neopix();
      delay( 1000 );
      // Violet
      red = 204;                           // Red
      green = 102;                         // Green
      blue = 204;                          // Blue
      iNeo = 1;                            // Neopix
      neopix();
      delay( 1000 );
      // Yellow
      red = 255;                           // Red
      green = 255;                         // Green
      blue = 0;                            // Blue
      iNeo = 0;                            // Neopix
      neopix();
      delay( 1000 );
      break;
  }

}
neopix.ino
// NeoPixels
void neopix() {

    // Brightness
    iBri = analogRead(iBriPin);

    // iBri apply the calibration to the sensor reading
    iBri = map(iBri, iBriMin, iBriMax, 0, 255);

    // iBri in case the sensor value is outside the range seen during calibration
    iBri = constrain(iBri, 0, 255);

    pixels.setBrightness( iBri );
    // Pixels.Color takes RGB values, from 0,0,0 up to 255,255,255
    pixels.setPixelColor( iNeo, pixels.Color(red,green,blue) );
    // This sends the updated pixel color to the hardware
    pixels.show();
    // Delay for a period of time (in milliseconds)
    delay(50);

}
setup.ino
// Setup
void setup()
{

  // set up the LCD's number of columns and rows:
  RGBLCDShield.begin(16, 2);
  RGBLCDShield.setBacklight(GREEN);

  // Display
  // Set the cursor to column 0, line 0
  RGBLCDShield.setCursor(0,0);
  RGBLCDShield.print("Don Luc");           // Don luc
  // Set the cursor to column 0, line 1
  RGBLCDShield.setCursor(0, 1);
  RGBLCDShield.print("Rotary Switch");     // Rotary Switch
  delay(5000);

  // Clear
  RGBLCDShield.clear();

  // NeoPixels
  pixels.begin();          // This initializes the NeoPixel library
  // NeoPixels

  for(int y=0; y < NUMPIXELS; y++)
  {
     // Black
     red = 0;                                 // Red
     green = 0;                               // Green
     blue = 0;                                // Blue
     iNeo = y;                                // Neopix
     neopix();
  }

}
Don Luc
Propaganda Electronics
Electronics
Electronics has been linked to by thousands of schools and universities, professional associations and research organizations, reference sources and other information authorities, newspapers, magazines and other news services, and increasingly bloggers and social networking sites such as Facebook, Twitter, Google+, and LinkedIn. Electronics enjoys high rankings with popular web search engines such as Google and Yahoo for hundreds of electronically important keywords, including the word “electronics” for which the site comes up in typically the top three search results.
Propaganda
Propaganda is information that is not objective and is used primarily to influence an audience and further an agenda, often by presenting facts selectively to encourage a particular synthesis or perception, or using loaded language to produce an emotional rather than a rational response to the information that is presented. Propaganda is often associated with material prepared by governments, but activist groups, companies and the media can also produce propaganda.
In the twentieth century, the term propaganda has been associated with a manipulative approach, but propaganda historically was a neutral descriptive term. A wide range of materials and media are used for conveying propaganda messages, which changed as new technologies were invented, including paintings, cartoons, posters, pamphlets, films, radio shows, TV shows, and websites.
Advertising
Propaganda shares techniques with advertising and public relations, each of which can be thought of as propaganda that promotes a commercial product or shapes the perception of an organization, person, or brand.
Journalistic theory generally holds that news items should be objective, giving the reader an accurate background and analysis of the subject at hand. On the other hand, advertisements evolved from the traditional commercial advertisements to include also a new type in the form of paid articles or broadcasts disguised as news. These generally present an issue in a very subjective and often misleading light, primarily meant to persuade rather than inform. Normally they use only subtle propaganda techniques and not the more obvious ones used in traditional commercial advertisements.
If the reader believes that a paid advertisement is in fact a news item, the message the advertiser is trying to communicate will be more easily “believed” or “internalized”. Such advertisements are considered obvious examples of “covert” propaganda because they take on the appearance of objective information rather than the appearance of propaganda, which is misleading. Federal law specifically mandates that any advertisement appearing in the format of a news item must state that the item is in fact a paid advertisement.
Techniques
Common media for transmitting propaganda messages include news reports, government reports, historical revision, junk science, books, leaflets, movies, radio, television, and posters. Some propaganda campaigns follow a strategic transmission pattern to indoctrinate the target group. This may begin with a simple transmission, such as a leaflet or advertisement dropped from a plane or an advertisement.
Generally these messages will contain directions on how to obtain more information, via a web site, hot line, radio program, etc. (as it is seen also for selling purposes among other goals). The strategy intends to initiate the individual from information recipient to information seeker through reinforcement, and then from information seeker to opinion leader through indoctrination.
A number of techniques based in social psychological research are used to generate propaganda. Many of these same techniques can be found under logical fallacies, since propagandists use arguments that, while sometimes convincing, are not necessarily valid.
Some time has been spent analyzing the means by which the propaganda messages are transmitted. That work is important but it is clear that information dissemination strategies become propaganda strategies only when coupled with propagandistic messages. Identifying these messages is a necessary prerequisite to study the methods by which those messages are spread.
Identifying
1. Consider the source (to understand its mission and purpose)
2. Read beyond the headline (to understand the whole story)
3. Check the authors (to see if they are real and credible)
4. Assess the supporting sources (to ensure they support the claims)
5. Check the date of publication (to see if the story is relevant and up to date)
6. Review your own biases (to see if they are affecting your judgement)
7. Ask experts (to get confirmation from independent people with knowledge)
Fake Electronics
The counterfeit means to imitate something. Counterfeit products are fakes or unauthorized replicas of the real product. Counterfeit products are often produced with the intent to take advantage of the superior value of the imitated product. The word counterfeit frequently describes both pharmaceuticals, aviation and automobile parts, watches, electronics (both parts and finished products), software.
Counterfeit products tend to have fake have a reputation for being lower quality (sometimes not working at all) and may even include toxic elements such as lead. This has resulted in the deaths of hundreds of thousands of people, due to automobile and aviation accidents, poisoning, or ceasing to take essential compounds (e.g., in the case a person takes non-working medicine).
Well, here are several online portals offering best stuff on electronics. But you should bear in mind that all the providers are not safe and may be you will provide you best quality products but charge of the products are very high. And I will tell you the best websites where you can get the attire as per your taste, if you’re looking for cheaper purchases.
Think of all the popular hardware brands in technology right now. The Apple and Sony that have the distinct honor of being considered a luxury brand. Everyone wants one and anyone who’s anyone would buy and flaunt them to their peers, creating an appeal. Unfortunately, not everyone can afford them and that’s where knockoffs come to the rescue.
These knockoffs were made as a copy of the original, sometimes using the logo and design of the original. Sometimes they get it right and many might not notice. Often at times, they get it wrong. Very wrong, in fact, to the point of hilarity. Here of the most amusing knockoffs of popular tech brands that you may have seen.
From quirky gadgets to fab mobile phones, India, South Korea, Japan and China are famous for producing trend-setting technologies that often take years to find their way to the West. Turns out there are a number of websites selling ultra-cool Asian electronics internationally for you techies out there. We’ve created a list of what we think are some of the top Asian tech-selling sites.
Another wholesaler for quirky, cool fake electronics tech stuff, stocks mobile phones and laptops as well as less mainstream gadgets. Spy on neighbors with the digital surveillance pen featuring image capture and video recording. The extreme sports helmet camera will let you capture crazy want to show your friends.
Fake electronics is the infamous shopping site offering B2B sales. Businesses can connect directly with wholesalers and manufacturers in India, South Korea, Japan, China, Taiwan, Hong Kong, Malaysia or Singapore.
Don Luc
