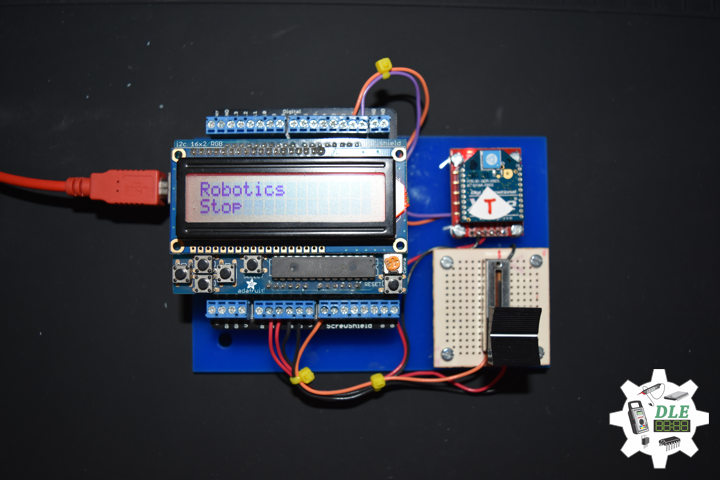
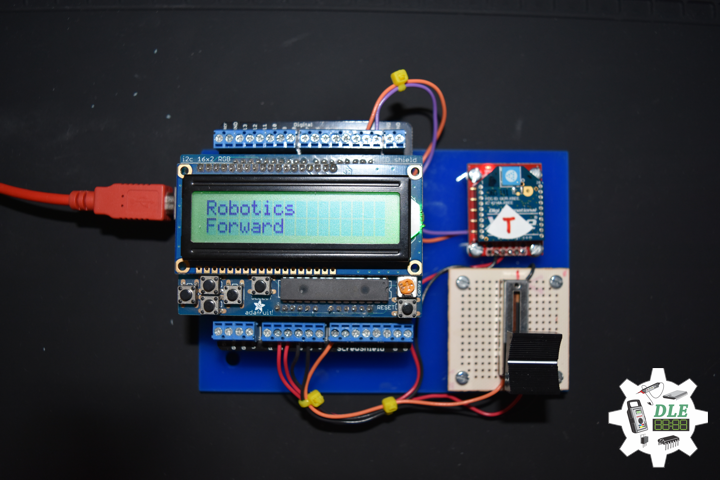
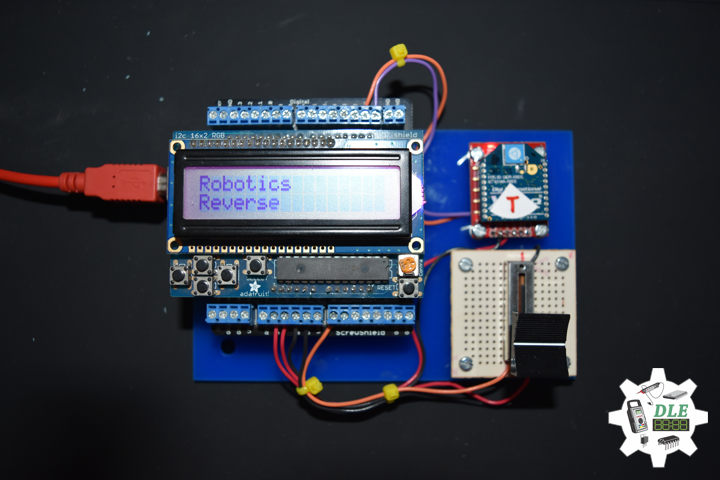
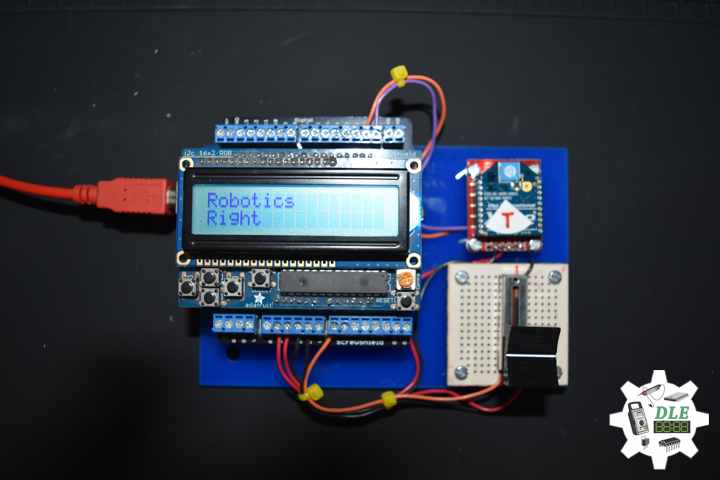
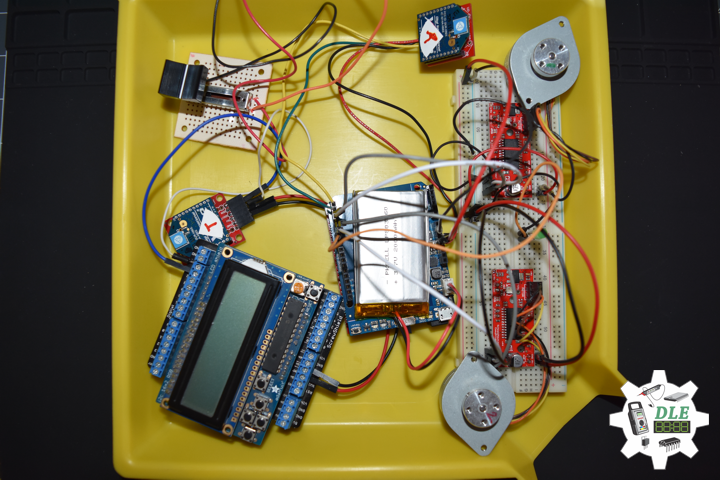
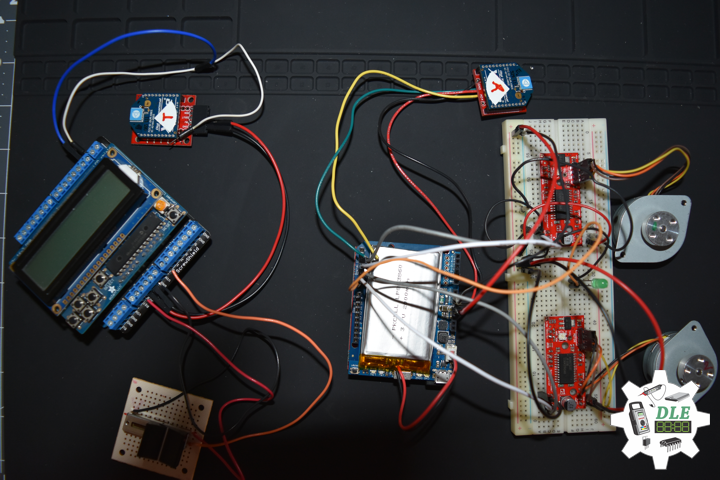
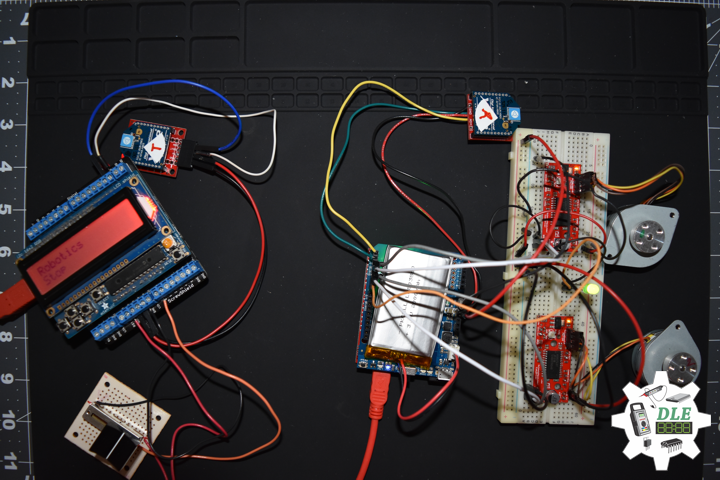
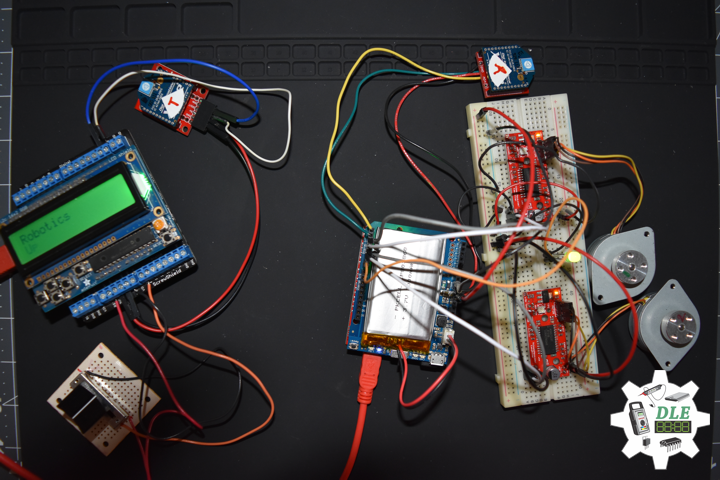
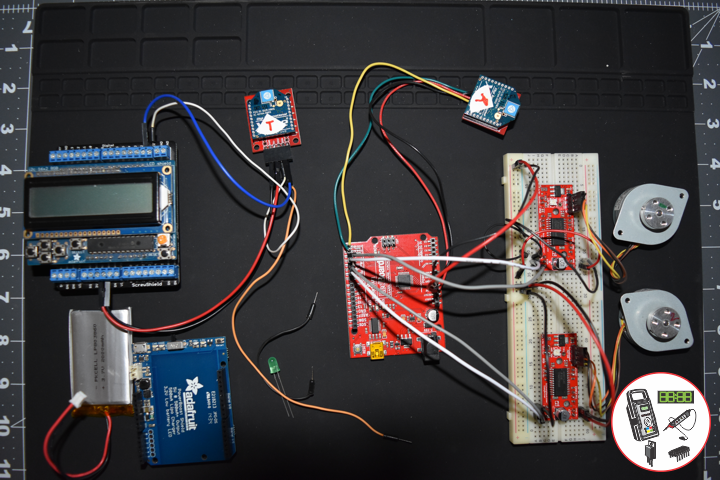
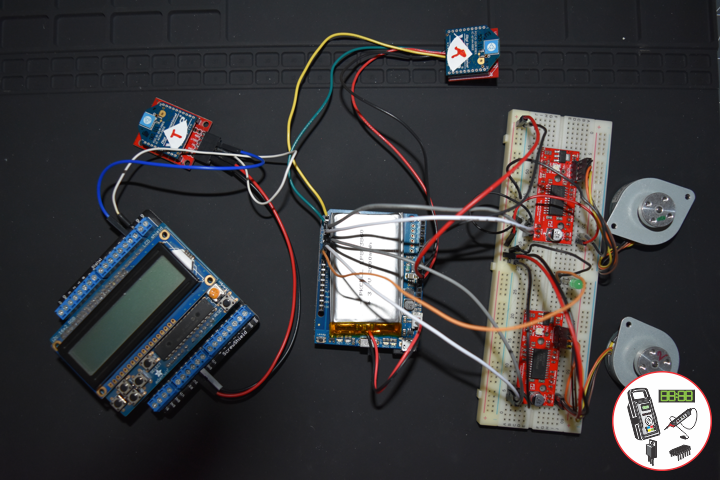
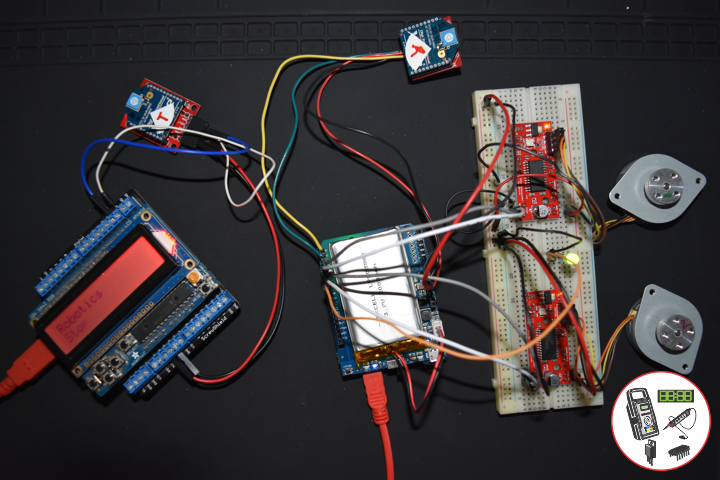
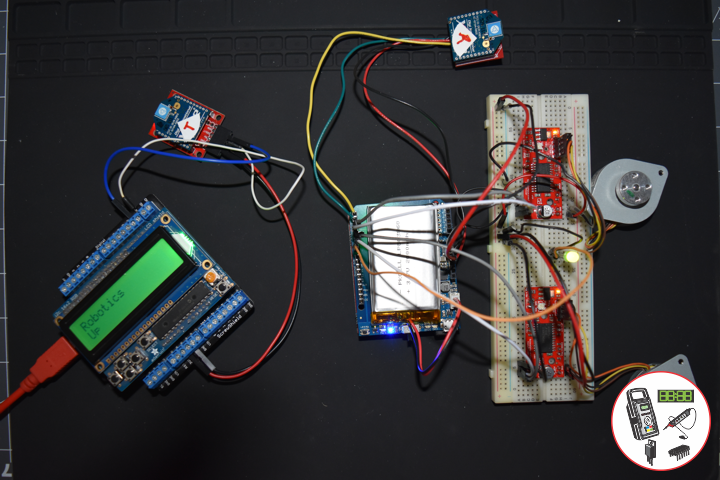
Project
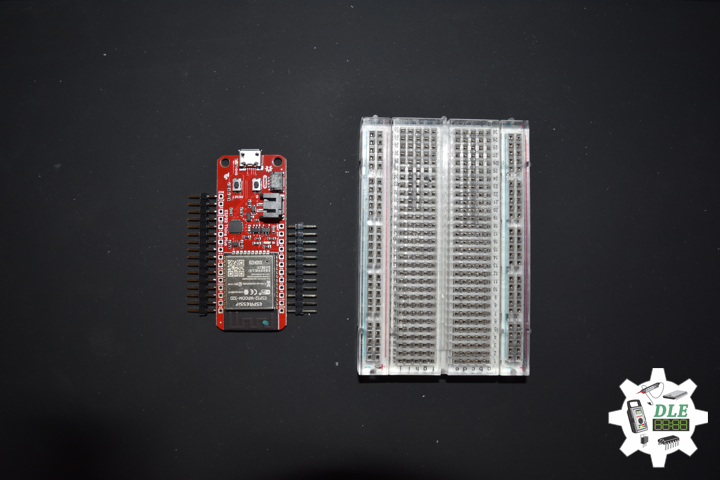
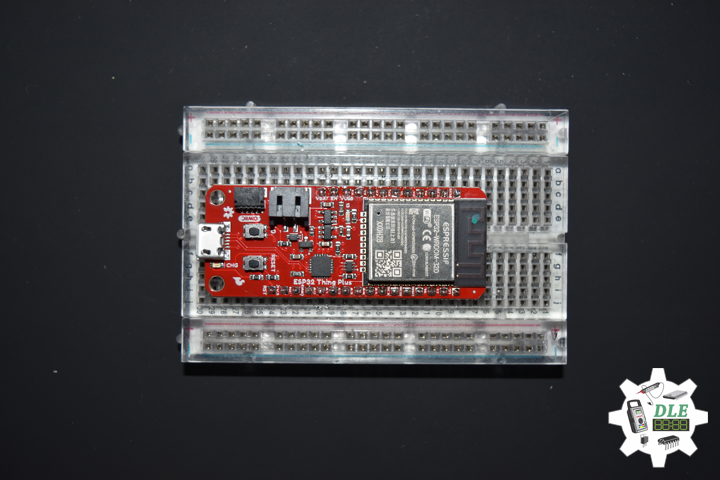
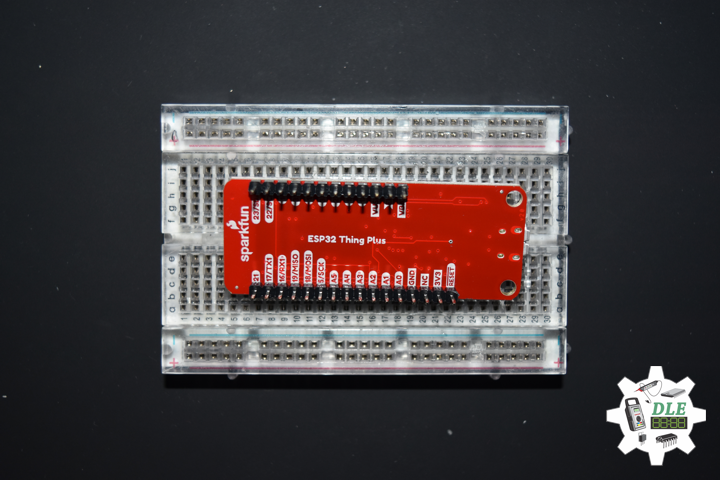
Project #14: Components – SparkFun Thing Plus – ESP32 WROOM – Mk08
——
——
——
——
SparkFun Thing Plus – ESP32 WROOM
SparkFun Item: WRL-15663
The SparkFun ESP32 Thing Plus is the next step to get started with Espressif IoT ideations while still enjoying all the amenities of the original ESP32 Thing. Espressif’s ESP32 WROOM is a powerful WiFi and Bluetooth MCU module that targets a wide variety of applications. At the core of this module is the ESP32-D0WDQ6 chip which is designed to be both scalable and adaptive. To make the Thing Plus even easier to use, we’ve moved a few pins around to make the board Feather compatible and it utilizes our handy Qwiic Connect System which means no soldering or shields are required to connect it to the rest of your system.
Technology Experience
- Research & Development (R & D)
- Desktop Applications (Windows, OSX, Linux, Multi-OS, Multi-Tier, etc…)
- Mobile Applications (Android, iOS, Blackberry, Windows Mobile, Windows CE, etc…)
- Web Applications (LAMP, Scripting, Java, ASP, ASP.NET, RoR, Wakanda, etc…)
- Social Media Programming & Integration (Facebook, Twitter, YouTube, Pinterest, etc…)
- Content Management Systems (WordPress, Drupal, Joomla, Moodle, etc…)
- Bulletin Boards (phpBB, SMF, Vanilla, jobberBase, etc…)
- eCommerce (WooCommerce, OSCommerce, ZenCart, PayPal Shopping Cart, etc…)
Instructor
- DOS, Windows, OSX, Linux, iOS, Android, Multi-OS
- Linux-Apache-PHP-MySQL
- Robotics
- Arduino
- Raspberry Pi
- Espressif
Follow Us
The Alpha Geek
Aphasia
https://www.donluc.com/?page_id=2149
J. Luc Paquin – Curriculum Vitae
https://www.donluc.com/DLHackster/LucPaquinCVEngMk2020a.pdf
Web: https://www.donluc.com/
Web: http://www.jlpconsultants.com/
Web: https://www.donluc.com/DLHackster/
Web: https://www.hackster.io/neosteam-labs
Facebook: https://www.facebook.com/neosteam.labs.9/
YouTube: https://www.youtube.com/channel/UC5eRjrGn1CqkkGfZy0jxEdA
Twitter: https://twitter.com/labs_steam
Pinterest: https://www.pinterest.com/NeoSteamLabs/
Don Luc
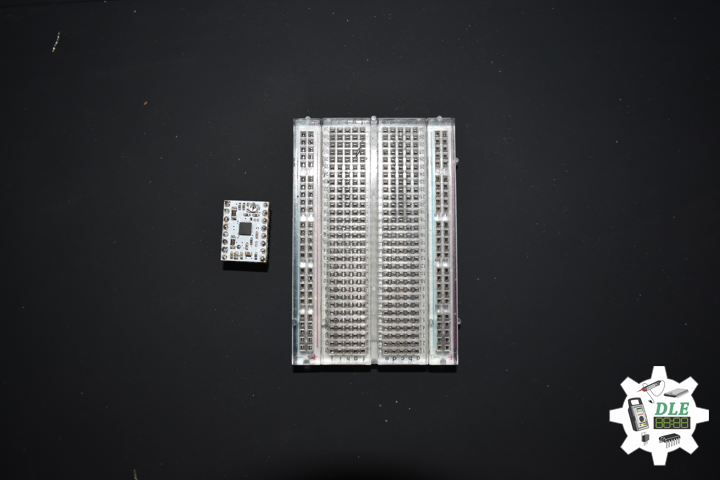
Project #14: Components – Pololu DRV8834 Stepper Motor Driver – Mk06
——
——
——
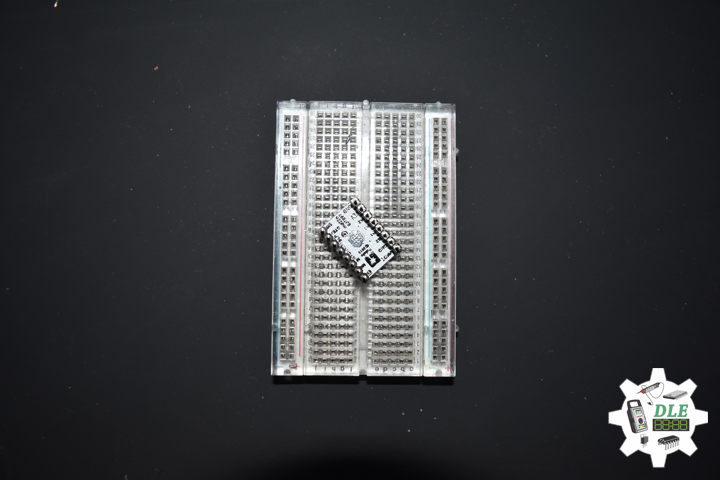
Pololu DRV8834 Low-Voltage Stepper Motor Driver Carrier
Pololu Item: 2134
This is a breakout board for TI’s DRV8834 microstepping bipolar stepper motor driver. It has a pinout and interface that are nearly identical to those of our A4988 carriers, so it can be used as a drop-in replacement for those boards in many applications. The DRV8834 operates from 2.5–10.8 V, allowing stepper motors to be powered with voltages that are too low for other drivers, and can deliver up to approximately 1.5 A per phase continuously without a heat sink or forced air flow (up to 2 A peak). It features adjustable current limiting, overcurrent and overtemperature protection, and six microstep resolutions (down to 1/32-step). This board ships with 0.1in male header pins included but not soldered in.
Technology Experience
- Research & Development (R & D)
- Desktop Applications (Windows, OSX, Linux, Multi-OS, Multi-Tier, etc…)
- Mobile Applications (Android, iOS, Blackberry, Windows Mobile, Windows CE, etc…)
- Web Applications (LAMP, Scripting, Java, ASP, ASP.NET, RoR, Wakanda, etc…)
- Social Media Programming & Integration (Facebook, Twitter, YouTube, Pinterest, etc…)
- Content Management Systems (WordPress, Drupal, Joomla, Moodle, etc…)
- Bulletin Boards (phpBB, SMF, Vanilla, jobberBase, etc…)
- eCommerce (WooCommerce, OSCommerce, ZenCart, PayPal Shopping Cart, etc…)
Instructor
- DOS, Windows, OSX, Linux, iOS, Android, Multi-OS
- Linux-Apache-PHP-MySQL
- Robotics
- Arduino
- Raspberry Pi
- Espressif
Follow Us
The Alpha Geek
Aphasia
https://www.donluc.com/?page_id=2149
J. Luc Paquin – Curriculum Vitae
https://www.donluc.com/DLHackster/LucPaquinCVEngMk2020a.pdf
Web: https://www.donluc.com/
Web: http://www.jlpconsultants.com/
Web: https://www.donluc.com/DLHackster/
Web: https://www.hackster.io/neosteam-labs
Facebook: https://www.facebook.com/neosteam.labs.9/
YouTube: https://www.youtube.com/channel/UC5eRjrGn1CqkkGfZy0jxEdA
Twitter: https://twitter.com/labs_steam
Pinterest: https://www.pinterest.com/NeoSteamLabs/
Don Luc
Project #12: Robotics – Unmanned Vehicles 1h – Mk12
——
——
——
——
——
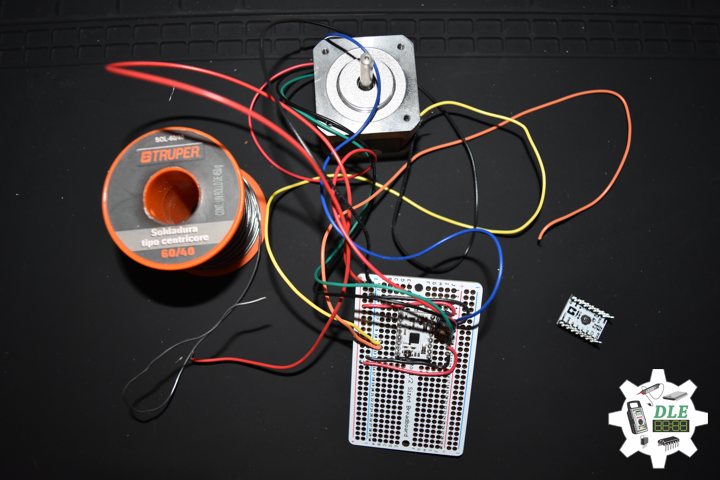
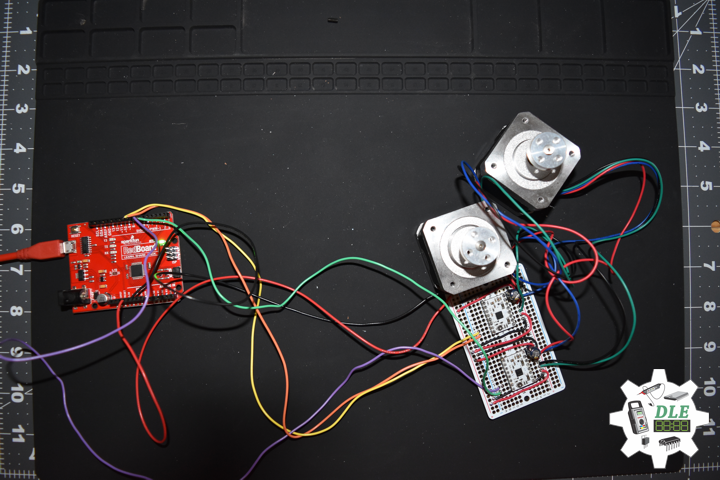
Pololu Stepper Motor Bipolar, 200 Steps/Rev, 2.8V, 1.7 A/Phase
This hybrid bipolar stepping motor has a 1.8° step angle (200 steps/revolution). Each phase draws 1.7 A at 2.8 V, allowing for a holding torque of 3.7 kg-cm. The motor has four color-coded wires terminated with bare leads: black and green connect to one coil; red and blue connect to the other.
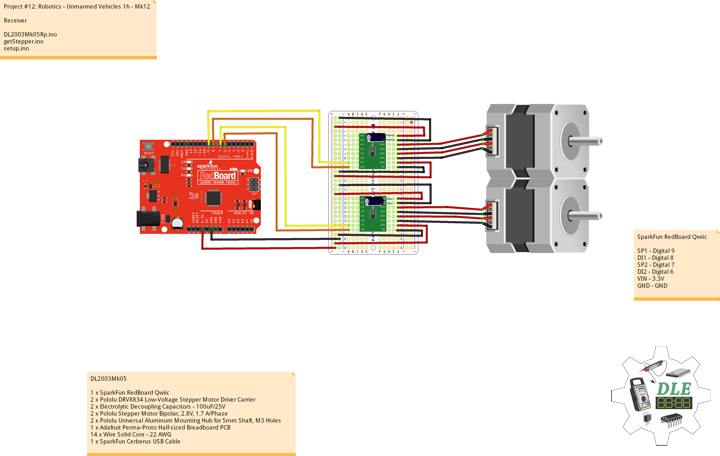
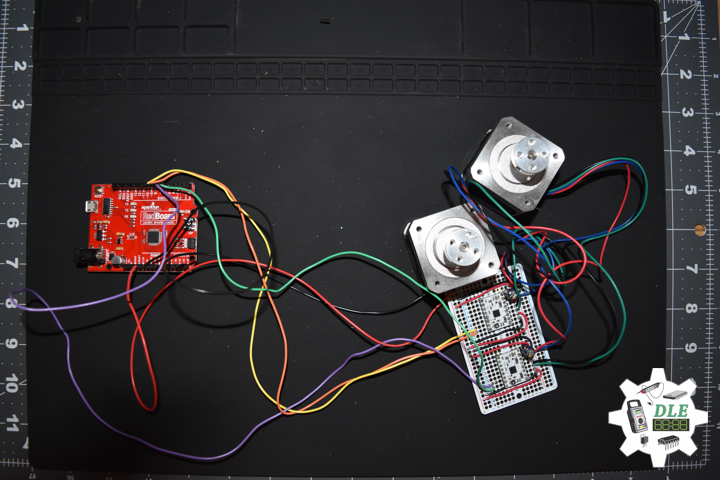
DL2003Mk05
1 x SparkFun RedBoard Qwiic
2 x Pololu DRV8834 Low-Voltage Stepper Motor Driver Carrier
2 x Electrolytic Decoupling Capacitors – 100uF/25V
2 x Pololu Stepper Motor Bipolar, 2.8V, 1.7 A/Phase
2 x Pololu Universal Aluminum Mounting Hub for 5mm Shaft, M3 Holes
1 x Adafruit Perma-Proto Half-sized Breadboard PCB
14 x Wire Solid Core – 22 AWG
1 x SparkFun Cerberus USB Cable
SparkFun RedBoard Qwiic
SP1 – Digital 9
DI1 – Digital 8
SP2 – Digital 7
DI2 – Digital 6
VIN – 3.3V
GND – GND
DL2003Mk05Rp.ino
// ***** Don Luc Electronics © *****
// Software Version Information
// Project #12: Robotics - Unmanned Vehicles 1h - Mk12
// 03-05
// DL2003Mk05Rp.ino 12-12
// Receiver
// 1 x SparkFun RedBoard Qwiic
// 2 x Pololu DRV8834 Low-Voltage Stepper Motor Driver Carrier
// 2 x Electrolytic Decoupling Capacitors - 100uF/25V
// 2 x Pololu Stepper Motor Bipolar, 2.8V, 1.7 A/Phase
// 2 x Pololu Universal Aluminum Mounting Hub for 5mm Shaft, M3 Holes
// 1 x Adafruit Perma-Proto Half-sized Breadboard PCB

// Include the library code:
// DRV8834 Stepper Motor Driver
#include <BasicStepperDriver.h>
#include <MultiDriver.h>

// DRV8834 Stepper Motor Driver
// Stepper motor steps per revolution. Most steppers are 200 steps or 1.8 degrees/step
#define MOTOR_STEPS 200
// Target RPM for X axis stepper motor
#define MOTOR_X_RPM 800
// Target RPM for Y axis stepper motor
#define MOTOR_Y_RPM 800
// Since microstepping is set externally, make sure this matches the selected mode
// If it doesn't, the motor will move at a different RPM than chosen
// 1=full step, 2=half step etc.
#define MICROSTEPS 1
// X Stepper motor
#define DIR_X 8
#define STEP_X 9
// Y Stepper motor
#define DIR_Y 6
#define STEP_Y 7
// BasicStepperDriver
BasicStepperDriver stepperX(MOTOR_STEPS, DIR_X, STEP_X);
BasicStepperDriver stepperY(MOTOR_STEPS, DIR_Y, STEP_Y);
// Pick one of the two controllers below each motor moves independently
MultiDriver controller(stepperX, stepperY);

// Software Version Information
String sver = "12-12";
// Unit ID information
String uid = "";

void loop() {

   controller.rotate(360, 360);

}
getStepper.ino
// Stepper
// isStepperSetup
void isStepperSetup() {

  // Set stepper target motors RPM.
  stepperX.begin(MOTOR_X_RPM, MICROSTEPS);
  stepperY.begin(MOTOR_Y_RPM, MICROSTEPS);

}
setup.ino
// Setup
void setup() {

  // DRV8834 Stepper Motor Driver
  isStepperSetup();

}
Technology Experience
- Research & Development (R & D)
- Desktop Applications (Windows, OSX, Linux, Multi-OS, Multi-Tier, etc…)
- Mobile Applications (Android, iOS, Blackberry, Windows Mobile, Windows CE, etc…)
- Web Applications (LAMP, Scripting, Java, ASP, ASP.NET, RoR, Wakanda, etc…)
- Social Media Programming & Integration (Facebook, Twitter, YouTube, Pinterest, etc…)
- Content Management Systems (WordPress, Drupal, Joomla, Moodle, etc…)
- Bulletin Boards (phpBB, SMF, Vanilla, jobberBase, etc…)
- eCommerce (WooCommerce, OSCommerce, ZenCart, PayPal Shopping Cart, etc…)
Instructor
- DOS, Windows, OSX, Linux, iOS, Android, Multi-OS
- Linux-Apache-PHP-MySQL
- Robotics
- Arduino
- Raspberry Pi
- Espressif
Follow Us
The Alpha Geek
Aphasia
https://www.donluc.com/?page_id=2149
J. Luc Paquin – Curriculum Vitae
https://www.donluc.com/DLHackster/LucPaquinCVEngMk2020a.pdf
Web: https://www.donluc.com/
Web: http://www.jlpconsultants.com/
Web: https://www.donluc.com/DLHackster/
Web: https://www.hackster.io/neosteam-labs
Facebook: https://www.facebook.com/neosteam.labs.9/
YouTube: https://www.youtube.com/channel/UC5eRjrGn1CqkkGfZy0jxEdA
Twitter: https://twitter.com/labs_steam
Pinterest: https://www.pinterest.com/NeoSteamLabs/
Don Luc
Project #12: Robotics – Unmanned Vehicles 1g – Mk11
——
——
Receiver – Rain – Etc…
Technology Experience
- Research & Development (R & D)
- Desktop Applications (Windows, OSX, Linux, Multi-OS, Multi-Tier, etc…)
- Mobile Applications (Android, iOS, Blackberry, Windows Mobile, Windows CE, etc…)
- Web Applications (LAMP, Scripting, Java, ASP, ASP.NET, RoR, Wakanda, etc…)
- Social Media Programming & Integration (Facebook, Twitter, YouTube, Pinterest, etc…)
- Content Management Systems (WordPress, Drupal, Joomla, Moodle, etc…)
- Bulletin Boards (phpBB, SMF, Vanilla, jobberBase, etc…)
- eCommerce (WooCommerce, OSCommerce, ZenCart, PayPal Shopping Cart, etc…)
Instructor
- DOS, Windows, OSX, Linux, iOS, Android, Multi-OS
- Linux-Apache-PHP-MySQL
- Robotics
- Arduino
- Raspberry Pi
- Espressif
Follow Us
The Alpha Geek
Aphasia
https://www.donluc.com/?page_id=2149
J. Luc Paquin – Curriculum Vitae
https://www.donluc.com/DLHackster/LucPaquinCVEngMk2020a.pdf
Web: https://www.donluc.com/
Web: http://www.jlpconsultants.com/
Web: https://www.donluc.com/DLHackster/
Web: https://www.hackster.io/neosteam-labs
Facebook: https://www.facebook.com/neosteam.labs.9/
YouTube: https://www.youtube.com/channel/UC5eRjrGn1CqkkGfZy0jxEdA
Twitter: https://twitter.com/labs_steam
Pinterest: https://www.pinterest.com/NeoSteamLabs/
Don Luc
Project #14: Components – SparkFun XBee Explorer Regulated – Mk05
——
——
——
——
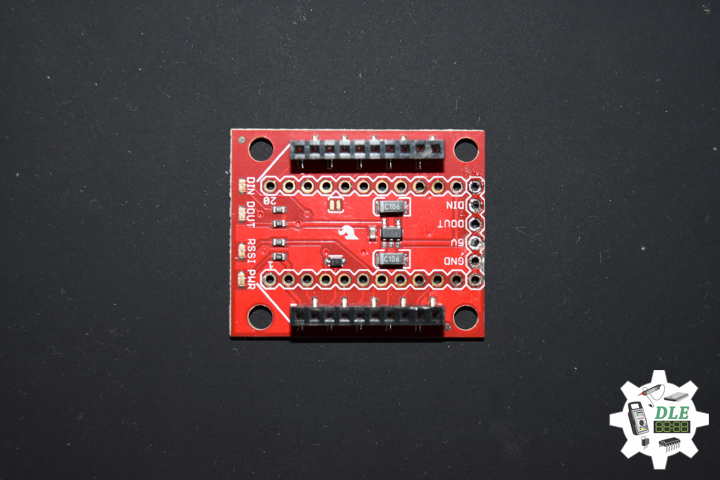
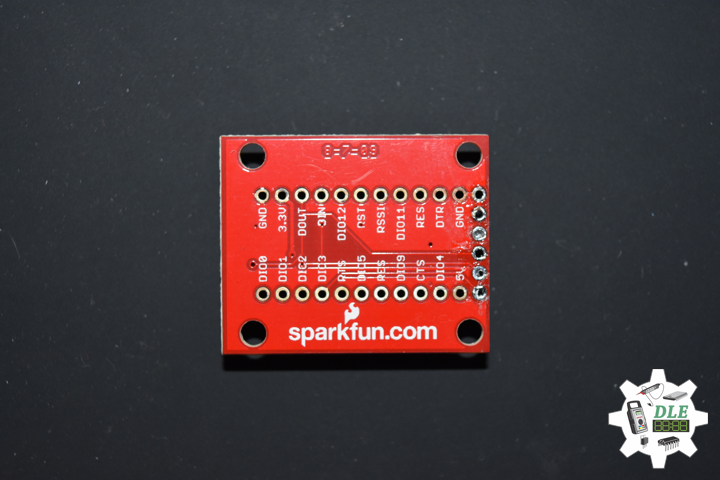
SparkFun XBee Explorer Regulated
SparkFun Item: WRL-11373
The SparkFun XBee Explorer Regulated takes care of the 3.3V regulation, signal conditioning, and basic activity indicators. It translates the 5V serial signals to 3.3V so that you can connect a 5V (down to 3.3V) system to any XBee module. The board was conveniently designed to mate directly with the SparkFun Arduino Pro series of boards for wireless bootloading and USB based configuration.
Follow Us
J. Luc Paquin – Curriculum Vitae
https://www.donluc.com/DLHackster/LucPaquinCVEngMk2020a.pdf
Web: https://www.donluc.com/
Web: http://www.jlpconsultants.com/
Web: https://www.donluc.com/DLHackster/
Web: https://www.hackster.io/neosteam-labs
Web: http://neosteamlabs.com/
YouTube: https://www.youtube.com/channel/UC5eRjrGn1CqkkGfZy0jxEdA
Facebook: https://www.facebook.com/neosteam.labs.9/
Instagram: https://www.instagram.com/neosteamlabs/
Pinterest: https://www.pinterest.com/NeoSteamLabs/
Twitter: https://twitter.com/labs_steam
Etsy: https://www.etsy.com/shop/NeoSteamLabs
Don Luc
Project #12: Robotics – Unmanned Vehicles 1f – Mk10
——
——
——
——
——
——
——
——
——
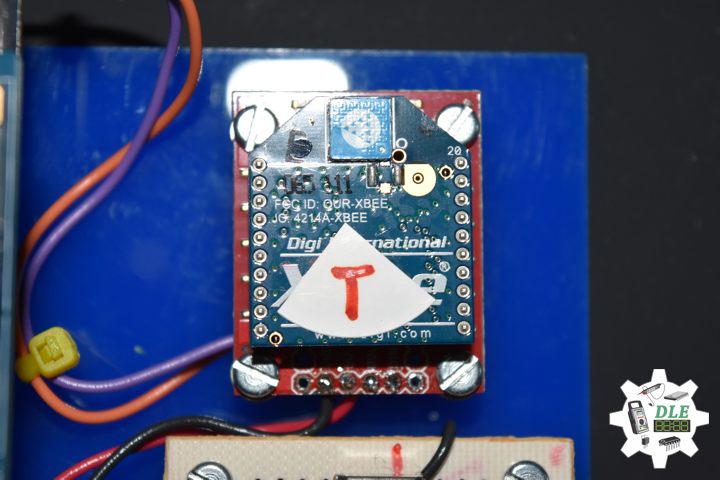
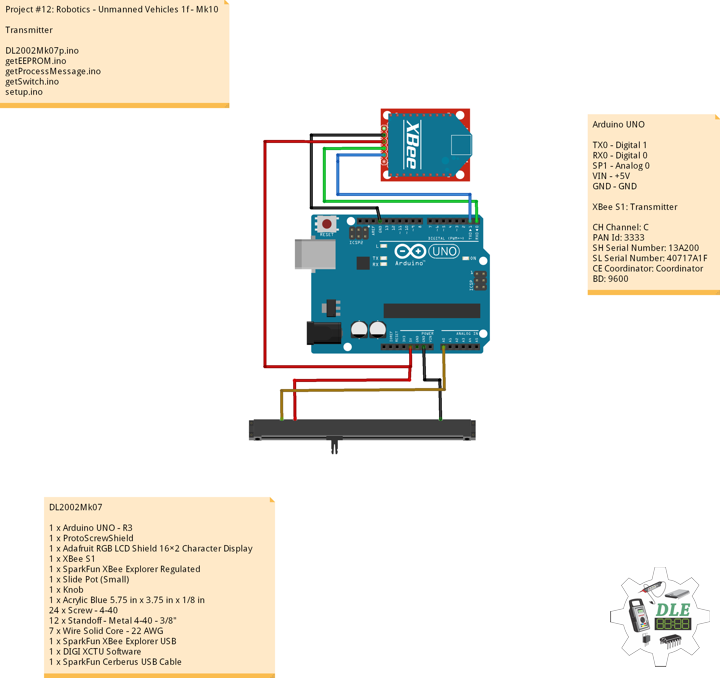
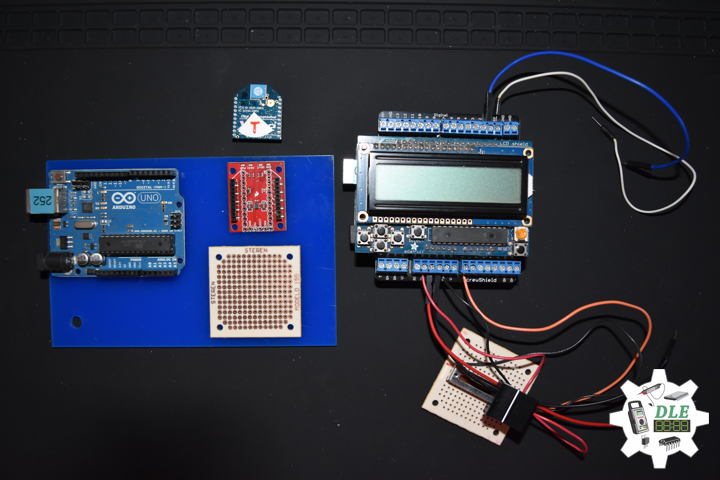
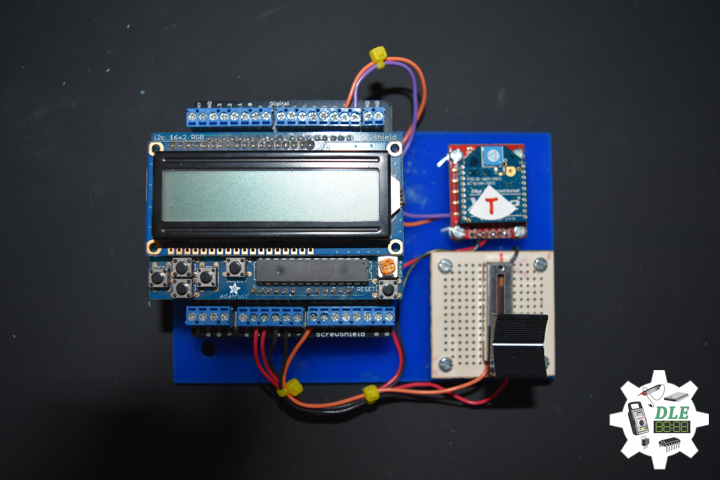
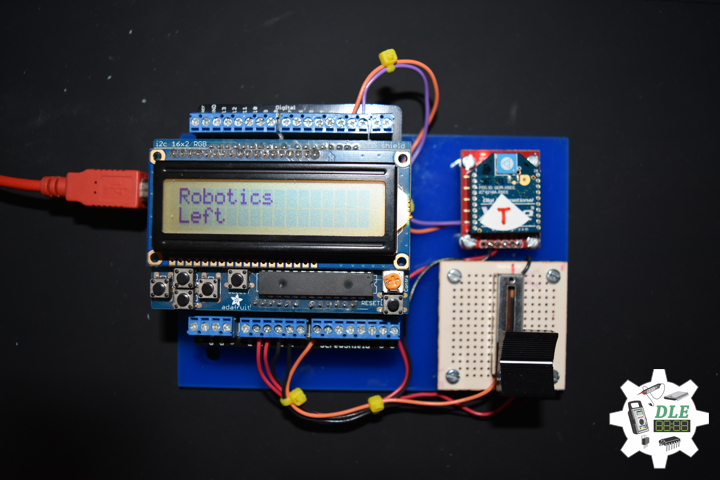
Transmitter
DL2002Mk07
1 x Arduino UNO – R3
1 x ProtoScrewShield
1 x Adafruit RGB LCD Shield 16×2 Character Display
1 x XBee S1
1 x SparkFun XBee Explorer Regulated
1 x Slide Pot (Small)
1 x Knob
1 x Acrylic Blue 5.75in x 3.75in x 1/8in
24 x Screw – 4-40
12 x Standoff – Metal 4-40 – 3/8″
7 x Wire Solid Core – 22 AWG
1 x SparkFun XBee Explorer USB
1 x DIGI XCTU Software
1 x SparkFun Cerberus USB Cable
Arduino UNO
TX0 – Digital 1
RX0 – Digital 0
LP1 – Analog A0
VIN – +5V
GND – GND
XBee S1: Transmitter
CH Channel: C
PAN Id: 3333
SH Serial Number: 13A200
SL Serial Number: 40717A1F
CE Coordinator: Coordinator
BD: 9600
DL2002Mk07p.ino
// ***** Don Luc Electronics © *****
// Software Version Information
// Project #12: Robotics - Unmanned Vehicles 1f - Mk10
// 02-07
// DL2002Mk01p.ino 12-10
// Arduino UNO - R3
// ProtoScrewShield
// Adafruit RGB LCD Shield 16×2 Character Display
// EEPROM with Unique ID
// Transmitter
// XBee S1
// Stepper
// Slide Pot (Small)
// Knob

// Include the library code:
// EEPROM library to read and write EEPROM with unique ID for unit
#include <EEPROM.h>
// Adafruit RGB LCD Shield
#include <Adafruit_RGBLCDShield.h>

// Adafruit RGB LCD Shield
Adafruit_RGBLCDShield RGBLCDShield = Adafruit_RGBLCDShield();

// These #defines make it easy to set the backlight color
#define OFF 0x0
#define RED 0x1
#define YELLOW 0x3
#define GREEN 0x2
#define TEAL 0x6
#define BLUE 0x4
#define VIOLET 0x5
#define WHITE 0x7

// Momentary Button
int yy = 0;
uint8_t momentaryButton = 0;

// Communication
unsigned long dTime = 50;

// Slide Pot (Small)
int iSP1 = A0;                           // Select the input pin for the slide pot
int iValue = 0;                          // Variable to store the value

// The current address in the EEPROM (i.e. which byte we're going to  read to next)
// Version
String sver = "12-10.p";
// Unit ID Information
String uid = "";

void loop() {

  // Clear
  RGBLCDShield.clear();

  // set the cursor to column 0, line 0
  RGBLCDShield.setCursor(0,0);
  RGBLCDShield.print("Robotics");         // Robotics

  // Momentary Button
  momentaryButton = RGBLCDShield.readButtons();

  switch ( yy ) {
    case 1:

      // Forward
      isSwitch1();

      break;
    case 2:

      // Reverse
      isSwitch2();

      break;
    case 3:

      // Right
      isSwitch3();

      break;
    case 4:

      // Left
      isSwitch4();

      break;
    case 5:

      // Stop
      isSwitch5();

      break;
    default:

      // Stop
      yy = 5;
      RGBLCDShield.setBacklight(RED);
      isSwitch5();

   }

   if ( momentaryButton ) {

    if ( momentaryButton & BUTTON_UP ) {

      yy = 1;
      // Forward
      RGBLCDShield.setBacklight(GREEN);

    }

    if ( momentaryButton & BUTTON_DOWN ) {

      yy = 2;
      // Reverse
      RGBLCDShield.setBacklight(VIOLET);

    }

    if ( momentaryButton & BUTTON_LEFT ) {

      yy = 3;
      // Right
      RGBLCDShield.setBacklight(TEAL);

    }

    if ( momentaryButton & BUTTON_RIGHT ) {

      yy = 4;
      // Left
      RGBLCDShield.setBacklight(YELLOW);
    }

    if ( momentaryButton & BUTTON_SELECT ) {

      yy = 5;
      // Stop
      RGBLCDShield.setBacklight(RED);

    }

  }

  // Read the value
  iValue = analogRead( iSP1 );

  // Process Message
  isProcessMessage();

  delay( dTime );

}
getEEPROM.ino
// EEPROM
// isUID
void isUID()
{

  // Is Unit ID
  uid = "";
  for (int x = 0; x < 5; x++)
  {
    uid = uid + char(EEPROM.read(x));
  }

}
getProcessMessage.ino
// ProcessMessage
// isProcessMessage
void isProcessMessage() {

    // Loop through serial buffer
    while ( Serial.available() )
   {

      // Print = "<" + yy + "|" + sver + "|" + iValue + "*"

      Serial.print( '<'  );
      Serial.print( yy );
      Serial.print( '|' );
      Serial.print( iValue );
      Serial.println( '*' );

   }

}
getSwitch.ino
// Switch
// Switch 1
void isSwitch1(){

   yy = 1;

   // Stepper
   // Forward
   RGBLCDShield.setCursor(0,1);
   RGBLCDShield.print("Forward");

}
// Switch 2
void isSwitch2(){

   yy = 2;

   // Stepper
   // Reverse
   RGBLCDShield.setCursor(0,1);
   RGBLCDShield.print("Reverse");

}
// Switch 3
void isSwitch3(){

   yy = 3;

   // Stepper
   // Right
   RGBLCDShield.setCursor(0,1);
   RGBLCDShield.print("Right");

}
// Switch 4
void isSwitch4(){

   yy = 4;

   // Stepper
   // Left
   RGBLCDShield.setCursor(0,1);
   RGBLCDShield.print("Left");

}
// Switch 5
void isSwitch5(){

   yy = 5;

   // Stepper
   // Stop
   RGBLCDShield.setCursor(0,1);
   RGBLCDShield.print("Stop");

}
setup.ino
// Setup
void setup() {

  // Open serial port at 9600 baud
  Serial.begin( 9600 );

  // Pause
  delay(5);

  // EEPROM Unit ID
  isUID();

  // Pause
  delay(5);

  // Adafruit RGB LCD Shield
  // Set up the LCD's number of columns and rows:
  RGBLCDShield.begin(16, 2);
  RGBLCDShield.setBacklight(GREEN);

  // Display
  // Set the cursor to column 0, line 0
  RGBLCDShield.setCursor(0,0);
  RGBLCDShield.print("Don Luc Electron");         // Don luc Electron
  // Set the cursor to column 0, line 1
  RGBLCDShield.setCursor(0, 1);
  RGBLCDShield.print("Robotics");                 // Robotics

  delay(5000);

  // Clear
  RGBLCDShield.clear();

  // Display
  // Set the cursor to column 0, line 0
  RGBLCDShield.setCursor(0,0);
  RGBLCDShield.print("Version: ");                // Version
  RGBLCDShield.print( sver );
  // Set the cursor to column 0, line 1
  RGBLCDShield.setCursor(0, 1);
  RGBLCDShield.print("UID: ");                    // Unit ID Information
  RGBLCDShield.print( uid );

  delay(5000);

  // Clear
  RGBLCDShield.clear();

}
Follow Us
J. Luc Paquin – Curriculum Vitae
https://www.donluc.com/DLHackster/LucPaquinCVEngMk2020a.pdf
Web: https://www.donluc.com/
Web: http://www.jlpconsultants.com/
Web: https://www.donluc.com/DLHackster/
Web: https://www.hackster.io/neosteam-labs
Web: http://neosteamlabs.com/
YouTube: https://www.youtube.com/channel/UC5eRjrGn1CqkkGfZy0jxEdA
Facebook: https://www.facebook.com/neosteam.labs.9/
Instagram: https://www.instagram.com/neosteamlabs/
Pinterest: https://www.pinterest.com/NeoSteamLabs/
Twitter: https://twitter.com/labs_steam
Etsy: https://www.etsy.com/shop/NeoSteamLabs
Don Luc
Project #14: Components – Pan/Tilt Bracket Kit – Mk04
——
——
——
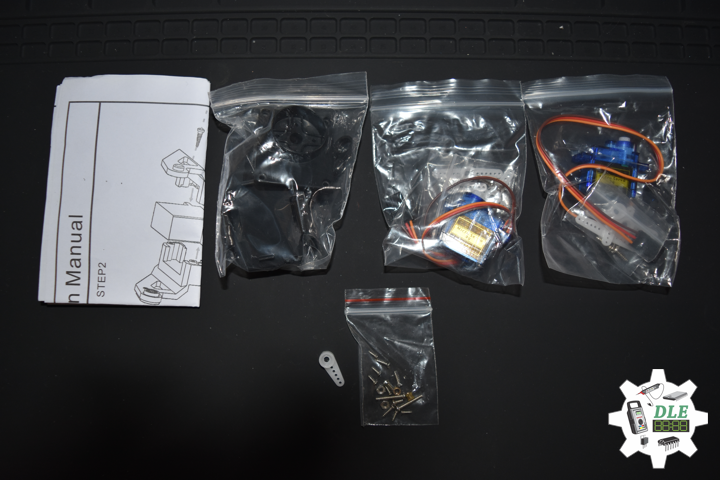
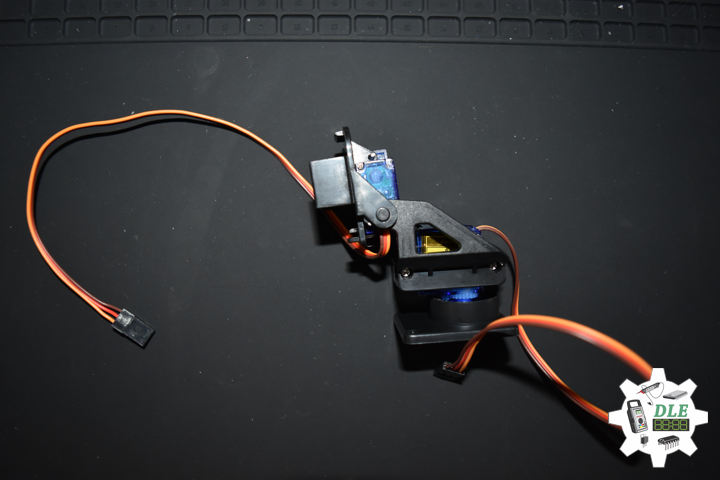
SparkFun Item: ROB-14391
This is an easy-to-assemble pan/tilt bracket kit that utilizes servos to move on two axes fit for camera and helping-hand applications. Everything is included to get this kit assembled, even the servos.
Follow Us
J. Luc Paquin – Curriculum Vitae
https://www.donluc.com/DLHackster/LucPaquinCVEngMk2020a.pdf
Web: https://www.donluc.com/
Web: http://www.jlpconsultants.com/
Web: https://www.donluc.com/DLHackster/
Web: https://www.hackster.io/neosteam-labs
Web: http://neosteamlabs.com/
YouTube: https://www.youtube.com/channel/UC5eRjrGn1CqkkGfZy0jxEdA
Facebook: https://www.facebook.com/neosteam.labs.9/
Instagram: https://www.instagram.com/neosteamlabs/
Pinterest: https://www.pinterest.com/NeoSteamLabs/
Twitter: https://twitter.com/labs_steam
Etsy: https://www.etsy.com/shop/NeoSteamLabs
Don Luc
Project #12: Robotics – Unmanned Vehicles 1e – Mk09
——
——
——
——
——
——
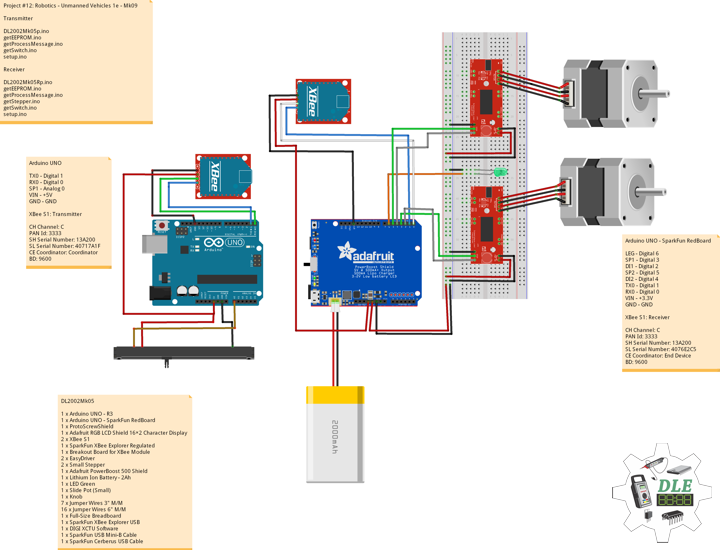
DL2002Mk05
1 x Arduino UNO – R3
1 x Arduino UNO – SparkFun RedBoard
1 x ProtoScrewShield
1 x Adafruit RGB LCD Shield 16×2 Character Display
2 x XBee S1
1 x SparkFun XBee Explorer Regulated
1 x Breakout Board for XBee Module
2 x EasyDriver
2 x Small Stepper
1 x Adafruit PowerBoost 500 Shield
1 x Lithium Ion Battery – 2Ah
1 x LED Green
1 x Slide Pot (Small)
1 x Knob
7 x Jumper Wires 3″ M/M
16 x Jumper Wires 6″ M/M
1 x Full-Size Breadboard
1 x SparkFun XBee Explorer USB
1 x DIGI XCTU Software
1 x SparkFun USB Mini-B Cable
1 x SparkFun Cerberus USB Cable
Arduino UNO
TX0 – Digital 1
RX0 – Digital 0
LP1 – Analog A0
VIN – +5V
GND – GND
XBee S1: Transmitter
CH Channel: C
PAN Id: 3333
SH Serial Number: 13A200
SL Serial Number: 40717A1F
CE Coordinator: Coordinator
BD: 9600
DL2002Mk05p.ino
// ***** Don Luc Electronics © *****
// Software Version Information
// Project #12: Robotics - Unmanned Vehicles 1d - Mk09
// 02-05
// DL2002Mk01p.ino 12-09
// Arduino UNO - R3
// ProtoScrewShield
// Adafruit RGB LCD Shield 16×2 Character Display
// EEPROM with Unique ID
// Transmitter
// XBee S1
// Stepper
// Slide Pot (Small)
// Knob

// Include the library code:
// EEPROM library to read and write EEPROM with unique ID for unit
#include <EEPROM.h>
// Adafruit RGB LCD Shield
#include <Adafruit_RGBLCDShield.h>

// Adafruit RGB LCD Shield
Adafruit_RGBLCDShield RGBLCDShield = Adafruit_RGBLCDShield();

// These #defines make it easy to set the backlight color
#define OFF 0x0
#define RED 0x1
#define YELLOW 0x3
#define GREEN 0x2
#define TEAL 0x6
#define BLUE 0x4
#define VIOLET 0x5
#define WHITE 0x7

// Momentary Button
int yy = 0;
uint8_t momentaryButton = 0;

// Communication
unsigned long dTime = 50;

// Slide Pot (Small)
int iSP1 = A0;                           // Select the input pin for the slide pot
int iValue = 0;                          // Variable to store the value

// The current address in the EEPROM (i.e. which byte we're going to  read to next)
// Version
String sver = "12-9.p";
// Unit ID Information
String uid = "";

void loop() {

  // Clear
  RGBLCDShield.clear();

  // set the cursor to column 0, line 0
  RGBLCDShield.setCursor(0,0);
  RGBLCDShield.print("Robotics");         // Robotics

  // Momentary Button
  momentaryButton = RGBLCDShield.readButtons();

  switch ( yy ) {
    case 1:

      // Up
      isSwitch1();

      break;
    case 2:

      // Down
      isSwitch2();

      break;
    case 3:

      // Right
      isSwitch3();

      break;
    case 4:

      // Left
      isSwitch4();

      break;
    case 5:

      // Stop
      isSwitch5();

      break;
    default:

      // Stop
      yy = 5;
      RGBLCDShield.setBacklight(RED);
      isSwitch5();

   }

   if ( momentaryButton ) {

    if ( momentaryButton & BUTTON_UP ) {

      yy = 1;
      // Up
      RGBLCDShield.setBacklight(GREEN);

    }

    if ( momentaryButton & BUTTON_DOWN ) {

      yy = 2;
      // Down
      RGBLCDShield.setBacklight(VIOLET);

    }

    if ( momentaryButton & BUTTON_LEFT ) {

      yy = 3;
      // Right
      RGBLCDShield.setBacklight(TEAL);

    }

    if ( momentaryButton & BUTTON_RIGHT ) {

      yy = 4;
      // Left
      RGBLCDShield.setBacklight(YELLOW);
    }

    if ( momentaryButton & BUTTON_SELECT ) {

      yy = 5;
      // Stop
      RGBLCDShield.setBacklight(RED);

    }

  }

  // Read the value
  iValue = analogRead( iSP1 );

  // Process Message
  isProcessMessage();

  delay( dTime );

}
getEEPROM.ino
// EEPROM
// isUID
void isUID()
{

  // Is Unit ID
  uid = "";
  for (int x = 0; x < 5; x++)
  {
    uid = uid + char(EEPROM.read(x));
  }

}
getProcessMessage.ino
// ProcessMessage
// isProcessMessage
void isProcessMessage() {

   // String msg = "";

   /// Loop through serial buffer one byte at a time until you reach * which will be end of message
   //while ( Serial.available() )
  // {

      // Print => XBEE + Unit ID + Version + *
      // msg = "XBEE|" + uid + "|" + sver + "|" + yy + "|*";

      Serial.print( '<'  );
      Serial.print( yy );
      Serial.print( '|' );
      Serial.print( iValue );
      Serial.println( '*' );

  // }

}
getSwitch.ino
// Switch
// Switch 1
void isSwitch1(){

   yy = 1;

   // Stepper
   // Up
   RGBLCDShield.setCursor(0,1);
   RGBLCDShield.print("Up");

}
// Switch 2
void isSwitch2(){

   yy = 2;

   // Stepper
   // Down
   RGBLCDShield.setCursor(0,1);
   RGBLCDShield.print("Down");

}
// Switch 3
void isSwitch3(){

   yy = 3;

   // Stepper
   // Right
   RGBLCDShield.setCursor(0,1);
   RGBLCDShield.print("Right");

}
// Switch 4
void isSwitch4(){

   yy = 4;

   // Stepper
   // Left
   RGBLCDShield.setCursor(0,1);
   RGBLCDShield.print("Left");

}
// Switch 5
void isSwitch5(){

   yy = 5;

   // Stepper
   // Stop
   RGBLCDShield.setCursor(0,1);
   RGBLCDShield.print("Stop");

}
setup.ino
// Setup
void setup() {

  // Open serial port at 9600 baud
  Serial.begin( 9600 );

  // Pause
  delay(5);

  // EEPROM Unit ID
  isUID();

  // Pause
  delay(5);

  // Adafruit RGB LCD Shield
  // Set up the LCD's number of columns and rows:
  RGBLCDShield.begin(16, 2);
  RGBLCDShield.setBacklight(GREEN);

  // Display
  // Set the cursor to column 0, line 0
  RGBLCDShield.setCursor(0,0);
  RGBLCDShield.print("Don Luc Electron");         // Don luc Electron
  // Set the cursor to column 0, line 1
  RGBLCDShield.setCursor(0, 1);
  RGBLCDShield.print("Robotics");                 // Robotics

  // Serial
  // Serial.println( "Don Luc Electronics");
  // Serial.println( "Robotics");

  delay(5000);

  // Clear
  RGBLCDShield.clear();

  // Display
  // Set the cursor to column 0, line 0
  RGBLCDShield.setCursor(0,0);
  RGBLCDShield.print("Version: ");                // Version
  RGBLCDShield.print( sver );
  // Set the cursor to column 0, line 1
  RGBLCDShield.setCursor(0, 1);
  RGBLCDShield.print("UID: ");                    // Unit ID Information
  RGBLCDShield.print( uid );

  // Serial
  // Serial.print( "Software Version Information: ");
  // Serial.println( sver );
  // Serial.print( "Unit ID Information: ");
  // Serial.println( uid );

  delay(5000);

  // Clear
  RGBLCDShield.clear();

}
Arduino UNO – SparkFun RedBoard
LEG – Digital 6
SP1 – Digital 3
DI1 – Digital 2
SP2 – Digital 5
DI2 – Digital 4
TX0 – Digital 1
RX0 – Digital 0
VIN – +5V
GND – GND
XBee S1: Receiver
CH Channel: C
PAN Id: 3333
SH Serial Number: 13A200
SL Serial Number: 4076E2C5
CE Coordinator: End Device
BD: 9600
DL2002Mk05Rp.ino
// ***** Don Luc Electronics © *****
// Software Version Information
// Project #12: Robotics - Unmanned Vehicles 1e - Mk09
// 02-05
// DL2002Mk05Rp.ino 12-09
// Arduino UNO - SparkFun RedBoard
// EEPROM with Unique ID
// Receiver
// Breakout Board for XBee Module
// XBee S1
// 2 x EasyDriver
// 2 x Small Stepper
// Adafruit PowerBoost 500 Shield
// Lithium Ion Battery - 2Ah
// LED Green
// delayMicroseconds

// Include the library code:
// EEPROM library to read and write EEPROM with unique ID for unit
#include <EEPROM.h>

// Momentary Button
int yy = "";

// 2 x EasyDriver - 2 x Stepper
int dirPinR = 2;                           // EasyDriver Right
int stepPinR = 3;                          // stepPin Right
int dirPinL = 4;                           // EasyDriver Left
int stepPinL = 5;                          // stepPin Left
int i = 0;

// LED Green
int iLEDGreen = 6;

// Process Message
bool bStart = false;                       // Start
bool bEnd   = false;                       // End
int incb = 0;                              // Variable to store the incoming byte
String msg = "";                           // Message
String zzz = "";
byte in = 0;                               // Index
int x = 0;

// delayMicroseconds
int dMicro = 0;

// Software Version Information
String sver = "12-09";
// Unit ID information
String uid = "";

void loop() {

  // Check for serial messages
  if ( Serial.available() )
  {

    isProcessMessage();

  }

  // Switch
  isSwitch();

}
getEEPROM.ino
// EEPROM
// isUID
void isUID()
{

  // Is Unit ID
  uid = "";
  for (int x = 0; x < 5; x++)
  {
    uid = uid + char(EEPROM.read(x));
  }

}
getProcessMessage.ino
// ProcessMessage
// isProcessMessage
void isProcessMessage() {

  // Loop through serial buffer one byte at a time until you reach * which will be end of message
  while ( Serial.available() )
  {

      // Read the incoming byte:
      incb = Serial.read();

      // Start the message when the '<' symbol is received
      if(incb == '<')
      {

        bStart = true;
        in = 0;
        msg = "";

      }
      // End the message when the '*' symbol is received
      else if(incb == '*')
      {
        bEnd = true;
        x = msg.length();
        msg.remove( x , 1);
        break;                                  // Done reading
      }
      // Read the message
      else
      {
        if(in < 8)                              // Make sure there is room
        {

           msg = msg + char(incb);
           in++;

        }
      }

   }

   if( bStart && bEnd)
   {

      // Stepper
      zzz = msg.charAt( 0 );
      yy = zzz.toInt();

      msg.remove( 0 , 2);

      // delayMicroseconds
      dMicro = msg.toInt() + 300;

      in = 0;
      zzz = "";
      msg = "";
      bStart = false;
      bEnd = false;

   }

}
getStepper.ino
// Stepper
// isStepperSetup
void isStepperSetup() {

  // 2 x EasyDriver
  pinMode(dirPinR, OUTPUT);
  pinMode(stepPinR, OUTPUT);
  pinMode(dirPinL, OUTPUT);
  pinMode(stepPinL, OUTPUT);

}
// isStepper1
void isStepper1(){

   // 2 x EasyDriver - Up
   digitalWrite(dirPinR, LOW);              // Set the direction.
   digitalWrite(dirPinL, LOW);              // Set the direction.

   digitalWrite(stepPinR, LOW);             // This LOW to HIGH change is what creates the
   digitalWrite(stepPinR, HIGH);            // "Rising Edge" so the easydriver knows to when to step.
   delayMicroseconds(dMicro);               // This delay time is close to top speed.
   digitalWrite(stepPinL, LOW);             // This LOW to HIGH change is what creates the
   digitalWrite(stepPinL, HIGH);            // "Rising Edge" so the easydriver knows to when to step.
   delayMicroseconds(dMicro);               // This delay time is close to top speed.

}
// isStepper2
void isStepper2(){

   // 2 x EasyDriver
   digitalWrite(dirPinR, HIGH);              // Set the direction.
   digitalWrite(dirPinL, HIGH);              // Set the direction.

   digitalWrite(stepPinR, LOW);             // This LOW to HIGH change is what creates the
   digitalWrite(stepPinR, HIGH);            // "Rising Edge" so the easydriver knows to when to step.
   delayMicroseconds(dMicro);               // This delay time is close to top speed.
   digitalWrite(stepPinL, LOW);             // This LOW to HIGH change is what creates the
   digitalWrite(stepPinL, HIGH);            // "Rising Edge" so the easydriver knows to when to step.
   delayMicroseconds(dMicro);               // This delay time is close to top speed.

}
// Switch 3
void isStepper3(){

   // Right

   // 2 x EasyDriver
   digitalWrite(dirPinR, LOW);              // Set the direction.
   digitalWrite(dirPinL, HIGH);             // Set the direction.   delay(5);

   digitalWrite(stepPinR, LOW);             // This LOW to HIGH change is what creates the
   digitalWrite(stepPinR, HIGH);            // "Rising Edge" so the easydriver knows to when to step.
   delayMicroseconds(dMicro);               // This delay time is close to top speed.
   digitalWrite(stepPinL, LOW);             // This LOW to HIGH change is what creates the
   digitalWrite(stepPinL, HIGH);            // "Rising Edge" so the easydriver knows to when to step.
   delayMicroseconds(dMicro);               // This delay time is close to top speed.

}
// Switch 4
void isStepper4(){

   // Left
   // 2 x EasyDriver
   digitalWrite(dirPinR, HIGH);             // Set the direction.
   digitalWrite(dirPinL, LOW);              // Set the direction.

   digitalWrite(stepPinR, LOW);             // This LOW to HIGH change is what creates the
   digitalWrite(stepPinR, HIGH);            // "Rising Edge" so the easydriver knows to when to step.
   delayMicroseconds(dMicro);               // This delay time is close to top speed.
   digitalWrite(stepPinL, LOW);             // This LOW to HIGH change is what creates the
   digitalWrite(stepPinL, HIGH);            // "Rising Edge" so the easydriver knows to when to step.
   delayMicroseconds(dMicro);               // This delay time is close to top speed.

}
// isStepperStop
void isStepperStop() {

   // 2 x EasyDriver
   digitalWrite(dirPinR, LOW);              // Set the direction.
   delay(5);
   digitalWrite(dirPinL, LOW);              // Set the direction.
   delay(5);
   digitalWrite(stepPinR, LOW);             // This LOW to HIGH change is what creates the
   digitalWrite(stepPinL, LOW);             // This LOW to HIGH change is what creates the

}
getSwitch.ino
// Switch
// isSwitch
void isSwitch(){

  switch ( yy ) {
    case 1:

      // Stepper 1 - Up
      isStepper1();

      break;
    case 2:

      // Stepper 2 - Back
      isStepper2();

      break;
    case 3:

      // Stepper 3 - Right
      isStepper3();

      break;
    case 4:

      // Stepper 4 - Left
      isStepper4();

      break;
    case 5:

      // Stepper Stop
      isStepperStop();

      break;
    default:

     // Stepper Stop
     isStepperStop();

   }

}
setup.ino
// Setup
void setup() {

  // Open the serial port at 9600 bps:
  Serial.begin( 9600 );

  // Pause
  delay(5);

  // EEPROM Unit ID
  isUID();

  // Pause
  delay(5);

  // 2 x EasyDriver
  isStepperSetup();

  // LED Green
  pinMode(iLEDGreen, OUTPUT);
  digitalWrite(iLEDGreen, HIGH);

}
Follow Us
J. Luc Paquin – Curriculum Vitae
https://www.donluc.com/DLHackster/LucPaquinCVEngMk2020a.pdf
Web: https://www.donluc.com/
Web: http://www.jlpconsultants.com/
Web: https://www.donluc.com/DLHackster/
Web: https://www.hackster.io/neosteam-labs
Web: http://neosteamlabs.com/
YouTube: https://www.youtube.com/channel/UC5eRjrGn1CqkkGfZy0jxEdA
Facebook: https://www.facebook.com/neosteam.labs.9/
Instagram: https://www.instagram.com/neosteamlabs/
Pinterest: https://www.pinterest.com/NeoSteamLabs/
Twitter: https://twitter.com/labs_steam
Etsy: https://www.etsy.com/shop/NeoSteamLabs
Don Luc
Project #14: Components – Slide Pot (Small) – Knob – Mk03
——
——
——
——
Slide Pot – Small (10k Linear Taper)
SparkFun Item: COM-11620
A simple slide potentiometer can go a long way. Rated at 10KOhm and 0.1W. Comes with solder tab connections. The pot has an overall travel of 20mm and has two mounting holes on top.
Slide Potentiometer Knob
SparkFun Item: COM-14889
This is a simple knob that connects to the small and medium sized linear slide potentiometers. Each knob uses friction to secure itself to fit onto the slide pot. Once attached, this small knob provides you with an easier to use potentiometer for your project.
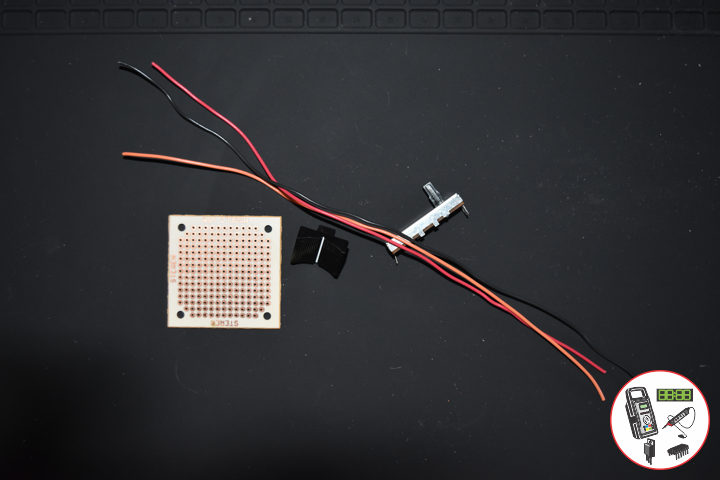
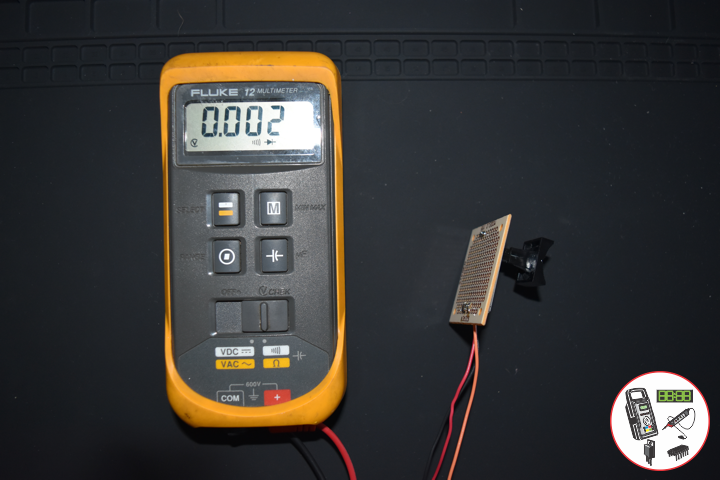
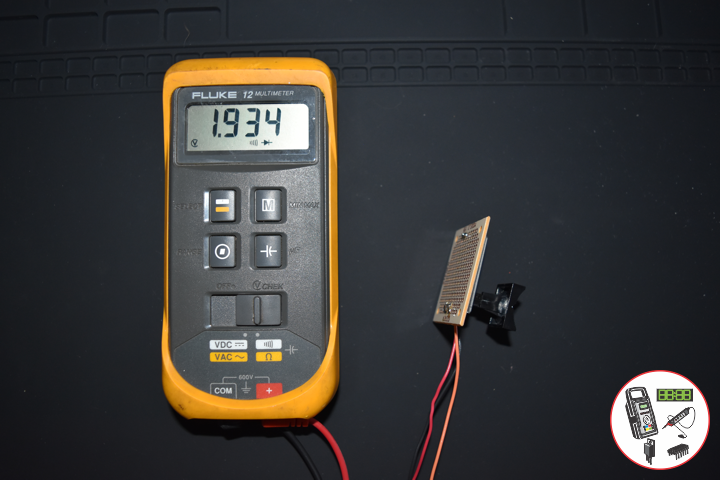
A printed circuit board (PCB) mechanically supports and electrically connects electrical or electronic components.
Follow Us
J. Luc Paquin – Curriculum Vitae
https://www.donluc.com/DLHackster/LucPaquinCVEngMk2020a.pdf
Web: https://www.donluc.com/
Web: http://www.jlpconsultants.com/
Web: https://www.donluc.com/DLHackster/
Web: https://www.hackster.io/neosteam-labs
Web: http://neosteamlabs.com/
YouTube: https://www.youtube.com/channel/UC5eRjrGn1CqkkGfZy0jxEdA
Facebook: https://www.facebook.com/neosteam.labs.9/
Instagram: https://www.instagram.com/neosteamlabs/
Pinterest: https://www.pinterest.com/NeoSteamLabs/
Twitter: https://twitter.com/labs_steam
Etsy: https://www.etsy.com/shop/NeoSteamLabs
Don Luc
Project #12: Robotics – Unmanned Vehicles 1d – Mk08
——
——
——
——
——
——
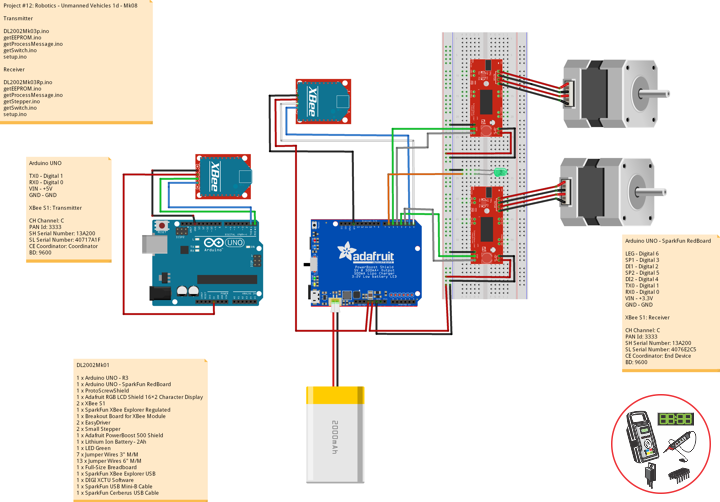
DL2002Mk03
1 x Arduino UNO – R3
1 x Arduino UNO – SparkFun RedBoard
1 x ProtoScrewShield
1 x Adafruit RGB LCD Shield 16×2 Character Display
2 x XBee S1
1 x SparkFun XBee Explorer Regulated
1 x Breakout Board for XBee Module
2 x EasyDriver
2 x Small Stepper
1 x Adafruit PowerBoost 500 Shield
1 x Lithium Ion Battery – 2Ah
1 x LED Green
7 x Jumper Wires 3″ M/M
13 x Jumper Wires 6″ M/M
1 x Full-Size Breadboard
1 x SparkFun XBee Explorer USB
1 x DIGI XCTU Software
1 x SparkFun USB Mini-B Cable
1 x SparkFun Cerberus USB Cable
Arduino UNO
TX0 – Digital 1
RX0 – Digital 0
VIN – +5V
GND – GND
XBee S1: Transmitter
CH Channel: C
PAN Id: 3333
SH Serial Number: 13A200
SL Serial Number: 40717A1F
CE Coordinator: Coordinator
BD: 9600
DL2002Mk03p.ino
// ***** Don Luc Electronics © *****
// Software Version Information
// Project #12: Robotics - Unmanned Vehicles 1d - Mk08
// 02-03
// DL2002Mk01p.ino 12-08
// Arduino UNO - R3
// ProtoScrewShield
// Adafruit RGB LCD Shield 16×2 Character Display
// EEPROM with Unique ID
// Transmitter
// XBee S1
// Stepper

// Include the library code:
// EEPROM library to read and write EEPROM with unique ID for unit
#include <EEPROM.h>
// Adafruit RGB LCD Shield
#include <Adafruit_RGBLCDShield.h>

// Adafruit RGB LCD Shield
Adafruit_RGBLCDShield RGBLCDShield = Adafruit_RGBLCDShield();

// These #defines make it easy to set the backlight color
#define OFF 0x0
#define RED 0x1
#define YELLOW 0x3
#define GREEN 0x2
#define TEAL 0x6
#define BLUE 0x4
#define VIOLET 0x5
#define WHITE 0x7

// Momentary Button
int yy = 0;
uint8_t momentaryButton = 0;

// Communication
unsigned long dTime = 50;

// The current address in the EEPROM (i.e. which byte we're going to  read to next)
// Version
String sver = "12-7.p";
// Unit ID Information
String uid = "";

void loop() {

  // Clear
  RGBLCDShield.clear();

  // set the cursor to column 0, line 0
  RGBLCDShield.setCursor(0,0);
  RGBLCDShield.print("Robotics");         // Robotics

  // Momentary Button
  momentaryButton = RGBLCDShield.readButtons();

  switch ( yy ) {
    case 1:

      // Up
      isSwitch1();

      break;
    case 2:

      // Down
      isSwitch2();

      break;
    case 3:

      // Right
      isSwitch3();

      break;
    case 4:

      // Left
      isSwitch4();

      break;
    case 5:

      // Stop
      isSwitch5();

      break;
    default:

      // Stop
      yy = 5;
      RGBLCDShield.setBacklight(RED);
      isSwitch5();

   }

   if ( momentaryButton ) {

    if ( momentaryButton & BUTTON_UP ) {

      yy = 1;
      // Up
      RGBLCDShield.setBacklight(GREEN);

    }

    if ( momentaryButton & BUTTON_DOWN ) {

      yy = 2;
      // Down
      RGBLCDShield.setBacklight(VIOLET);

    }

    if ( momentaryButton & BUTTON_LEFT ) {

      yy = 3;
      // Right
      RGBLCDShield.setBacklight(TEAL);

    }

    if ( momentaryButton & BUTTON_RIGHT ) {

      yy = 4;
      // Left
      RGBLCDShield.setBacklight(YELLOW);
    }

    if ( momentaryButton & BUTTON_SELECT ) {

      yy = 5;
      // Stop
      RGBLCDShield.setBacklight(RED);

    }

  }

  // Process Message
  isProcessMessage();

  delay( dTime );

}
getEEPROM.ino
// EEPROM
// isUID
void isUID()
{

  // Is Unit ID
  uid = "";
  for (int x = 0; x < 5; x++)
  {
    uid = uid + char(EEPROM.read(x));
  }

}
getProcessMessage.ino
// ProcessMessage
// isProcessMessage
void isProcessMessage() {

   // String msg = "";

   /// Loop through serial buffer one byte at a time until you reach * which will be end of message
   //while ( Serial.available() )
  // {

      // Print => XBEE + Unit ID + Version + *
      // msg = "XBEE|" + uid + "|" + sver + "|" + yy + "|*";

      Serial.print( '<'  );
      Serial.print( yy );
      Serial.println( '*' );

  // }

}
getSwitch.ino
// Switch
// Switch 1
void isSwitch1(){

   yy = 1;

   // Stepper
   // Up
   RGBLCDShield.setCursor(0,1);
   RGBLCDShield.print("Up");

}
// Switch 2
void isSwitch2(){

   yy = 2;

   // Stepper
   // Down
   RGBLCDShield.setCursor(0,1);
   RGBLCDShield.print("Down");

}
// Switch 3
void isSwitch3(){

   yy = 3;

   // Stepper
   // Right
   RGBLCDShield.setCursor(0,1);
   RGBLCDShield.print("Right");

}
// Switch 4
void isSwitch4(){

   yy = 4;

   // Stepper
   // Left
   RGBLCDShield.setCursor(0,1);
   RGBLCDShield.print("Left");

}
// Switch 5
void isSwitch5(){

   yy = 5;

   // Stepper
   // Stop
   RGBLCDShield.setCursor(0,1);
   RGBLCDShield.print("Stop");

}
setup.ino
// Setup
void setup() {

  // Open serial port at 9600 baud
  Serial.begin( 9600 );

  // Pause
  delay(5);

  // EEPROM Unit ID
  isUID();

  // Pause
  delay(5);

  // Adafruit RGB LCD Shield
  // Set up the LCD's number of columns and rows:
  RGBLCDShield.begin(16, 2);
  RGBLCDShield.setBacklight(GREEN);

  // Display
  // Set the cursor to column 0, line 0
  RGBLCDShield.setCursor(0,0);
  RGBLCDShield.print("Don Luc Electron");         // Don luc Electron
  // Set the cursor to column 0, line 1
  RGBLCDShield.setCursor(0, 1);
  RGBLCDShield.print("Robotics");                 // Robotics

  // Serial
  // Serial.println( "Don Luc Electronics");
  // Serial.println( "Robotics");

  delay(5000);

  // Clear
  RGBLCDShield.clear();

  // Display
  // Set the cursor to column 0, line 0
  RGBLCDShield.setCursor(0,0);
  RGBLCDShield.print("Version: ");                // Version
  RGBLCDShield.print( sver );
  // Set the cursor to column 0, line 1
  RGBLCDShield.setCursor(0, 1);
  RGBLCDShield.print("UID: ");                    // Unit ID Information
  RGBLCDShield.print( uid );

  // Serial
  // Serial.print( "Software Version Information: ");
  // Serial.println( sver );
  // Serial.print( "Unit ID Information: ");
  // Serial.println( uid );

  delay(5000);

  // Clear
  RGBLCDShield.clear();

}
Arduino UNO – SparkFun RedBoard
LEG – Digital 6
SP1 – Digital 3
DI1 – Digital 2
SP2 – Digital 5
DI2 – Digital 4
TX0 – Digital 1
RX0 – Digital 0
VIN – +3.3V
GND – GND
XBee S1: Receiver
CH Channel: C
PAN Id: 3333
SH Serial Number: 13A200
SL Serial Number: 4076E2C5
CE Coordinator: End Device
BD: 9600
DL2002Mk03Rp.ino
// ***** Don Luc Electronics © *****
// Software Version Information
// Project #12: Robotics - Unmanned Vehicles 1d - Mk08
// 02-03
// DL2002Mk01Rp.ino 12-08
// Arduino UNO - SparkFun RedBoard
// EEPROM with Unique ID
// Receiver
// Breakout Board for XBee Module
// XBee S1
// 2 x EasyDriver
// 2 x Small Stepper
// Adafruit PowerBoost 500 Shield
// Lithium Ion Battery - 2Ah
// LED Green

// Include the library code:
// EEPROM library to read and write EEPROM with unique ID for unit
#include <EEPROM.h>

// Momentary Button
int yy = "";

// 2 x EasyDriver - 2 x Stepper
int dirPinR = 2;                           // EasyDriver Right
int stepPinR = 3;                          // stepPin Right
int dirPinL = 4;                           // EasyDriver Left
int stepPinL = 5;                          // stepPin Left
int i = 0;

// LED Green
int iLEDGreen = 6;

// Software Version Information
String sver = "12-08";
// Unit ID information
String uid = "";

void loop() {

  // Check for serial messages
  if ( Serial.available() )
  {

    isProcessMessage();

  }

  // Switch
  isSwitch();

}
getEEPROM.ino
// EEPROM
// isUID
void isUID()
{

  // Is Unit ID
  uid = "";
  for (int x = 0; x < 5; x++)
  {
    uid = uid + char(EEPROM.read(x));
  }

}
getProcessMessage.ino
// ProcessMessage
// isProcessMessage
void isProcessMessage() {

   int incb = 0;
   String msg = "";
   String zzz = "";

  // Loop through serial buffer one byte at a time until you reach * which will be end of message
  while ( Serial.available() )
  {

      // Read the incoming byte:
      incb = Serial.read();
      // Add character to string
      msg = msg + char(incb);

      // Check if receive character is the end of message *
      if ( incb == 42 )
      {

         // Serial.println(msg);

         zzz = msg.charAt( 1 );

         // Serial.println(zzz);

         yy = zzz.toInt();

         // Serial.println( yy );

      }
   }

}
getStepper.ino
// Stepper
// isStepperSetup
void isStepperSetup() {

  // 2 x EasyDriver
  pinMode(dirPinR, OUTPUT);
  pinMode(stepPinR, OUTPUT);
  pinMode(dirPinL, OUTPUT);
  pinMode(stepPinL, OUTPUT);

}
// isStepper1
void isStepper1(){

   // 2 x EasyDriver - Up
   digitalWrite(dirPinR, LOW);              // Set the direction.
   delay(5);
   digitalWrite(dirPinL, LOW);              // Set the direction.
   delay(5);

   for (i = 0; i<300; i++)                 // Iterate for 1000 microsteps.
   {
     digitalWrite(stepPinR, LOW);           // This LOW to HIGH change is what creates the
     digitalWrite(stepPinR, HIGH);          // "Rising Edge" so the easydriver knows to when to step.
     delayMicroseconds(300);                // This delay time is close to top speed.
     digitalWrite(stepPinL, LOW);           // This LOW to HIGH change is what creates the
     digitalWrite(stepPinL, HIGH);          // "Rising Edge" so the easydriver knows to when to step.
     delayMicroseconds(300);                // This delay time is close to top speed.
   }

}
// isStepper2
void isStepper2(){

   // 2 x EasyDriver
   digitalWrite(dirPinR, HIGH);              // Set the direction.
   delay(5);
   digitalWrite(dirPinL, HIGH);              // Set the direction.
   delay(5);

   for (i = 0; i<1000; i++)                 // Iterate for 1000 microsteps.
   {
     digitalWrite(stepPinR, LOW);           // This LOW to HIGH change is what creates the
     digitalWrite(stepPinR, HIGH);          // "Rising Edge" so the easydriver knows to when to step.
     delayMicroseconds(300);                // This delay time is close to top speed.
     digitalWrite(stepPinL, LOW);           // This LOW to HIGH change is what creates the
     digitalWrite(stepPinL, HIGH);          // "Rising Edge" so the easydriver knows to when to step.
     delayMicroseconds(300);                // This delay time is close to top speed.
   }

}
// Switch 3
void isStepper3(){

   // Right

   // 2 x EasyDriver
   digitalWrite(dirPinR, LOW);               // Set the direction.
   delay(5);
   digitalWrite(dirPinL, HIGH);              // Set the direction.
   delay(5);

   for (i = 0; i<300; i++)                 // Iterate for 1000 microsteps.
   {
     digitalWrite(stepPinR, LOW);           // This LOW to HIGH change is what creates the
     digitalWrite(stepPinR, HIGH);          // "Rising Edge" so the easydriver knows to when to step.
     delayMicroseconds(300);                // This delay time is close to top speed.
     digitalWrite(stepPinL, LOW);           // This LOW to HIGH change is what creates the
     digitalWrite(stepPinL, HIGH);          // "Rising Edge" so the easydriver knows to when to step.
     delayMicroseconds(300);                // This delay time is close to top speed.
   }

}
// Switch 4
void isStepper4(){

   // Left
   // 2 x EasyDriver
   digitalWrite(dirPinR, HIGH);             // Set the direction.
   delay(5);
   digitalWrite(dirPinL, LOW);              // Set the direction.
   delay(5);

   for (i = 0; i<300; i++)                 // Iterate for 1000 microsteps.
   {
     digitalWrite(stepPinR, LOW);           // This LOW to HIGH change is what creates the
     digitalWrite(stepPinR, HIGH);          // "Rising Edge" so the easydriver knows to when to step.
     delayMicroseconds(300);                // This delay time is close to top speed.
     digitalWrite(stepPinL, LOW);           // This LOW to HIGH change is what creates the
     digitalWrite(stepPinL, HIGH);          // "Rising Edge" so the easydriver knows to when to step.
     delayMicroseconds(300);                // This delay time is close to top speed.
   }

}
// isStepperStop
void isStepperStop() {

   // 2 x EasyDriver
   digitalWrite(dirPinR, LOW);              // Set the direction.
   delay(5);
   digitalWrite(dirPinL, LOW);              // Set the direction.
   delay(5);
   digitalWrite(stepPinR, LOW);             // This LOW to HIGH change is what creates the
   digitalWrite(stepPinL, LOW);             // This LOW to HIGH change is what creates the

}
getSwitch.ino
// Switch
// isSwitch
void isSwitch(){

  switch ( yy ) {
    case 1:

      // Stepper 1 - Up
      isStepper1();

      break;
    case 2:

      // Stepper 2 - Back
      isStepper2();

      break;
    case 3:

      // Stepper 3 - Right
      isStepper3();

      break;
    case 4:

      // Stepper 4 - Left
      isStepper4();

      break;
    case 5:

      // Stepper Stop
      isStepperStop();

      break;
    default:

      // Stepper Stop
      isStepperStop();

   }

}
setup.ino
// Setup
void setup() {

  // Open the serial port at 9600 bps:
  Serial.begin( 9600 );

  // Pause
  delay(5);

  // EEPROM Unit ID
  isUID();

  // Pause
  delay(5);

  // Serial
  // Serial.print( "Software Version Information: ");
  // Serial.println( sver );
  // Serial.print( "Unit ID Information: ");
  // Serial.println( uid );

  // delay(5000);

  // 2 x EasyDriver
  isStepperSetup();

  // LED Green
  pinMode(iLEDGreen, OUTPUT);
  digitalWrite(iLEDGreen, HIGH);

}
Follow Us
J. Luc Paquin – Curriculum Vitae
https://www.donluc.com/DLHackster/LucPaquinCVEngMk2020a.pdf
Web: https://www.donluc.com/
Web: http://www.jlpconsultants.com/
Web: https://www.donluc.com/DLHackster/
Web: https://www.hackster.io/neosteam-labs
Web: http://neosteamlabs.com/
YouTube: https://www.youtube.com/channel/UC5eRjrGn1CqkkGfZy0jxEdA
Facebook: https://www.facebook.com/neosteam.labs.9/
Instagram: https://www.instagram.com/neosteamlabs/
Pinterest: https://www.pinterest.com/NeoSteamLabs/
Twitter: https://twitter.com/labs_steam
Etsy: https://www.etsy.com/shop/NeoSteamLabs
Don Luc
