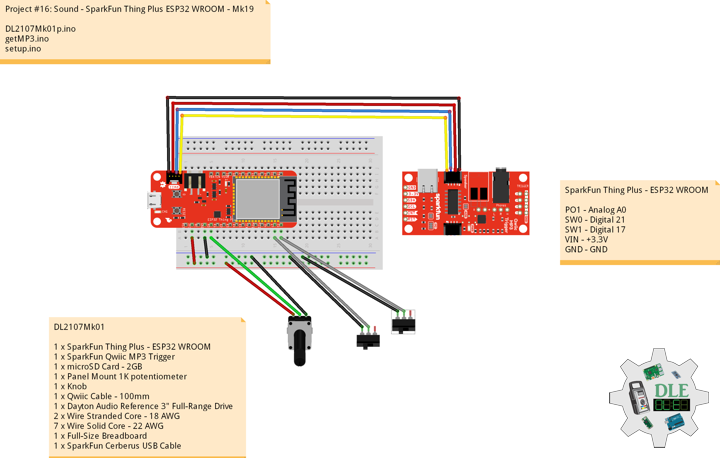
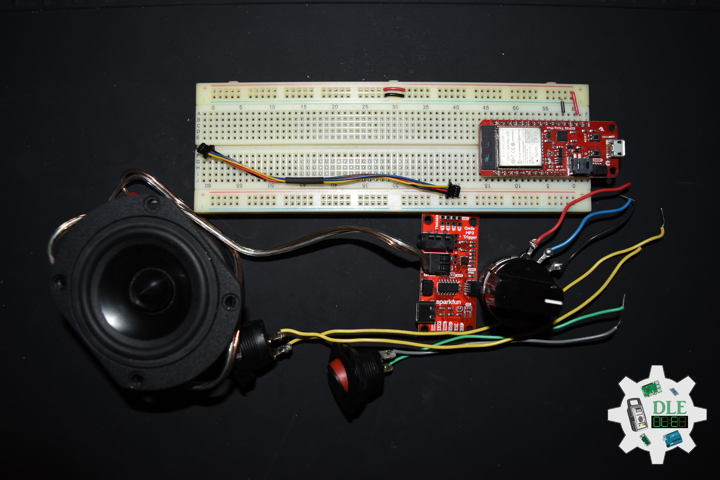
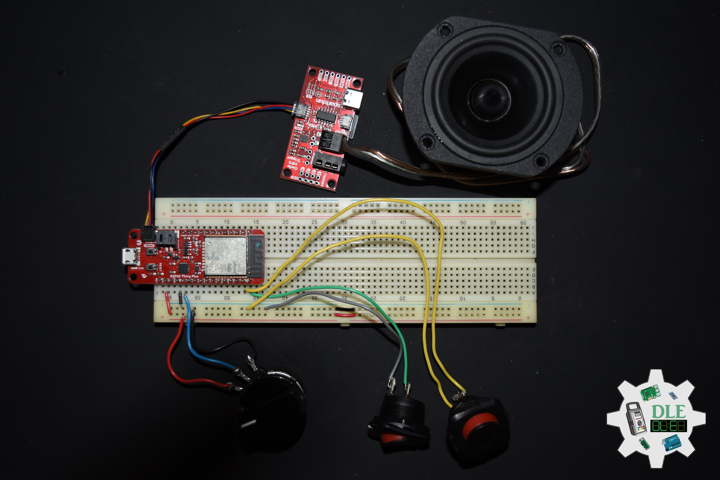
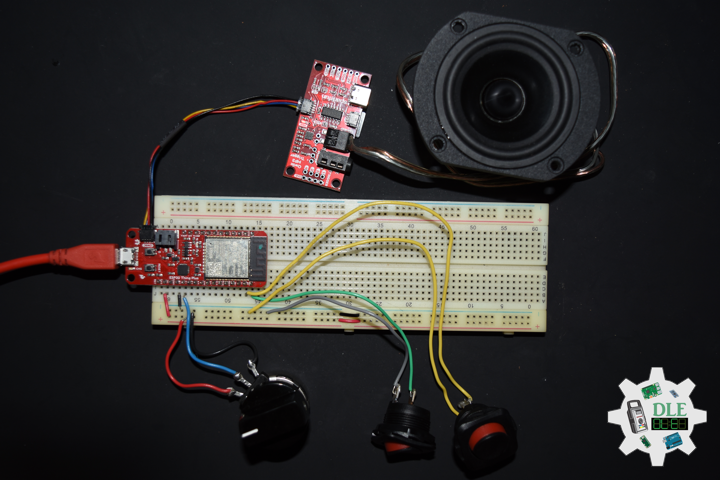
The Alpha Geek – Geeking Out

Programming

Project #11: ESP32 Feather – Rocker Switches – Mk06

ESP32 Feather – Rocker Switches

——

——

ESP32 Feather - Rocker Switches

——

ESP32 Feather - Rocker Switches

——

ESP32 Feather - Rocker Switches

——

ESP32 Feather - Rocker Switches

——

Rocker Switch – Round

These panel-mounting rocker switches simple SPST on-off. They mount into a 20.2mm diameter hole and are rated up to 16A @ 12v.

DonLuc1909Mk03

1 x Adafruit HUZZAH32 ESP32 Feather
1 x Adafruit SHARP Memory Display
1 x Adafruit Adalogger FeatherWing – RTC + SD
1 x CR1220 12mm Lithium Battery
1 x 8Gb Micro SD Card
1 x RHT03 Humidity and Temperature Sensor
1 x LED Green
1 x Rocker Switches
1 x 100 Ohm
1 x 10K Ohm
14 x Jumper Wires 3″ M/M
6 x Jumper Wires 6″ M/M
1 x Full-Size Breadboard
1 x SparkFun Cerberus USB Cable

Adafruit HUZZAH32 ESP32 Feather

LG1 – Digital 21
RO1 – Digital 16
RHT – Digital 17
SCK – Digital 13
MOS – Digital 12
SSD – Digital 27
SDA – Digital 23
SCL – Digital 22
SD1 – Digital 33
SC2 – Digital 5
MO2 – Digital 18
MI2 – Digital 19
GND – GND
VIN – +3.3V

DL1909Mk03.ino

// ***** Don Luc Electronics *****
// Software Version Information
// Project #11: HUZZAH32 ESP32 Feather - Rocker Switches - Mk06
// 09-03
// DL1909Mk03p.ino 11-06
// Adafruit HUZZAH32 ESP32 Feather Board
// SHARP Display
// LED Green
// Adalogger FeatherWing - RTC + SD
// EEPROM
// RHT03 Humidity and Temperature Sensor
// Rocker Switches

// include Library Code
// SHARP Memory Display
#include <Adafruit_SharpMem.h>
#include <Adafruit_GFX.h>
// Date and Time
#include "RTClib.h"
// EEPROM library to read EEPROM with unique ID for unit
#include "EEPROM.h"
// RHT Humidity and Temperature Sensor
#include <SparkFun_RHT03.h>
// SD Card
#include "FS.h"
#include "SD.h"
#include "SPI.h"

// SHARP Memory Display
// any pins can be used
#define SHARP_SCK  13
#define SHARP_MOSI 12
#define SHARP_SS   27
// Set the size of the display here, e.g. 144x168!
Adafruit_SharpMem display(SHARP_SCK, SHARP_MOSI, SHARP_SS, 144, 168);
// The currently-available SHARP Memory Display (144x168 pixels)
// requires > 4K of microcontroller RAM; it WILL NOT WORK on Arduino Uno
// or other <4K "classic" devices!
#define BLACK 0
#define WHITE 1
int minorHalfSize; // 1/2 of lesser of display width or height

// LED Green
int iLEDGreen =  21;                 // LED Green

// PCF8523 Precision RTC 
RTC_PCF8523 rtc;
String dateRTC = "";
String timeRTC = "";

// The current address in the EEPROM (i.e. which byte
// we're going to  read to next)
#define EEPROM_SIZE 64
String sver = "9-3.p";
// Unit ID information
String uid = "";

// RHT Humidity and Temperature Sensor
const int RHT03_DATA_PIN = 17;          // RHT03 data pin Digital 17
RHT03 rht;                              // This creates a RTH03 object, which we'll use to interact with the sensor
float latestHumidity;
float latestTempC;
float latestTempF;

// SD Card
const int chipSelect = 33;              // SD Card
String zzzzzz = "";

// Rocker Switches
int iRow1 = 16;                          // Rocker Switches
int iRow1State = 0;                      // Variable for reading the pushbutton status

void loop() {

  // Date and Time 
  isRTC();
  
  // RHT03 Humidity and Temperature Sensor
  isRHT03();
  
  // SHARP Memory Display On
  isDisplayOn();
  
  // Rocker Switched
  // Read the state of the iRow1 value
  iRow1State = digitalRead(iRow1);

  // check if the pushbutton is pressed. If it is, the buttonState is HIGH:
  if (iRow1State == HIGH) {

    // iLEDGreen
    digitalWrite(iLEDGreen,  HIGH );
    // SD Card
    isSD();

  } else {

    // iLEDGreen
    digitalWrite(iLEDGreen,  LOW );
  
  }
   
  // Delay 
  delay( 1000 );

}

getDisplay.ino

// SHARP Memory Display On
void isDisplayOn() {

    // Clear Display
    display.clearDisplay();
    // text display date, time, LED on
    display.setRotation(4);
    display.setTextSize(2);
    display.setTextColor(BLACK);
    display.setCursor(0,10);
    display.println( dateRTC );
    display.setCursor(0,30);
    display.println( timeRTC );
    display.setTextSize(2);
    display.setCursor(0,55);
    display.print("Hum: ");
    display.print( latestHumidity );
    display.println("%");
    display.setCursor(0,75);
    display.print("Cel: ");
    display.print( latestTempC );
    display.println("*C");
    display.setCursor(0,95);
     display.print("Fah: ");
    display.print( latestTempF );
    display.println("*F");
    display.refresh();

}
// SHARP Memory Display - UID
void isDisplayUID() {

    // text display EEPROM
    display.setRotation(4);
    display.setTextSize(2);
    display.setTextColor(BLACK);
    display.setCursor(0,20);
    display.print( "UID: " );
    display.println( uid );
   // display.setTextSize();
    display.setTextColor(BLACK);
    display.setCursor(0,45);
    display.print( "VER: ");
    display.println( sver  );
    display.refresh();
    delay( 100 );
    
}

getEEPROM.ino

// EEPROM
void GetUID()
{
  
  // Get unit ID
  uid = "";
  for (int x = 0; x < 5; x++)
  {
    uid = uid + char(EEPROM.read(x));
  }
  
}

getRHT.ino

// RHT03 Humidity and Temperature Sensor
void isRHT03(){

  // Call rht.update() to get new humidity and temperature values from the sensor.
  int updateRet = rht.update();

  // The humidity(), tempC(), and tempF() functions can be called -- after 
  // a successful update() -- to get the last humidity and temperature value 
  latestHumidity = rht.humidity();
  latestTempC = rht.tempC();
  latestTempF = rht.tempF();
  
}

getRTCpcf8523.ino

// PCF8523 Precision RTC 
void setupRTC() {

  // pcf8523 Precision RTC   
  if (! rtc.begin()) {
    while (1);
  }  
  if (! rtc.initialized()) {
    // Following line sets the RTC to the date & time this sketch was compiled
    rtc.adjust(DateTime(F(__DATE__), F(__TIME__)));
    // This line sets the RTC with an explicit date & time, for example to set
    // January 21, 2014 at 3am you would call:
    // rtc.adjust(DateTime(2018, 9, 29, 12, 17, 0));
  }
  
}
// Date and Time RTC
void isRTC () {

  // Date and Time
  DateTime now = rtc.now();
  // Date
  dateRTC = now.year(), DEC; 
  dateRTC = dateRTC + "/";
  dateRTC = dateRTC + now.month(), DEC;
  dateRTC = dateRTC + "/";
  dateRTC = dateRTC + now.day(), DEC;
  // Time
  timeRTC = now.hour(), DEC;
  timeRTC = timeRTC + ":";
  timeRTC = timeRTC + now.minute(), DEC;
  timeRTC = timeRTC + ":";
  timeRTC = timeRTC + now.second(), DEC;
  
}

getSD.ino

// SD Card
void setupSD() {

  // SD Card
    pinMode( chipSelect , OUTPUT );
    if(!SD.begin( chipSelect )){
        ;  
        return;
    }
    uint8_t cardType = SD.cardType();

    if(cardType == CARD_NONE){
        ; 
        return;
    }

    //Serial.print("SD Card Type: ");
    if(cardType == CARD_MMC){
        ; 
    } else if(cardType == CARD_SD){
        ; 
    } else if(cardType == CARD_SDHC){
        ; 
    } else {
        ; 
    } 

    uint64_t cardSize = SD.cardSize() / (1024 * 1024);
  
}
// SD Card
void isSD() {

  zzzzzz = "";

  zzzzzz = uid + "|" + sver + "|" + dateRTC + "|" + timeRTC + "|" + latestHumidity + "|" + latestTempC + "|" + latestTempF + "|\r";

  char msg[zzzzzz.length() + 1];

  zzzzzz.toCharArray(msg, zzzzzz.length() + 1);

  appendFile(SD, "/espdata.txt", msg );
  
}
// List Dir
void listDir(fs::FS &fs, const char * dirname, uint8_t levels){
    dirname;
    File root = fs.open(dirname);
    if(!root){
        return;
    }
    if(!root.isDirectory()){
        return;
    }

    File file = root.openNextFile();
    while(file){
        if(file.isDirectory()){
            file.name();
            if(levels){
                listDir(fs, file.name(), levels -1);
            }
        } else {
            file.name();
            file.size();
        }
        file = root.openNextFile();
    }
}
// Write File
void writeFile(fs::FS &fs, const char * path, const char * message){
    path;
    File file = fs.open(path, FILE_WRITE);
    if(!file){
        return;
    }
    if(file.print(message)){
        ;  
    } else {
        ;  
    }
    file.close();
}
// Append File
void appendFile(fs::FS &fs, const char * path, const char * message){
    //Serial.printf("Appending to file: %s\n", path);
    path;
    File file = fs.open(path, FILE_APPEND);
    if(!file){
        return;
    }
    if(file.print(message)){
        ;  
    } else {
        ;  
    }
    file.close();
}

setup.ino

// Setup
void setup() {

  // EEPROM with unique ID
  EEPROM.begin(EEPROM_SIZE);
   
  // Get Unit ID
  GetUID();
  
  // SHARP Display start & clear the display
  display.begin();
  display.clearDisplay();

  isDisplayUID();

  delay( 5000 );
  
  // Initialize the LED Green
  pinMode(iLEDGreen, OUTPUT);

  // PCF8523 Precision RTC 
  setupRTC();

  // Date and Time RTC
  isRTC();

  // RHT03 Humidity and Temperature Sensor
  // Call rht.begin() to initialize the sensor and our data pin
  rht.begin(RHT03_DATA_PIN);

  // SD Card
  setupSD();

  // Rocker Switches
  pinMode(iRow1, INPUT);
  
}

Follow Us

Web: https://www.donluc.com/
Web: http://neosteamlabs.com/
Web: http://www.jlpconsultants.com/
YouTube: https://www.youtube.com/channel/UC5eRjrGn1CqkkGfZy0jxEdA
Facebook: https://www.facebook.com/neosteam.labs.9/
Instagram: https://www.instagram.com/neosteamlabs/
Pinterest: https://www.pinterest.com/NeoSteamLabs/
Twitter: https://twitter.com/labs_steam
Etsy: https://www.etsy.com/shop/NeoSteamLabs

Don Luc

Project #11: ESP32 Feather – RTC + SD – Mk05

ESP32 Feather – RTC + SD – Mk05

——

——

Adafruit Adalogger FeatherWing

——

Adafruit Adalogger FeatherWing

——

Adafruit Adalogger FeatherWing

——

Adafruit Adalogger FeatherWing – RTC + SD

A Feather board without ambition is a Feather board without FeatherWings! This is the Adalogger FeatherWing: it adds both a battery-backed Real Time Clock and micro SD card storage to any Feather main board.

DonLuc1909Mk02

1 x Adafruit HUZZAH32 ESP32 Feather
1 x Adafruit SHARP Memory Display
1 x Adafruit Adalogger FeatherWing – RTC + SD
1 x CR1220 12mm Lithium Battery
1 x 8Gb Micro SD Card
1 x RHT03 Humidity and Temperature Sensor
1 x LED Green
1 x 100 Ohm
14 x Jumper Wires 3″ M/M
6 x Jumper Wires 6″ M/M
1 x Full-Size Breadboard
1 x SparkFun Cerberus USB Cable

Adafruit HUZZAH32 ESP32 Feather

LG1 – Digital 21
RHT – Digital 17
SCK – Digital 13
MOS – Digital 12
SSD – Digital 27
SDA – Digital 23
SCL – Digital 22
SD1 – Digital 33
SC2 – Digital 5
MO2 – Digital 18
MI2 – Digital 19
GND – GND
VIN – +3.3V

DL1909Mk02.ino

// ***** Don Luc Electronics *****
// Software Version Information
// Project #11: HUZZAH32 ESP32 Feather - Mk05
// 09-02
// DL1909Mk02p.ino 11-05
// Adafruit HUZZAH32 ESP32 Feather Board
// SHARP Display
// LED Green
// Adalogger FeatherWing - RTC + SD
// EEPROM
// RHT03 Humidity and Temperature Sensor

// include Library Code
// SHARP Memory Display
#include <Adafruit_SharpMem.h>
#include <Adafruit_GFX.h>
// Date and Time
#include "RTClib.h"
// EEPROM library to read EEPROM with unique ID for unit
#include "EEPROM.h"
// RHT Humidity and Temperature Sensor
#include <SparkFun_RHT03.h>
// SD Card
#include "FS.h"
#include "SD.h"
#include "SPI.h"

// SHARP Memory Display
// any pins can be used
#define SHARP_SCK  13
#define SHARP_MOSI 12
#define SHARP_SS   27
// Set the size of the display here, e.g. 144x168!
Adafruit_SharpMem display(SHARP_SCK, SHARP_MOSI, SHARP_SS, 144, 168);
// The currently-available SHARP Memory Display (144x168 pixels)
// requires > 4K of microcontroller RAM; it WILL NOT WORK on Arduino Uno
// or other <4K "classic" devices!
#define BLACK 0
#define WHITE 1
int minorHalfSize; // 1/2 of lesser of display width or height

// LED Green
int iLEDGreen =  21;                 // LED Green

// PCF8523 Precision RTC 
RTC_PCF8523 rtc;
String dateRTC = "";
String timeRTC = "";

// The current address in the EEPROM (i.e. which byte
// we're going to  read to next)
#define EEPROM_SIZE 64
String sver = "9-2.p";
// Unit ID information
String uid = "";

// RHT Humidity and Temperature Sensor
const int RHT03_DATA_PIN = 17;          // RHT03 data pin Digital 17
RHT03 rht;                              // This creates a RTH03 object, which we'll use to interact with the sensor
float latestHumidity;
float latestTempC;
float latestTempF;

// SD Card
const int chipSelect = 33;              // SD Card
String zzzzzz = "";

void loop() {

  // iLEDGreen
  digitalWrite(iLEDGreen,  HIGH );
  // Date and Time 
  isRTC();
  // RHT03 Humidity and Temperature Sensor
  isRHT03();
  // SHARP Memory Display On
  isDisplayOn();
  // SD Card
  isSD();
  // iLEDGreen
  digitalWrite(iLEDGreen,  LOW );   
  // Delay 1
  delay( 10000 );

}

getDisplay.ino

// SHARP Memory Display On
void isDisplayOn() {

    // Clear Display
    display.clearDisplay();
    // text display date, time, LED on
    display.setRotation(4);
    display.setTextSize(2);
    display.setTextColor(BLACK);
    display.setCursor(0,10);
    display.println( dateRTC );
    display.setCursor(0,30);
    display.println( timeRTC );
    display.setTextSize(2);
    display.setCursor(0,55);
    display.print("Hum: ");
    display.print( latestHumidity );
    display.println("%");
    display.setCursor(0,75);
    display.print("Cel: ");
    display.print( latestTempC );
    display.println("*C");
    display.setCursor(0,95);
     display.print("Fah: ");
    display.print( latestTempF );
    display.println("*F");
    display.refresh();

}
// SHARP Memory Display - UID
void isDisplayUID() {

    // text display EEPROM
    display.setRotation(4);
    display.setTextSize(2);
    display.setTextColor(BLACK);
    display.setCursor(0,20);
    display.print( "UID: " );
    display.println( uid );
   // display.setTextSize();
    display.setTextColor(BLACK);
    display.setCursor(0,45);
    display.print( "VER: ");
    display.println( sver  );
    display.refresh();
    delay( 100 );
    
}

getEEPROM.ino

// EEPROM
void GetUID()
{
  
  // Get unit ID
  uid = "";
  for (int x = 0; x < 5; x++)
  {
    uid = uid + char(EEPROM.read(x));
  }
  
}

getRHT.ino

// RHT03 Humidity and Temperature Sensor
void isRHT03(){

  // Call rht.update() to get new humidity and temperature values from the sensor.
  int updateRet = rht.update();

  // The humidity(), tempC(), and tempF() functions can be called -- after 
  // a successful update() -- to get the last humidity and temperature value 
  latestHumidity = rht.humidity();
  latestTempC = rht.tempC();
  latestTempF = rht.tempF();
  
}

getRTCpcf8523.ino

// PCF8523 Precision RTC 
void setupRTC() {

  // pcf8523 Precision RTC   
  if (! rtc.begin()) {
    while (1);
  }  
  if (! rtc.initialized()) {
    // Following line sets the RTC to the date & time this sketch was compiled
    rtc.adjust(DateTime(F(__DATE__), F(__TIME__)));
    // This line sets the RTC with an explicit date & time, for example to set
    // January 21, 2014 at 3am you would call:
    // rtc.adjust(DateTime(2018, 9, 29, 12, 17, 0));
  }
  
}
// Date and Time RTC
void isRTC () {

  // Date and Time
  DateTime now = rtc.now();
  // Date
  dateRTC = now.year(), DEC; 
  dateRTC = dateRTC + "/";
  dateRTC = dateRTC + now.month(), DEC;
  dateRTC = dateRTC + "/";
  dateRTC = dateRTC + now.day(), DEC;
  // Time
  timeRTC = now.hour(), DEC;
  timeRTC = timeRTC + ":";
  timeRTC = timeRTC + now.minute(), DEC;
  timeRTC = timeRTC + ":";
  timeRTC = timeRTC + now.second(), DEC;
  
}

getSD.ino

// SD Card
void setupSD() {

  // SD Card
    pinMode( chipSelect , OUTPUT );
    if(!SD.begin( chipSelect )){
        ;  
        return;
    }
    uint8_t cardType = SD.cardType();

    if(cardType == CARD_NONE){
        ; 
        return;
    }

    //Serial.print("SD Card Type: ");
    if(cardType == CARD_MMC){
        ; 
    } else if(cardType == CARD_SD){
        ; 
    } else if(cardType == CARD_SDHC){
        ; 
    } else {
        ; 
    } 

    uint64_t cardSize = SD.cardSize() / (1024 * 1024);
  
}
// SD Card
void isSD() {

  zzzzzz = "";

  zzzzzz = uid + "|" + sver + "|" + dateRTC + "|" + timeRTC + "|" + latestHumidity + "|" + latestTempC + "|" + latestTempF + "|\r";

  char msg[zzzzzz.length() + 1];

  zzzzzz.toCharArray(msg, zzzzzz.length() + 1);

  appendFile(SD, "/espdata.txt", msg );
  
}
// List Dir
void listDir(fs::FS &fs, const char * dirname, uint8_t levels){
    dirname;
    File root = fs.open(dirname);
    if(!root){
        return;
    }
    if(!root.isDirectory()){
        return;
    }

    File file = root.openNextFile();
    while(file){
        if(file.isDirectory()){
            file.name();
            if(levels){
                listDir(fs, file.name(), levels -1);
            }
        } else {
            file.name();
            file.size();
        }
        file = root.openNextFile();
    }
}
// Write File
void writeFile(fs::FS &fs, const char * path, const char * message){
    path;
    File file = fs.open(path, FILE_WRITE);
    if(!file){
        return;
    }
    if(file.print(message)){
        ;  
    } else {
        ;  
    }
    file.close();
}
// Append File
void appendFile(fs::FS &fs, const char * path, const char * message){
    //Serial.printf("Appending to file: %s\n", path);
    path;
    File file = fs.open(path, FILE_APPEND);
    if(!file){
        return;
    }
    if(file.print(message)){
        ;  
    } else {
        ;  
    }
    file.close();
}

setup.ino

// Setup
void setup() {

  // EEPROM with unique ID
  EEPROM.begin(EEPROM_SIZE);
   
  // Get Unit ID
  GetUID();
  
  // SHARP Display start & clear the display
  display.begin();
  display.clearDisplay();

  isDisplayUID();

  delay( 5000 );
  
  // Initialize the LED Green
  pinMode(iLEDGreen, OUTPUT);

  // PCF8523 Precision RTC 
  setupRTC();

  // Date and Time RTC
  isRTC();

  // RHT03 Humidity and Temperature Sensor
  // Call rht.begin() to initialize the sensor and our data pin
  rht.begin(RHT03_DATA_PIN);

  // SD Card
  setupSD();

}

Follow Us

Web: https://www.donluc.com/
Web: http://neosteamlabs.com/
Web: http://www.jlpconsultants.com/
YouTube: https://www.youtube.com/channel/UC5eRjrGn1CqkkGfZy0jxEdA
Facebook: https://www.facebook.com/neosteam.labs.9/
Instagram: https://www.instagram.com/neosteamlabs/
Pinterest: https://www.pinterest.com/NeoSteamLabs/
Twitter: https://twitter.com/labs_steam
Etsy: https://www.etsy.com/shop/NeoSteamLabs

Don Luc

Project #11: ESP32 Feather – RHT03 – Mk04

Humidity and Temperature Sensor

——

——

RHT03 - Humidity and Temperature Sensor

——

RHT03 - Humidity and Temperature Sensor

——

RHT03 - Humidity and Temperature Sensor

——

RHT03 - Humidity and Temperature Sensor

——

RHT03 – Humidity and Temperature Sensor

The RHT03 is a low cost humidity and temperature sensor with a single wire digital interface. The sensor is calibrated and doesn’t require extra components so you can get right to measuring relative humidity and temperature.

DonLuc1909Mk01

1 x Adafruit HUZZAH32 ESP32 Feather
1 x Adafruit SHARP Memory Display
1 x Adafruit DS3231 Precision RTC FeatherWing
1 x CR1220 12mm Lithium Battery
1 x RHT03 Humidity and Temperature Sensor
1 x LED Green
1 x 100 Ohm
14 x Jumper Wires 3″ M/M
2 x Jumper Wires 6″ M/M
1 x Full-Size Breadboard
1 x SparkFun Cerberus USB Cable

Adafruit HUZZAH32 ESP32 Feather

LG1 – Digital 21
RHT – Digital 17
SCK – Digital 13
MOS – Digital 12
SSD – Digital 27
SDA – Digital 23
SCL – Digital 22
GND – GND
VIN – +3.3V

DL1909Mk01.ino

// ***** Don Luc Electronics *****
// Software Version Information
// Project #11: HUZZAH32 ESP32 Feather - Mk04
// 09-01
// DonLuc1909Mk01p.ino 11-04
// Adafruit HUZZAH32 ESP32 Feather Board
// SHARP Display
// LED Green
// DS3231 Precision RTC
// EEPROM
// RHT03 Humidity and Temperature Sensor

// include Library Code
#include <Adafruit_SharpMem.h>
#include <Adafruit_GFX.h>
#include <RTClib.h>
#include <Wire.h>
#include "EEPROM.h"
#include <SparkFun_RHT03.h>

// SHARP Memory Display
// any pins can be used
#define SHARP_SCK  13
#define SHARP_MOSI 12
#define SHARP_SS   27
// Set the size of the display here, e.g. 144x168!
Adafruit_SharpMem display(SHARP_SCK, SHARP_MOSI, SHARP_SS, 144, 168);
// The currently-available SHARP Memory Display (144x168 pixels)
// requires > 4K of microcontroller RAM; it WILL NOT WORK on Arduino Uno
// or other <4K "classic" devices!
#define BLACK 0
#define WHITE 1
int minorHalfSize; // 1/2 of lesser of display width or height

// LED Green
int iLEDGreen =  21;                 // LED Green

// DS3231 Precision RTC 
RTC_DS3231 RTC;
String sDate;
String sTime;

// The current address in the EEPROM (i.e. which byte
// we're going to  read to next)
#define EEPROM_SIZE 64
String sver = "9-1.p";
// Unit ID information
String uid = "";

// RHT Humidity and Temperature Sensor
const int RHT03_DATA_PIN = 17;          // RHT03 data pin Digital 17
RHT03 rht;                              // This creates a RTH03 object, which we'll use to interact with the sensor
float latestHumidity;
float latestTempC;
float latestTempF;

void loop() {

  // iLEDGreen
  digitalWrite(iLEDGreen,  HIGH );
  // DS3231 Precision RTC 
  timeRTC();
  // RHT03 Humidity and Temperature Sensor
  isRHT03();
  // SHARP Memory Display On
  isDisplayOn();
  // iLEDGreen
  digitalWrite(iLEDGreen,  LOW );   
  // Delay 1
  delay( 1000 );

}

getDisplay.ino

// SHARP Memory Display On
void isDisplayOn() {

    // Clear Display
    display.clearDisplay();
    // text display date, time, LED on
    display.setRotation(4);
    display.setTextSize(2);
    display.setTextColor(BLACK);
    display.setCursor(0,10);
    display.println( sDate );
    display.setCursor(0,30);
    display.println( sTime );
    display.setTextSize(2);
    display.setCursor(0,55);
    display.print("Hum: ");
    display.print( latestHumidity );
    display.println("%");
    display.setCursor(0,75);
    display.print("Cel: ");
    display.print( latestTempC );
    display.println("*C");
    display.setCursor(0,95);
     display.print("Fah: ");
    display.print( latestTempF );
    display.println("*F");
    display.refresh();

}
// SHARP Memory Display - UID
void isDisplayUID() {

    // text display EEPROM
    display.setRotation(4);
    display.setTextSize(3);
    display.setTextColor(BLACK);
    display.setCursor(0,20);
    display.println( sver );
   // display.setTextSize();
    display.setTextColor(BLACK);
    display.setCursor(0,65);
    display.println( uid );
    display.refresh();
    delay( 100 );
    
}

getEEPROM.ino

// EEPROM
void GetUID()
{
  
  // Get unit ID
  uid = "";
  for (int x = 0; x < 5; x++)
  {
    uid = uid + char(EEPROM.read(x));
  }
  
}

getRHT.ino

// RHT03 Humidity and Temperature Sensor
void isRHT03(){

  // Call rht.update() to get new humidity and temperature values from the sensor.
  int updateRet = rht.update();

  // The humidity(), tempC(), and tempF() functions can be called -- after 
  // a successful update() -- to get the last humidity and temperature value 
  latestHumidity = rht.humidity();
  latestTempC = rht.tempC();
  latestTempF = rht.tempF();
  
}

getRTCDS3231.ino

// DS3231 Precision RTC 
void setupRTC() {

  // DS3231 Precision RTC   
  RTC.begin();
  if (! RTC.begin()) {
    while (1);
  }
  
  DateTime now = RTC.now();

  if (RTC.lostPower()) {
    // Following line sets the RTC to the date & time this sketch was compiled
    RTC.adjust(DateTime(F(__DATE__), F(__TIME__)));
  }
  
}
// timeRTC
void timeRTC() {

    // DS3231 Precision RTC 
    sDate = "";
    sTime = "";
    
    DateTime now = RTC.now();

    // sData
    sDate += String(now.year(), DEC);
    sDate += "/";
    sDate += String(now.month(), DEC);
    sDate += "/";
    sDate += String(now.day(), DEC);
    
    // sTime
    sTime += String(now.hour(), DEC);
    sTime += ":";
    sTime += String(now.minute(), DEC);
    sTime += ":";
    sTime += String(now.second(), DEC);

}

setup.ino

// Setup
void setup() {

  // EEPROM with unique ID
  EEPROM.begin(EEPROM_SIZE);
   
  // Get Unit ID
  GetUID();
  
  // SHARP Display start & clear the display
  display.begin();
  display.clearDisplay();

  isDisplayUID();

  delay( 5000 );
  
  // Initialize the LED Green
  pinMode(iLEDGreen, OUTPUT);

  // DS3231 Precision RTC 
  setupRTC();

  // DS3231 Precision RTC 
  timeRTC();

  // RHT03 Humidity and Temperature Sensor
  // Call rht.begin() to initialize the sensor and our data pin
  rht.begin(RHT03_DATA_PIN);
    
}

Follow Us

Web: https://www.donluc.com/
Web: http://neosteamlabs.com/
Web: http://www.jlpconsultants.com/
YouTube: https://www.youtube.com/channel/UC5eRjrGn1CqkkGfZy0jxEdA
Facebook: https://www.facebook.com/neosteam.labs.9/
Instagram: https://www.instagram.com/neosteamlabs/
Pinterest: https://www.pinterest.com/NeoSteamLabs/
Twitter: https://twitter.com/labs_steam
Etsy: https://www.etsy.com/shop/NeoSteamLabs

Don Luc

Project #11: ESP32 Feather – DS3231 Precision RTC – Mk03

Adafruit HUZZAH32 ESP32 Feather

——

——

ESP32 Feather - DS3231 Precision RTC

——

ESP32 Feather - DS3231 Precision RTC

——

ESP32 Feather - DS3231 Precision RTC

——

ESP32 Feather - DS3231 Precision RTC

——

Adafruit DS3231 Precision RTC FeatherWing

A Feather board without ambition is a Feather board without FeatherWings! This is the DS3231 Precision RTC FeatherWing: it adds an extremely accurate I2C-integrated Real Time Clock (RTC) with a Temperature Compensated Crystal Oscillator to any Feather main board. This RTC is the most precise you can get in a small, low power package. Most RTCs use an external 32kHz timing crystal that is used to keep time with low current draw.

With a CR1220 12mm lithium battery plugged into the top of the FeatherWing, you can get years of precision timekeeping, even when main power is lost. Great for datalogging and clocks, or anything where you need to really know the time.

DonLuc1908Mk03

1 x Adafruit HUZZAH32 ESP32 Feather
1 x Adafruit SHARP Memory Display
1 x Adafruit DS3231 Precision RTC FeatherWing
1 x CR1220 12mm Lithium Battery
1 x LED Green
1 x Push Button
1 x 100 Ohm
1 x 10K Ohm
14 x Jumper Wires 3″ M/M
2 x Jumper Wires 6″ M/M
1 x Full-Size Breadboard
1 x SparkFun Cerberus USB Cable

Adafruit HUZZAH32 ESP32 Feather

LG1 – Digital 21
PB1 – Digital 17
SCK – Digital 13
MOS – Digital 12
SSD – Digital 27
SDA – Digital 23
SCL – Digital 22
GND – GND
VIN – +3.3V

DL1908Mk03p.ino

// ***** Don Luc Electronics *****
// Software Version Information
// Project #11: HUZZAH32 ESP32 Feather - DS3231 Precision RTC - Mk03
// 08-03
// DonLuc1908Mk03p.ino 08-03
// Adafruit HUZZAH32 ESP32 Feather Board
// SHARP Display
// LED Green
// Push Button
// DS3231 Precision RTC 

// include Library Code
#include <Adafruit_SharpMem.h>
#include <Adafruit_GFX.h>
#include <RTClib.h>
#include <Wire.h>

// SHARP Memory Display
// any pins can be used
#define SHARP_SCK  13
#define SHARP_MOSI 12
#define SHARP_SS   27
// Set the size of the display here, e.g. 144x168!
Adafruit_SharpMem display(SHARP_SCK, SHARP_MOSI, SHARP_SS, 144, 168);
// The currently-available SHARP Memory Display (144x168 pixels)
// requires > 4K of microcontroller RAM; it WILL NOT WORK on Arduino Uno
// or other <4K "classic" devices!
#define BLACK 0
#define WHITE 1
int minorHalfSize; // 1/2 of lesser of display width or height

// LED Green
int iLEDGreen =  21;                 // LED Green
int stateLEDGreen = LOW;             // stateLEDGreen 

// Button
int iBut1 = 17;                      // Button 1
int ButState1;                       // Variable for reading the button status
int previous = LOW;                  // previous
long lTime = 0;                      // lTime
long debounce = 500;                 // debounce

// DS3231 Precision RTC 
RTC_DS3231 RTC;
String sDate;
String sTime;

void loop() {
  
  // Read the state of the button value
  ButState1 = digitalRead(iBut1);
  
  // Check if the button is pressed
  if (ButState1 == HIGH && previous == LOW && millis() - lTime > debounce) 
  {

     if(stateLEDGreen == HIGH)
     {
      
        // stateLEDGreen = LOW
        stateLEDGreen = LOW;
        // DS3231 Precision RTC 
        timeRTC();
        // SHARP Memory Display Off
        isDisplayOff();

             
     } else 
     {

        // stateLEDGreen = HIGH
        stateLEDGreen = HIGH;
        // DS3231 Precision RTC 
        timeRTC(); 
        // SHARP Memory Display On
        isDisplayOn();
            
    }
    lTime = millis();

  } 

  // iLEDGreen
  digitalWrite(iLEDGreen, stateLEDGreen);
  previous == ButState1;  
 
}

getDisplay.ino

// SHARP Memory Display On
void isDisplayOn() {

    // Clear Display
    display.clearDisplay();
    // text display date, time, LED on
    display.setRotation(4);
    display.setTextSize(2);
    display.setTextColor(BLACK);
    display.setCursor(10,10);
    display.println( sDate );
    display.setCursor(10,30);
    display.println( sTime );
    display.setTextSize(3);
    display.setCursor(10,55);
    display.println("LED On");
    display.refresh();

}
// SHARP Memory Display Off
void isDisplayOff() {

    // Clear Display
    display.clearDisplay();
    // text display date, time, LED off
    display.setRotation(4);
    display.setTextSize(2);
    display.setTextColor(BLACK);
    display.setCursor(10,10);
    display.println( sDate );
    display.setCursor(10,30);
    display.println( sTime );
    display.setTextSize(3);    
    display.setCursor(10,55);
    display.println("LED Off");
    display.refresh();

}

getRTCDS3231.ino

// DS3231 Precision RTC 
void setupRTC() {

  // DS3231 Precision RTC   
  RTC.begin();
  if (! RTC.begin()) {
    while (1);
  }
  
  DateTime now = RTC.now();

  if (RTC.lostPower()) {
    // Following line sets the RTC to the date & time this sketch was compiled
    RTC.adjust(DateTime(F(__DATE__), F(__TIME__)));
  }
  
}
// timeRTC
void timeRTC() {

    // DS3231 Precision RTC 
    sDate = "";
    sTime = "";
    
    DateTime now = RTC.now();

    // sData
    sDate += String(now.year(), DEC);
    sDate += "/";
    sDate += String(now.month(), DEC);
    sDate += "/";
    sDate += String(now.day(), DEC);
    
    // sTime
    sTime += String(now.hour(), DEC);
    sTime += ":";
    sTime += String(now.minute(), DEC);
    sTime += ":";
    sTime += String(now.second(), DEC);

}

setup.ino

// Setup
void setup() {

  // SHARP Display start & clear the display
  display.begin();
  display.clearDisplay();

  // Button 1
  // Initialize the button as an input
  pinMode(iBut1, INPUT);
  
  // Initialize the LED Green
  pinMode(iLEDGreen, OUTPUT);

  // DS3231 Precision RTC 
  setupRTC();

  // stateLEDGreen = LOW
  stateLEDGreen = LOW;
  // DS3231 Precision RTC 
  timeRTC();
  // SHARP Memory Display Off
  isDisplayOff();  
    
}

Follow Us

Web: https://www.donluc.com/
Web: http://neosteamlabs.com/
Web: http://www.jlpconsultants.com/
YouTube: https://www.youtube.com/channel/UC5eRjrGn1CqkkGfZy0jxEdA
Facebook: https://www.facebook.com/neosteam.labs.9/
Instagram: https://www.instagram.com/neosteamlabs/
Pinterest: https://www.pinterest.com/NeoSteamLabs/
Twitter: https://twitter.com/labs_steam
Etsy: https://www.etsy.com/shop/NeoSteamLabs

Don Luc

Project #11: ESP32 Feather – Push Button – Mk02

ESP32 Feather – Push Button – Mk02

——

——

ESP32 Feather - Push Button - Mk02

——

ESP32 Feather - Push Button - Mk02

——

ESP32 Feather - Push Button - Mk02

——

ESP32 Feather - Push Button - Mk02

——

Momentary Pushbutton Switch

This is a standard 12mm square momentary button. What we really like is the large button head and good tactile feel (it ‘clicks’ really well). This button is great for user input on a PCB or a good, big reset button on a breadboard. Breadboard friendly!

DonLuc1908Mk02

1 x Adafruit HUZZAH32 ESP32 Feather
1 x Adafruit SHARP Memory Display
1 x LED Green
1 x Push Button
1 x 100 Ohm
1 x 10K Ohm
12 x Jumper Wires 3″ M/M
1 x Full-Size Breadboard
1 x SparkFun Cerberus USB Cable

Adafruit HUZZAH32 ESP32 Feather

LG1 – Digital 21
PB1 – Digital 17
SCK – Digital 13
MOS – Digital 12
SSD – Digital 27
GND – GND
VIN – +3.3V

Follow Us

Web: http://neosteamlabs.com/
Web: https://www.donluc.com/
Web: http://www.jlpconsultants.com/
YouTube: https://www.youtube.com/channel/UC5eRjrGn1CqkkGfZy0jxEdA
Facebook: https://www.facebook.com/neosteam.labs.9/
Instagram: https://www.instagram.com/neosteamlabs/
Pinterest: https://www.pinterest.com/NeoSteamLabs/
Twitter: https://twitter.com/labs_steam
Etsy: https://www.etsy.com/shop/NeoSteamLabs

DL1908Mk02p.ino

// ***** Don Luc Electronics *****
// Software Version Information
// Project #11: HUZZAH32 ESP32 Feather - Push Button - Mk02
// 08-02
// DonLuc1908Mk02p.ino 08-02
// Adafruit HUZZAH32 ESP32 Feather Board
// SHARP Display
// LED Green
// Push Button

// include Library Code
#include <Adafruit_SharpMem.h>
#include <Adafruit_GFX.h>

// SHARP Memory Display
// any pins can be used
#define SHARP_SCK  13
#define SHARP_MOSI 12
#define SHARP_SS   27
// Set the size of the display here, e.g. 144x168!
Adafruit_SharpMem display(SHARP_SCK, SHARP_MOSI, SHARP_SS, 144, 168);
// The currently-available SHARP Memory Display (144x168 pixels)
// requires > 4K of microcontroller RAM; it WILL NOT WORK on Arduino Uno
// or other <4K "classic" devices!
#define BLACK 0
#define WHITE 1
int minorHalfSize; // 1/2 of lesser of display width or height

// LED Green
int iLEDGreen =  21;                 // LED Green
int stateLEDGreen = LOW;             // stateLEDGreen 

// Button
int iBut1 = 17;                      // Button 1
int ButState1;                       // Variable for reading the button status
int previous = LOW;                  // previous
long lTime = 0;                      // lTime
long debounce = 500;                 // debounce

void loop() {
  
  // Read the state of the button value
  ButState1 = digitalRead(iBut1);
  
  // Check if the button is pressed
  if (ButState1 == HIGH && previous == LOW && millis() - lTime > debounce) 
  {

     if(stateLEDGreen == HIGH)
     {
      
        // stateLEDGreen = LOW
        stateLEDGreen = LOW;
        // SHARP Memory Display Off
        isDisplayOff();
             
     } else 
     {

        // stateLEDGreen = HIGH
        stateLEDGreen = HIGH; 
        // SHARP Memory Display On
        isDisplayOn();
            
    }
    lTime = millis();

  } 

  // iLEDGreen
  digitalWrite(iLEDGreen, stateLEDGreen);
  previous == ButState1;  
 
}

getDisplay.ino

// SHARP Memory Display On
void isDisplayOn() {

    // Clear Display
    display.clearDisplay();
    // text display tests
    display.setRotation(4);
    //display.clearDisplay();
    display.setTextSize(5);
    display.setTextColor(BLACK);
    display.setCursor(10,25);
    display.println("LED");
    display.setCursor(10,75);
    display.println("On");
    display.refresh();

}
// SHARP Memory Display Off
void isDisplayOff() {

    // Clear Display
    display.clearDisplay();
    // text display tests
    display.setRotation(4);
    //display.clearDisplay();
    display.setTextSize(5);
    display.setTextColor(BLACK);
    display.setCursor(10,25);
    display.println("LED");
    display.setCursor(10,75);
    display.println("Off");
    display.refresh();

}

setup.ino

// Setup
void setup() {

  // SHARP Display start & clear the display
  display.begin();
  display.clearDisplay();

  // Button 1
  // Initialize the button as an input
  pinMode(iBut1, INPUT);
  
  // Initialize the LED Green
  pinMode(iLEDGreen, OUTPUT);
    
}

Don Luc

Fun with browsers and WordPress

Apr 30, 2010 @ 20:40

It has been one of those days. Somebody reported to me last night that the theme of our <a href=”http://www.igourmand.com/eatdrink/”>food and wine blog</a> did not display the first photo of any page correctly. The first image appeared after a huge space. The problem only happened with Internet Explorer and everything was fine with Firefox. Thus became the quest early this morning at 8am and I started tracking the problem.

I first thought that it was some “Div” problem as the theme used was one that I had made over 5 years ago. I recently rewrote it to change the look and then I rewrote it again last week to bring it into line with the current WordPress theme architecture. I had yet to polish it and finish formatting it and commenting it properly, so my logical thought was it was just some error in one of the PHP files of the theme. I even remembered checking it with various browsers just last week to make sure there was not such a problem, but since I have been doing small incremental update maybe some little error slipped in and I did not catch it.

I first checked the source code in the browser to see if I could find something wrong there. I used a few automated HTML formatter and the results were dismal. If somebody has a good HTML formatter that actually works to recommend, please let me know.

I ended up formatting everything by hand and after reviewing the code found out that there was absolutely nothing obviously wrong with it, and nothing that would explain the discrepancy between Firefox and IE. I had a hunch that the problem might be with the sidebar code, so I disabled it and low and behold the huge space before the first image on a page disappeared. Thus my hunch was right.

I then re-enabled each section of the sidebar one after another until the problem reappeared and finally found that the problem was with the image links I added a few days ago in the sidebar. There is absolutely no reason that IE should behave this way, except that it does not interpret the CSS properly. There is plenty of space for both the sidebar image links and the image in the post, and even if I resized the image in the post to a smaller size the problem continued.

I then starting fine-tuning the CSS and with just a few minor changes of around 15 pixels in one section everything popped back together as it should. I guess that IE is just very bad at properly following the CSS and placing elements on the screen.

Once that was done I decided that since I was in the middle of doing a lot of things with the theme, I should finish it properly. I spent the rest of the day properly formatting the code, changing deprecated WordPress functions to their new versions, profusely commenting the theme so the next time I need to modify things I can quickly find what I am looking for, doing some minor cosmetic changes to the theme, and generally improved its function and look. I still want to spend a bit of time beautifying things, but now it will be a much simpler job after the work that was done today.

What started as what I thought would be a simple job finding a faulty line of code, ended up a day of detective work. The nice thing is that I learned a lot dissecting the more recent template format of WordPress as I had not digged in its depths since version 1.5. It is much more flexible and powerful now and I will go to bed much less stupid tonight after a great day learning new things about the inner works of WordPress. I’m just glad that the work was for myself as I would not have like to explain the reason to justify a full day a work simply to move a picture up in a blog to a client.

Don Luc

Why Consult Ants?

Apr 22, 2010 @ 19:23

As you main have noticed the blog is launching its new look today. I spent the last hour creating a quick and dirty theme for the blogs with a few simple graphics and over the new few weeks I will probably refine the look when I have a bit more time.

Some of you might be wondering why I named the blog “Consult Ants”. Besides the obvious bad pun, the name reflects my view of what the consulting business has evolved over the last decade. When I started as a consultant over 25 years ago, the profession was very different and was guided by some standards, which of course a lot of consultants were not following and giving a bad name to the profession, but it did meant something to the users of our services as the consultants that were doing a good job were respected in the industry and by our clients.

Today it seems that everybody and their cousins is a consultants, and just mentioning the name “Consultant” brings a bad connotation to a lot of people’s minds. It used to be that one would rise to the top of their field and then become a consultant, but now I see teenagers that label themselves consultants and want to sell their services at $5 an hour. That is not good for them, their clients, and for all consultants. I will rant and rave about this at length in the future, but this is what brought the name of this new blog to my mind. It seems that in lots of people’s minds us professional consultants are like a bunch of little interchangeable ants that are just running around in circles doing work and that every ant is doing the same job mindlessly. I want to bring this piece of information to the surface and dispel it, thus the name “Consult Ants” is there to bring it to the attention of most.

Since this blog will not be a structured one and will be more of a stream of mind type of blog, I am not sure exactly where this will lead, but bear with me when I try to find its directions and feel free to participate in the comment section.

Don Luc

Welcome to our new consulting industry blog!

Apr 20, 2010 @ 12:35

I have been blogging for over 5 years now in other venues and I thought that it was time to post my thought about what has been my main business for over 25 years. I started as a food-wine consultant back in the early 80’s. I was also active in the emerging field of computer graphics and animation at the time and also started to be more and more involved in the IT world as I had trained as a programmer at university. By the dawn of the 90’s I was a full time IT consultant/programmer/graphics/animation specialist. Then the industry changed rapidly with the event of the big Internet crash of the late 90’s and I became a software developer and launch my own line of products. Now I am back where I started and I am a Business/IT/Programmer/Hardware/Robotics/Graphics/Animation/Web/Food/Wine specialist.

I have seen many trends come and go, good and bad, and lived through many major industry changes. I do deplore some of the current state of the industry, and applaud some of the new trends. My wife had been telling me for years to write about the the industry as we discuss things a lot and she always tells me that I was born to teach, or preach when I get excited about a subject. Since my motto has always been to learn something new daily, and that a wasted day is one where you learn nothing new, I decided to share some of that hard-earned let’s call it “wisdom” for lack of a better term.

I know that I am considered as a dinosaur in this business where you are considered old when you hit 25, but there are some of us old fogies at over twice that, that are still active and can still provide a full contribution to this or these fields.

Don Luc

Categories
Archives