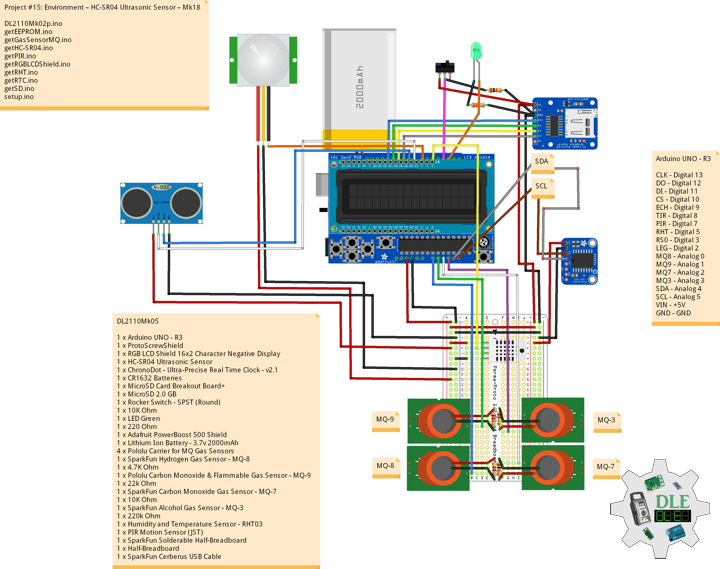
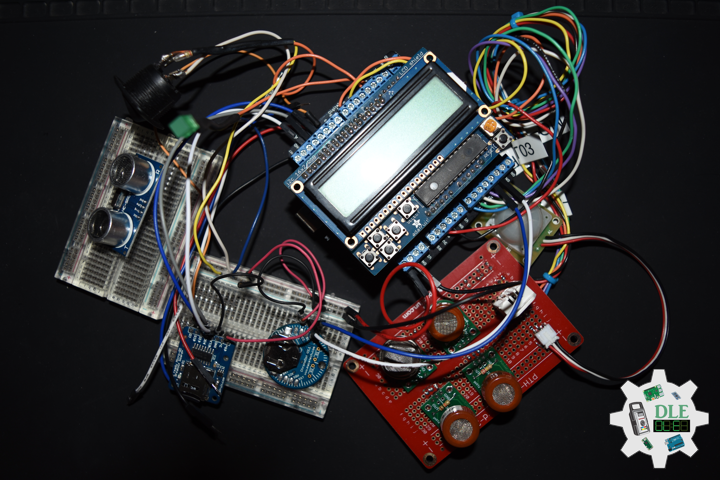
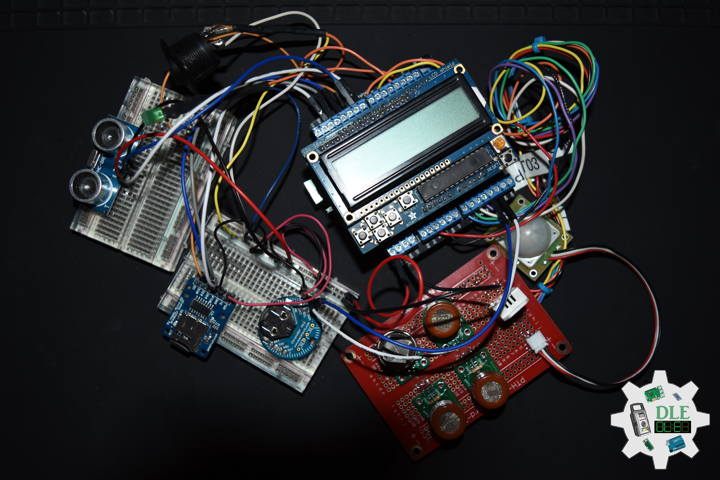
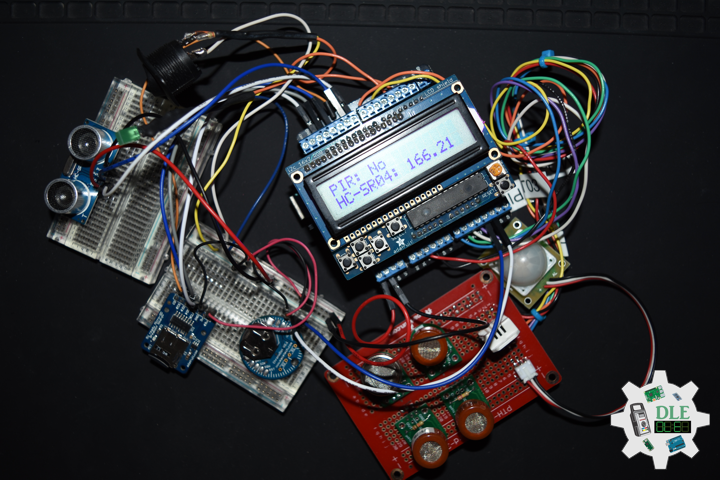
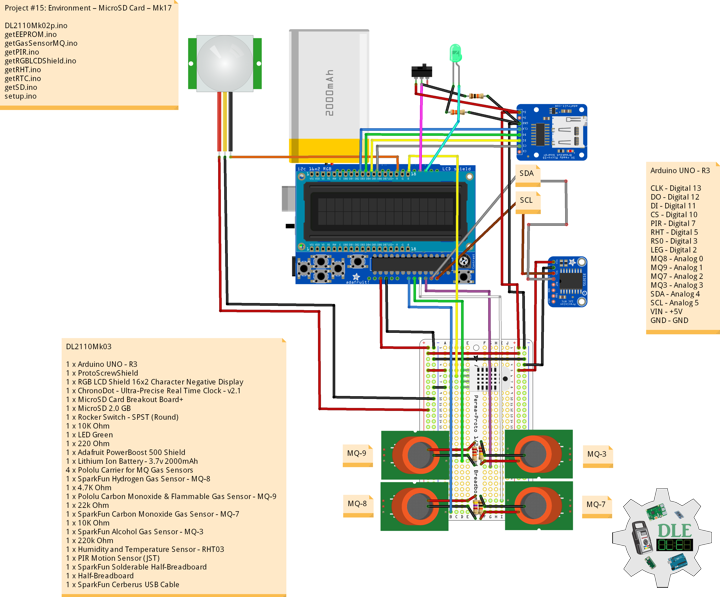
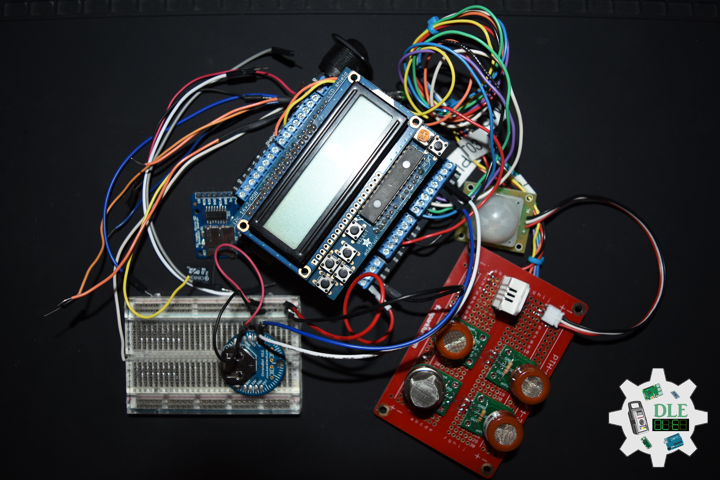
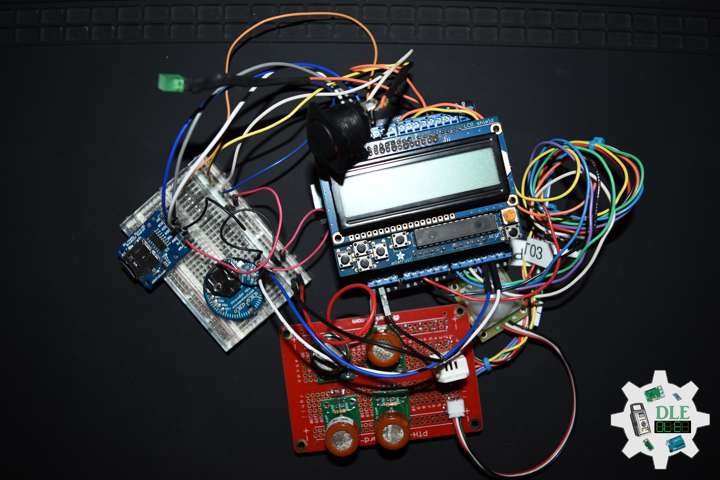
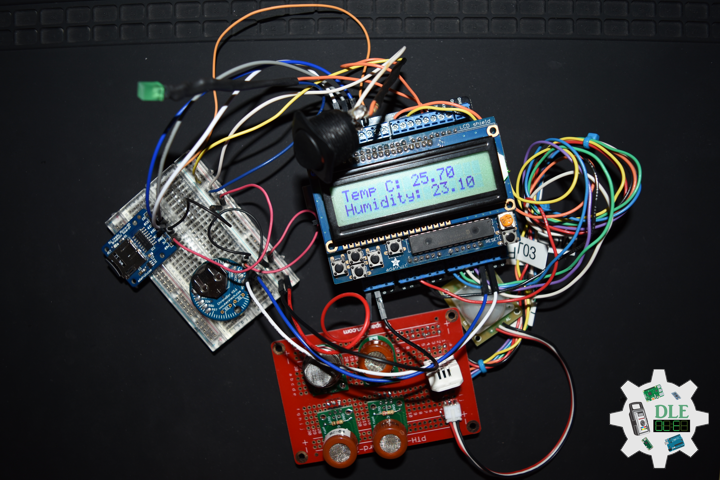
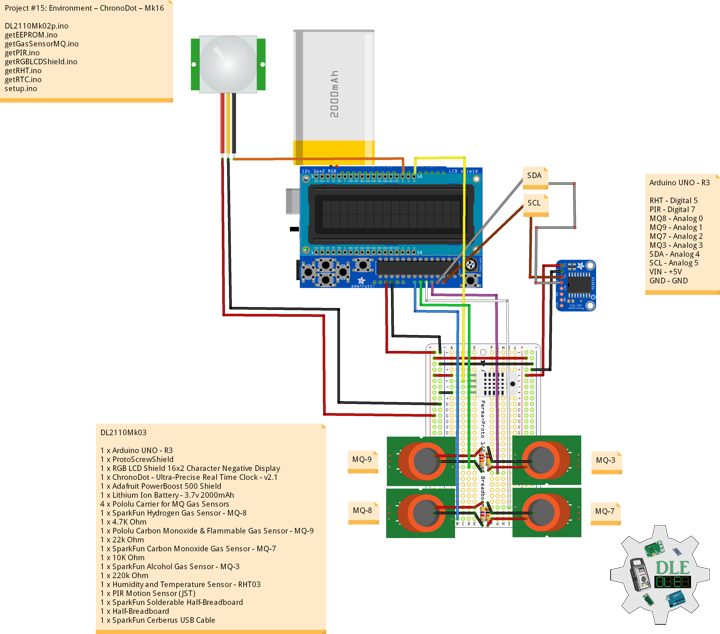
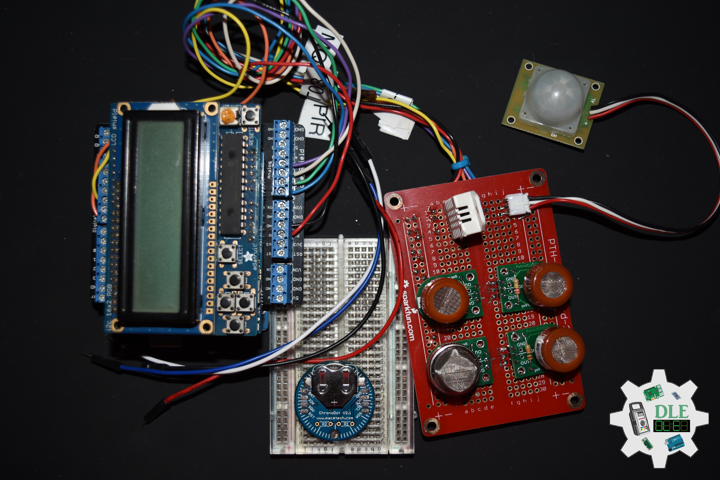
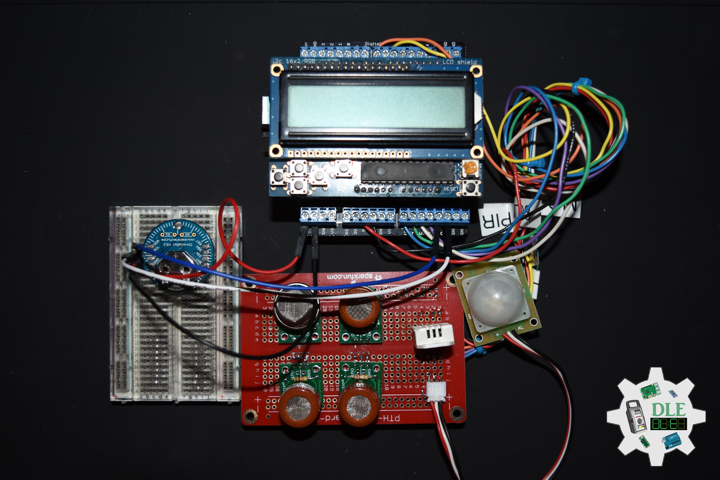
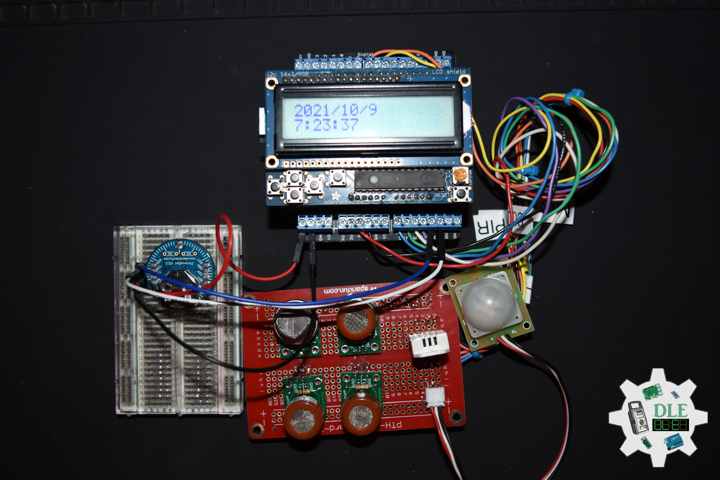
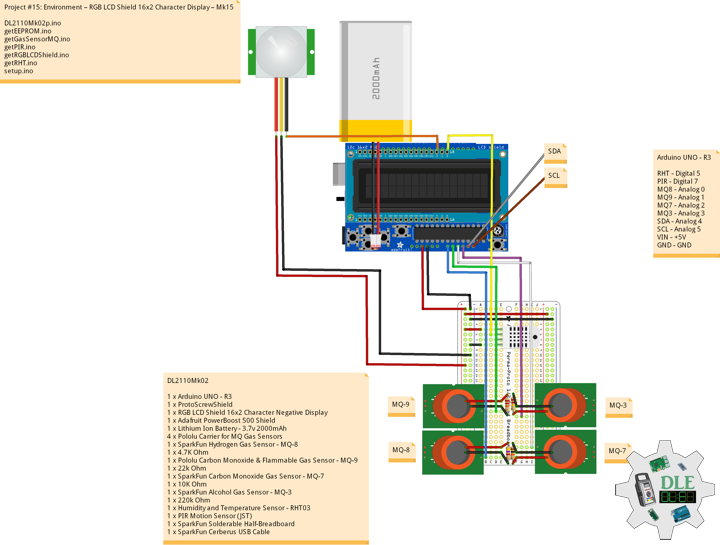
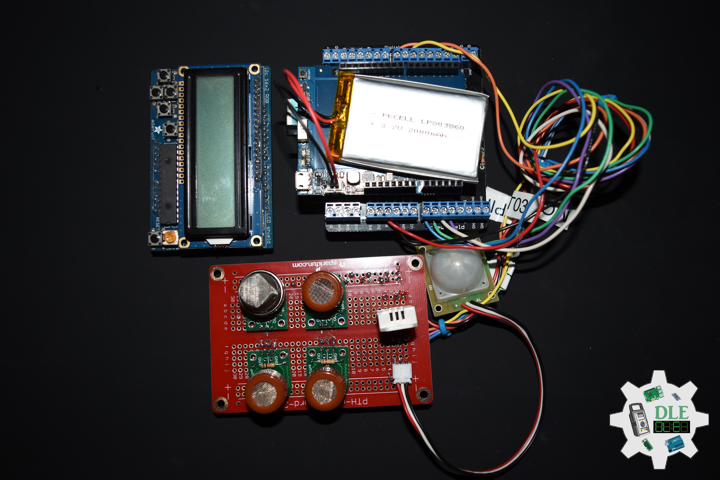
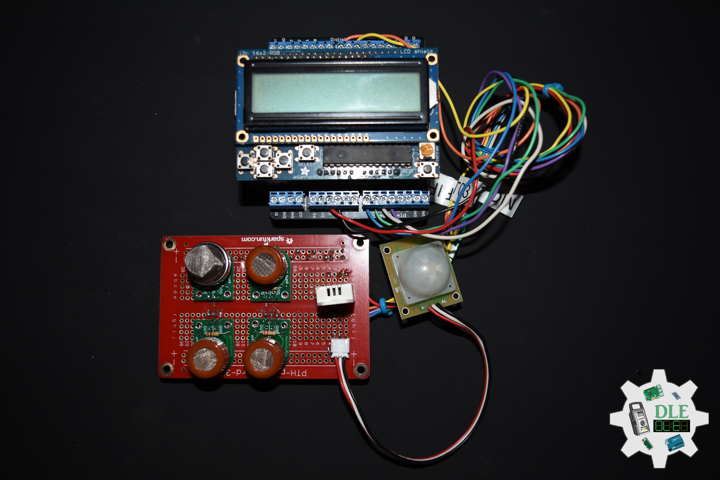
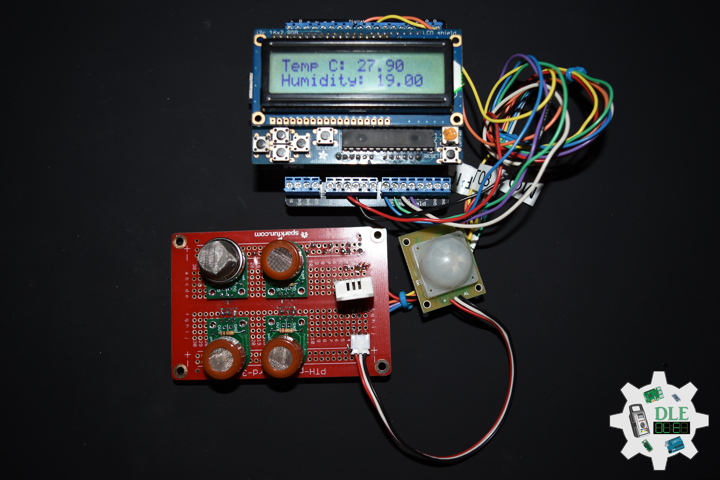
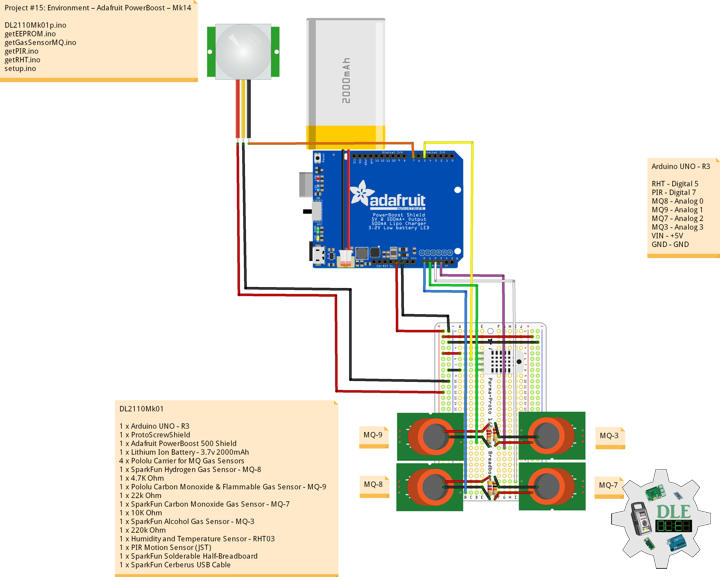
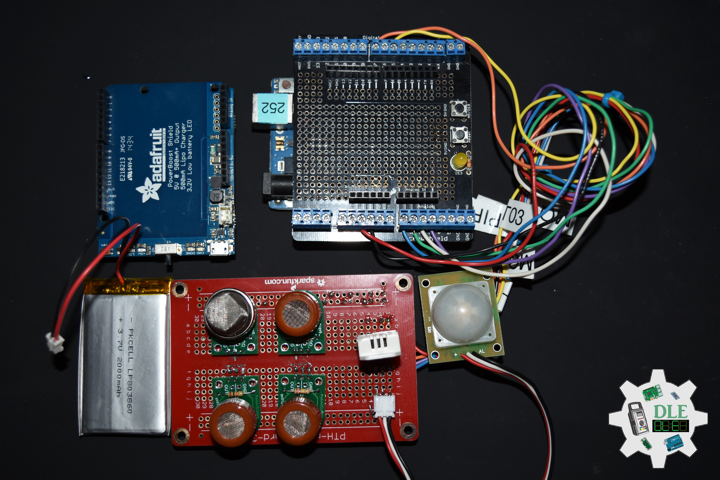
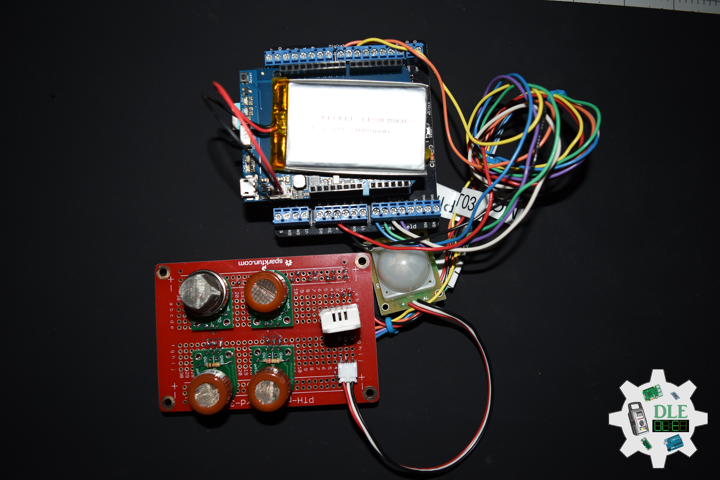
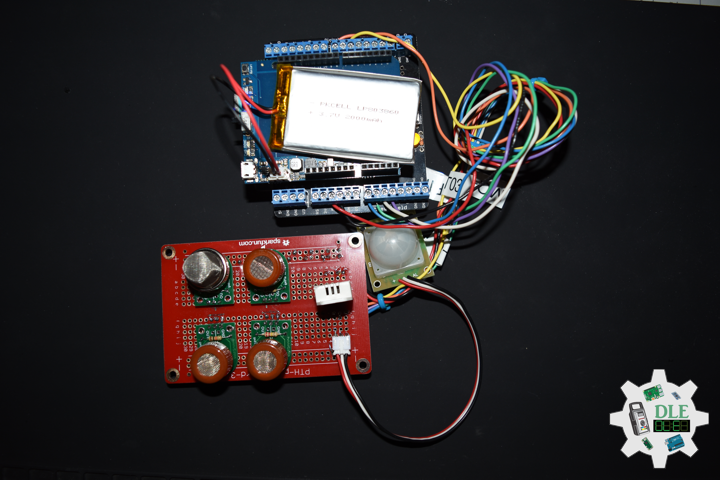
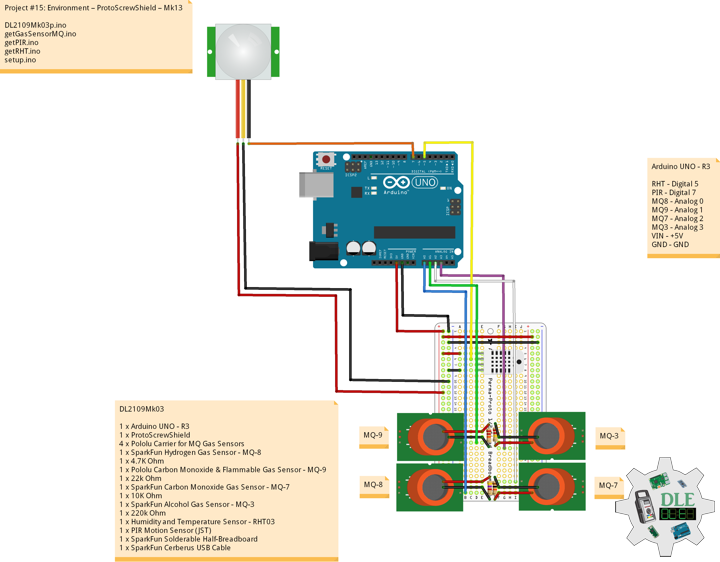
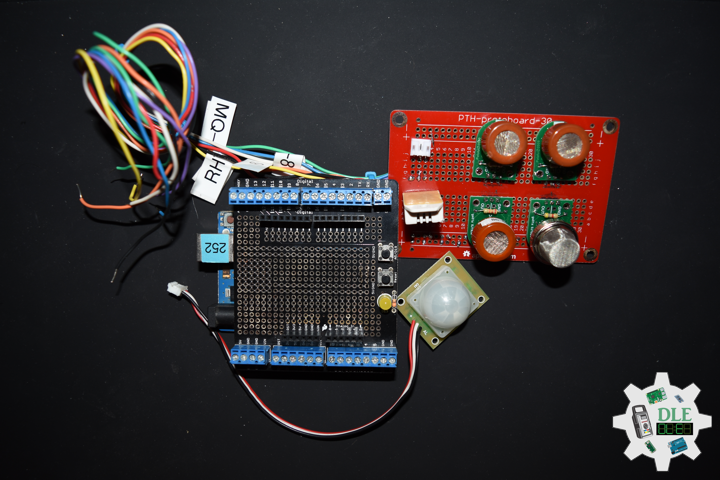
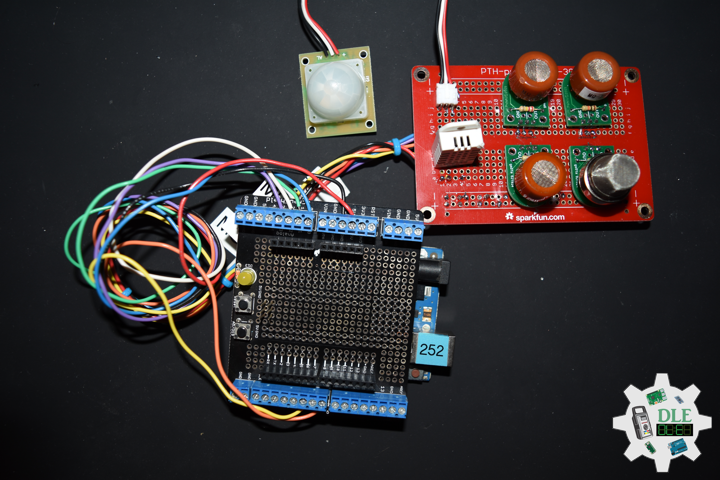
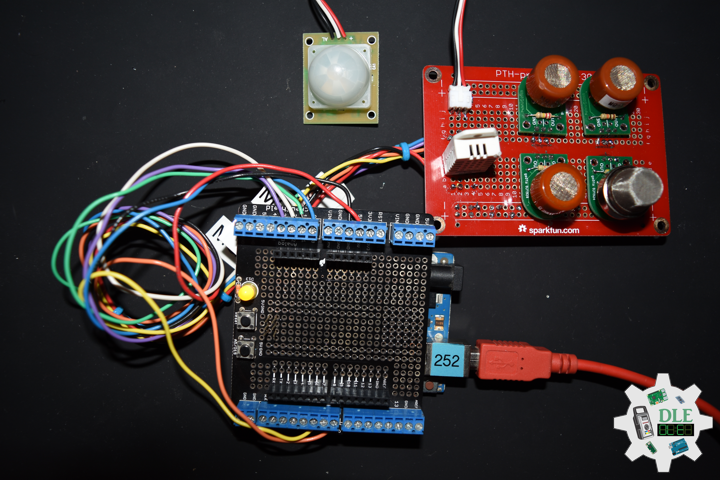
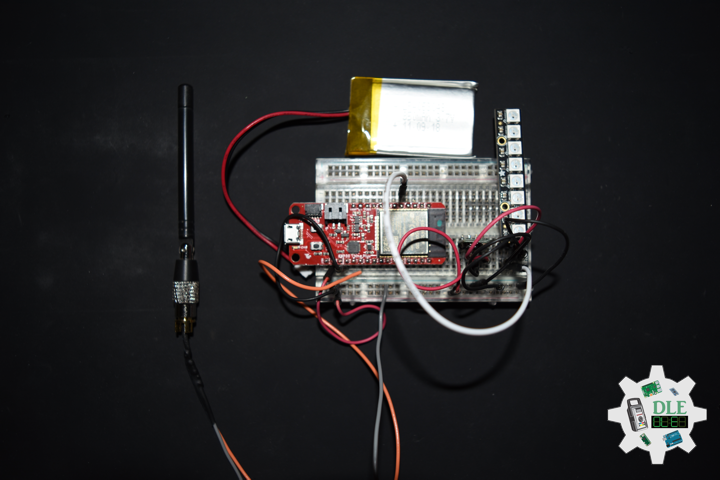
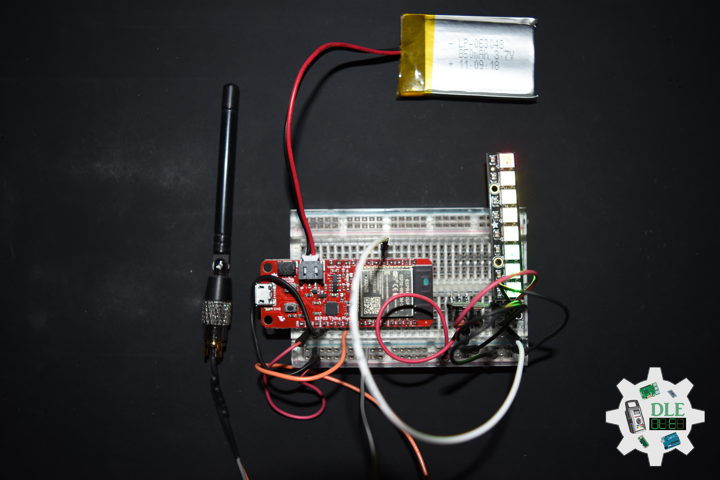
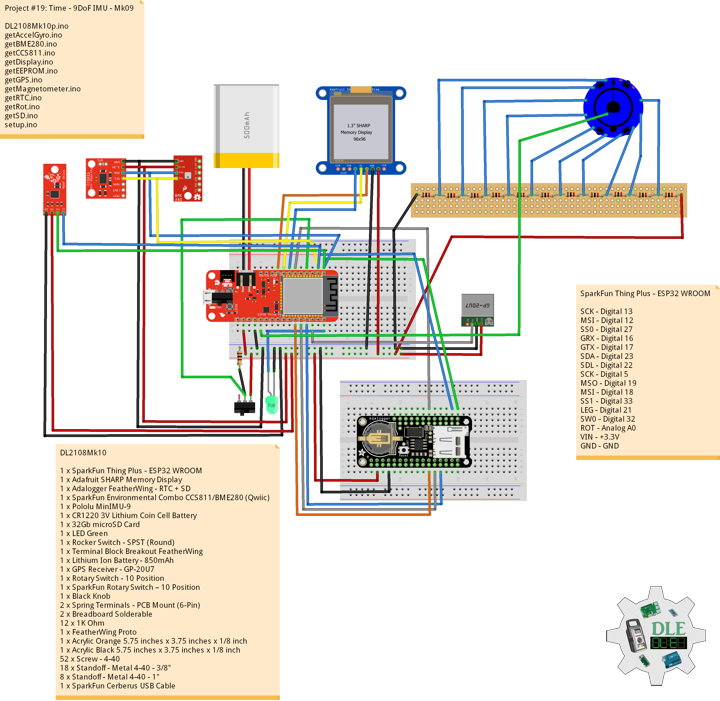
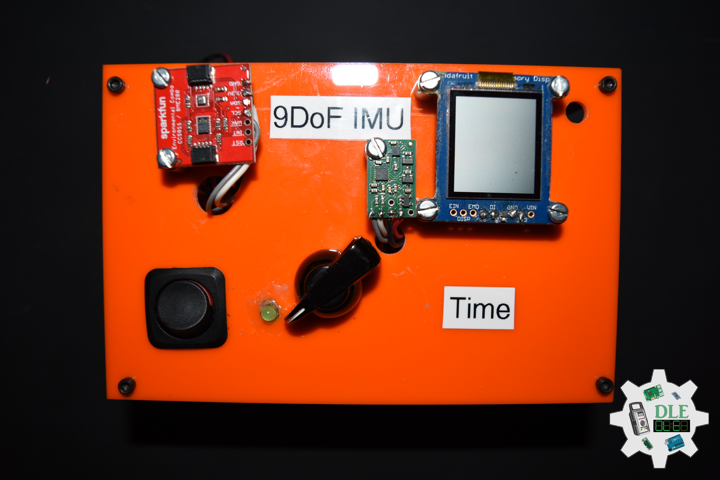
Components
Project #16: Sound – Waveform – Mk05
——
#donluc #sound #simplekeyboard #synthesizer #programming #arduino #fritzing #electronics #microcontrollers #consultant #vlog
——
——
——
——
Waveform
In acoustics the waveform of a signal is the shape of its graph as a function of time, independent of its time and magnitude scales and of any displacement in time. In acoustics, it is usually applied to steady periodic sounds—variations of pressure in air or other media. In these cases, the waveform is an attribute that is independent of the frequency, amplitude, or phase shift of the signal. The term can also be used for non-periodic signals, like chirps and pulses. There are certain wave types that are historically used in electronic music, known as classic waveforms: sine, sawtooth, square, and triangle. These are the four waveforms generated by the classic Moog synthesizer oscillators, and are still quite useful in computer music.
Sine Wave
To the human ear, a sound that is made of more than one sine wave will have perceptible harmonics; addition of different sine waves results in a different waveform and thus changes the timbre of the sound. Presence of higher harmonics in addition to the fundamental causes variation in the timbre, which is the reason why the same musical note played on different instruments sounds different.
Synthesizer
A synthesizer is an electronic musical instrument that generates audio signals. Synthesizers generate audio through methods including subtractive synthesis, additive synthesis, and frequency modulation synthesis. These sounds may be shaped and modulated by components such as filters, envelopes, and low-frequency oscillators. Synthesizers are typically played with keyboards.
Simple keyboard in Arduino is a single-oscillator digital synthesizer generates a square wave tone(). But this simply a square wave and so it sounds rather boring. With a simple trick we can generate any waveform with an Arduino, and with this even imitate musical instruments. The adsr object provides a signal in the shape of an ADSR envelope (attack, decay, sustain, release) commonly used in synthesizer design. You specify an attack time in ms, a decay time in ms, a sustain level, and a release time in ms. Arduino waveform sine wave!
DL2010Mk04
1 x Arduino Pro Mini 328 – 5V/16MHz
8 x Tactile Button
1 x Audio Jack 3.5mm
1 x SparkFun Audio Jack Breakout
1 x Hamburger Mini Speaker
8 x Wire Solid Core – 22 AWG
1 x Jumper Wires 3in M/M
11 x Jumper Wires 6in M/M
2 x Full-Size Breadboard
1 x SparkFun Cerberus USB Cable
1 x SparkFun FTDI Basic Breakout – 5V
Arduino Pro Mini 328 – 5V/16MHz
SPK – Digital 11
KY2 – Digital 2
KY3 – Digital 3
KY4 – Digital 4
KY5 – Digital 5
KY6 – Digital 6
KY7 – Digital 7
KY8 – Digital 8
KY9 – Digital 9
VIN – +5V
GND – GND
DL2010Mk04p.ino
// ***** Don Luc Electronics © ***** // Software Version Information // Project #16: Sound - Waveform - Mk05 // 10-04 // DL2010Mk04p.ino 16-05 // 1 x Arduino Pro Mini 328 - 5V/16MHz // 8 x Tactile Button // 1 x Audio Jack 3.5mm // 1 x SparkFun Audio Jack Breakout // 1 x Hamburger Mini Speaker // 8 x Wire Solid Core - 22 AWG // 1 x Jumper Wires 3in M/M // 11 x Jumper Wires 6in M/M // 2 x Full-Size Breadboard // 1 x SparkFun Cerberus USB Cable // 1 x SparkFun FTDI Basic Breakout - 5V // Include the Library Code // Pitches #include "pitches.h" // Waveform - Chimes #include "chimes.h" using namespace Chimes; // Sum of ADSR values must not exceed 100% uint8_t envelope[] = { 0, // Attack[%] 20, // Decay[%] 0, // Sustain[%] 80, // Release[%] 16 // Sustain Level 1..32 }; // Simple Keyboard // Minimum reading of the button that generates a note const int iKeyboard2 = 2; const int iKeyboard3 = 3; const int iKeyboard4 = 4; const int iKeyboard5 = 5; const int iKeyboard6 = 6; const int iKeyboard7 = 7; const int iKeyboard8 = 8; const int iKeyboard9 = 9; // Button is pressed int aa = 1; int bb = 1; int cc = 1; int dd = 1; int ee = 1; int ff = 1; int gg = 1; int hh = 1; // Software Version Information String sver = "16-05"; void loop() { // Keyboard isKeyboard(); }
chimes.cpp
/*This work is licensed under the Creative Commons Attribution-ShareAlike 4.0 International License. To view a copy of this license, visit https://creativecommons.org/licenses/by-sa/4.0/deed.en */ #include#include "chimes.h" #define ISR_CYCLE 16 //16s char strbuf[255]; uint16_t ADSR_default[] = {0, 0, 100, 0, MAX_VOLUME}; uint16_t ADSR_env[5]; uint16_t nSamples; //Number of samples in Array uint8_t adsrPhase; uint32_t tPeriod; uint8_t *samples; //Array with samples uint8_t *_envelope, _waveform, _duty_cycle; uint16_t &_sustain_lvl = ADSR_env[4]; enum ADSR_phase { ATTACK, DECAY, SUSTAIN, RELEASE }; namespace Chimes { void init(uint8_t waveform, uint8_t duty_cycle, uint8_t *envelope) { Serial.begin(115200); //PWM Signal generation DDRB |= (1 << PB3) + (1 << PB0); //OC2A, Pin 11 TCCR2A = (1 << WGM21) + (1 << WGM20); //Fast PWM TCCR2A |= (0 << COM2A0) + (1 << COM2A1); //Set OC2A on compare match, clear OC2A at BOTTOM,(inverting mode). TCCR2B = (0 << CS22) + (0 << CS21) + (1 << CS20); //No Prescaling samples = (uint8_t *)malloc(0); _waveform = waveform; _duty_cycle = duty_cycle; _envelope = envelope; } void play(uint16_t freq, uint16_t duration) { uint8_t waveform = _waveform; //Init adsr according to the length of the note for (int i = 0; i < 4; i++) { if (_envelope) { ADSR_env[i] = (uint32_t)_envelope[i] * duration / 100; } else { ADSR_env[i] = (uint32_t)ADSR_default[i] * duration / 100; } //Serial.println(ADSR_env[i]); } ADSR_env[4] = _envelope ? _envelope[4] : MAX_VOLUME; //Serial.println(ADSR_env[4]); if (freq == 0) { //Pause tPeriod = ISR_CYCLE * 100; waveform = PAUSE; } else tPeriod = 1E6 / freq; nSamples = tPeriod / ISR_CYCLE; realloc(samples, nSamples); uint16_t nDuty = (_duty_cycle * nSamples) / 100; switch (waveform) { case SINE: //Sinewave for (int i = 0; i < nSamples; i++) { samples[i] = 128 + 127 * sin(2 * PI * i / nSamples); } break; case TRI: //Triangle for (int16_t i = 0; i < nSamples; i++) { if (i < nDuty) { samples[i] = 255 * (double)i / nDuty; //Rise } else { samples[i] = 255 * (1 - (double)(i - nDuty) / (nSamples - nDuty)); //Fall } } break; case RECT: //Rectangle for (int16_t i = 0; i < nSamples; i++) { i < nDuty ? samples[i] = 255 : samples[i] = 0; } break; case PAUSE: //Rectangle memset(samples, 0, nSamples); } TIMSK2 = (1 << TOIE2); /*for(uint16_t i = 0; i < nSamples; i++) { sprintf(strbuf, "%d: %d", i, samples[i]); Serial.println(strbuf); }*/ } //Returns true, while note is playing boolean isPlaying() { return (1 << TOIE2) & TIMSK2; } } // namespace Chimes //Called every 16s, when TIMER1 overflows ISR(TIMER2_OVF_vect) { static uint32_t adsr_timer, adsr_time; static uint16_t cnt; //Index counter static uint8_t sustain_lvl, vol; //Set OCR2A to the next value in sample array, this will change the duty cycle accordingly OCR2A = vol * samples[cnt] / MAX_VOLUME; if (cnt < nSamples - 1) { cnt++; } else { cnt = 0; adsr_timer += tPeriod; if (adsr_timer >= 10000) { //every 10 millisecond adsr_timer = 0; switch (adsrPhase) { case ATTACK: if (ADSR_env[ATTACK]) { vol = MAX_VOLUME * (float)adsr_time / ADSR_env[ATTACK]; if (vol == MAX_VOLUME) { //Attack phase over adsrPhase = DECAY; adsr_time = 0; } } else { adsrPhase = DECAY; vol = MAX_VOLUME; adsr_time = 0; } break; case DECAY: if (ADSR_env[DECAY]) { sustain_lvl = _sustain_lvl; vol = MAX_VOLUME - (MAX_VOLUME - _sustain_lvl) * (float)adsr_time / ADSR_env[DECAY]; if (vol <= sustain_lvl) { adsr_time = 0; adsrPhase = SUSTAIN; } } else { adsrPhase = SUSTAIN; sustain_lvl = MAX_VOLUME; adsr_time = 0; } break; case SUSTAIN: if (adsr_time > ADSR_env[SUSTAIN]) { adsrPhase = RELEASE; adsr_time = 0; } break; case RELEASE: if (ADSR_env[RELEASE]) { vol = sustain_lvl * (1 - (float)adsr_time / ADSR_env[RELEASE]); if (vol == 0) { //Attack phase over adsr_time = 0; TIMSK2 = (0 << TOIE2); adsrPhase = ATTACK; } } else { adsrPhase = ATTACK; vol = 0; adsr_time = 0; TIMSK2 = (0 << TOIE2); } break; } adsr_time += 10; } } }
chimes.h
/*This work is licensed under the Creative Commons Attribution-ShareAlike 4.0 International License. To view a copy of this license, visit https://creativecommons.org/licenses/by-sa/4.0/deed.en */ #ifndef CHIMES_H #define CHIMES_H #include "Arduino.h" enum waveform { SINE, //Sinus RECT, //Triangle TRI, //Rectangle PAUSE //Internal, do not use }; #define MAX_VOLUME 32 namespace Chimes { void init(uint8_t waveform = SINE, uint8_t duty_cycle = 50, uint8_t *envelope = NULL); void play(uint16_t freq, uint16_t duration); //Returns true while note is playing boolean isPlaying(); } // namespace Chimes #endif
getKeyboard.ino
// getKeyboard // setupKeyboard void setupKeyboard() { // Initialize the pushbutton pin as an input pinMode(iKeyboard2, INPUT_PULLUP); pinMode(iKeyboard3, INPUT_PULLUP); pinMode(iKeyboard4, INPUT_PULLUP); pinMode(iKeyboard5, INPUT_PULLUP); pinMode(iKeyboard6, INPUT_PULLUP); pinMode(iKeyboard7, INPUT_PULLUP); pinMode(iKeyboard8, INPUT_PULLUP); pinMode(iKeyboard9, INPUT_PULLUP); } // isKeyboard void isKeyboard() { // Read the state of the pushbutton value if ( digitalRead(iKeyboard2) == LOW ) { // Button is pressed - pullup keeps pin high normally aa = aa + 1; // Waveform isPlaying(); play(NOTE_A4, 1000); } else { aa = aa - 1; } // Read the state of the pushbutton value if ( digitalRead(iKeyboard3) == LOW ) { // Button is pressed - pullup keeps pin high normally bb = bb + 1; // Waveform isPlaying(); play(NOTE_B4, 1000); } else { bb = bb - 1; } // Read the state of the pushbutton value if ( digitalRead(iKeyboard4) == LOW ) { // Button is pressed - pullup keeps pin high normally cc = cc + 1; // Waveform isPlaying(); play(NOTE_C5, 1000); } else { cc = cc - 1; } // Read the state of the pushbutton value if ( digitalRead(iKeyboard5) == LOW ) { // Button is pressed - pullup keeps pin high normally dd = dd + 1; // Waveform isPlaying(); play(NOTE_D5, 1000); } else { dd = dd - 1; } // Read the state of the pushbutton value if ( digitalRead(iKeyboard6) == LOW ) { // Button is pressed - pullup keeps pin high normally ee = ee + 1; // Waveform isPlaying(); play(NOTE_E5, 1000); } else { ee = ee - 1; } // Read the state of the pushbutton value if ( digitalRead(iKeyboard7) == LOW ) { // Button is pressed - pullup keeps pin high normally ff = ff + 1; // Waveform isPlaying(); play(NOTE_F5, 1000); } else { ff = ff - 1; } // Read the state of the pushbutton value if ( digitalRead(iKeyboard8) == LOW ) { // Button is pressed - pullup keeps pin high normally gg = gg + 1; // Waveform isPlaying(); play(NOTE_G5, 1000); } else { gg = gg - 1; } // Read the state of the pushbutton value if ( digitalRead(iKeyboard9) == LOW ) { // Button is pressed - pullup keeps pin high normally hh = hh + 1; // Waveform isPlaying(); play(NOTE_A5, 1000); } else { hh = hh - 1; } // Waveform isPlaying(); play(0, 50); }
pitches.h
/***************************************************************** * Pitches NOTE_B0 <=> NOTE_DS8 - NOTE_A4 is "A" measured at 440Hz *****************************************************************/ #define NOTE_B0 31 #define NOTE_C1 33 #define NOTE_CS1 35 #define NOTE_D1 37 #define NOTE_DS1 39 #define NOTE_E1 41 #define NOTE_F1 44 #define NOTE_FS1 46 #define NOTE_G1 49 #define NOTE_GS1 52 #define NOTE_A1 55 #define NOTE_AS1 58 #define NOTE_B1 62 #define NOTE_C2 65 #define NOTE_CS2 69 #define NOTE_D2 73 #define NOTE_DS2 78 #define NOTE_E2 82 #define NOTE_F2 87 #define NOTE_FS2 93 #define NOTE_G2 98 #define NOTE_GS2 104 #define NOTE_A2 110 #define NOTE_AS2 117 #define NOTE_B2 123 #define NOTE_C3 131 #define NOTE_CS3 139 #define NOTE_D3 147 #define NOTE_DS3 156 #define NOTE_E3 165 #define NOTE_F3 175 #define NOTE_FS3 185 #define NOTE_G3 196 #define NOTE_GS3 208 #define NOTE_A3 220 #define NOTE_AS3 233 #define NOTE_B3 247 #define NOTE_C4 262 #define NOTE_CS4 277 #define NOTE_D4 294 #define NOTE_DS4 311 #define NOTE_E4 330 #define NOTE_F4 349 #define NOTE_FS4 370 #define NOTE_G4 392 #define NOTE_GS4 415 #define NOTE_A4 440 #define NOTE_AS4 466 #define NOTE_B4 494 #define NOTE_C5 523 #define NOTE_CS5 554 #define NOTE_D5 587 #define NOTE_DS5 622 #define NOTE_E5 659 #define NOTE_F5 698 #define NOTE_FS5 740 #define NOTE_G5 784 #define NOTE_GS5 831 #define NOTE_A5 880 #define NOTE_AS5 932 #define NOTE_B5 988 #define NOTE_C6 1047 #define NOTE_CS6 1109 #define NOTE_D6 1175 #define NOTE_DS6 1245 #define NOTE_E6 1319 #define NOTE_F6 1397 #define NOTE_FS6 1480 #define NOTE_G6 1568 #define NOTE_GS6 1661 #define NOTE_A6 1760 #define NOTE_AS6 1865 #define NOTE_B6 1976 #define NOTE_C7 2093 #define NOTE_CS7 2217 #define NOTE_D7 2349 #define NOTE_DS7 2489 #define NOTE_E7 2637 #define NOTE_F7 2794 #define NOTE_FS7 2960 #define NOTE_G7 3136 #define NOTE_GS7 3322 #define NOTE_A7 3520 #define NOTE_AS7 3729 #define NOTE_B7 3951 #define NOTE_C8 4186 #define NOTE_CS8 4435 #define NOTE_D8 4699 #define NOTE_DS8 4978
setup.ino
// Setup void setup() { // Setup Keyboard setupKeyboard(); // Waveform init( // SINE, TRI and RECT SINE, // Duty cycle 0..100%, only matters for Triangle and Rectangle 50, // Envelope envelope); }
Technology Experience
- Single-Board Microcontrollers (PIC, Arduino, Raspberry Pi,Espressif, etc...)
- Robotics
- Research & Development (R & D)
- Desktop Applications (Windows, OSX, Linux, Multi-OS, Multi-Tier, etc...)
- Mobile Applications (Android, iOS, Blackberry, Windows Mobile, Windows CE, etc...)
- Web Applications (LAMP, Scripting, Java, ASP, ASP.NET, RoR, Wakanda, etc...)
- Social Media Programming & Integration (Facebook, Twitter, YouTube, Pinterest, etc...)
- Content Management Systems (WordPress, Drupal, Joomla, Moodle, etc...)
- Bulletin Boards (phpBB, SMF, Vanilla, jobberBase, etc...)
- eCommerce (WooCommerce, OSCommerce, ZenCart, PayPal Shopping Cart, etc...)
Instructor
- Arduino
- Raspberry Pi
- Espressif
- Robotics
- DOS, Windows, OSX, Linux, iOS, Android, Multi-OS
- Linux-Apache-PHP-MySQL
Follow Us
J. Luc Paquin – Curriculum Vitae
https://www.donluc.com/DLHackster/LucPaquinCVEngMk2020a.pdf
Web: https://www.donluc.com/
Web: http://www.jlpconsultants.com/
Web: https://www.donluc.com/DLHackster/
Web: https://www.hackster.io/neosteam-labs
Facebook: https://www.facebook.com/neosteam.labs.9/
YouTube: https://www.youtube.com/channel/UC5eRjrGn1CqkkGfZy0jxEdA
Twitter: https://twitter.com/labs_steam
Pinterest: https://www.pinterest.com/NeoSteamLabs/
Instagram: https://www.instagram.com/luc.paquin/
Don Luc
Project #16: Sound – Simple Keyboard – Mk04
——
#donluc #sound #synthesizer #simplekeyboard #programming #arduino #fritzing #electronics #microcontrollers #consultant #vlog
——
——
——
——
While frequencies are represented with numbers (Hz), pitch is represented with letters. For example, if you have ever heard an orchestra ‘tune’ at the beginning of a concert, a single player plays an “A” measured at 440Hz. With pitch, we only use the letters A, B, C, D, E, F, and G. These pitches repeat every 8 notes, called an octave. In order to differentiate between which octaves we are referring to when talking about pitch, a number is added after the letter. Simply put in the 19th century and decided that was the case.
One very important aspect of all music theory is that octaves are specifically defined as ‘doubling’ or ‘halving’ a pitch’s frequency. For example, the frequencies 220 Hz, 440 Hz, and 880 Hz are all A’s, but exist in different octaves: A3, A4, and A5 respectively. In Western music theory, we have generally
agreed that within each octave there are 12 equal subdivisions or pitches. So how do we determine where these other notes are ‘tuned’ in relationship to that A440.
Simple Keyboard
This simple keyboard how to use the tone() command to generate different pitches depending on which button is pressed. Connect each button to digital pins 2 => 9, using to ground on each input line. Connect digital pins two wires to the board. The first one black long vertical rows on the side of the breadboard to provide access to ground. The two wire goes from digital pin to one leg of the button. When the button is open (unpressed) there is no connection between the two legs of the button, so the pin is connected to ground and we read a LOW. When the button is closed (pressed), it makes a connection between its two legs. Connect one terminal of your speaker to digital pin 10 through and its other terminal to ground.
The sketch uses an extra file, pitches.h. This file contains all the pitch values for typical notes. This note table on whose work the tone() command was based. You may find it useful for whenever you want to make musical notes. Player plays an NOTE_A4 measured at 440Hz, NOTE_B4 measured at 494Hz, NOTE_C5 measured at 523Hz, NOTE_D5 measured at 587Hz, NOTE_E5 measured at 659Hz, NOTE_F5 measured at 698Hz, NOTE_G5 measured at 784Hz and NOTE_A5 measured at 880Hz.
DL2010Mk03
1 x Arduino Pro Mini 328 – 5V/16MHz
8 x Tactile Button
1 x Audio Jack 3.5mm
1 x SparkFun Audio Jack Breakout
1 x Hamburger Mini Speaker
8 x Wire Solid Core – 22 AWG
1 x Jumper Wires 3in M/M
11 x Jumper Wires 6in M/M
2 x Full-Size Breadboard
1 x SparkFun Cerberus USB Cable
1 x SparkFun FTDI Basic Breakout – 5V
Arduino Pro Mini 328 – 5V/16MHz
SPK – Digital 10
KY2 – Digital 2
KY3 – Digital 3
KY4 – Digital 4
KY5 – Digital 5
KY6 – Digital 6
KY7 – Digital 7
KY8 – Digital 8
KY9 – Digital 9
VIN – +5V
GND – GND
DL2010Mk03p.ino
// ***** Don Luc Electronics © ***** // Software Version Information // Project #16: Sound - Simple Keyboard - Mk04 // 10-03 // DL2010Mk03p.ino 16-04 // 1 x Arduino Pro Mini 328 - 5V/16MHz // 8 x Tactile Button // 1 x Audio Jack 3.5mm // 1 x SparkFun Audio Jack Breakout // 1 x Hamburger Mini Speaker // 8 x Wire Solid Core - 22 AWG // 1 x Jumper Wires 3in M/M // 11 x Jumper Wires 6in M/M // 2 x Full-Size Breadboard // 1 x SparkFun Cerberus USB Cable // 1 x SparkFun FTDI Basic Breakout - 5V // Include the Library Code #include "pitches.h" // Mini Speaker int SPK = 10; // Simple Keyboard // Minimum reading of the button that generates a note const int iKeyboard2 = 2; const int iKeyboard3 = 3; const int iKeyboard4 = 4; const int iKeyboard5 = 5; const int iKeyboard6 = 6; const int iKeyboard7 = 7; const int iKeyboard8 = 8; const int iKeyboard9 = 9; // Button is pressed int aa = 1; int bb = 1; int cc = 1; int dd = 1; int ee = 1; int ff = 1; int gg = 1; int hh = 1; // Software Version Information String sver = "16-04"; void loop() { // Keyboard isKeyboard(); }
getKeyboard.1no
// getKeyboard // setupKeyboard void setupKeyboard() { // Initialize the pushbutton pin as an input pinMode(iKeyboard2, INPUT_PULLUP); pinMode(iKeyboard3, INPUT_PULLUP); pinMode(iKeyboard4, INPUT_PULLUP); pinMode(iKeyboard5, INPUT_PULLUP); pinMode(iKeyboard6, INPUT_PULLUP); pinMode(iKeyboard7, INPUT_PULLUP); pinMode(iKeyboard8, INPUT_PULLUP); pinMode(iKeyboard9, INPUT_PULLUP); } // isKeyboard void isKeyboard() { // Read the state of the pushbutton value if ( digitalRead(iKeyboard2) == LOW ) { // Button is pressed - pullup keeps pin high normally aa = aa + 1; tone(SPK, NOTE_A4, 20); } else { aa = aa - 1; } // Read the state of the pushbutton value if ( digitalRead(iKeyboard3) == LOW ) { // Button is pressed - pullup keeps pin high normally bb = bb + 1; tone(SPK, NOTE_B4, 20); } else { bb = bb - 1; } // Read the state of the pushbutton value if ( digitalRead(iKeyboard4) == LOW ) { // Button is pressed - pullup keeps pin high normally cc = cc + 1; tone(SPK, NOTE_C5, 20); } else { cc = cc - 1; } // Read the state of the pushbutton value if ( digitalRead(iKeyboard5) == LOW ) { // Button is pressed - pullup keeps pin high normally dd = dd + 1; tone(SPK, NOTE_D5, 20); } else { dd = dd - 1; } // Read the state of the pushbutton value if ( digitalRead(iKeyboard6) == LOW ) { // Button is pressed - pullup keeps pin high normally ee = ee + 1; tone(SPK, NOTE_E5, 20); } else { ee = ee - 1; } // Read the state of the pushbutton value if ( digitalRead(iKeyboard7) == LOW ) { // Button is pressed - pullup keeps pin high normally ff = ff + 1; tone(SPK, NOTE_F5, 20); } else { ff = ff - 1; } // Read the state of the pushbutton value if ( digitalRead(iKeyboard8) == LOW ) { // Button is pressed - pullup keeps pin high normally gg = gg + 1; tone(SPK, NOTE_G5, 20); } else { gg = gg - 1; } // Read the state of the pushbutton value if ( digitalRead(iKeyboard9) == LOW ) { // Button is pressed - pullup keeps pin high normally hh = hh + 1; tone(SPK, NOTE_A5, 20); } else { hh = hh - 1; } noTone(SPK); }
pitches.h
/***************************************************************** * Pitches NOTE_B0 <=> NOTE_DS8 - NOTE_A4 is "A" measured at 440Hz *****************************************************************/ #define NOTE_B0 31 #define NOTE_C1 33 #define NOTE_CS1 35 #define NOTE_D1 37 #define NOTE_DS1 39 #define NOTE_E1 41 #define NOTE_F1 44 #define NOTE_FS1 46 #define NOTE_G1 49 #define NOTE_GS1 52 #define NOTE_A1 55 #define NOTE_AS1 58 #define NOTE_B1 62 #define NOTE_C2 65 #define NOTE_CS2 69 #define NOTE_D2 73 #define NOTE_DS2 78 #define NOTE_E2 82 #define NOTE_F2 87 #define NOTE_FS2 93 #define NOTE_G2 98 #define NOTE_GS2 104 #define NOTE_A2 110 #define NOTE_AS2 117 #define NOTE_B2 123 #define NOTE_C3 131 #define NOTE_CS3 139 #define NOTE_D3 147 #define NOTE_DS3 156 #define NOTE_E3 165 #define NOTE_F3 175 #define NOTE_FS3 185 #define NOTE_G3 196 #define NOTE_GS3 208 #define NOTE_A3 220 #define NOTE_AS3 233 #define NOTE_B3 247 #define NOTE_C4 262 #define NOTE_CS4 277 #define NOTE_D4 294 #define NOTE_DS4 311 #define NOTE_E4 330 #define NOTE_F4 349 #define NOTE_FS4 370 #define NOTE_G4 392 #define NOTE_GS4 415 #define NOTE_A4 440 #define NOTE_AS4 466 #define NOTE_B4 494 #define NOTE_C5 523 #define NOTE_CS5 554 #define NOTE_D5 587 #define NOTE_DS5 622 #define NOTE_E5 659 #define NOTE_F5 698 #define NOTE_FS5 740 #define NOTE_G5 784 #define NOTE_GS5 831 #define NOTE_A5 880 #define NOTE_AS5 932 #define NOTE_B5 988 #define NOTE_C6 1047 #define NOTE_CS6 1109 #define NOTE_D6 1175 #define NOTE_DS6 1245 #define NOTE_E6 1319 #define NOTE_F6 1397 #define NOTE_FS6 1480 #define NOTE_G6 1568 #define NOTE_GS6 1661 #define NOTE_A6 1760 #define NOTE_AS6 1865 #define NOTE_B6 1976 #define NOTE_C7 2093 #define NOTE_CS7 2217 #define NOTE_D7 2349 #define NOTE_DS7 2489 #define NOTE_E7 2637 #define NOTE_F7 2794 #define NOTE_FS7 2960 #define NOTE_G7 3136 #define NOTE_GS7 3322 #define NOTE_A7 3520 #define NOTE_AS7 3729 #define NOTE_B7 3951 #define NOTE_C8 4186 #define NOTE_CS8 4435 #define NOTE_D8 4699 #define NOTE_DS8 4978
setup.ino
// Setup void setup() { // Setup Keyboard setupKeyboard(); }
Technology Experience
- Single-Board Microcontrollers (PIC, Arduino, Raspberry Pi,Espressif, etc…)
- Robotics
- Research & Development (R & D)
- Desktop Applications (Windows, OSX, Linux, Multi-OS, Multi-Tier, etc…)
- Mobile Applications (Android, iOS, Blackberry, Windows Mobile, Windows CE, etc…)
- Web Applications (LAMP, Scripting, Java, ASP, ASP.NET, RoR, Wakanda, etc…)
- Social Media Programming & Integration (Facebook, Twitter, YouTube, Pinterest, etc…)
- Content Management Systems (WordPress, Drupal, Joomla, Moodle, etc…)
- Bulletin Boards (phpBB, SMF, Vanilla, jobberBase, etc…)
- eCommerce (WooCommerce, OSCommerce, ZenCart, PayPal Shopping Cart, etc…)
Instructor
- Arduino
- Raspberry Pi
- Espressif
- Robotics
- DOS, Windows, OSX, Linux, iOS, Android, Multi-OS
- Linux-Apache-PHP-MySQL
Follow Us
J. Luc Paquin – Curriculum Vitae
https://www.donluc.com/DLHackster/LucPaquinCVEngMk2020a.pdf
Web: https://www.donluc.com/
Web: http://www.jlpconsultants.com/
Web: https://www.donluc.com/DLHackster/
Web: https://www.hackster.io/neosteam-labs
Facebook: https://www.facebook.com/neosteam.labs.9/
YouTube: https://www.youtube.com/channel/UC5eRjrGn1CqkkGfZy0jxEdA
Twitter: https://twitter.com/labs_steam
Pinterest: https://www.pinterest.com/NeoSteamLabs/
Instagram: https://www.instagram.com/luc.paquin/
Don Luc
Project #16: Sound – Frequency and Pitch – Mk03
——
#donluc #sound #synthesizer #programming #arduino #fritzing #electronics #microcontrollers #consultant #vlog
——
——
——
——
Frequency and Pitch
Frequency is how often something happens. Since sound is vibrations, we use frequency to describe how often something is vibrating. Frequency is measured in Hertz (Hz), which is simply how often per second. So, something oscillating at 1 Hz is vibrating once every second. A complete vibration is called a cycle, measured at one full peak and trough of a wave. In the early days of electronic music, the terms cycles per second (cps) was used instead of Hz.
The above picture is a sine wave, the purest representation of a single frequency or vibration. The time it takes for the wave to complete one cycle is the wave’s frequency. More vibrations per second produce higher sounding frequencies and fewer vibrations per second produce lower sounding frequencies. Tuning instruments, science experiments, testing audio equipment, testing your hearing what’s the highest frequency you can hear? Humans perceive frequency of sound waves as pitch. Each musical note corresponds to a particular frequency which can be measured in hertz. An infant’s ear is able to perceive frequencies ranging from 20 Hz to 20,000 Hz. The average adult human can hear sounds between 20 Hz and 16,000 Hz.
Tone
The Arduino is a single-oscillator digital synthesizer. Generates a square wave tone() of the specified frequency on a pin. The pin can be connected to a other speaker. Only one tone can be generated at a time. If the tone is playing on the same pin, the call will set its frequency. the Arduino pin on which to generate the tone. The frequency of the tone in hertz. The duration of the tone in milliseconds. By passing voltage through a potentiometer and into an analog input on your board, it is possible to measure the amount of resistance produced by a potentiometer as an frequency.
DL2010Mk02
1 x Arduino Pro Mini 328 – 5V/16MHz
1 x 1K Potentiometer
1 x Knob
1 x Audio Jack 3.5mm
1 x SparkFun Audio Jack Breakout
1 x Hamburger Mini Speaker
5 x Jumper Wires 3in M/M
2 x Jumper Wires 6in M/M
1 x Full-Size Breadboard
1 x SparkFun Cerberus USB Cable
1 x SparkFun FTDI Basic Breakout – 5V
Arduino Pro Mini 328 – 5V/16MHz
SPK – Digital 6
CAP – Analog A0
VIN – +5V
GND – GND
DL2010Mk02p.ino
// ***** Don Luc Electronics © ***** // Software Version Information // Project #16: Sound - Frequency and Pitch - Mk03 // 10-02 // DL2010Mk02p.ino 16-03 // 1 x Arduino Pro Mini 328 - 5V/16MHz // 1 x 1K Potentiometer // 1 x Knob // 1 x Audio Jack 3.5mm // 1 x SparkFun Audio Jack Breakout // 1 x Hamburger Mini Speaker // 5 x Jumper Wires 3in M/M // 2 x Jumper Wires 6in M/M // 1 x Full-Size Breadboard // 1 x SparkFun Cerberus USB Cable // 1 x SparkFun FTDI Basic Breakout - 5V // Include the Library Code // Mini Speaker int SPK = 6; // Frequency int iCap = A0; int iFreg = 0; // Software Version Information String sver = "16-03"; void loop() { // Frequency iFreg = analogRead(iCap); iFreg = map(iFreg, 0, 1023, 31, 4978); // Mini Speaker tone(SPK, iFreg, 20); // Delay the actual frequency of updates reads for stability delay(1); }
setup.ino
// Setup void setup() { // Setup }
Technology Experience
- Single-Board Microcontrollers (PIC, Arduino, Raspberry Pi,Espressif, etc…)
- Robotics
- Research & Development (R & D)
- Desktop Applications (Windows, OSX, Linux, Multi-OS, Multi-Tier, etc…)
- Mobile Applications (Android, iOS, Blackberry, Windows Mobile, Windows CE, etc…)
- Web Applications (LAMP, Scripting, Java, ASP, ASP.NET, RoR, Wakanda, etc…)
- Social Media Programming & Integration (Facebook, Twitter, YouTube, Pinterest, etc…)
- Content Management Systems (WordPress, Drupal, Joomla, Moodle, etc…)
- Bulletin Boards (phpBB, SMF, Vanilla, jobberBase, etc…)
- eCommerce (WooCommerce, OSCommerce, ZenCart, PayPal Shopping Cart, etc…)
Instructor
- Arduino
- Raspberry Pi
- Espressif
- Robotics
- DOS, Windows, OSX, Linux, iOS, Android, Multi-OS
- Linux-Apache-PHP-MySQL
Follow Us
J. Luc Paquin – Curriculum Vitae
https://www.donluc.com/DLHackster/LucPaquinCVEngMk2020a.pdf
Web: https://www.donluc.com/
Web: http://www.jlpconsultants.com/
Web: https://www.donluc.com/DLHackster/
Web: https://www.hackster.io/neosteam-labs
Facebook: https://www.facebook.com/neosteam.labs.9/
YouTube: https://www.youtube.com/channel/UC5eRjrGn1CqkkGfZy0jxEdA
Twitter: https://twitter.com/labs_steam
Pinterest: https://www.pinterest.com/NeoSteamLabs/
Instagram: https://www.instagram.com/luc.paquin/
Don Luc
Project #16: Sound – Brownian Noise – Mk02
——
#donluc #sound #programming #arduino #fritzing #electronics #microcontrollers #consultant #vlog
——
——
——
——
Brownian Noise
White noise has equal intensity at equal frequencies. This sounds tinny and harsh to humans. The problem is due to the high frequencies. In order to produce a more pleasant sound, we need to attenuate those high frequencies. This is called a “low pass filter”. Brownian noise is noise with a power density which decreases 6 dB per octave with increasing frequency and, when heard, has a “damped” or “soft” quality compared to white and pink noise.
In science is the kind of signal noise produced by Brownian motion, hence its alternative name of random walk noise. The graphic representation of the sound signal mimics a Brownian pattern. The sound is a low roar resembling a waterfall or heavy rainfall.
Brown Noise Sleep Machine
Brown noise can be produced by integrating white noise. That is, whereas white noise can be produced by randomly choosing each sample independently, Brown noise can be produced by adding a random offset to each sample to obtain the next one. Note that while the first sample is random across the entire range that the sound sample can take on, the remaining offsets from there on are a tenth or thereabouts, leaving room for the signal to bounce around.
This is a pretty common diode. It acts as a flyback, a protective measure to against voltage spikes caused by inductive loads, in this case the speaker. It is basically the same setup, except that an electrolytic decoupling capacitors has been added. I found that 33uF to be suitable. If the output sounds too tinny, which I think is unlikely, then increase the capacitance. As you increase the capacitance, the output volume will go down. So you might try experimenting with a lower capacitance and potentiometer.
DL2010Mk01
1 x Arduino Pro Mini 328 – 5V/16MHz
1 x 1K Potentiometer
1 x Knob
1 x Diode Small Signal – 1N4148
1 x Electrolytic Decoupling Capacitors – 33uF/63V
1 x Audio Jack 3.5mm
1 x SparkFun Audio Jack Breakout
1 x Hamburger Mini Speaker
9 x Jumper Wires 3in M/M
1 x Full-Size Breadboard
1 x SparkFun Cerberus USB Cable
1 x SparkFun FTDI Basic Breakout – 5V
Arduino Pro Mini 328 – 5V/16MHz
SPT – Digital 6
VIN – +5V
GND – GND
DL2010Mk01p.ino
// ***** Don Luc Electronics © ***** // Software Version Information // Project #16: Sound - Brownian Noise - Mk02 // 09-02 // DL2010Mk01p.ino 16-02 // 1 x Arduino Pro Mini 328 - 5V/16MHz // 1 x 1K Potentiometer // 1 x Knob // 1 x Diode Small Signal - 1N4148 // 1 x Electrolytic Decoupling Capacitors - 33uF/63V // 1 x Audio Jack 3.5mm // 1 x SparkFun Audio Jack Breakout // 1 x Hamburger Mini Speaker // 9 x Jumper Wires 3in M/M // 1 x Full-Size Breadboard // 1 x SparkFun Cerberus USB Cable // 1 x SparkFun FTDI Basic Breakout - 5V // Include the Library Code // Mini Speaker int SPK = 6; long randNumber; // Software Version Information String sver = "16-02"; void loop() { // Mini Speaker randNumber = random(); digitalWrite( SPK , randNumber ); // Delay the actual frequency of updates delayMicroseconds (50); }
setup.ino
// Setup void setup() { // Connect a speaker between ground pinMode(SPK, OUTPUT); // Random Seed randomSeed(analogRead( SPK )); }
Technology Experience
- Single-Board Microcontrollers (PIC, Arduino, Raspberry Pi,Espressif, etc…)
- Robotics
- Research & Development (R & D)
- Desktop Applications (Windows, OSX, Linux, Multi-OS, Multi-Tier, etc…)
- Mobile Applications (Android, iOS, Blackberry, Windows Mobile, Windows CE, etc…)
- Web Applications (LAMP, Scripting, Java, ASP, ASP.NET, RoR, Wakanda, etc…)
- Social Media Programming & Integration (Facebook, Twitter, YouTube, Pinterest, etc…)
- Content Management Systems (WordPress, Drupal, Joomla, Moodle, etc…)
- Bulletin Boards (phpBB, SMF, Vanilla, jobberBase, etc…)
- eCommerce (WooCommerce, OSCommerce, ZenCart, PayPal Shopping Cart, etc…)
Instructor
- Arduino
- Raspberry Pi
- Espressif
- Robotics
- DOS, Windows, OSX, Linux, iOS, Android, Multi-OS
- Linux-Apache-PHP-MySQL
Follow Us
J. Luc Paquin – Curriculum Vitae
https://www.donluc.com/DLHackster/LucPaquinCVEngMk2020a.pdf
Web: https://www.donluc.com/
Web: http://www.jlpconsultants.com/
Web: https://www.donluc.com/DLHackster/
Web: https://www.hackster.io/neosteam-labs
Facebook: https://www.facebook.com/neosteam.labs.9/
YouTube: https://www.youtube.com/channel/UC5eRjrGn1CqkkGfZy0jxEdA
Twitter: https://twitter.com/labs_steam
Pinterest: https://www.pinterest.com/NeoSteamLabs/
Instagram: https://www.instagram.com/luc.paquin/
Don Luc
Project #16: Sound – White Noise – Mk01
——
#donluc #sound #programming #arduino #fritzing #electronics #microcontrollers #consultant #vlog
——
——
——
——
White Noise
In signal processing, white noise is a random signal having equal intensity at different frequencies, giving it a constant power spectral density. In other words, the signal has equal power in any band of a given bandwidth when the bandwidth is measured in Hz. The term is used, with this or similar meanings, in many scientific and technical disciplines, including physics, acoustical engineering, telecommunications, and statistical forecasting. White noise refers to a statistical model for signals and signal sources, rather than to any specific signal.
White noise is commonly used in the production of electronic music, usually either directly or as an input for a filter to create other types of noise signal. A simple example of white noise is a nonexistent radio station (static). White noise is also used to obtain the impulse response of an electrical circuit, in particular of amplifiers and other audio equipment. Computing, white noise is used as the basis of some random number generators.
Sounds from all frequencies we can hear. Tends to sound high pitch and tinny. This tends to be the least pleasant noise.
Simple breakout board for the 3.5mm audio jack, TRS are abbreviations for Tip / Ring / Sleeve. A TRS is often though of as stereo, as the addition of the ring gives us two contacts allowing us a left and right audio channel.
DL2009Mk01
1 x Arduino Pro Mini 328 – 5V/16MHz
1 x Audio Jack 3.5mm
1 x SparkFun Audio Jack Breakout
1 x Hamburger Mini Speaker
3 x Jumper Wires 3in M/M
1 x Half-Size Breadboard
1 x SparkFun Cerberus USB Cable
1 x SparkFun FTDI Basic Breakout – 5V
Arduino Pro Mini 328 – 5V/16MHz
SPT – Digital 6
SPR – Digital 7
VIN – +5V
GND – GND
DL2009Mk01p.ino
// ***** Don Luc Electronics © ***** // Software Version Information // Project #16: Sound - White Noise - Mk01 // 09-01 // DL2009Mk01p.ino 16-01 // 1 x Arduino Pro Mini 328 - 5V/16MHz // 1 x Audio Jack 3.5mm // 1 x SparkFun Audio Jack Breakout // 1 x Hamburger Mini Speaker // 3 x Jumper Wires 3in M/M // 1 x Half-Size Breadboard // 1 x SparkFun Cerberus USB Cable // 1 x SparkFun FTDI Basic Breakout - 5V // Include the Library Code // Mini Speaker int Tip = 6; int Ring = 7; long randNumber; // Software Version Information String sver = "16-01"; void loop() { // Mini Speaker randNumber = random(); digitalWrite( Tip , randNumber ); randNumber = random(); digitalWrite( Ring , randNumber ); // Delay the actual frequency of updates delayMicroseconds (50); }
setup.ino
// Setup void setup() { // Connect a speaker between ground pinMode(Tip, OUTPUT); pinMode(Ring, OUTPUT); // Random Seed randomSeed(analogRead( Tip )); randomSeed(analogRead( Ring )); }
Technology Experience
- Single-Board Microcontrollers (Arduino, Raspberry Pi,Espressif, etc…)
- Robotics
- Research & Development (R & D)
- Desktop Applications (Windows, OSX, Linux, Multi-OS, Multi-Tier, etc…)
- Mobile Applications (Android, iOS, Blackberry, Windows Mobile, Windows CE, etc…)
- Web Applications (LAMP, Scripting, Java, ASP, ASP.NET, RoR, Wakanda, etc…)
- Social Media Programming & Integration (Facebook, Twitter, YouTube, Pinterest, etc…)
- Content Management Systems (WordPress, Drupal, Joomla, Moodle, etc…)
- Bulletin Boards (phpBB, SMF, Vanilla, jobberBase, etc…)
- eCommerce (WooCommerce, OSCommerce, ZenCart, PayPal Shopping Cart, etc…)
Instructor
- Arduino
- Raspberry Pi
- Espressif
- Robotics
- DOS, Windows, OSX, Linux, iOS, Android, Multi-OS
- Linux-Apache-PHP-MySQL
Follow Us
J. Luc Paquin – Curriculum Vitae
https://www.donluc.com/DLHackster/LucPaquinCVEngMk2020a.pdf
Web: https://www.donluc.com/
Web: http://www.jlpconsultants.com/
Web: https://www.donluc.com/DLHackster/
Web: https://www.hackster.io/neosteam-labs
Facebook: https://www.facebook.com/neosteam.labs.9/
YouTube: https://www.youtube.com/channel/UC5eRjrGn1CqkkGfZy0jxEdA
Twitter: https://twitter.com/labs_steam
Pinterest: https://www.pinterest.com/NeoSteamLabs/
Instagram: https://www.instagram.com/luc.paquin/
Don Luc
Project #14: Components – SparkFun Solderable Breadboard – Mk20
——
#DonLuc #Electronics #Components #SolderableBreadboard #Microcontrollers #Environment #SparkFun #Consultant #Vlog #Aphasia
——
——
——
SparkFun Solderable Breadboard
SparkFun Item: PRT-12070
This is the SparkFun Solderable Breadboard. A bare PCB that is the exact size as our regular breadboard with the same connections to pins and power rails. This board is especially useful for preserving a prototype or experiment you just created on a solderless breadboard by soldering all the pieces in place.
Technology Experience
- Single-Board Microcontrollers (Arduino, Raspberry Pi,Espressif, etc…)
- Robotics
- Research & Development (R & D)
- Desktop Applications (Windows, OSX, Linux, Multi-OS, Multi-Tier, etc…)
- Mobile Applications (Android, iOS, Blackberry, Windows Mobile, Windows CE, etc…)
- Web Applications (LAMP, Scripting, Java, ASP, ASP.NET, RoR, Wakanda, etc…)
- Social Media Programming & Integration (Facebook, Twitter, YouTube, Pinterest, etc…)
- Content Management Systems (WordPress, Drupal, Joomla, Moodle, etc…)
- Bulletin Boards (phpBB, SMF, Vanilla, jobberBase, etc…)
- eCommerce (WooCommerce, OSCommerce, ZenCart, PayPal Shopping Cart, etc…)
Instructor
- Arduino
- Raspberry Pi
- Espressif
- Robotics
- DOS, Windows, OSX, Linux, iOS, Android, Multi-OS
- Linux-Apache-PHP-MySQL
Follow Us
The Alpha Geek
Aphasia
https://www.donluc.com/?page_id=2149
J. Luc Paquin – Curriculum Vitae
https://www.donluc.com/DLHackster/LucPaquinCVEngMk2020a.pdf
Web: https://www.donluc.com/
Web: http://www.jlpconsultants.com/
Web: https://www.donluc.com/DLHackster/
Web: https://www.hackster.io/neosteam-labs
Facebook: https://www.facebook.com/neosteam.labs.9/
YouTube: https://www.youtube.com/channel/UC5eRjrGn1CqkkGfZy0jxEdA
Twitter: https://twitter.com/labs_steam
Pinterest: https://www.pinterest.com/NeoSteamLabs/
Instagram: https://www.instagram.com/luc.paquin/
Don Luc
Project #14: Components – EMF Meters – Mk19
——
#DonLuc #Electronics #Components #EMF #Microcontrollers #Environment #SparkFun #Consultant #Vlog #Aphasia
——
——
——
Telescopic Antenna SMA – 300 MHz to 1.1 GHz (ANT700)
SparkFun Item: WRL-13982
This ANT700 is a telescopic antenna designed for operation from 300 MHz to 1.1 GHz with a total length that is configurable from 9.5 cm to 24.5 cm. Each ANT700 is constructed of stainless steel and features an SMA male connector, rotating shaft, and adjustable elbow.
SMA Connector
SparkFun Item: WRL-00593
PCB edge mount – SMA RF connector. Perfect for prototyping with the GPS and Cellular devices that require an antenna connection. These connectors have a female signal pin and will correctly mate with the original SMA type antennas.
EMF Meter
An EMF meter is a scientific instrument for measuring electromagnetic fields. Most meters measure the electromagnetic radiation flux density or the change in an electromagnetic field over time, essentially the same as a radio antenna, but with quite different detection characteristics. Single axis meters are cheaper than tri-axis meters, but take longer to complete a survey because the meter only measures one dimension of the field. Single axis instruments have to be tilted and turned on all three axes to obtain a full measurement.
1 x Antenna SMA
1 x SMA Connector
1 x 3.3M Ohm
Technology Experience
- Research & Development (R & D)
- Desktop Applications (Windows, OSX, Linux, Multi-OS, Multi-Tier, etc…)
- Mobile Applications (Android, iOS, Blackberry, Windows Mobile, Windows CE, etc…)
- Web Applications (LAMP, Scripting, Java, ASP, ASP.NET, RoR, Wakanda, etc…)
- Social Media Programming & Integration (Facebook, Twitter, YouTube, Pinterest, etc…)
- Content Management Systems (WordPress, Drupal, Joomla, Moodle, etc…)
- Bulletin Boards (phpBB, SMF, Vanilla, jobberBase, etc…)
- eCommerce (WooCommerce, OSCommerce, ZenCart, PayPal Shopping Cart, etc…)
Instructor
- DOS, Windows, OSX, Linux, iOS, Android, Multi-OS
- Linux-Apache-PHP-MySQL
- Robotics
- Arduino
- Raspberry Pi
- Espressif
Follow Us
The Alpha Geek
Aphasia
https://www.donluc.com/?page_id=2149
J. Luc Paquin – Curriculum Vitae
https://www.donluc.com/DLHackster/LucPaquinCVEngMk2020a.pdf
Web: https://www.donluc.com/
Web: http://www.jlpconsultants.com/
Web: https://www.donluc.com/DLHackster/
Web: https://www.hackster.io/neosteam-labs
Facebook: https://www.facebook.com/neosteam.labs.9/
YouTube: https://www.youtube.com/channel/UC5eRjrGn1CqkkGfZy0jxEdA
Twitter: https://twitter.com/labs_steam
Pinterest: https://www.pinterest.com/NeoSteamLabs/
Instagram: https://www.instagram.com/luc.paquin/
Don Luc
Project #14: Components – SparkFun Alcohol Gas Sensor – MQ-3 – Mk18
——
#DonLuc #Electronics #Components #MQ3 #Microcontrollers #Environment #SparkFun #Consultant #Vlog #Aphasia
——
——
——
SparkFun Alcohol Gas Sensor – MQ-3
SparkFun Item: SEN-08880
This alcohol sensor is suitable for detecting alcohol concentration on your breath, just like your common breathalyzer. It has a high sensitivity and fast response time. Sensor provides an analog resistive output based on alcohol concentration. The drive circuit is very simple, all it needs is one resistor. A simple interface could be a 0-5V ADC. This sensor has a high sensitivity and fast response time. The sensor’s output is an analog resistance. The drive circuit is very simple; all you need to do is power the heater coil with 5V, add a load resistance, and connect the output to an ADC. This semiconductor gas sensor detects the presence of alcohol gas at concentrations from 0.04 mg/L to 4 mg/L, a range suitable for making a breathalyser. The sensor’s simple analog voltage interface requires only one analog input pin from your microcontroller.
To calculate estimated peak blood alcohol concentration (EBAC), a variation, including drinking period in hours, of the Widmark formula was used. The formula is:
EBAC = ( 0.806 × SD × 1.2 BW × Wt \ MR × DP ) × 10
Where:
-0.806 is a constant for body water in the blood (mean 80.6%)
-SD is the number of standard drinks, that being 10 grams of ethanol each
-1.2 is a factor to convert the amount in grams
-BW is a body water constant (0.58 for males and 0.49 for females)
-Wt is body weight (kilogram)
-MR is the metabolism constant (0.015 for males and 0.017 for females)
-DP is the drinking period in hours
-10 converts the result to permillage of alcohol
BAC% = Breath mg/L * 0.21
1 x SparkFun Alcohol Gas Sensor – MQ-3
1 x Pololu Carrier for MQ Gas Sensors
3 x Break Away Headers – Straight
1 x 220k Ohm
Technology Experience
- Research & Development (R & D)
- Desktop Applications (Windows, OSX, Linux, Multi-OS, Multi-Tier, etc…)
- Mobile Applications (Android, iOS, Blackberry, Windows Mobile, Windows CE, etc…)
- Web Applications (LAMP, Scripting, Java, ASP, ASP.NET, RoR, Wakanda, etc…)
- Social Media Programming & Integration (Facebook, Twitter, YouTube, Pinterest, etc…)
- Content Management Systems (WordPress, Drupal, Joomla, Moodle, etc…)
- Bulletin Boards (phpBB, SMF, Vanilla, jobberBase, etc…)
- eCommerce (WooCommerce, OSCommerce, ZenCart, PayPal Shopping Cart, etc…)
Instructor
- DOS, Windows, OSX, Linux, iOS, Android, Multi-OS
- Linux-Apache-PHP-MySQL
- Robotics
- Arduino
- Raspberry Pi
- Espressif
Follow Us
The Alpha Geek
Aphasia
https://www.donluc.com/?page_id=2149
J. Luc Paquin – Curriculum Vitae
https://www.donluc.com/DLHackster/LucPaquinCVEngMk2020a.pdf
Web: https://www.donluc.com/
Web: http://www.jlpconsultants.com/
Web: https://www.donluc.com/DLHackster/
Web: https://www.hackster.io/neosteam-labs
Facebook: https://www.facebook.com/neosteam.labs.9/
YouTube: https://www.youtube.com/channel/UC5eRjrGn1CqkkGfZy0jxEdA
Twitter: https://twitter.com/labs_steam
Pinterest: https://www.pinterest.com/NeoSteamLabs/
Don Luc
Project #14: Components – SparkFun Carbon Monoxide Gas Sensor – MQ-7 – Mk17
——
#DonLuc #Electronics #Components #MQ-7 #Microcontrollers #Environment #SparkFun #Pololu #Consultant #Vlog #Aphasia
——
——
——
SparkFun Carbon Monoxide Gas Sensor – MQ-7
SparkFun Item: SEN-09403
This is a simple-to-use Carbon Monoxide (CO) sensor, suitable for sensing CO concentrations in the air. The MQ-7 can detect CO-gas concentrations anywhere from 10 to 500ppm. This sensor has a high sensitivity and fast response time. The sensor’s output is an analog resistance. The drive circuit is very simple; all you need to do is power the heater coil with 5V, add a load resistance, and connect the output to an ADC.
1 x SparkFun Carbon Monoxide Gas Sensor – MQ-7
1 x Pololu Carrier for MQ Gas Sensors
3 x Break Away Headers – Straight
1 x 10k Ohm
Technology Experience
- Research & Development (R & D)
- Desktop Applications (Windows, OSX, Linux, Multi-OS, Multi-Tier, etc…)
- Mobile Applications (Android, iOS, Blackberry, Windows Mobile, Windows CE, etc…)
- Web Applications (LAMP, Scripting, Java, ASP, ASP.NET, RoR, Wakanda, etc…)
- Social Media Programming & Integration (Facebook, Twitter, YouTube, Pinterest, etc…)
- Content Management Systems (WordPress, Drupal, Joomla, Moodle, etc…)
- Bulletin Boards (phpBB, SMF, Vanilla, jobberBase, etc…)
- eCommerce (WooCommerce, OSCommerce, ZenCart, PayPal Shopping Cart, etc…)
Instructor
- DOS, Windows, OSX, Linux, iOS, Android, Multi-OS
- Linux-Apache-PHP-MySQL
- Robotics
- Arduino
- Raspberry Pi
- Espressif
Follow Us
The Alpha Geek
Aphasia
https://www.donluc.com/?page_id=2149
J. Luc Paquin – Curriculum Vitae
https://www.donluc.com/DLHackster/LucPaquinCVEngMk2020a.pdf
Web: https://www.donluc.com/
Web: http://www.jlpconsultants.com/
Web: https://www.donluc.com/DLHackster/
Web: https://www.hackster.io/neosteam-labs
Facebook: https://www.facebook.com/neosteam.labs.9/
YouTube: https://www.youtube.com/channel/UC5eRjrGn1CqkkGfZy0jxEdA
Twitter: https://twitter.com/labs_steam
Pinterest: https://www.pinterest.com/NeoSteamLabs/
Don Luc
Project #14: Components – Pololu Carbon Monoxide & Flammable Gas Sensor – MQ-9 – Mk16
——
#DonLuc #Electronics #Components #MQ-9 #Microcontrollers #Environment #Pololu #Consultant #Vlog #Aphasia
——
——
——
Pololu Carbon Monoxide & Flammable Gas Sensor – MQ-9
Pololu Item: 1483
This semiconductor gas sensor detects the presence of Carbon Monoxide at concentrations from 10 to 1,000 ppm and combustible gas from 100 to 10,000 ppm. The sensor’s simple analog voltage interface requires only one analog input pin from your microcontroller. This Carbon Monoxide (CO) and flammable gas sensor detects the concentrations of CO and combustible gas in the air and ouputs its reading as an analog voltage. The sensor can measure concentrations of CO from 10 to 1,000 ppm and flammable gas, high sensitivity to Methane, Propane and CO, from 100 to 10,000 ppm. The sensor can operate at temperatures from -10 to 50°C and consumes less than 150 mA at 5 V.
1 x Pololu Carbon Monoxide & Flammable Gas Sensor – MQ-9
1 x Pololu Carrier for MQ Gas Sensors
3 x Break Away Headers – Straight
1 x 20k Ohm
Technology Experience
- Research & Development (R & D)
- Desktop Applications (Windows, OSX, Linux, Multi-OS, Multi-Tier, etc…)
- Mobile Applications (Android, iOS, Blackberry, Windows Mobile, Windows CE, etc…)
- Web Applications (LAMP, Scripting, Java, ASP, ASP.NET, RoR, Wakanda, etc…)
- Social Media Programming & Integration (Facebook, Twitter, YouTube, Pinterest, etc…)
- Content Management Systems (WordPress, Drupal, Joomla, Moodle, etc…)
- Bulletin Boards (phpBB, SMF, Vanilla, jobberBase, etc…)
- eCommerce (WooCommerce, OSCommerce, ZenCart, PayPal Shopping Cart, etc…)
Instructor
- DOS, Windows, OSX, Linux, iOS, Android, Multi-OS
- Linux-Apache-PHP-MySQL
- Robotics
- Arduino
- Raspberry Pi
- Espressif
Follow Us
The Alpha Geek
Aphasia
https://www.donluc.com/?page_id=2149
J. Luc Paquin – Curriculum Vitae
https://www.donluc.com/DLHackster/LucPaquinCVEngMk2020a.pdf
Web: https://www.donluc.com/
Web: http://www.jlpconsultants.com/
Web: https://www.donluc.com/DLHackster/
Web: https://www.hackster.io/neosteam-labs
Facebook: https://www.facebook.com/neosteam.labs.9/
YouTube: https://www.youtube.com/channel/UC5eRjrGn1CqkkGfZy0jxEdA
Twitter: https://twitter.com/labs_steam
Pinterest: https://www.pinterest.com/NeoSteamLabs/
Don Luc