The Alpha Geek – Geeking Out

Fritzing

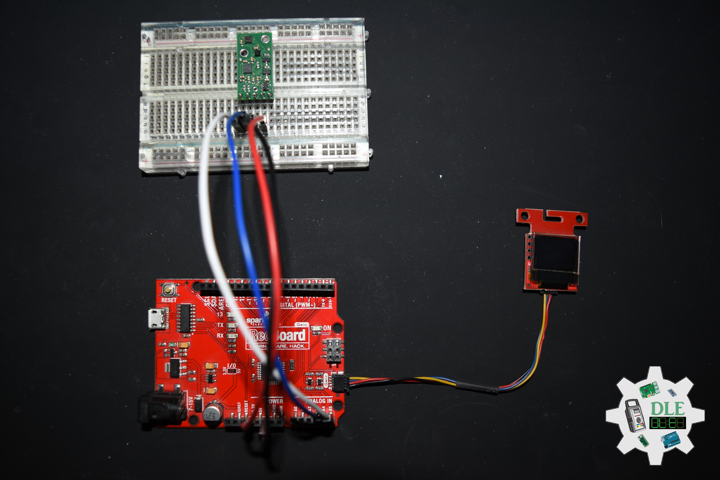
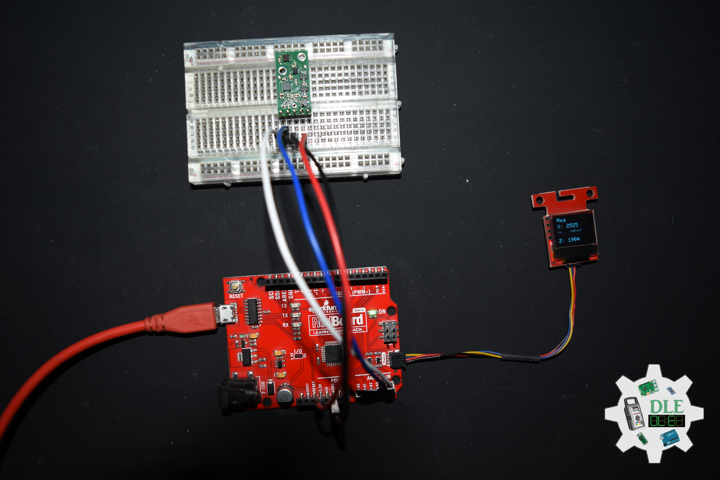
Project #12: Robotics – DRV8835 Dual Motor Driver – Mk17

——

#DonLucElectronics #DonLuc #Robotics #Arduino #ArduinoUNO #DCMotor #MotorDriver #Project #Fritzing #Programming #Electronics #Microcontrollers #Consultant

——

DRV8835 Dual Motor Driver

——

DRV8835 Dual Motor Driver

——

DRV8835 Dual Motor Driver

——

DRV8835 Dual Motor Driver Carrier

This tiny breakout board for TI’s DRV8835 dual motor driver can deliver 1.2 A per channel continuously (1.5 A peak) to a pair of DC motors, and it supports two possible control interfaces for added flexibility of use: IN/IN and PHASE/ENABLE. With an operating voltage range from 0 V to 11 V and built-in protection against reverse-voltage, under-voltage, over-current, and over-temperature, this driver is a great solution for powering up to two small, low-voltage motors. The carrier board has the form factor of a 14-pin DIP package, which makes it easy to use with standard solderless breadboards and 0.1 inch perfboards.

Solarbotics RM2 (High-Power Motor for GM2/3/8/9)

This high-power brushed DC motor fits in the GM2/3/8/9 series of gear motors, offering approximately 3 times the speed, twice the torque and quadruple the power-draw. Retrofitting the gear motor is easy – just remove the motor retainer strap, transfer the pinion gear, and reinstall – that’s it.

DL2201Mk01

1 x Arduino UNO
1 x DRV8835 Dual Motor Driver Carrier
2 x Solarbotics RM2
2 x Pololu Universal Aluminum Mounting Hub 3mm Shaft, #4-40 Holes
2 x Pololu Mini Plastic Gearmotor Bracket Pair – Wide
2 x Rotary Potentiometer – 10k Ohm
2 x Knob
1 x Half-Size Breadboard
1 x Adafruit Perma-Proto Quarter-Sized Breadboard
1 x SparkFun Cerberus USB Cable

Arduino UNO

M11 – Digital 2
M12 – Digital 3
M21 – Digital 4
M22 – Digital 5
PO0 – Analog A0
PO1 – Analog A1
VIN – +5V
GND – GND

——

DL2201Mk01p.ino

/* ***** Don Luc Electronics © *****
Software Version Information
Project #12: Robotics - DRV8835 Dual Motor Driver - Mk17
01-01
DL2201Mk01p.ino
1 x Arduino UNO
1 x DRV8835 Dual Motor Driver Carrier
2 x Solarbotics RM2
2 x Pololu Universal Aluminum Mounting Hub 3mm Shaft, #4-40 Holes
2 x Pololu Mini Plastic Gearmotor Bracket Pair - Wide
2 x Rotary Potentiometer - 10k Ohm
2 x Knob
1 x Half-Size Breadboard
1 x Adafruit Perma-Proto Quarter-Sized Breadboard
1 x SparkFun Cerberus USB Cable
*/

// Include the library code:

// Solarbotics RM2 -> 1
#define MOTOR1_IN1 2
#define MOTOR1_IN2 3
// Solarbotics RM2 -> 2
#define MOTOR2_IN1 4
#define MOTOR2_IN2 5

// Rotary Potentiometer -> 1
int s1 = A0;
// Speed -> 1
int s1s = 0;
// Rotary Potentiometer -> 2
int s2 = A1;
// Speed -> 2
int s2s = 0;

// Software Version Information
String sver = "12-17p";
// Unit ID information
String uid = "";

void loop() {

  // RM2 Motor
  isRM2Motor();

}

getRM2Motor.ino

// RM2 Motor
// Setup RM2 Motor
void isSetupRM2Motor() {

  // Solarbotics RM2 -> 1
  pinMode(MOTOR1_IN1, OUTPUT);
  pinMode(MOTOR1_IN2, OUTPUT);
  // Solarbotics RM2 -> 2
  pinMode(MOTOR2_IN1, OUTPUT);
  pinMode(MOTOR2_IN2, OUTPUT);
  
}
// isRM2Motor
void isRM2Motor() {

  // Rotary Potentiometer -> 1
  s1s = analogRead( s1 );
  s1s = map(s1s, 0, 1023, 0, 200);
  // Rotary Potentiometer -> 2
  s2s = analogRead( s2 );  
  s2s = map(s2s, 0, 1023, 0, 200);

  // Solarbotics RM2 -> 1 Forward
  digitalWrite(MOTOR1_IN1, LOW);
  analogWrite(MOTOR1_IN2, s1s);
  delay(10);

  // Solarbotics RM2 -> 2 Backward
  digitalWrite(MOTOR2_IN2, LOW);
  analogWrite(MOTOR2_IN1, s2s);
  delay(10);

}

setup.ino

// Setup
void setup() {

  // Solarbotics RM2 Motor
  isSetupRM2Motor();

}

——

People can contact us: https://www.donluc.com/?page_id=1927

Technology Experience

  • Single-Board Microcontrollers (PIC, Arduino, Raspberry Pi,Espressif, etc…)
  • IoT
  • Robotics
  • Camera and Video Capture Receiver Stationary, Wheel/Tank and Underwater Vehicle
  • Unmanned Vehicles Terrestrial and Marine
  • Research & Development (R & D)
  • Desktop Applications (Windows, OSX, Linux, Multi-OS, Multi-Tier, etc…)
  • Mobile Applications (Android, iOS, Blackberry, Windows Mobile, Windows CE, etc…)
  • Web Applications (LAMP, Scripting, Java, ASP, ASP.NET, RoR, Wakanda, etc…)
  • Social Media Programming & Integration (Facebook, Twitter, YouTube, Pinterest, etc…)
  • Content Management Systems (WordPress, Drupal, Joomla, Moodle, etc…)
  • Bulletin Boards (phpBB, SMF, Vanilla, jobberBase, etc…)
  • eCommerce (WooCommerce, OSCommerce, ZenCart, PayPal Shopping Cart, etc…)

Instructor and E-Mentor

  • IoT
  • PIC Microcontrollers
  • Arduino
  • Raspberry Pi
  • Espressif
  • Robotics
  • DOS, Windows, OSX, Linux, iOS, Android, Multi-OS
  • Linux-Apache-PHP-MySQL

Follow Us

J. Luc Paquin – Curriculum Vitae – 2021 English & Español
https://www.jlpconsultants.com/luc/

Web: https://www.donluc.com/
Web: https://www.jlpconsultants.com/
Facebook: https://www.facebook.com/neosteam.labs.9/
YouTube: https://www.youtube.com/channel/UC5eRjrGn1CqkkGfZy0jxEdA
Twitter: https://twitter.com/labs_steam
Pinterest: https://www.pinterest.com/NeoSteamLabs/
Instagram: https://www.instagram.com/neosteamlabs/

Don Luc

Project #12: Robotics – Vertical – Mk15

——

#DonLucElectronics #DonLuc #Robotics #Arduino #Fio #XBee #Stepper #EasyDriver #Project #Fritzing #Programming #Electronics #Microcontrollers #Consultant

——

Vertical

——

Vertical

——

Vertical

——

Joystick

A joystick is an input device consisting of a stick that pivots on a base and reports its angle or direction to the device it is controlling. A joystick, also known as the control column, is the principal control device in the cockpit of many civilian and military aircraft, either as a centre stick or side-stick. It often has supplementary switches to control various aspects of the aircraft’s flight.

Pololu Adjustable Step-Up Voltage Regulator U1V11A

This compact U1V11A switching step-up voltage regulator efficiently boosts input voltages as low as 0.5 V to an adjustable output voltage between 2 V and 5.25 V. Unlike most boost regulators, the U1V11A offers a true shutdown option that turns off power to the load, and it automatically switches to a linear down-regulation mode when the input voltage exceeds the output.

DL2112Mk05

2 x Fio v3 – ATmega32U4
2 x XBee S1
2 x Lithium Ion Battery – 850mAh
1 x Thumb Joystick
1 x SparkFun Thumb Joystick Breakout
1 x Slide Pot (Small)
1 x Slide Potentiometer Knob
1 x LED Green
1 x Pololu Adjustable Step-Up Voltage Regulator U1V11A
2 x EasyDriver
2 x Small Stepper
1 x Nine Volt Battery
1 x 9V Battery Connector
1 x Half-Size Breadboard
1 x Full-Size Breadboard
1 x SparkFun Cerberus USB Cable

Fio v3 – ATmega32U4 – Transmitter

XBee S1: Transmitter

CH Channel: C
PAN Id: 3333
SH Serial Number: 13A200
SL Serial Number: 40717A1F
CE Coordinator: Coordinator
BD: 9600

RX0 – Digital 0
TX0 – Digital 1
PO0 – Analog A0
JY0 – Analog A1
JY1 – Analog A2
SE0 – Digital 16
VIN – +3.3V
GND – GND

——

DL2112Mk05t.ino

/* ***** Don Luc Electronics © *****
Software Version Information
Project #12: Robotics - XBee S1 - Transmitter - Mk15
12-05
DL2112Mk05t.ino
1 x Fio v3 - ATmega32U4
1 x XBee S1
1 x Lithium Ion Battery - 850mAh
1 x Thumb Joystick
1 x SparkFun Thumb Joystick Breakout
1 x Slide Pot (Small)
1 x Slide Potentiometer Knob
1 x SparkFun Cerberus USB Cable
*/

// Include the Library Code
// EEPROM library to read and write EEPROM with unique ID for unit
#include <EEPROM.h>

// Communication
unsigned long dTime = 50;

// Slide Pot (Small)
// Select the input pin for the slide pot
// Power
const int iSP1 = A0;
// Power to store the value
int iPower = 0;

// Connections to joystick
// Vertical
const int VERT = A1;
// Horizontal
const int HORIZ = A2;
// Pushbutton
const int SEL = 16;
// Initialize variables for analog and digital values
int vertical;
int horizontal;
int select;

// Software Version Information
// Version
String sver = "12-15t";
// Unit ID Information
// UID
String uid = "";

void loop()
{

  // Thumb Joystick
  isThumbJoystick();
    
  // Process Message
  isProcessMessage();

  delay( dTime );
  
}

getEEPROM.ino

// EEPROM
// is UID
void isUID()
{
  
  // Is Unit ID
  // UID
  uid = "";
  for (int x = 0; x < 5; x++)
  {
    uid = uid + char(EEPROM.read(x));
  }
  
}

getProcessMessage.ino

// Process Message
// isProcessMessage
void isProcessMessage() {
  
   // Loop through serial buffer
   // Print = "<" + vertical + "|" + horizontal + "|" + select + "|" + iValue + "|" + sver + "|" + uid + "*"
      
   Serial1.print( '<'  );
   Serial1.print( vertical );
   Serial1.print( '|' );
   Serial1.print( horizontal );
   Serial1.print( '|' );
   Serial1.print( select );
   Serial1.print( '|' );
   Serial1.print( iPower );
   Serial1.print( '|' );
   Serial1.print( sver );
   Serial1.print( '|' );
   Serial1.print( uid );
   Serial1.println( '*' );

}

getThumbJoystick.ino

// Thumb Joystick
void isThumbJoystick() {

  // Read all values from the joystick
  // Joystick was sitting around 520 for the vertical and horizontal values
  // Will be 0-1023
  vertical = analogRead(VERT);
  // Will be 0-1023
  horizontal = analogRead(HORIZ);
  // Will be HIGH (1) if not pressed, and LOW (0) if pressed
  select = digitalRead(SEL);
  // Read the value
  // Power be 0-1023
  iPower = analogRead( iSP1 );
 
}

setup.ino

// Setup
void setup()
{

  // EEPROM Unit ID
  isUID();
  
  // Pause
  delay(5);
  
  // Make the SEL line an input
  pinMode(SEL, INPUT_PULLUP);
  
  // Open Serial1 port at 9600 baud
  Serial1.begin( 9600 );

  // Pause
  delay(5);

}

——

Fio v3 – ATmega32U4 – Receiver

XBee S1: Receiver

CH Channel: C
PAN Id: 3333
SH Serial Number: 13A200
SL Serial Number: 4076E2C5
CE Coordinator: End Device
BD: 9600

RX0 – Digital 0
TX0 – Digital 1
DR0 – Digital 2
ST0 – Digital 3
DR1 – Digital 4
ST1 – Digital 5
LED – Digital 6
VIN – +3.3V
GND – GND

——

DL2112Mk05r.ino

/* ***** Don Luc Electronics © *****
Software Version Information
Project #12: Robotics - Vertical - Mk15
12-05
DL2112Mk04r.ino
1 x Fio v3 - ATmega32U4
1 x XBee S1
1 x Lithium Ion Battery - 850mAh
1 x LED Green
1 x Pololu Adjustable Step-Up Voltage Regulator U1V11A
2 x EasyDriver
2 x Small Stepper
1 x Nine Volt Battery
1 x 9V Battery Connector
1 x Half-Size Breadboard
1 x Full-Size Breadboard
1 x SparkFun Cerberus USB Cable
*/

// Include the library code:
// EEPROM library to read and write EEPROM with unique ID for unit
#include <EEPROM.h>

// LED Green
int iLEDGreen = 6;

// 2 x EasyDriver - 2 x Stepper
// EasyDriver Right
int dirPinR = 2;
// stepPin Right
int stepPinR = 3;
// EasyDriver Left
int dirPinL = 4;
// stepPin Left
int stepPinL = 5;
// Microsteps
int i = 0;
// Power be 0-1023
int iPower = 0;
String POW = "";
// Joystick was sitting around 520 for the vertical and horizontal values
// Will be 0-1023
// Vertical
int vertical;
String VER = "";
// Horizontal
// Will be 0-1023
int horizontal;
String HOR = "";
// Select
// Will be HIGH (1) if not pressed, and LOW (0) if pressed
int select;
String SEL = "";
int firstClosingBracket = 0;
// Map Vertical and Horizontal
int mapVer = 0;
int mapHor = 0;

// Process Message
// Start
bool bStart = false;
// End
bool bEnd   = false;
// Variable to store the incoming byte
int incb = 0;
// Message
String msg = "";
// Index
byte in = 0;
int x = 0;

// Software Version Information
String sver = "12-15r";
// Unit ID information
String uid = "";

void loop() {

  // Check for serial messages
  isProcessMessage();

}

getEEPROM.ino

// EEPROM
// isUID
void isUID()
{
  
  // Is Unit ID
  uid = "";
  for (int x = 0; x < 5; x++)
  {
    uid = uid + char(EEPROM.read(x));
  }
  
}

getProcessMessage.ino

// ProcessMessage
// isProcessMessage
void isProcessMessage() {

  // Loop through serial buffer one byte at a time until you reach * which will be end of message
  while ( Serial1.available() > 0 ) 
  {
      
      // Read the incoming byte:
      incb = Serial1.read();
      
      // Start the message when the '<' symbol is received
      if(incb == '<')
      {
        
        bStart = true;
        in = 0;
        msg = "";
        
      }
      // End the message when the '*' symbol is received
      else if(incb == '*')
      {
        
        bEnd = true;
        x = msg.length();
        msg.remove( x , 1);
        // Done reading
        
        break;
      }
      // Read the message
      else
      {
        
        msg = msg + char(incb);
        in++;
        //Serial.println( msg );

      }
      
   }

   // Start - End
   if( bStart && bEnd)
   {

      // isStepper => msg
      isStepper();
      
      digitalWrite(iLEDGreen, HIGH);
      in = 0;
      msg = "";
      bStart = false;
      bEnd = false;
      vertical;
      horizontal;
      iPower;
      
   }

}

getStepper.ino

// Stepper
// isStepperSetup
void isStepperSetup() {

  // 2 x EasyDriver
  pinMode(dirPinR, OUTPUT);
  pinMode(stepPinR, OUTPUT);
  pinMode(dirPinL, OUTPUT);
  pinMode(stepPinL, OUTPUT);

}
// isStepper
void isStepper() {

  // msg = vertical + "|" + horizontal + "|" + select + "|" + iValue + "|" + sver + "|" + uid
  firstClosingBracket = 0;
  // Vertical
  firstClosingBracket = msg.indexOf('|');
  VER = msg;
  VER.remove(firstClosingBracket);
  vertical = VER.toInt();
  // Horizontal
  firstClosingBracket = firstClosingBracket + 1;
  msg.remove(0, firstClosingBracket );
  firstClosingBracket = msg.indexOf('|');
  HOR = msg;
  HOR.remove(firstClosingBracket);
  horizontal = HOR.toInt();
  // Select
  firstClosingBracket = firstClosingBracket + 1;
  msg.remove(0, firstClosingBracket );  
  firstClosingBracket = msg.indexOf('|');
  SEL = msg;
  SEL.remove(firstClosingBracket);
  // Power
  firstClosingBracket = firstClosingBracket + 1;
  msg.remove(0, firstClosingBracket );    
  firstClosingBracket = msg.indexOf('|');
  POW = msg;
  POW.remove(firstClosingBracket);
  iPower = POW.toInt();

  // EasyDriver Right
  // Set the direction
  // Joystick was sitting around 520 for the vertical and horizontal values
  // Will be 0-1023
  mapVer = map(vertical, 0, 1023, -512, 512);
  mapHor = map(horizontal, 0, 1023, -512, 512);
  
  // Vertical
  if ( mapVer <= 12 ) {

    // Set the direction HIGH
    digitalWrite(dirPinR, HIGH);
    delay(5);
    digitalWrite(dirPinL, HIGH);
    delay(5);
    
  } else {

    // Set the direction LOW
    digitalWrite(dirPinR, LOW);
    delay(5);
    digitalWrite(dirPinL, LOW);
    delay(5);
    
  }

  // Iterate for 200 microsteps
  for (i = 0; i<200; i++)
  { 

     // This LOW to HIGH change is what creates the
     digitalWrite(stepPinR, LOW);
     // "Rising Edge" so the easydriver knows to when to step.
     digitalWrite(stepPinR, HIGH);
     // This delay time is close to top speed.
     delayMicroseconds(iPower);
     // This LOW to HIGH change is what creates the
     digitalWrite(stepPinL, LOW);
     // "Rising Edge" so the easydriver knows to when to step.
     digitalWrite(stepPinL, HIGH);
     // This delay time is close to top speed.
     delayMicroseconds(iPower);

 }
   
}

setup.ino

// Setup
void setup() {

  // Open the serial port at 9600 bps:
  Serial1.begin( 9600 );

  // Pause
  delay(5);

  // EEPROM Unit ID
  isUID();
  
  // Pause
  delay(5);

  // 2 x EasyDriver
  isStepperSetup();

  // Pause
  delay(5);
  
  // LED Green
  pinMode(iLEDGreen, OUTPUT);
  digitalWrite(iLEDGreen, LOW);

}

——

People can contact us: https://www.donluc.com/?page_id=1927

Technology Experience

  • Single-Board Microcontrollers (PIC, Arduino, Raspberry Pi,Espressif, etc…)
  • IoT
  • Robotics
  • Camera and Video Capture Receiver Stationary, Wheel/Tank and Underwater Vehicle
  • Unmanned Vehicles Terrestrial and Marine
  • Research & Development (R & D)
  • Desktop Applications (Windows, OSX, Linux, Multi-OS, Multi-Tier, etc…)
  • Mobile Applications (Android, iOS, Blackberry, Windows Mobile, Windows CE, etc…)
  • Web Applications (LAMP, Scripting, Java, ASP, ASP.NET, RoR, Wakanda, etc…)
  • Social Media Programming & Integration (Facebook, Twitter, YouTube, Pinterest, etc…)
  • Content Management Systems (WordPress, Drupal, Joomla, Moodle, etc…)
  • Bulletin Boards (phpBB, SMF, Vanilla, jobberBase, etc…)
  • eCommerce (WooCommerce, OSCommerce, ZenCart, PayPal Shopping Cart, etc…)

Instructor and E-Mentor

  • IoT
  • PIC Microcontrollers
  • Arduino
  • Raspberry Pi
  • Espressif
  • Robotics
  • DOS, Windows, OSX, Linux, iOS, Android, Multi-OS
  • Linux-Apache-PHP-MySQL

Follow Us

J. Luc Paquin – Curriculum Vitae – 2021 English & Español
https://www.jlpconsultants.com/luc/

Web: https://www.donluc.com/
Web: https://www.jlpconsultants.com/
Facebook: https://www.facebook.com/neosteam.labs.9/
YouTube: https://www.youtube.com/channel/UC5eRjrGn1CqkkGfZy0jxEdA
Twitter: https://twitter.com/labs_steam
Pinterest: https://www.pinterest.com/NeoSteamLabs/
Instagram: https://www.instagram.com/neosteamlabs/

Don Luc
Project #12: Robotics – Transmitter and Receiver – Mk14

——

#DonLucElectronics #DonLuc #Robotics #Arduino #Fio #XBee #XBeeS1 #Transmitter #Project #Fritzing #Programming #Electronics #Microcontrollers #Consultant

——

Transmitter and Receiver

——

Transmitter and Receiver

——

Transmitter and Receiver

——

Serial

Used for communication between the Arduino board and a computer or other devices. All Arduino boards have at least one serial port, and some have several. Fio v3 ATmega32U4 board, Serial1 pins, 0(RX), 1(TX). On Fio v3 ATmega32U4, pins 0 and 1 are used for communication with the computer. Connecting anything to these pins can interfere with that communication, including causing failed uploads to the board. You can use the Arduino environment’s built-in serial monitor to communicate with an Arduino board. Click the serial monitor button in the toolbar and select the same baud rate used in the call to begin(). Serial communication on pins TX/RX uses TTL logic levels 3.3V . Don’t connect these pins directly to an RS232 serial port, they operate at +/- 12V and can damage your Arduino board.

DL2112Mk04

2 x Fio v3 – ATmega32U4
2 x XBee S1
2 x Lithium Ion Battery – 850mAh
1 x Thumb Joystick
1 x SparkFun Thumb Joystick Breakout
1 x Slide Pot (Small)
1 x Slide Potentiometer Knob
1 x LED Green
1 x Half-Size Breadboard
1 x SparkFun Cerberus USB Cable

Fio v3 – ATmega32U4 – Transmitter

XBee S1: Transmitter

CH Channel: C
PAN Id: 3333
SH Serial Number: 13A200
SL Serial Number: 40717A1F
CE Coordinator: Coordinator
BD: 9600

RX0 – Digital 0
TX0 – Digital 1
PO0 – Analog A0
JY0 – Analog A1
JY1 – Analog A2
SE0 – Digital 16
VIN – +3.3V
GND – GND

DL2112Mk04t.ino

/* ***** Don Luc Electronics © *****
Software Version Information
Project #12: Robotics - XBee S1 - Transmitter - Mk14
12-04
DL2112Mk04t.ino
1 x Fio v3 - ATmega32U4
1 x XBee S1
1 x Lithium Ion Battery - 850mAh
1 x Thumb Joystick
1 x SparkFun Thumb Joystick Breakout
1 x Slide Pot (Small)
1 x Slide Potentiometer Knob
1 x SparkFun Cerberus USB Cable
*/

// Include the Library Code
// EEPROM library to read and write EEPROM with unique ID for unit
#include <EEPROM.h>

// Communication
unsigned long dTime = 50;

// Slide Pot (Small)
// Select the input pin for the slide pot
// Power
const int iSP1 = A0;
// Power to store the value
int iPower = 0;

// Connections to joystick
// Vertical
const int VERT = A1;
// Horizontal
const int HORIZ = A2;
// Pushbutton
const int SEL = 16;
// Initialize variables for analog and digital values
int vertical;
int horizontal;
int select;

// Software Version Information
// Version
String sver = "12-14t";
// Unit ID Information
// UID
String uid = "";

void loop()
{

  // Thumb Joystick
  isThumbJoystick();
    
  // Process Message
  isProcessMessage();

  delay( dTime );
  
}

getEEPROM.ino

// EEPROM
// is UID
void isUID()
{
  
  // Is Unit ID
  // UID
  uid = "";
  for (int x = 0; x < 5; x++)
  {
    uid = uid + char(EEPROM.read(x));
  }
  
}

getProcessMessage.ino

// Process Message
// isProcessMessage
void isProcessMessage() {
  
   // Loop through serial buffer
   // Print = "<" + vertical + "|" + horizontal + "|" + select + "|" + iValue + "|" + sver + "|" + uid + "*"
      
   Serial1.print( '<'  );
   Serial1.print( vertical );
   Serial1.print( '|' );
   Serial1.print( horizontal );
   Serial1.print( '|' );
   Serial1.print( select );
   Serial1.print( '|' );
   Serial1.print( iPower );
   Serial1.print( '|' );
   Serial1.print( sver );
   Serial1.print( '|' );
   Serial1.print( uid );
   Serial1.println( '*' );

}

getThumbJoystick.ino

// Thumb Joystick
void isThumbJoystick() {

  // Read all values from the joystick
  // Joystick was sitting around 520 for the vertical and horizontal values
  // Will be 0-1023
  vertical = analogRead(VERT);
  // Will be 0-1023
  horizontal = analogRead(HORIZ);
  // Will be HIGH (1) if not pressed, and LOW (0) if pressed
  select = digitalRead(SEL);
  // Read the value
  // Power be 0-1023
  iPower = analogRead( iSP1 );
 
}

setup.ino

// Setup
void setup()
{

  // EEPROM Unit ID
  isUID();
  
  // Pause
  delay(5);
  
  // Make the SEL line an input
  pinMode(SEL, INPUT_PULLUP);
  
  // Open Serial1 port at 9600 baud
  Serial1.begin( 9600 );

  // Pause
  delay(5);

}

——

Fio v3 – ATmega32U4 – Receiver

XBee S1: Receiver

CH Channel: C
PAN Id: 3333
SH Serial Number: 13A200
SL Serial Number: 4076E2C5
CE Coordinator: End Device
BD: 9600

RX0 – Digital 0
TX0 – Digital 1
LED – Digital 6
VIN – +3.3V
GND – GND

DL2112Mk04r.ino

/* ***** Don Luc Electronics © *****
Software Version Information
Project #12: Robotics - Receiver - Mk14
12-04
DL2112Mk04r.ino
1 x Fio v3 - ATmega32U4
1 x XBee S1
1 x Lithium Ion Battery - 850mAh
1 x LED Green
1 x Half-Size Breadboard
1 x SparkFun Cerberus USB Cable
*/

// Include the library code:
// EEPROM library to read and write EEPROM with unique ID for unit
#include <EEPROM.h>

// LED Green
int iLEDGreen = 6;

// Process Message
// Start
bool bStart = false;
// End
bool bEnd   = false;
// Variable to store the incoming byte
int incb = 0;
// Message
String msg = "";
// Index
byte in = 0;
int x = 0;

// Software Version Information
String sver = "12-14r";
// Unit ID information
String uid = "";

void loop() {

  // Check for serial messages
  isProcessMessage();

}

getEEPROM.ino

// EEPROM
// isUID
void isUID()
{
  
  // Is Unit ID
  uid = "";
  for (int x = 0; x < 5; x++)
  {
    uid = uid + char(EEPROM.read(x));
  }
  
}

getProcessMessage.ino

// ProcessMessage
// isProcessMessage
void isProcessMessage() {
   
  // Loop through serial buffer one byte at a time until you reach * which will be end of message
  while ( Serial1.available() > 0 ) 
  {
      
      // Read the incoming byte:
      incb = Serial1.read();
      
      // Start the message when the '<' symbol is received
      if(incb == '<')
      {
        
        bStart = true;
        in = 0;
        msg = "";
        // Done reading
        
      }
      // End the message when the '*' symbol is received
      else if(incb == '*')
      {
        
        bEnd = true;
        x = msg.length();
        msg.remove( x , 1);
        // Done reading
        
        break;
      }
      // Read the message
      else
      {
        
        msg = msg + char(incb);
        in++;

      }
      
   }

   // Start - End
   if( bStart && bEnd)
   {
    
      digitalWrite(iLEDGreen, HIGH);
      in = 0;
      msg = "";
      bStart = false;
      bEnd = false;
      
   }

}

setup.ino

// Setup
void setup() {

  // Open the serial port at 9600 bps:
  Serial1.begin( 9600 );

  // Pause
  delay(5);

  // EEPROM Unit ID
  isUID();
  
  // Pause
  delay(5);
  
  // LED Green
  pinMode(iLEDGreen, OUTPUT);
  digitalWrite(iLEDGreen, LOW);

}

——

People can contact us: https://www.donluc.com/?page_id=1927

Technology Experience

  • Single-Board Microcontrollers (PIC, Arduino, Raspberry Pi,Espressif, etc…)
  • IoT
  • Robotics
  • Camera and Video Capture Receiver Stationary, Wheel/Tank and Underwater Vehicle
  • Unmanned Vehicles Terrestrial and Marine
  • Research & Development (R & D)
  • Desktop Applications (Windows, OSX, Linux, Multi-OS, Multi-Tier, etc…)
  • Mobile Applications (Android, iOS, Blackberry, Windows Mobile, Windows CE, etc…)
  • Web Applications (LAMP, Scripting, Java, ASP, ASP.NET, RoR, Wakanda, etc…)
  • Social Media Programming & Integration (Facebook, Twitter, YouTube, Pinterest, etc…)
  • Content Management Systems (WordPress, Drupal, Joomla, Moodle, etc…)
  • Bulletin Boards (phpBB, SMF, Vanilla, jobberBase, etc…)
  • eCommerce (WooCommerce, OSCommerce, ZenCart, PayPal Shopping Cart, etc…)

Instructor and E-Mentor

  • IoT
  • PIC Microcontrollers
  • Arduino
  • Raspberry Pi
  • Espressif
  • Robotics
  • DOS, Windows, OSX, Linux, iOS, Android, Multi-OS
  • Linux-Apache-PHP-MySQL

Follow Us

J. Luc Paquin – Curriculum Vitae – 2021 English & Español
https://www.jlpconsultants.com/luc/

Web: https://www.donluc.com/
Web: https://www.jlpconsultants.com/
Facebook: https://www.facebook.com/neosteam.labs.9/
YouTube: https://www.youtube.com/channel/UC5eRjrGn1CqkkGfZy0jxEdA
Twitter: https://twitter.com/labs_steam
Pinterest: https://www.pinterest.com/NeoSteamLabs/
Instagram: https://www.instagram.com/neosteamlabs/

Don Luc
Project #20: CircuitPython – Audio Out WAV – Mk02

——

#DonLucElectronics #DonLuc #METROM0Express #CircuitPython #Sound #Project #Fritzing #Programming #Electronics #Microcontrollers #Consultant

——

Audio Out WAV

——

Audio Out WAV

——

Audio Out WAV

——

Play a Wave File

You can use any supported wave file you like. CircuitPython supports mono or stereo, at 22 KHz sample rate, or less, and 16-bit WAV format. The METRO M0 Express boards support only mono. The reason for mono is that there’s only one analog output on those boards. The 22 KHz or less because the CircuitPython can’t handle more data than that, and also it will not sound much better, and the DAC output is 10-bit so anything over 16-bit will just take up room without better quality. Since the WAV file must fit on the CircuitPython file system, it must be under 2 MB.

HamletUMk01.wav -> 1316 KB

We’re going to play the wave file for 10 seconds, pause it, wait for a button to be pressed, and then resume the file to play through to the end. Then it loops back to the beginning and starts again. First we create the button object, assign it to pin A1, and set it as an input with a pull-up.

Now we will ask the audio playback system to load the wave data from the file HamletUMk01.wav and finally request that the audio is played through the A0 analog output pin. The audio file is now ready to go, and can be played at any time with play. Inside our loop, we start by playing the file.

DL2112Mk02

1 x Adafruit METRO M0 Express
1 x SparkFun Audio Jack Breakout
1 x Audio Jack 3.5mm
1 x Hamburger Mini Speaker
1 x Tactile Button
1 x 10K potentiometer
1 x Knob
1 x 100uF 16V Electrolytic Capacitors
1 x SparkFun Cerberus USB Cable

Adafruit METRO M0 Express

AUD – Analog A0
BUT – Analog A1
VIN – +3.3V
VIN – +5V
GND – GND

code.py

"""
***** Don Luc Electronics © *****
Software Version Information
Project #20: CircuitPython – Audio Out WAV – Mk02
12-02
DL2112Mk02
code.py
1 x Adafruit METRO M0 Express
1 x SparkFun Audio Jack Breakout
1 x Audio Jack 3.5mm
1 x Hamburger Mini Speaker
1 x Tactile Button
1 x 10K potentiometer
1 x Knob
1 x 100uF 16V Electrolytic Capacitors
1 x SparkFun Cerberus USB Cable
"""
# Module
import time
import board
import digitalio
# audiocore -> WaveFile
from audiocore import WaveFile

try:
    from audioio import AudioOut
except ImportError:
    try:
        from audiopwmio import PWMAudioOut as AudioOut
    except ImportError:
        # Not always supported by every board.
        pass  

# Button A1
button = digitalio.DigitalInOut(board.A1)
button.switch_to_input(pull=digitalio.Pull.UP)

# William Shakespeare - Hamlet
wave_file = open("HamletUMk01.wav", "rb")
wave = WaveFile(wave_file)
# audio -> A0
audio = AudioOut(board.A0)

while True:
    # Play
    audio.play(wave)

    # This allows you to do other things while the audio plays.
    t = time.monotonic()
    # -> 10 second
    while time.monotonic() - t < 10:
        pass

    audio.pause()
    print("Waiting for button press to continue.")
    while button.value:
        pass
    # Resume    
    audio.resume()
    while audio.playing:
        pass
    # Done    
    print("Done")

People can contact us: https://www.donluc.com/?page_id=1927

Technology Experience

  • Single-Board Microcontrollers (PIC, Arduino, Raspberry Pi,Espressif, etc...)
  • IoT
  • Robotics
  • Camera and Video Capture Receiver Stationary, Wheel/Tank and Underwater Vehicle
  • Unmanned Vehicles Terrestrial and Marine
  • Research & Development (R & D)
  • Desktop Applications (Windows, OSX, Linux, Multi-OS, Multi-Tier, etc...)
  • Mobile Applications (Android, iOS, Blackberry, Windows Mobile, Windows CE, etc...)
  • Web Applications (LAMP, Scripting, Java, ASP, ASP.NET, RoR, Wakanda, etc...)
  • Social Media Programming & Integration (Facebook, Twitter, YouTube, Pinterest, etc...)
  • Content Management Systems (WordPress, Drupal, Joomla, Moodle, etc...)
  • Bulletin Boards (phpBB, SMF, Vanilla, jobberBase, etc...)
  • eCommerce (WooCommerce, OSCommerce, ZenCart, PayPal Shopping Cart, etc...)

Instructor and E-Mentor

  • IoT
  • PIC Microcontrollers
  • Arduino
  • Raspberry Pi
  • Espressif
  • Robotics
  • DOS, Windows, OSX, Linux, iOS, Android, Multi-OS
  • Linux-Apache-PHP-MySQL

Follow Us

J. Luc Paquin – Curriculum Vitae - 2021 English & Español
https://www.jlpconsultants.com/luc/

Web: https://www.donluc.com/
Web: https://www.jlpconsultants.com/
Facebook: https://www.facebook.com/neosteam.labs.9/
YouTube: https://www.youtube.com/channel/UC5eRjrGn1CqkkGfZy0jxEdA
Twitter: https://twitter.com/labs_steam
Pinterest: https://www.pinterest.com/NeoSteamLabs/
Instagram: https://www.instagram.com/neosteamlabs/

Don Luc
Project #20: CircuitPython – Metro M0 Express Blink – Mk01

——

#DonLucElectronics #DonLuc #AdafruitMETROM0Express #CircuitPython #Project #Programming #Electronics #Microcontrollers #Consultant

——

Metro M0 Express Blink

——

Metro M0 Express Blink

——

Metro M0 Express Blink

——

Metro M0 Express Blink

——

Metro is our series of microcontroller boards for use with the Arduino IDE. This new Metro M0 Express board looks a whole lot like our original Metro 328, but with a huge upgrade. Instead of the ATmega328, this Metro features a ATSAMD21G18 chip, an ARM Cortex M0+. It’s our first Metro that is designed for use with CircuitPython. CircuitPython is our beginner-oriented flavor of MicroPython, and as the name hints at, its a small but full-featured version of the popular Python programming language specifically for use with circuitry and electronics.

Not only can you use CircuitPython, but the Metro M0 is also usable in the Arduino IDE.

At the Metro M0’s heart is an ATSAMD21G18 ARM Cortex M0 processor, clocked at 48 MHz and at 3.3V logic, the same one used in the new Arduino Zero. This chip has a whopping 256K of FLASH and 32K of RAM. This chip comes with built in USB so it has USB-to-Serial program and debug capability built in with no need for an FTDI-like chip.

  • Power the METRO with 7-9V polarity protected DC or the micro USB connector to any 5V USB source. The 2.1mm DC jack has an on/off switch next to it so you can turn off your setup easily. The METRO will automagically switch between USB and DC.
  • METRO has 25 GPIO pins, 12 of which are analog in, and one of which is a true analog out. There’s a hardware SPI port, hardware I2C port and hardware UART. Logic level is 3.3V
  • Native USB, there’s no need for a hardware USB to Serial converter as the Metro M0 has built in USB support. When used to act like a serial device, the USB interface can be used by any computer to listen/send data to the METRO, and can also be used to launch and update code via the bootloader. It can also act like a keyboard, mouse or MIDI device as well.
  • Four indicator LEDs and one NeoPixel, on the front edge of the PCB, for easy debugging. One green power LED, two RX/TX LEDs for data being sent over USB, and a red LED connected. Next to the reset button there is an RGB NeoPixel that can be used for any purpose.
  • 2 MB SPI Flash storage chip is included on board. You can use the SPI Flash storage like a very tiny hard drive. When used in Circuit Python, the 2 MB flash acts as storage for all your scripts, libraries and files. When used in Arduino, you can read/write files to it, like a little datalogger or SD card, and then with our helper program, access the files over USB.
  • Easy reprogramming, comes pre-loaded with the UF2 bootloader, which looks like a USB storage key. Simply drag firmware on to program, no special tools or drivers needed. It can be used to load up CircuitPython, PXT/MakeCode or Arduino IDE (it is bossa-compatible)

DL2112Mk01

1 x Adafruit METRO M0 Express

Adafruit METRO M0 Express

VIN – +3.3V
VIN – +5V
GND – GND

code.py

"""
***** Don Luc Electronics © *****
Software Version Information
Project #20: CircuitPython – Metro M0 Express Blink – Mk01
12-01
DL2112Mk01
code.py
1 x Adafruit METRO M0 Express
"""
# Module
import board
import digitalio
import time

# Red LED Connected
led = digitalio.DigitalInOut(board.LED)
led.direction = digitalio.Direction.OUTPUT

# Blink
while True:
    led.value = True
    time.sleep(1.5)
    led.value = False
    time.sleep(1.5)

People can contact us: https://www.donluc.com/?page_id=1927

Technology Experience

  • Single-Board Microcontrollers (PIC, Arduino, Raspberry Pi,Espressif, etc…)
  • IoT
  • Robotics
  • Camera and Video Capture Receiver Stationary, Wheel/Tank and Underwater Vehicle
  • Unmanned Vehicles Terrestrial and Marine
  • Research & Development (R & D)
  • Desktop Applications (Windows, OSX, Linux, Multi-OS, Multi-Tier, etc…)
  • Mobile Applications (Android, iOS, Blackberry, Windows Mobile, Windows CE, etc…)
  • Web Applications (LAMP, Scripting, Java, ASP, ASP.NET, RoR, Wakanda, etc…)
  • Social Media Programming & Integration (Facebook, Twitter, YouTube, Pinterest, etc…)
  • Content Management Systems (WordPress, Drupal, Joomla, Moodle, etc…)
  • Bulletin Boards (phpBB, SMF, Vanilla, jobberBase, etc…)
  • eCommerce (WooCommerce, OSCommerce, ZenCart, PayPal Shopping Cart, etc…)

Instructor and E-Mentor

  • IoT
  • PIC Microcontrollers
  • Arduino
  • Raspberry Pi
  • Espressif
  • Robotics
  • DOS, Windows, OSX, Linux, iOS, Android, Multi-OS
  • Linux-Apache-PHP-MySQL

Follow Us

J. Luc Paquin – Curriculum Vitae – 2021 English & Español
https://www.jlpconsultants.com/luc/

Web: https://www.donluc.com/
Web: https://www.jlpconsultants.com/
Facebook: https://www.facebook.com/neosteam.labs.9/
YouTube: https://www.youtube.com/channel/UC5eRjrGn1CqkkGfZy0jxEdA
Twitter: https://twitter.com/labs_steam
Pinterest: https://www.pinterest.com/NeoSteamLabs/
Instagram: https://www.instagram.com/neosteamlabs/

Don Luc
Project #15: Environment – MQ, PIR, HCSR04, RHT03, RTC and MicroSD – Mk19

——

#DonLucElectronics #DonLuc #Environment #MQ #PIR #HCSR04 #RHT03 #RTC #MicroSD #ArduinoUNO #Arduino #PowerBoost #Project #Programming #Electronics #Microcontrollers #Consultant

——

MQ, PIR, HCSR04, RHT03, RTC and MicroSD

——

MQ, PIR, HCSR04, RHT03, RTC and MicroSD

——

MQ, PIR, HCSR04, RHT03, RTC and MicroSD

——

MQ, PIR, HCSR04, RHT03, RTC and MicroSD

——

MQ, PIR, HCSR04, RHT03, RTC and MicroSD

——

Project enclosure for protecting your electronic. You’ve got too much stuff to fit into a so you need an upgrade and here it is.

  • Arduino UNO
  • ProtoScrewShield
  • RGB LCD Character
  • HC-SR04 Ultrasonic Sensor
  • ChronoDot – Real Time Clock, Batteries
  • MicroSD Card Board, MicroSD 2.0 GB
  • Adafruit PowerBoost 500 Shield, Lithium Ion Battery – 3.7v 2000mAh
  • Hydrogen Gas Sensor
  • Carbon Monoxide & Flammable Gas Sensor
  • Carbon Monoxide Gas Sensor
  • Alcohol Gas Sensor
  • Temperature and Humidity Sensor
  • PIR Motion Sensor
  • Breadboard Solderables, Acrylics, Wood, Rocker Switch, LED Green, Resistors, USB Cable, Etc…

DL2111Mk01

1 x Arduino UNO – R3
1 x ProtoScrewShield
1 x RGB LCD Shield 16×2 Character Negative Display
1 x HC-SR04 Ultrasonic Sensor
1 x ChronoDot – Ultra-Precise Real Time Clock – v2.1
1 x CR1632 Batteries
1 x MicroSD Card Breakout Board+
1 x MicroSD 2.0 GB
1 x Rocker Switch – SPST (Round)
1 x 10K Ohm
1 x LED Green
1 x 220 Ohm
1 x Adafruit PowerBoost 500 Shield
1 x Lithium Ion Battery – 3.7v 2000mAh
4 x Pololu Carrier for MQ Gas Sensors
1 x SparkFun Hydrogen Gas Sensor – MQ-8
1 x 4.7K Ohm
1 x Pololu Carbon Monoxide & Flammable Gas Sensor – MQ-9
1 x 22k Ohm
1 x SparkFun Carbon Monoxide Gas Sensor – MQ-7
1 x 10K Ohm
1 x SparkFun Alcohol Gas Sensor – MQ-3
1 x 220k Ohm
1 x Temperature and Humidity Sensor- RHT03
1 x PIR Motion Sensor (JST)
1 x SparkFun Solderable Half-Breadboard
1 x Breadboard Solderable
1 x Adafruit Perma-Prote Half-Size Breadboard
1 x Acrylic Blue 5.75 inches x 3.75 inches x 1/8 inch
1 x Acrylic Ivory 5.75 inches x 3.75 inches x 1/8 inch
1 x Wood
2 x Union Squad – 1 Inch
4 x Screw 6-32, Flat Washer, Lock Washer, Hex Nut
28 x Screw – 4-40
14 x Standoff – Metal 4-40 – 3/8″
8 x Standoff – Metal 4-40 – 1″
1 x SparkFun Cerberus USB Cable

Arduino UNO – R3

CLK – Digital 13
DO – Digital 12
DI – Digital 11
CS – Digital 10
ECH – Digital 9
TIR – Digital 8
PIR – Digital 7
RHT – Digital 5
RS0 – Digital 3
LEG – Digital 2
MQ8 – Analog 0
MQ9 – Analog 1
MQ7 – Analog 2
MQ3 – Analog 3
SDA – Analog 4
SCL – Analog 5
VIN – +5V
GND – GND

DL2111Mk01p.ino

/* 
***** Don Luc Electronics © *****
Software Version Information
Project #15: Environment – MQ, PIR, HCSR04, RHT03, RTC and MicroSD – Mk19
11-01
DL2111Mk01p.ino
1 x Arduino UNO - R3
1 x ProtoScrewShield
1 x RGB LCD Shield 16x2 Character Negative Display
1 x HC-SR04 Ultrasonic Sensor
1 x ChronoDot - Ultra-Precise Real Time Clock - v2.1
1 x CR1632 Batteries
1 x MicroSD Card Breakout Board+
1 x MicroSD 2.0 GB
1 x Rocker Switch - SPST (Round)
1 x 10K Ohm
1 x LED Green
1 x 220 Ohm
1 x Adafruit PowerBoost 500 Shield
1 x Lithium Ion Battery - 3.7v 2000mAh
4 x Pololu Carrier for MQ Gas Sensors
1 x SparkFun Hydrogen Gas Sensor - MQ-8
1 x 4.7K Ohm
1 x Pololu Carbon Monoxide & Flammable Gas Sensor - MQ-9
1 x 22k Ohm
1 x SparkFun Carbon Monoxide Gas Sensor - MQ-7
1 x 10K Ohm
1 x SparkFun Alcohol Gas Sensor - MQ-3
1 x 220k Ohm
1 x Temperature and Humidity Sensor - RHT03
1 x PIR Motion Sensor (JST)
1 x SparkFun Solderable Half-Breadboard
1 x Breadboard Solderable
1 x Adafruit Perma-Prote Half-Size Breadboard
1 x Acrylic Blue 5.75 inches x 3.75 inches x 1/8 inch
1 x Acrylic Ivory 5.75 inches x 3.75 inches x 1/8 inch
1 x Wood
2 x Union Squad - 1 Inch
4 x Screw 6-32, Flat Washer, Lock Washer, Hex Nut
28 x Screw - 4-40
14 x Standoff - Metal 4-40 - 3/8"
8 x Standoff - Metal 4-40 - 1"d
1 x SparkFun Cerberus USB Cable
*/

// Include the Library Code
// EEPROM Library to Read and Write EEPROM with Unique ID for Unit
#include <EEPROM.h>
// RHT Temperature and Humidity Sensor
#include <SparkFun_RHT03.h>
// Adafruit RGB LCD Shield 16x2
#include <Adafruit_RGBLCDShield.h>
// Wire
#include <Wire.h>
// DS3231 RTC Date and Time
#include <RTClib.h>
// SD Card
#include <SPI.h>
#include <SD.h>

// RHT Temperature and Humidity Sensor
// RHT03 data pin Digital 5
const int RHT03_DATA_PIN = 5;
// This creates a RTH03 object, which we'll use to interact with the sensor
RHT03 rht;
float latestHumidity;
float latestTempC;

// Gas Sensors MQ
// Hydrogen Gas Sensor - MQ-8
int iMQ8 = A0;
int iMQ8Raw = 0;
int iMQ8ppm = 0;
// Two points are taken from the curve in datasheet.
// With these two points, a line is formed which is
// "approximately equivalent" to the original curve.
float H2Curve[3] = {2.3, 0.93,-1.44};

// Carbon Monoxide & Flammable Gas Sensor - MQ-9
int iMQ9 = A1;
int iMQ9Raw = 0;
int iMQ9ppm = 0;

// Carbon Monoxide Gas Sensor - MQ-7
int iMQ7 = A2;
int iMQ7Raw = 0;
int iMQ7ppm = 0;

// Alcohol Gas Sensor - MQ-3
int iMQ3 = A3;
int iMQ3Raw = 0;
int iMQ3ppm = 0;

// PIR Motion
// Motion detector
const int iMotion = 7;
// Proximity
int proximity = LOW;
String Det = "";

// Adafruit RGB LCD Shield
Adafruit_RGBLCDShield RGBLCDShield = Adafruit_RGBLCDShield();
// These #defines make it easy to set the backlight color
#define OFF 0x0
#define RED 0x1
#define YELLOW 0x3
#define GREEN 0x2
#define TEAL 0x6
#define BLUE 0x4
#define VIOLET 0x5
#define WHITE 0x7
// Momentary Button
int yy = 0;
uint8_t momentaryButton = 0;

// DS3231 RTC Date and Time
RTC_DS3231 rtc;
String sDate;
String sTime;

// SD Card
const int chipSelect = 10;
String zzzzzz = "";

// LED Green
int iLEDGreen = 2;

// Rocker Switch - SPST (Round)
int iSS1 = 3;
// State
int iSS1State = 0;

// HC-SR04 Ultrasonic Sensor
int iTrig = 8;
int iEcho = 9;
// Stores the distance measured by the distance sensor
float distance = 0;

// Software Version Information
String uid = "";
// Version
String sver = "15-19";

void loop()
{
     
  // Adafruit RGB LCD Shield
  // Clear
  RGBLCDShield.clear();

  // iLEDGreen LOW
  digitalWrite(iLEDGreen,  LOW );
  
  // RHT Temperature and Humidity Sensor
  isRHT03();

  // Gas Sensors MQ
  isGasSensor();

  // isPIR Motion
  isPIR();

  // DS3231 RTC Date and Time
  isRTC();
  
  // HC-SR04 Ultrasonic Sensor
  isHCSR04();

  // Adafruit RGB LCD Shield
  // Display
  isDisplay();

  // Slide Switch
  // Read the state of the iSS1 value
  iSS1State = digitalRead(iSS1);
  
  // If it is the Slide Switch State is HIGH
  if (iSS1State == HIGH) {

    // iLEDGreen HIGH
    digitalWrite(iLEDGreen,  HIGH );
    
    // MicroSD Card
    isSD();

  } else {

    // iLEDGreen LOW
    digitalWrite(iLEDGreen,  LOW );
  
  }

  // Delay
  delay( 500 );
 
}

getEEPROM.ino

// EEPROM
// isUID EEPROM Unique ID
void isUID()
{
  
  // Is Unit ID
  uid = "";
  for (int x = 0; x < 5; x++)
  {
    uid = uid + char(EEPROM.read(x));
  }
  
}

getGasSensorMQ.ino

// Gas Sensors MQ
// Gas Sensor
void isGasSensor() {

  // Read in analog value from each gas sensors
  
  // Hydrogen Gas Sensor - MQ-8
  iMQ8Raw = analogRead( iMQ8 );

  // Carbon Monoxide & Flammable Gas Sensor - MQ-9
  iMQ9Raw = analogRead( iMQ9 );  

  // Carbon Monoxide Gas Sensor - MQ-7
  iMQ7Raw = analogRead( iMQ7 );

  // Alcohol Gas Sensor - MQ-3
  iMQ3Raw = analogRead( iMQ3 );
  
  // Caclulate the PPM of each gas sensors

  // Hydrogen Gas Sensor - MQ-8
  iMQ8ppm = isMQ8( iMQ8Raw );

  // Carbon Monoxide & Flammable Gas Sensor - MQ-9
  iMQ9ppm = isMQ9( iMQ9Raw ); 

  // Carbon Monoxide Gas Sensor - MQ-7
  iMQ7ppm = isMQ7( iMQ7Raw ); 

  // Alcohol Gas Sensor - MQ-3
  iMQ3ppm = isMQ3( iMQ3Raw ); 

}
// Hydrogen Gas Sensor - MQ-8 - PPM
int isMQ8(double rawValue) {

  // RvRo
  double RvRo = rawValue * (3.3 / 1023);

  return (pow(4.7,( ((log(RvRo)-H2Curve[1])/H2Curve[2]) + H2Curve[0])));
  
}
// Carbon Monoxide & Flammable Gas Sensor - MQ-9
int isMQ9(double rawValue) {

  double RvRo = rawValue * 3.3 / 4095;

  double ppm = 3.027*exp(1.0698*( RvRo ));
  return ppm;
  
}
// Carbon Monoxide Gas Sensor - MQ-7
int isMQ7(double rawValue) {

  double RvRo = rawValue * 3.3 / 4095;

  double ppm = 3.027*exp(1.0698*( RvRo ));
  return ppm;
  
}
// Alcohol Gas Sensor - MQ-3
int isMQ3(double rawValue) {

  double RvRo = rawValue * 3.3 / 4095;

  double bac = RvRo * 0.21;
  return bac;
  
}

getHC-SR04.ino

// HC-SR04 Ultrasonic Sensor
// Setup HC-SR04
void setupHCSR04() {

  // The trigger iTrig will output pulses of electricity
  pinMode(iTrig, OUTPUT);
  // The echo iEcho will measure the duration of pulses coming back from the distance sensor
  pinMode(iEcho, INPUT);
  
}
// HC-SR04
void isHCSR04() {

  // Variable to store the distance measured by the sensor
  distance = isDistance();
    
}
// Distance
float isDistance() {
  
  // Variable to store the time it takes for a ping to bounce off an object
  float echoTime;
  // Variable to store the distance calculated from the echo time
  float calculatedDistance;

  // Send out an ultrasonic pulse that's 10ms long
  digitalWrite(iTrig, HIGH);
  delayMicroseconds(10);
  digitalWrite(iTrig, LOW);

  // Use the pulseIn command to see how long it takes for the
  // pulse to bounce back to the sensor
  echoTime = pulseIn(iEcho, HIGH);

  // Calculate the distance of the object that reflected the pulse
  // (half the bounce time multiplied by the speed of sound)
  // cm = 58.0
  calculatedDistance = echoTime / 58.0;

  // Send back the distance that was calculated
  return calculatedDistance;
  
}

getPIR.ino

// PIR Motion
// Setup PIR
void setupPIR() {

  // Setup PIR Montion
  pinMode(iMotion, INPUT_PULLUP);
  
}
// isPIR Motion
void isPIR() {

  // Proximity
  proximity = digitalRead(iMotion);
  if (proximity == LOW) 
  {

    // PIR Motion Sensor's LOW, Motion is detected
    Det = "Motion Yes";

  }
  else
  {

    // PIR Motion Sensor's HIGH
    Det = "No";
    
  }
  
}

getRGBLCDShield.ino

// Adafruit RGB LCD Shield
// Setup RGB LCD Shield
void isSetupRGBLCDShield() {

  // Adafruit RGB LCD Shield
  // Set up the LCD's number of columns and rows: 
  RGBLCDShield.begin(16, 2);

  // Set the cursor to column 0, line 0
  RGBLCDShield.setBacklight(RED);
  // Don luc 
  RGBLCDShield.setCursor(0,0);
  RGBLCDShield.print("Don Luc");
  // Set the cursor to column 0, line 1
  RGBLCDShield.setCursor(0, 1);
  // Electronics
  RGBLCDShield.print("Electronics");
  // Delay
  delay(5000);
  // Clear
  RGBLCDShield.clear();

  // Set the cursor to column 0, line 0
  RGBLCDShield.setBacklight(TEAL);
  // Version 
  RGBLCDShield.setCursor(0,0);
  RGBLCDShield.print("Version: " + sver);
  // Set the cursor to column 0, line 1
  RGBLCDShield.setCursor(0, 1);
  // Unit ID
  RGBLCDShield.print("Unit ID: " + uid);
  // Delay
  delay(5000);
  // Clear
  RGBLCDShield.clear();
  
}
// isDisplay
void isDisplay() {

  // Momentary Button
  momentaryButton = RGBLCDShield.readButtons();

  switch ( yy ) {
    case 1:
    
      // RHT Temperature and Humidity Sensor
      // Set the cursor to column 0, line 0
      RGBLCDShield.setCursor(0,0);
      // Temperature C
      RGBLCDShield.print( "Temp C: " );
      RGBLCDShield.print( latestTempC );
      // Set the cursor to column 0, line 1
      RGBLCDShield.setCursor(0, 1);
      // Humidity
      RGBLCDShield.print( "Humidity: " );
      RGBLCDShield.print( latestHumidity );

      break;
    case 2:
    
      // Set the cursor to column 0, line 0
      // PIR Motion Sensor
      RGBLCDShield.setCursor(0,0);
      RGBLCDShield.print( "PIR: " );
      RGBLCDShield.print( Det );
      // Set the cursor to column 0, line 1
      // HC-SR04 Ultrasonic Sensor
      RGBLCDShield.setCursor(0, 1);
      RGBLCDShield.print( "HC-SR04: " );
      RGBLCDShield.print( distance );
      
      break;
    case 3:

      // Gas Sensors 1
      // Set the cursor to column 0, line 0
      RGBLCDShield.setCursor(0,0);
      // Hydrogen Gas Sensor - MQ-8
      RGBLCDShield.print( "MQ-8: " );
      RGBLCDShield.print( iMQ8ppm );
      // Set the cursor to column 0, line 1
      RGBLCDShield.setCursor(0, 1);
      // Carbon Monoxide & Flammable Gas Sensor - MQ-9
      RGBLCDShield.print( "MQ-9: " );
      RGBLCDShield.print( iMQ9ppm );
      
      break;
    case 4:

      // Gas Sensors 2
      // Set the cursor to column 0, line 0
      RGBLCDShield.setCursor(0,0);
      // Carbon Monoxide Gas Sensor - MQ-7
      RGBLCDShield.print( "MQ-7: " );
      RGBLCDShield.print( iMQ7ppm );
      // Set the cursor to column 0, line 1
      RGBLCDShield.setCursor(0, 1);
      // Alcohol Gas Sensor - MQ-3
      RGBLCDShield.print( "MQ-3: " );
      RGBLCDShield.print( iMQ3ppm );
      
      break;
    case 5:

      // DS3231 RTC Date and Time
      // Date and Time
      DateTime now = rtc.now();
      // Set the cursor to column 0, line 0
      // Date 
      RGBLCDShield.setCursor(0,0);
      RGBLCDShield.print( sDate );
      // Set the cursor to column 0, line 1
      RGBLCDShield.setCursor(0, 1);
      // Time
      RGBLCDShield.print( sTime );
      
      break;
    default:

      // Don luc Electronics
      yy = 5;
      RGBLCDShield.setBacklight(RED);
      // Set the cursor to column 0, line 0
      // Don luc 
      RGBLCDShield.setCursor(0,0);
      RGBLCDShield.print("Don Luc");
      // Set the cursor to column 0, line 1
      RGBLCDShield.setCursor(0, 1);
      // Electronics
      RGBLCDShield.print("Electronics");

   }
   
   if ( momentaryButton ) {
    
    if ( momentaryButton & BUTTON_UP ) {
      
      yy = 1;
      // RHT Temperature and Humidity Sensor
      RGBLCDShield.setBacklight(GREEN);
      
    }
    
    if ( momentaryButton & BUTTON_DOWN ) {
      
      yy = 2;
      // PIR Motion Sensor
      RGBLCDShield.setBacklight(VIOLET);
      
    }
    
    if ( momentaryButton & BUTTON_LEFT ) {
      
      yy = 3;
      // Gas Sensors 1
      RGBLCDShield.setBacklight(TEAL);
      
    }
    
    if ( momentaryButton & BUTTON_RIGHT ) {

      yy = 4;
      // Gas Sensors 2
      RGBLCDShield.setBacklight(YELLOW);
    }
    
    if ( momentaryButton & BUTTON_SELECT ) {

      yy = 5;
      // DS3231 RTC Date and Time
      RGBLCDShield.setBacklight(WHITE);
   
    }
    
  }
  
}

getRHT.ino

// RHT Temperature and Humidity Sensor
// setup RHT Temperature and Humidity Sensor
void setupRTH03() {

  // RHT Temperature and Humidity Sensor
  // Call rht.begin() to initialize the sensor and our data pin
  rht.begin(RHT03_DATA_PIN);
  
}
// RHT Temperature and Humidity Sensor
void isRHT03(){

  // Call rht.update() to get new humidity and temperature values from the sensor.
  int updateRet = rht.update();

  // The humidity(), tempC(), and tempF() functions can be called -- after 
  // a successful update() -- to get the last humidity and temperature value 
  latestHumidity = rht.humidity();
  latestTempC = rht.tempC();

}

getRTC.ino

// DS3231 RTC Date and Time
// Setup DS3231 RTC
void isSetupRTC() {

  if (! rtc.begin()) {
    while (1);
  }

  if (rtc.lostPower()) {
    // Following line sets the RTC to the date & time this sketch was compiled
    rtc.adjust(DateTime(F(__DATE__), F(__TIME__)));
    // This line sets the RTC with an explicit date & time, for example to set
    // January 21, 2014 at 3am you would call:
    // rtc.adjust(DateTime(2014, 1, 21, 3, 0, 0));
  }
  
}
// DS3231 RTC Date and Time
void isRTC(){
 
    // Date and Time
    sDate = "";
    sTime = "";
    // Date Time
    DateTime now = rtc.now();

    // sData
    sDate += String(now.year(), DEC);
    sDate += "/";
    sDate += String(now.month(), DEC);
    sDate += "/";
    sDate += String(now.day(), DEC);
  
    // sTime
    sTime += String(now.hour(), DEC);
    sTime += ":";
    sTime += String(now.minute(), DEC);
    sTime += ":";
    sTime += String(now.second(), DEC);
    
}

getSD.ino

// MicroSD Card
// MicroSD Setup
void setupSD() {

  // MicroSD Card
  if (!SD.begin(chipSelect)) {

     while (true);

  }
 
}
// MicroSD Card
void isSD() {

  zzzzzz = "";

  // Don Luc Electronics © (1983-2021)
  // Arduino Data
  // EEPROM Unique ID
  // Version
  // Date
  // Time
  // Temperature Celsius
  // Humidity
  // Hydrogen Gas Sensor - MQ-8
  // Carbon Monoxide & Flammable Gas Sensor - MQ-9
  // Carbon Monoxide Gas Sensor - MQ-7
  // Alcohol Gas Sensor - MQ-3
  // PIR Motion
  // HC-SR04 Ultrasonic Sensor
  // EEPROM Unique ID|Version|Date|Time|Temperature Celsius|Humidity|MQ-8|MQ-9|MQ-7|MQ-3|PIR Motion|HC-SR04|
  zzzzzz = uid + "|" + sver + "|" + sDate + "|" + sTime + "|" + latestTempC + "|" + latestHumidity + "|"
  + iMQ8ppm + "|" + iMQ9ppm + "|" + iMQ7ppm + "|" + 
  iMQ3ppm + "|" + Det + "|" + distance + "|";

  
  // Open the file. Note that only one file can be open at a time,
  // so you have to close this one before opening another.

  File dataFile = SD.open("arddata.txt", FILE_WRITE);

  // If the file is available, write to it:
  if ( dataFile ) {

    dataFile.println( zzzzzz );

    dataFile.close();

  }
  
}

setup.ino

// Setup
void setup()
{
    
  // EEPROM Unique ID
  isUID();
  
  // RHT Temperature and Humidity Sensor
  // Setup RTH03 Temperature and Humidity Sensor
  setupRTH03();

  // PIR Motion
  // Setup PIR
  setupPIR();

  // Setup DS3231 RTC
  isSetupRTC();

  //MicroSD Card
  setupSD();

  // Initialize the LED Green
  pinMode(iLEDGreen, OUTPUT);
  // iLEDGreen LOW
  digitalWrite(iLEDGreen,  LOW );

  // Slide Switch
  pinMode(iSS1, INPUT);

  // Setup HC-SR04
  setupHCSR04();

  // Adafruit RGB LCD Shield
  isSetupRGBLCDShield();

}

——

People can contact us: https://www.donluc.com/?page_id=1927

Technology Experience

  • Single-Board Microcontrollers (PIC, Arduino, Raspberry Pi,Espressif, etc…)
  • IoT
  • Robotics
  • Camera and Video Capture Receiver Stationary, Wheel/Tank and Underwater Vehicle
  • Unmanned Vehicles Terrestrial and Marine
  • Research & Development (R & D)
  • Desktop Applications (Windows, OSX, Linux, Multi-OS, Multi-Tier, etc…)
  • Mobile Applications (Android, iOS, Blackberry, Windows Mobile, Windows CE, etc…)
  • Web Applications (LAMP, Scripting, Java, ASP, ASP.NET, RoR, Wakanda, etc…)
  • Social Media Programming & Integration (Facebook, Twitter, YouTube, Pinterest, etc…)
  • Content Management Systems (WordPress, Drupal, Joomla, Moodle, etc…)
  • Bulletin Boards (phpBB, SMF, Vanilla, jobberBase, etc…)
  • eCommerce (WooCommerce, OSCommerce, ZenCart, PayPal Shopping Cart, etc…)

Instructor and E-Mentor

  • IoT
  • PIC Microcontrollers
  • Arduino
  • Raspberry Pi
  • Espressif
  • Robotics
  • DOS, Windows, OSX, Linux, iOS, Android, Multi-OS
  • Linux-Apache-PHP-MySQL

Follow Us

J. Luc Paquin – Curriculum Vitae – 2021 English & Español
https://www.jlpconsultants.com/luc/

Web: https://www.donluc.com/
Web: https://www.jlpconsultants.com/
Facebook: https://www.facebook.com/neosteam.labs.9/
YouTube: https://www.youtube.com/channel/UC5eRjrGn1CqkkGfZy0jxEdA
Twitter: https://twitter.com/labs_steam
Pinterest: https://www.pinterest.com/NeoSteamLabs/
Instagram: https://www.instagram.com/neosteamlabs/

Don Luc
Project #15: Environment – HC-SR04 Ultrasonic Sensor – Mk18

——

#DonLucElectronics #DonLuc #Environment #MQ #PIR #HCSR04 #RHT03 #RTC #ArduinoUNO #Arduino #AdafruitPowerBoost #Project #Programming #Electronics #Microcontrollers #Consultant

——

HC-SR04

——

HC-SR04

——

HC-SR04

——

HC-SR04

——

HC-SR04 Ultrasonic Sensor

This is the HC-SR04 ultrasonic distance sensor. This economical sensor provides 2cm to 400cm of non-contact measurement functionality with a ranging accuracy that can reach up to 3mm. Each HC-SR04 module includes an ultrasonic transmitter, a receiver and a control circuit.

There are only four pins that you need to worry about on the HC-SR04: VCC (Power), Trig (Trigger), Echo (Receive), and GND (Ground). You will find this sensor very easy to set up and use for your next range-finding project. This sensor has additional control circuitry that can prevent inconsistent “bouncy” data depending on the application.

DL2110Mk05

1 x Arduino UNO – R3
1 x ProtoScrewShield
1 x RGB LCD Shield 16×2 Character Negative Display
1 x HC-SR04 Ultrasonic Sensor
1 x ChronoDot – Ultra-Precise Real Time Clock – v2.1
1 x CR1632 Batteries
1 x MicroSD Card Breakout Board+
1 x MicroSD 2.0 GB
1 x Rocker Switch – SPST (Round)
1 x 10K Ohm
1 x LED Green
1 x 220 Ohm
1 x Adafruit PowerBoost 500 Shield
1 x Lithium Ion Battery – 3.7v 2000mAh
4 x Pololu Carrier for MQ Gas Sensors
1 x SparkFun Hydrogen Gas Sensor – MQ-8
1 x 4.7K Ohm
1 x Pololu Carbon Monoxide & Flammable Gas Sensor – MQ-9
1 x 22k Ohm
1 x SparkFun Carbon Monoxide Gas Sensor – MQ-7
1 x 10K Ohm
1 x SparkFun Alcohol Gas Sensor – MQ-3
1 x 220k Ohm
1 x Temperature and Humidity Sensor- RHT03
1 x PIR Motion Sensor (JST)
1 x SparkFun Solderable Half-Breadboard
1 x Half-Breadboard
1 x SparkFun Cerberus USB Cable

Arduino UNO – R3

CLK – Digital 13
DO – Digital 12
DI – Digital 11
CS – Digital 10
ECH – Digital 9
TIR – Digital 8
PIR – Digital 7
RHT – Digital 5
RS0 – Digital 3
LEG – Digital 2
MQ8 – Analog 0
MQ9 – Analog 1
MQ7 – Analog 2
MQ3 – Analog 3
SDA – Analog 4
SCL – Analog 5
VIN – +5V
GND – GND

DL2110Mk05p.ino

/* 
***** Don Luc Electronics © *****
Software Version Information
Project #15: Environment – HC-SR04 Ultrasonic Sensor – Mk18
10-05
DL2110Mk05p.ino
1 x Arduino UNO - R3
1 x ProtoScrewShield
1 x RGB LCD Shield 16x2 Character Negative Display
1 x HC-SR04 Ultrasonic Sensor
1 x ChronoDot - Ultra-Precise Real Time Clock - v2.1
1 x CR1632 Batteries
1 x MicroSD Card Breakout Board+
1 x MicroSD 2.0 GB
1 x Rocker Switch - SPST (Round)
1 x 10K Ohm
1 x LED Green
1 x 220 Ohm
1 x Adafruit PowerBoost 500 Shield
1 x Lithium Ion Battery - 3.7v 2000mAh
4 x Pololu Carrier for MQ Gas Sensors
1 x SparkFun Hydrogen Gas Sensor - MQ-8
1 x 4.7K Ohm
1 x Pololu Carbon Monoxide & Flammable Gas Sensor - MQ-9
1 x 22k Ohm
1 x SparkFun Carbon Monoxide Gas Sensor - MQ-7
1 x 10K Ohm
1 x SparkFun Alcohol Gas Sensor - MQ-3
1 x 220k Ohm
1 x Temperature and Humidity Sensor - RHT03
1 x PIR Motion Sensor (JST)
1 x SparkFun Solderable Half-Breadboard
1 x Half-Breadboard
1 x SparkFun Cerberus USB Cable
*/

// Include the Library Code
// EEPROM Library to Read and Write EEPROM with Unique ID for Unit
#include <EEPROM.h>
// RHT Temperature and Humidity Sensor
#include <SparkFun_RHT03.h>
// Adafruit RGB LCD Shield 16x2
#include <Adafruit_RGBLCDShield.h>
// Wire
#include <Wire.h>
// DS3231 RTC Date and Time
#include <RTClib.h>
// SD Card
#include <SPI.h>
#include <SD.h>

// RHT Temperature and Humidity Sensor
// RHT03 data pin Digital 5
const int RHT03_DATA_PIN = 5;
// This creates a RTH03 object, which we'll use to interact with the sensor
RHT03 rht;
float latestHumidity;
float latestTempC;

// Gas Sensors MQ
// Hydrogen Gas Sensor - MQ-8
int iMQ8 = A0;
int iMQ8Raw = 0;
int iMQ8ppm = 0;
// Two points are taken from the curve in datasheet.
// With these two points, a line is formed which is
// "approximately equivalent" to the original curve.
float H2Curve[3] = {2.3, 0.93,-1.44};

// Carbon Monoxide & Flammable Gas Sensor - MQ-9
int iMQ9 = A1;
int iMQ9Raw = 0;
int iMQ9ppm = 0;

// Carbon Monoxide Gas Sensor - MQ-7
int iMQ7 = A2;
int iMQ7Raw = 0;
int iMQ7ppm = 0;

// Alcohol Gas Sensor - MQ-3
int iMQ3 = A3;
int iMQ3Raw = 0;
int iMQ3ppm = 0;

// PIR Motion
// Motion detector
const int iMotion = 7;
// Proximity
int proximity = LOW;
String Det = "";

// Adafruit RGB LCD Shield
Adafruit_RGBLCDShield RGBLCDShield = Adafruit_RGBLCDShield();
// These #defines make it easy to set the backlight color
#define OFF 0x0
#define RED 0x1
#define YELLOW 0x3
#define GREEN 0x2
#define TEAL 0x6
#define BLUE 0x4
#define VIOLET 0x5
#define WHITE 0x7
// Momentary Button
int yy = 0;
uint8_t momentaryButton = 0;

// DS3231 RTC Date and Time
RTC_DS3231 rtc;
String sDate;
String sTime;

// SD Card
const int chipSelect = 10;
String zzzzzz = "";

// LED Green
int iLEDGreen = 2;

// Rocker Switch - SPST (Round)
int iSS1 = 3;
// State
int iSS1State = 0;

// HC-SR04 Ultrasonic Sensor
int iTrig = 8;
int iEcho = 9;
// Stores the distance measured by the distance sensor
float distance = 0;

// Software Version Information
String uid = "";
// Version
String sver = "15-18";

void loop()
{
     
  // Adafruit RGB LCD Shield
  // Clear
  RGBLCDShield.clear();

  // iLEDGreen LOW
  digitalWrite(iLEDGreen,  LOW );
  
  // RHT Temperature and Humidity Sensor
  isRHT03();

  // Gas Sensors MQ
  isGasSensor();

  // isPIR Motion
  isPIR();

  // DS3231 RTC Date and Time
  isRTC();
  
  // HC-SR04 Ultrasonic Sensor
  isHCSR04();

  // Adafruit RGB LCD Shield
  // Display
  isDisplay();

  // Slide Switch
  // Read the state of the iSS1 value
  iSS1State = digitalRead(iSS1);
  
  // If it is the Slide Switch State is HIGH
  if (iSS1State == HIGH) {

    // iLEDGreen HIGH
    digitalWrite(iLEDGreen,  HIGH );
    
    // MicroSD Card
    isSD();

  } else {

    // iLEDGreen LOW
    digitalWrite(iLEDGreen,  LOW );
  
  }

  // Delay
  delay( 500 );
 
}

getEEPROM.ino

// EEPROM
// isUID EEPROM Unique ID
void isUID()
{
  
  // Is Unit ID
  uid = "";
  for (int x = 0; x < 5; x++)
  {
    uid = uid + char(EEPROM.read(x));
  }
  
}

getGasSensorMQ.ino

// Gas Sensors MQ
// Gas Sensor
void isGasSensor() {

  // Read in analog value from each gas sensors
  
  // Hydrogen Gas Sensor - MQ-8
  iMQ8Raw = analogRead( iMQ8 );

  // Carbon Monoxide & Flammable Gas Sensor - MQ-9
  iMQ9Raw = analogRead( iMQ9 );  

  // Carbon Monoxide Gas Sensor - MQ-7
  iMQ7Raw = analogRead( iMQ7 );

  // Alcohol Gas Sensor - MQ-3
  iMQ3Raw = analogRead( iMQ3 );
  
  // Caclulate the PPM of each gas sensors

  // Hydrogen Gas Sensor - MQ-8
  iMQ8ppm = isMQ8( iMQ8Raw );

  // Carbon Monoxide & Flammable Gas Sensor - MQ-9
  iMQ9ppm = isMQ9( iMQ9Raw ); 

  // Carbon Monoxide Gas Sensor - MQ-7
  iMQ7ppm = isMQ7( iMQ7Raw ); 

  // Alcohol Gas Sensor - MQ-3
  iMQ3ppm = isMQ3( iMQ3Raw ); 

}
// Hydrogen Gas Sensor - MQ-8 - PPM
int isMQ8(double rawValue) {

  // RvRo
  double RvRo = rawValue * (3.3 / 1023);

  return (pow(4.7,( ((log(RvRo)-H2Curve[1])/H2Curve[2]) + H2Curve[0])));
  
}
// Carbon Monoxide & Flammable Gas Sensor - MQ-9
int isMQ9(double rawValue) {

  double RvRo = rawValue * 3.3 / 4095;

  double ppm = 3.027*exp(1.0698*( RvRo ));
  return ppm;
  
}
// Carbon Monoxide Gas Sensor - MQ-7
int isMQ7(double rawValue) {

  double RvRo = rawValue * 3.3 / 4095;

  double ppm = 3.027*exp(1.0698*( RvRo ));
  return ppm;
  
}
// Alcohol Gas Sensor - MQ-3
int isMQ3(double rawValue) {

  double RvRo = rawValue * 3.3 / 4095;

  double bac = RvRo * 0.21;
  return bac;
  
}

getHC-SR04.ino

// HC-SR04 Ultrasonic Sensor
// Setup HC-SR04
void setupHCSR04() {

  // The trigger iTrig will output pulses of electricity
  pinMode(iTrig, OUTPUT);
  // The echo iEcho will measure the duration of pulses coming back from the distance sensor
  pinMode(iEcho, INPUT);
  
}
// HC-SR04
void isHCSR04() {

  // Variable to store the distance measured by the sensor
  distance = isDistance();
    
}
// Distance
float isDistance() {
  
  // Variable to store the time it takes for a ping to bounce off an object
  float echoTime;
  // Variable to store the distance calculated from the echo time
  float calculatedDistance;

  // Send out an ultrasonic pulse that's 10ms long
  digitalWrite(iTrig, HIGH);
  delayMicroseconds(10);
  digitalWrite(iTrig, LOW);

  // Use the pulseIn command to see how long it takes for the
  // pulse to bounce back to the sensor
  echoTime = pulseIn(iEcho, HIGH);

  // Calculate the distance of the object that reflected the pulse
  // (half the bounce time multiplied by the speed of sound)
  // cm = 58.0
  calculatedDistance = echoTime / 58.0;

  // Send back the distance that was calculated
  return calculatedDistance;
  
}

getPIR.ino

// PIR Motion
// Setup PIR
void setupPIR() {

  // Setup PIR Montion
  pinMode(iMotion, INPUT_PULLUP);
  
}
// isPIR Motion
void isPIR() {

  // Proximity
  proximity = digitalRead(iMotion);
  if (proximity == LOW) 
  {

    // PIR Motion Sensor's LOW, Motion is detected
    Det = "Motion Yes";

  }
  else
  {

    // PIR Motion Sensor's HIGH
    Det = "No";
    
  }
  
}

getRGBLCDShield.ino

// Adafruit RGB LCD Shield
// Setup RGB LCD Shield
void isSetupRGBLCDShield() {

  // Adafruit RGB LCD Shield
  // Set up the LCD's number of columns and rows: 
  RGBLCDShield.begin(16, 2);

  // Set the cursor to column 0, line 0
  RGBLCDShield.setBacklight(RED);
  // Don luc 
  RGBLCDShield.setCursor(0,0);
  RGBLCDShield.print("Don Luc");
  // Set the cursor to column 0, line 1
  RGBLCDShield.setCursor(0, 1);
  // Electronics
  RGBLCDShield.print("Electronics");
  // Delay
  delay(5000);
  // Clear
  RGBLCDShield.clear();

  // Set the cursor to column 0, line 0
  RGBLCDShield.setBacklight(TEAL);
  // Version 
  RGBLCDShield.setCursor(0,0);
  RGBLCDShield.print("Version: " + sver);
  // Set the cursor to column 0, line 1
  RGBLCDShield.setCursor(0, 1);
  // Unit ID
  RGBLCDShield.print("Unit ID: " + uid);
  // Delay
  delay(5000);
  // Clear
  RGBLCDShield.clear();
  
}
// isDisplay
void isDisplay() {

  // Momentary Button
  momentaryButton = RGBLCDShield.readButtons();

  switch ( yy ) {
    case 1:
    
      // RHT Temperature and Humidity Sensor
      // Set the cursor to column 0, line 0
      RGBLCDShield.setCursor(0,0);
      // Temperature C
      RGBLCDShield.print( "Temp C: " );
      RGBLCDShield.print( latestTempC );
      // Set the cursor to column 0, line 1
      RGBLCDShield.setCursor(0, 1);
      // Humidity
      RGBLCDShield.print( "Humidity: " );
      RGBLCDShield.print( latestHumidity );

      break;
    case 2:
    
      // Set the cursor to column 0, line 0
      // PIR Motion Sensor
      RGBLCDShield.setCursor(0,0);
      RGBLCDShield.print( "PIR: " );
      RGBLCDShield.print( Det );
      // Set the cursor to column 0, line 1
      // HC-SR04 Ultrasonic Sensor
      RGBLCDShield.setCursor(0, 1);
      RGBLCDShield.print( "HC-SR04: " );
      RGBLCDShield.print( distance );
      
      break;
    case 3:

      // Gas Sensors 1
      // Set the cursor to column 0, line 0
      RGBLCDShield.setCursor(0,0);
      // Hydrogen Gas Sensor - MQ-8
      RGBLCDShield.print( "MQ-8: " );
      RGBLCDShield.print( iMQ8ppm );
      // Set the cursor to column 0, line 1
      RGBLCDShield.setCursor(0, 1);
      // Carbon Monoxide & Flammable Gas Sensor - MQ-9
      RGBLCDShield.print( "MQ-9: " );
      RGBLCDShield.print( iMQ9ppm );
      
      break;
    case 4:

      // Gas Sensors 2
      // Set the cursor to column 0, line 0
      RGBLCDShield.setCursor(0,0);
      // Carbon Monoxide Gas Sensor - MQ-7
      RGBLCDShield.print( "MQ-7: " );
      RGBLCDShield.print( iMQ7ppm );
      // Set the cursor to column 0, line 1
      RGBLCDShield.setCursor(0, 1);
      // Alcohol Gas Sensor - MQ-3
      RGBLCDShield.print( "MQ-3: " );
      RGBLCDShield.print( iMQ3ppm );
      
      break;
    case 5:

      // DS3231 RTC Date and Time
      // Date and Time
      DateTime now = rtc.now();
      // Set the cursor to column 0, line 0
      // Date 
      RGBLCDShield.setCursor(0,0);
      RGBLCDShield.print( sDate );
      // Set the cursor to column 0, line 1
      RGBLCDShield.setCursor(0, 1);
      // Time
      RGBLCDShield.print( sTime );
      
      break;
    default:

      // Don luc Electronics
      yy = 5;
      RGBLCDShield.setBacklight(RED);
      // Set the cursor to column 0, line 0
      // Don luc 
      RGBLCDShield.setCursor(0,0);
      RGBLCDShield.print("Don Luc");
      // Set the cursor to column 0, line 1
      RGBLCDShield.setCursor(0, 1);
      // Electronics
      RGBLCDShield.print("Electronics");

   }
   
   if ( momentaryButton ) {
    
    if ( momentaryButton & BUTTON_UP ) {
      
      yy = 1;
      // RHT Temperature and Humidity Sensor
      RGBLCDShield.setBacklight(GREEN);
      
    }
    
    if ( momentaryButton & BUTTON_DOWN ) {
      
      yy = 2;
      // PIR Motion Sensor
      RGBLCDShield.setBacklight(VIOLET);
      
    }
    
    if ( momentaryButton & BUTTON_LEFT ) {
      
      yy = 3;
      // Gas Sensors 1
      RGBLCDShield.setBacklight(TEAL);
      
    }
    
    if ( momentaryButton & BUTTON_RIGHT ) {

      yy = 4;
      // Gas Sensors 2
      RGBLCDShield.setBacklight(YELLOW);
    }
    
    if ( momentaryButton & BUTTON_SELECT ) {

      yy = 5;
      // DS3231 RTC Date and Time
      RGBLCDShield.setBacklight(WHITE);
   
    }
    
  }
  
}

getRHT.ino

// RHT Temperature and Humidity Sensor
// setup RHT Temperature and Humidity Sensor
void setupRTH03() {

  // RHT Temperature and Humidity Sensor
  // Call rht.begin() to initialize the sensor and our data pin
  rht.begin(RHT03_DATA_PIN);
  
}
// RHT Temperature and Humidity Sensor
void isRHT03(){

  // Call rht.update() to get new humidity and temperature values from the sensor.
  int updateRet = rht.update();

  // The humidity(), tempC(), and tempF() functions can be called -- after 
  // a successful update() -- to get the last humidity and temperature value 
  latestHumidity = rht.humidity();
  latestTempC = rht.tempC();

}

getRTC.ino

// DS3231 RTC Date and Time
// Setup DS3231 RTC
void isSetupRTC() {

  if (! rtc.begin()) {
    while (1);
  }

  if (rtc.lostPower()) {
    // Following line sets the RTC to the date & time this sketch was compiled
    rtc.adjust(DateTime(F(__DATE__), F(__TIME__)));
    // This line sets the RTC with an explicit date & time, for example to set
    // January 21, 2014 at 3am you would call:
    // rtc.adjust(DateTime(2014, 1, 21, 3, 0, 0));
  }
  
}
// DS3231 RTC Date and Time
void isRTC(){
 
    // Date and Time
    sDate = "";
    sTime = "";
    // Date Time
    DateTime now = rtc.now();

    // sData
    sDate += String(now.year(), DEC);
    sDate += "/";
    sDate += String(now.month(), DEC);
    sDate += "/";
    sDate += String(now.day(), DEC);
  
    // sTime
    sTime += String(now.hour(), DEC);
    sTime += ":";
    sTime += String(now.minute(), DEC);
    sTime += ":";
    sTime += String(now.second(), DEC);
    
}

getSD.ino

// MicroSD Card
// MicroSD Setup
void setupSD() {

  // MicroSD Card
  if (!SD.begin(chipSelect)) {

     while (true);

  }
 
}
// MicroSD Card
void isSD() {

  zzzzzz = "";

  // Don Luc Electronics © (1983-2021)
  // Arduino Data
  // EEPROM Unique ID
  // Version
  // Date
  // Time
  // Temperature Celsius
  // Humidity
  // Hydrogen Gas Sensor - MQ-8
  // Carbon Monoxide & Flammable Gas Sensor - MQ-9
  // Carbon Monoxide Gas Sensor - MQ-7
  // Alcohol Gas Sensor - MQ-3
  // PIR Motion
  // HC-SR04 Ultrasonic Sensor
  // EEPROM Unique ID|Version|Date|Time|Temperature Celsius|Humidity|MQ-8|MQ-9|MQ-7|MQ-3|PIR Motion|HC-SR04|
  zzzzzz = uid + "|" + sver + "|" + sDate + "|" + sTime + "|" + latestTempC + "|" + latestHumidity + "|"
  + iMQ8ppm + "|" + iMQ9ppm + "|" + iMQ7ppm + "|" + 
  iMQ3ppm + "|" + Det + "|" + distance + "|";

  
  // Open the file. Note that only one file can be open at a time,
  // so you have to close this one before opening another.

  File dataFile = SD.open("arddata.txt", FILE_WRITE);

  // If the file is available, write to it:
  if ( dataFile ) {

    dataFile.println( zzzzzz );

    dataFile.close();

  }
  
}

setup.ino

// Setup
void setup()
{
    
  // EEPROM Unique ID
  isUID();
  
  // RHT Temperature and Humidity Sensor
  // Setup RTH03 Temperature and Humidity Sensor
  setupRTH03();

  // PIR Motion
  // Setup PIR
  setupPIR();

  // Setup DS3231 RTC
  isSetupRTC();

  //MicroSD Card
  setupSD();

  // Initialize the LED Green
  pinMode(iLEDGreen, OUTPUT);
  // iLEDGreen LOW
  digitalWrite(iLEDGreen,  LOW );

  // Slide Switch
  pinMode(iSS1, INPUT);

  // Setup HC-SR04
  setupHCSR04();

  // Adafruit RGB LCD Shield
  isSetupRGBLCDShield();

}

——

People can contact us: https://www.donluc.com/?page_id=1927

Technology Experience

  • Single-Board Microcontrollers (PIC, Arduino, Raspberry Pi,Espressif, etc…)
  • IoT
  • Robotics
  • Camera and Video Capture Receiver Stationary, Wheel/Tank and Underwater Vehicle
  • Unmanned Vehicles Terrestrial and Marine
  • Research & Development (R & D)
  • Desktop Applications (Windows, OSX, Linux, Multi-OS, Multi-Tier, etc…)
  • Mobile Applications (Android, iOS, Blackberry, Windows Mobile, Windows CE, etc…)
  • Web Applications (LAMP, Scripting, Java, ASP, ASP.NET, RoR, Wakanda, etc…)
  • Social Media Programming & Integration (Facebook, Twitter, YouTube, Pinterest, etc…)
  • Content Management Systems (WordPress, Drupal, Joomla, Moodle, etc…)
  • Bulletin Boards (phpBB, SMF, Vanilla, jobberBase, etc…)
  • eCommerce (WooCommerce, OSCommerce, ZenCart, PayPal Shopping Cart, etc…)

Instructor and E-Mentor

  • IoT
  • PIC Microcontrollers
  • Arduino
  • Raspberry Pi
  • Espressif
  • Robotics
  • DOS, Windows, OSX, Linux, iOS, Android, Multi-OS
  • Linux-Apache-PHP-MySQL

Follow Us

J. Luc Paquin – Curriculum Vitae – 2021 English & Español
https://www.jlpconsultants.com/luc/

Web: https://www.donluc.com/
Web: https://www.jlpconsultants.com/
Facebook: https://www.facebook.com/neosteam.labs.9/
YouTube: https://www.youtube.com/channel/UC5eRjrGn1CqkkGfZy0jxEdA
Twitter: https://twitter.com/labs_steam
Pinterest: https://www.pinterest.com/NeoSteamLabs/
Instagram: https://www.instagram.com/neosteamlabs/

Don Luc
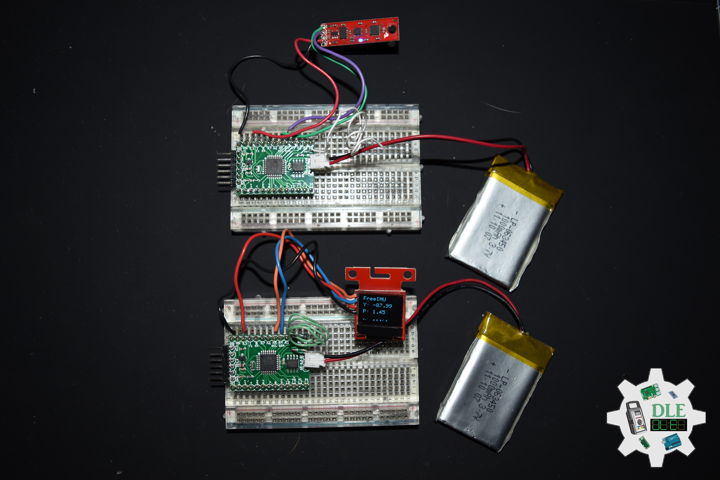
Project #15: Environment – ChronoDot – Mk16

——

#DonLucElectronics #DonLuc #Environment #MQ #PIR #RHT03 #RTC #ArduinoUNO #Arduino #AdafruitPowerBoost #Project #Programming #Electronics #Microcontrollers #Consultant #VideoBlog

——

ChronoDot

——

ChronoDot

——

ChronoDot

——

ChronoDot

——

ChronoDot – Ultra-Precise Real Time Clock – v2.1

The ChronoDot RTC is an extremely accurate real time clock module, based on the DS3231 temperature compensated RTC. It includes a CR1632 battery, which should last at least 8 years if the I2C interface is only used while the device has 5V power available. No external crystal or tuning capacitors are required.

The top side of the Chronodot now features a battery holder for 16mm 3V lithium coin cells. It pairs particularly well with CR1632 batteries. The DS3231 has an internal crystal and a switched bank of tuning capacitors. The temperature of the crystal is continously monitored, and the capacitors are adjusted to maintain a stable frequency. Other RTC solutions may drift minutes per month, especially in extreme temperature ranges…the ChronoDot will drift less than a minute per year. This makes the ChronoDot very well suited for time critical applications that cannot be regularly synchronized to an external clock.

DL2110Mk03

1 x Arduino UNO – R3
1 x ProtoScrewShield
1 x RGB LCD Shield 16×2 Character Negative Display
1 x ChronoDot – Ultra-Precise Real Time Clock – v2.1
1 x Adafruit PowerBoost 500 Shield
1 x Lithium Ion Battery – 3.7v 2000mAh
4 x Pololu Carrier for MQ Gas Sensors
1 x SparkFun Hydrogen Gas Sensor – MQ-8
1 x 4.7K Ohm
1 x Pololu Carbon Monoxide & Flammable Gas Sensor – MQ-9
1 x 22k Ohm
1 x SparkFun Carbon Monoxide Gas Sensor – MQ-7
1 x 10K Ohm
1 x SparkFun Alcohol Gas Sensor – MQ-3
1 x 220k Ohm
1 x Temperature and Humidity Sensor- RHT03
1 x PIR Motion Sensor (JST)
1 x SparkFun Solderable Half-Breadboard
1 x Half-Breadboard
1 x SparkFun Cerberus USB Cable

Arduino UNO – R3

RHT – Digital 5
PIR – Digital 7
MQ8 – Analog 0
MQ9 – Analog 1
MQ7 – Analog 2
MQ3 – Analog 3
SDA – Analog 4
SCL – Analog 5
VIN – +5V
GND – GND

——

DL2110Mk03p.ino

/* 
***** Don Luc Electronics © *****
Software Version Information
Project #15: Environment – ChronoDot – Mk16
10-03
DL2110Mk03p.ino
1 x Arduino UNO - R3
1 x ProtoScrewShield
1 x RGB LCD Shield 16x2 Character Negative Display
1 x ChronoDot - Ultra-Precise Real Time Clock - v2.1
1 x Adafruit PowerBoost 500 Shield
1 x Lithium Ion Battery - 3.7v 2000mAh
4 x Pololu Carrier for MQ Gas Sensors
1 x SparkFun Hydrogen Gas Sensor - MQ-8
1 x 4.7K Ohm
1 x Pololu Carbon Monoxide & Flammable Gas Sensor - MQ-9
1 x 22k Ohm
1 x SparkFun Carbon Monoxide Gas Sensor - MQ-7
1 x 10K Ohm
1 x SparkFun Alcohol Gas Sensor - MQ-3
1 x 220k Ohm
1 x Temperature and Humidity Sensor - RHT03
1 x PIR Motion Sensor (JST)
1 x SparkFun Solderable Half-Breadboard
1 x Half-Breadboard
1 x SparkFun Cerberus USB Cable
*/

// Include the Library Code
// EEPROM Library to Read and Write EEPROM with Unique ID for Unit
#include <EEPROM.h>
// RHT Temperature and Humidity Sensor
#include <SparkFun_RHT03.h>
// Adafruit RGB LCD Shield 16x2
#include <Adafruit_RGBLCDShield.h>
// Wire
#include <Wire.h>
// DS3231 RTC Date and Time
#include <RTClib.h>

// RHT Temperature and Humidity Sensor
// RHT03 data pin Digital 5
const int RHT03_DATA_PIN = 5;
// This creates a RTH03 object, which we'll use to interact with the sensor
RHT03 rht;
float latestHumidity;
float latestTempC;

// Gas Sensors MQ
// Hydrogen Gas Sensor - MQ-8
int iMQ8 = A0;
int iMQ8Raw = 0;
int iMQ8ppm = 0;
// Two points are taken from the curve in datasheet.
// With these two points, a line is formed which is
// "approximately equivalent" to the original curve.
float H2Curve[3] = {2.3, 0.93,-1.44};

// Carbon Monoxide & Flammable Gas Sensor - MQ-9
int iMQ9 = A1;
int iMQ9Raw = 0;
int iMQ9ppm = 0;

// Carbon Monoxide Gas Sensor - MQ-7
int iMQ7 = A2;
int iMQ7Raw = 0;
int iMQ7ppm = 0;

// Alcohol Gas Sensor - MQ-3
int iMQ3 = A3;
int iMQ3Raw = 0;
int iMQ3ppm = 0;

// PIR Motion
// Motion detector
const int iMotion = 7;
// Proximity
int proximity = LOW;
String Det = "";

// Adafruit RGB LCD Shield
Adafruit_RGBLCDShield RGBLCDShield = Adafruit_RGBLCDShield();
// These #defines make it easy to set the backlight color
#define OFF 0x0
#define RED 0x1
#define YELLOW 0x3
#define GREEN 0x2
#define TEAL 0x6
#define BLUE 0x4
#define VIOLET 0x5
#define WHITE 0x7
// Momentary Button
int yy = 0;
uint8_t momentaryButton = 0;

// DS3231 RTC Date and Time
RTC_DS3231 rtc;
String sDate;
String sTime;

// Software Version Information
String uid = "";
// Version
String sver = "15-16";

void loop()
{
     
  // Adafruit RGB LCD Shield
  // Clear
  RGBLCDShield.clear();
  
  // RHT Temperature and Humidity Sensor
  isRHT03();

  // Gas Sensors MQ
  isGasSensor();

  // isPIR Motion
  isPIR();

  // DS3231 RTC Date and Time
  isRTC();

  // Adafruit RGB LCD Shield
  // Display
  isDisplay();

  // Delay
  // Turn the LED on HIGH is the voltage level
  digitalWrite(LED_BUILTIN, HIGH);
  // Wait for a 0.5 second
  delay( 500 );
  // Turn the LED off by making the voltage LOW
  digitalWrite(LED_BUILTIN, LOW);
  // Wait for a 0.5 second
  delay( 500 );
 
}

getEEPROM.ino

// EEPROM
// isUID EEPROM Unique ID
void isUID()
{
  
  // Is Unit ID
  uid = "";
  for (int x = 0; x < 5; x++)
  {
    uid = uid + char(EEPROM.read(x));
  }
  
}

getGasSensorMQ.ino

// Gas Sensors MQ
// Gas Sensor
void isGasSensor() {

  // Read in analog value from each gas sensors
  
  // Hydrogen Gas Sensor - MQ-8
  iMQ8Raw = analogRead( iMQ8 );

  // Carbon Monoxide & Flammable Gas Sensor - MQ-9
  iMQ9Raw = analogRead( iMQ9 );  

  // Carbon Monoxide Gas Sensor - MQ-7
  iMQ7Raw = analogRead( iMQ7 );

  // Alcohol Gas Sensor - MQ-3
  iMQ3Raw = analogRead( iMQ3 );
  
  // Caclulate the PPM of each gas sensors

  // Hydrogen Gas Sensor - MQ-8
  iMQ8ppm = isMQ8( iMQ8Raw );

  // Carbon Monoxide & Flammable Gas Sensor - MQ-9
  iMQ9ppm = isMQ9( iMQ9Raw ); 

  // Carbon Monoxide Gas Sensor - MQ-7
  iMQ7ppm = isMQ7( iMQ7Raw ); 

  // Alcohol Gas Sensor - MQ-3
  iMQ3ppm = isMQ3( iMQ3Raw ); 

}
// Hydrogen Gas Sensor - MQ-8 - PPM
int isMQ8(double rawValue) {

  // RvRo
  double RvRo = rawValue * (3.3 / 1023);

  return (pow(4.7,( ((log(RvRo)-H2Curve[1])/H2Curve[2]) + H2Curve[0])));
  
}
// Carbon Monoxide & Flammable Gas Sensor - MQ-9
int isMQ9(double rawValue) {

  double RvRo = rawValue * 3.3 / 4095;

  double ppm = 3.027*exp(1.0698*( RvRo ));
  return ppm;
  
}
// Carbon Monoxide Gas Sensor - MQ-7
int isMQ7(double rawValue) {

  double RvRo = rawValue * 3.3 / 4095;

  double ppm = 3.027*exp(1.0698*( RvRo ));
  return ppm;
  
}
// Alcohol Gas Sensor - MQ-3
int isMQ3(double rawValue) {

  double RvRo = rawValue * 3.3 / 4095;

  double bac = RvRo * 0.21;
  return bac;
  
}

getPIR.ino

// PIR Motion
// Setup PIR
void setupPIR() {

  // Setup PIR Montion
  pinMode(iMotion, INPUT_PULLUP);
  
}
// isPIR Motion
void isPIR() {

  // Proximity
  proximity = digitalRead(iMotion);
  if (proximity == LOW) 
  {

    // PIR Motion Sensor's LOW, Motion is detected
    Det = "Motion Yes";

  }
  else
  {

    // PIR Motion Sensor's HIGH
    Det = "No";
    
  }
  
}

getRGBLCDShield.ino

// Adafruit RGB LCD Shield
// Setup RGB LCD Shield
void isSetupRGBLCDShield() {

  // Adafruit RGB LCD Shield
  // Set up the LCD's number of columns and rows: 
  RGBLCDShield.begin(16, 2);

  // Set the cursor to column 0, line 0
  RGBLCDShield.setBacklight(RED);
  // Don luc 
  RGBLCDShield.setCursor(0,0);
  RGBLCDShield.print("Don Luc");
  // Set the cursor to column 0, line 1
  RGBLCDShield.setCursor(0, 1);
  // Electronics
  RGBLCDShield.print("Electronics");
  // Delay
  delay(5000);
  // Clear
  RGBLCDShield.clear();

  // Set the cursor to column 0, line 0
  RGBLCDShield.setBacklight(TEAL);
  // Version 
  RGBLCDShield.setCursor(0,0);
  RGBLCDShield.print("Version: " + sver);
  // Set the cursor to column 0, line 1
  RGBLCDShield.setCursor(0, 1);
  // Unit ID
  RGBLCDShield.print("Unit ID: " + uid);
  // Delay
  delay(5000);
  // Clear
  RGBLCDShield.clear();
  
}
// isDisplay
void isDisplay() {

  // Momentary Button
  momentaryButton = RGBLCDShield.readButtons();

  switch ( yy ) {
    case 1:
    
      // RHT Temperature and Humidity Sensor
      // Set the cursor to column 0, line 0
      RGBLCDShield.setCursor(0,0);
      // Temperature C
      RGBLCDShield.print( "Temp C: " );
      RGBLCDShield.print( latestTempC );
      // Set the cursor to column 0, line 1
      RGBLCDShield.setCursor(0, 1);
      // Humidity
      RGBLCDShield.print( "Humidity: " );
      RGBLCDShield.print( latestHumidity );

      break;
    case 2:
    
      // PIR Motion Sensor
      // Set the cursor to column 0, line 0
      // PIR Motion Sensor
      RGBLCDShield.setCursor(0,0);
      RGBLCDShield.print( "PIR Motion" );
      // Set the cursor to column 0, line 1
      RGBLCDShield.setCursor(0, 1);
      // Det
      RGBLCDShield.print( Det );
      
      break;
    case 3:

      // Gas Sensors 1
      // Set the cursor to column 0, line 0
      RGBLCDShield.setCursor(0,0);
      // Hydrogen Gas Sensor - MQ-8
      RGBLCDShield.print( "MQ-8: " );
      RGBLCDShield.print( iMQ8ppm );
      // Set the cursor to column 0, line 1
      RGBLCDShield.setCursor(0, 1);
      // Carbon Monoxide & Flammable Gas Sensor - MQ-9
      RGBLCDShield.print( "MQ-9: " );
      RGBLCDShield.print( iMQ9ppm );
      
      break;
    case 4:

      // Gas Sensors 2
      // Set the cursor to column 0, line 0
      RGBLCDShield.setCursor(0,0);
      // Carbon Monoxide Gas Sensor - MQ-7
      RGBLCDShield.print( "MQ-7: " );
      RGBLCDShield.print( iMQ7ppm );
      // Set the cursor to column 0, line 1
      RGBLCDShield.setCursor(0, 1);
      // Alcohol Gas Sensor - MQ-3
      RGBLCDShield.print( "MQ-3: " );
      RGBLCDShield.print( iMQ3ppm );
      
      break;
    case 5:

      // DS3231 RTC Date and Time
      // Date and Time
      DateTime now = rtc.now();
      // Set the cursor to column 0, line 0
      // Date 
      RGBLCDShield.setCursor(0,0);
      RGBLCDShield.print( sDate );
      // Set the cursor to column 0, line 1
      RGBLCDShield.setCursor(0, 1);
      // Time
      RGBLCDShield.print( sTime );
      
      break;
    default:

      // Don luc Electronics
      yy = 5;
      RGBLCDShield.setBacklight(RED);
      // Set the cursor to column 0, line 0
      // Don luc 
      RGBLCDShield.setCursor(0,0);
      RGBLCDShield.print("Don Luc");
      // Set the cursor to column 0, line 1
      RGBLCDShield.setCursor(0, 1);
      // Electronics
      RGBLCDShield.print("Electronics");

   }
   
   if ( momentaryButton ) {
    
    if ( momentaryButton & BUTTON_UP ) {
      
      yy = 1;
      // RHT Temperature and Humidity Sensor
      RGBLCDShield.setBacklight(GREEN);
      
    }
    
    if ( momentaryButton & BUTTON_DOWN ) {
      
      yy = 2;
      // PIR Motion Sensor
      RGBLCDShield.setBacklight(VIOLET);
      
    }
    
    if ( momentaryButton & BUTTON_LEFT ) {
      
      yy = 3;
      // Gas Sensors 1
      RGBLCDShield.setBacklight(TEAL);
      
    }
    
    if ( momentaryButton & BUTTON_RIGHT ) {

      yy = 4;
      // Gas Sensors 2
      RGBLCDShield.setBacklight(YELLOW);
    }
    
    if ( momentaryButton & BUTTON_SELECT ) {

      yy = 5;
      // DS3231 RTC Date and Time
      RGBLCDShield.setBacklight(WHITE);
   
    }
    
  }
  
}

getRHT.ino

// RHT Temperature and Humidity Sensor
// setup RHT Temperature and Humidity Sensor
void setupRTH03() {

  // RHT Temperature and Humidity Sensor
  // Call rht.begin() to initialize the sensor and our data pin
  rht.begin(RHT03_DATA_PIN);
  
}
// RHT Temperature and Humidity Sensor
void isRHT03(){

  // Call rht.update() to get new humidity and temperature values from the sensor.
  int updateRet = rht.update();

  // The humidity(), tempC(), and tempF() functions can be called -- after 
  // a successful update() -- to get the last humidity and temperature value 
  latestHumidity = rht.humidity();
  latestTempC = rht.tempC();

}

getRTC.ino

// DS3231 RTC Date and Time
// Setup DS3231 RTC
void isSetupRTC() {

  if (! rtc.begin()) {
    while (1);
  }

  if (rtc.lostPower()) {
    // Following line sets the RTC to the date & time this sketch was compiled
    rtc.adjust(DateTime(F(__DATE__), F(__TIME__)));
    // This line sets the RTC with an explicit date & time, for example to set
    // January 21, 2014 at 3am you would call:
    // rtc.adjust(DateTime(2014, 1, 21, 3, 0, 0));
  }
  
}
// DS3231 RTC Date and Time
void isRTC(){
 
    // Date and Time
    sDate = "";
    sTime = "";
    // Date Time
    DateTime now = rtc.now();

    // sData
    sDate += String(now.year(), DEC);
    sDate += "/";
    sDate += String(now.month(), DEC);
    sDate += "/";
    sDate += String(now.day(), DEC);
  
    // sTime
    sTime += String(now.hour(), DEC);
    sTime += ":";
    sTime += String(now.minute(), DEC);
    sTime += ":";
    sTime += String(now.second(), DEC);
    
}

setup.ino

// Setup
void setup()
{
    
  // EEPROM Unique ID
  isUID();
  
  // RHT Temperature and Humidity Sensor
  // Setup RTH03 Temperature and Humidity Sensor
  setupRTH03();

  // PIR Motion
  // Setup PIR
  setupPIR();

  // Setup DS3231 RTC
  isSetupRTC();

  // Initialize digital pin LED_BUILTIN as an output.
  pinMode(LED_BUILTIN, OUTPUT);

  // Adafruit RGB LCD Shield
  isSetupRGBLCDShield();

}

——

People can contact us: https://www.donluc.com/?page_id=1927

Technology Experience

  • Single-Board Microcontrollers (PIC, Arduino, Raspberry Pi,Espressif, etc…)
  • IoT
  • Robotics
  • Camera and Video Capture Receiver Stationary, Wheel/Tank and Underwater Vehicle
  • Unmanned Vehicles Terrestrial and Marine
  • Research & Development (R & D)
  • Desktop Applications (Windows, OSX, Linux, Multi-OS, Multi-Tier, etc…)
  • Mobile Applications (Android, iOS, Blackberry, Windows Mobile, Windows CE, etc…)
  • Web Applications (LAMP, Scripting, Java, ASP, ASP.NET, RoR, Wakanda, etc…)
  • Social Media Programming & Integration (Facebook, Twitter, YouTube, Pinterest, etc…)
  • Content Management Systems (WordPress, Drupal, Joomla, Moodle, etc…)
  • Bulletin Boards (phpBB, SMF, Vanilla, jobberBase, etc…)
  • eCommerce (WooCommerce, OSCommerce, ZenCart, PayPal Shopping Cart, etc…)

Instructor and E-Mentor

  • PIC Microcontrollers
  • Arduino
  • Raspberry Pi
  • Espressif
  • Robotics
  • DOS, Windows, OSX, Linux, iOS, Android, Multi-OS
  • Linux-Apache-PHP-MySQL

Follow Us

J. Luc Paquin – Curriculum Vitae – 2021 English & Español
https://www.jlpconsultants.com/luc/

Web: https://www.donluc.com/
Web: https://www.jlpconsultants.com/
Web: https://www.donluc.com/DLE/
Web: https://www.donluc.com/DLHackster/
Web: https://www.hackster.io/neosteam-labs
Web: https://zoom.us/
Patreon: https://www.patreon.com/DonLucElectronics
Facebook: https://www.facebook.com/neosteam.labs.9/
YouTube: https://www.youtube.com/channel/UC5eRjrGn1CqkkGfZy0jxEdA
Twitter: https://twitter.com/labs_steam
Pinterest: https://www.pinterest.com/NeoSteamLabs/
Instagram: https://www.instagram.com/neosteamlabs/

Don Luc
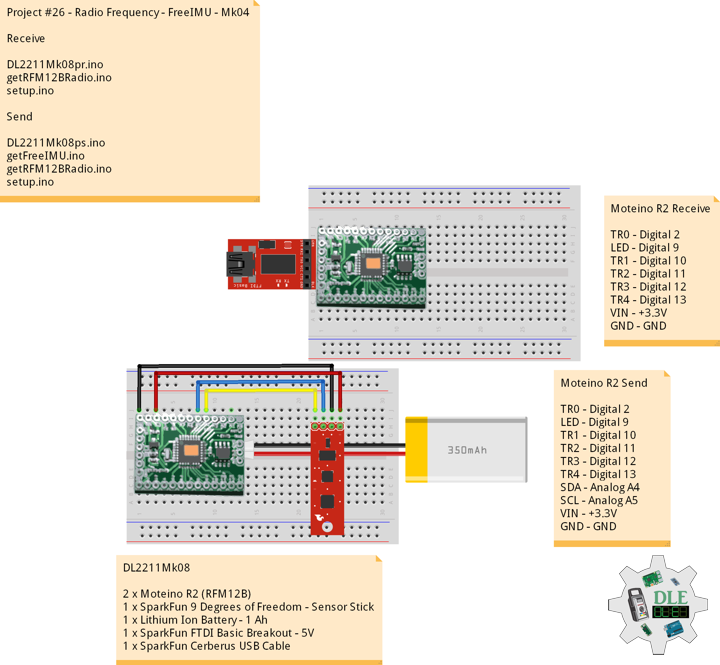
Project #15: Environment – RGB LCD Shield 16×2 Character Display – Mk15

——

#DonLucElectronics #DonLuc #Environment #MQ #PIR #RHT03 #ArduinoUNO #Arduino #AdafruitPowerBoost #Project #Programming #Electronics #Microcontrollers #Consultant #VideoBlog

——

RGB LCD Shield 16x2 Character Display

——

RGB LCD Shield 16x2 Character Display

——

RGB LCD Shield 16x2 Character Display

——

RGB LCD Shield 16x2 Character Display

——

RGB LCD Shield 16×2 Character Negative Display

With this in mind, we wanted to make it easier for people to get these LCD into their projects so we devised a shield that lets you control a 16×2 Character LCD, up to 3 backlight pins AND 5 keypad pins using only the two I2C pins on the Arduino. The shield is designed for Arduinos Uno. It uses the I2C pins at Analog 4 and Analog 5.

At this time, the library and shield can control the RGB backlight of our character LCDs by turning each LED on or off. This means you can display the following colors: Red, Yellow, Green, Teal, Blue, Violet, White and all off. This shield is perfect for when you want to build a stand-alone project with its own user interface. The 4 directional buttons plus select button allows basic control without having to attach a bulky computer.

Adjusting Contrast

The shield uses a character LCD with an external contrast potentiometer. The first time you use it, adjust the potentiometer in the bottom right until you see the text clearly.

DL2110Mk02

1 x Arduino UNO – R3
1 x ProtoScrewShield
1 x RGB LCD Shield 16×2 Character Negative Display
1 x Adafruit PowerBoost 500 Shield
1 x Lithium Ion Battery – 3.7v 2000mAh
4 x Pololu Carrier for MQ Gas Sensors
1 x SparkFun Hydrogen Gas Sensor – MQ-8
1 x 4.7K Ohm
1 x Pololu Carbon Monoxide & Flammable Gas Sensor – MQ-9
1 x 22k Ohm
1 x SparkFun Carbon Monoxide Gas Sensor – MQ-7
1 x 10K Ohm
1 x SparkFun Alcohol Gas Sensor – MQ-3
1 x 220k Ohm
1 x Temperature and Humidity Sensor- RHT03
1 x PIR Motion Sensor (JST)
1 x SparkFun Solderable Half-Breadboard
1 x SparkFun Cerberus USB Cable

Arduino UNO – R3

RHT – Digital 5
PIR – Digital 7
MQ8 – Analog 0
MQ9 – Analog 1
MQ7 – Analog 2
MQ3 – Analog 3
SDA – Analog 4
SCL – Analog 5
VIN – +5V
GND – GND

DL2110Mk02p.ino

/* 
***** Don Luc Electronics © *****
Software Version Information
Project #15: Environment – RGB LCD Shield 16x2 Character Display – Mk15
10-02
DL2110Mk02p.ino
1 x Arduino UNO - R3
1 x ProtoScrewShield
1 x RGB LCD Shield 16x2 Character Negative Display
1 x Adafruit PowerBoost 500 Shield
1 x Lithium Ion Battery - 3.7v 2000mAh
4 x Pololu Carrier for MQ Gas Sensors
1 x SparkFun Hydrogen Gas Sensor - MQ-8
1 x 4.7K Ohm
1 x Pololu Carbon Monoxide & Flammable Gas Sensor - MQ-9
1 x 22k Ohm
1 x SparkFun Carbon Monoxide Gas Sensor - MQ-7
1 x 10K Ohm
1 x SparkFun Alcohol Gas Sensor - MQ-3
1 x 220k Ohm
1 x Temperature and Humidity Sensor - RHT03
1 x PIR Motion Sensor (JST)
1 x SparkFun Solderable Half-Breadboard
1 x SparkFun Cerberus USB Cable
*/

// Include the Library Code
// EEPROM Library to Read and Write EEPROM with Unique ID for Unit
#include <EEPROM.h>
// RHT Temperature and Humidity Sensor
#include <SparkFun_RHT03.h>
// Adafruit RGB LCD Shield 16x2
#include <Adafruit_RGBLCDShield.h>

// RHT Temperature and Humidity Sensor
// RHT03 data pin Digital 5
const int RHT03_DATA_PIN = 5;
// This creates a RTH03 object, which we'll use to interact with the sensor
RHT03 rht;
float latestHumidity;
float latestTempC;

// Gas Sensors MQ
// Hydrogen Gas Sensor - MQ-8
int iMQ8 = A0;
int iMQ8Raw = 0;
int iMQ8ppm = 0;
// Two points are taken from the curve in datasheet.
// With these two points, a line is formed which is
// "approximately equivalent" to the original curve.
float H2Curve[3] = {2.3, 0.93,-1.44};

// Carbon Monoxide & Flammable Gas Sensor - MQ-9
int iMQ9 = A1;
int iMQ9Raw = 0;
int iMQ9ppm = 0;

// Carbon Monoxide Gas Sensor - MQ-7
int iMQ7 = A2;
int iMQ7Raw = 0;
int iMQ7ppm = 0;

// Alcohol Gas Sensor - MQ-3
int iMQ3 = A3;
int iMQ3Raw = 0;
int iMQ3ppm = 0;

// PIR Motion
// Motion detector
const int iMotion = 7;
// Proximity
int proximity = LOW;
String Det = "";

// Adafruit RGB LCD Shield
Adafruit_RGBLCDShield RGBLCDShield = Adafruit_RGBLCDShield();
// These #defines make it easy to set the backlight color
#define OFF 0x0
#define RED 0x1
#define YELLOW 0x3
#define GREEN 0x2
#define TEAL 0x6
#define BLUE 0x4
#define VIOLET 0x5
#define WHITE 0x7
// Momentary Button
int yy = 0;
uint8_t momentaryButton = 0;

// Software Version Information
String uid = "";
// Version
String sver = "15-15";

void loop()
{
     
  // Adafruit RGB LCD Shield
  // Clear
  RGBLCDShield.clear();
  
  // RHT Temperature and Humidity Sensor
  isRHT03();

  // Gas Sensors MQ
  isGasSensor();

  // isPIR Motion
  isPIR();

  // Adafruit RGB LCD Shield
  // Display
  isDisplay();

  // Delay
  // Turn the LED on HIGH is the voltage level
  digitalWrite(LED_BUILTIN, HIGH);
  // Wait for a 0.5 second
  delay( 500 );
  // Turn the LED off by making the voltage LOW
  digitalWrite(LED_BUILTIN, LOW);
  // Wait for a 0.5 second
  delay( 500 );
 
}

getEEPROM.ino

// EEPROM
// isUID EEPROM Unique ID
void isUID()
{
  
  // Is Unit ID
  uid = "";
  for (int x = 0; x < 5; x++)
  {
    uid = uid + char(EEPROM.read(x));
  }
  
}

getGasSensorMQ.ino

// Gas Sensors MQ
// Gas Sensor
void isGasSensor() {

  // Read in analog value from each gas sensors
  
  // Hydrogen Gas Sensor - MQ-8
  iMQ8Raw = analogRead( iMQ8 );

  // Carbon Monoxide & Flammable Gas Sensor - MQ-9
  iMQ9Raw = analogRead( iMQ9 );  

  // Carbon Monoxide Gas Sensor - MQ-7
  iMQ7Raw = analogRead( iMQ7 );

  // Alcohol Gas Sensor - MQ-3
  iMQ3Raw = analogRead( iMQ3 );
  
  // Caclulate the PPM of each gas sensors

  // Hydrogen Gas Sensor - MQ-8
  iMQ8ppm = isMQ8( iMQ8Raw );

  // Carbon Monoxide & Flammable Gas Sensor - MQ-9
  iMQ9ppm = isMQ9( iMQ9Raw ); 

  // Carbon Monoxide Gas Sensor - MQ-7
  iMQ7ppm = isMQ7( iMQ7Raw ); 

  // Alcohol Gas Sensor - MQ-3
  iMQ3ppm = isMQ3( iMQ3Raw ); 

}
// Hydrogen Gas Sensor - MQ-8 - PPM
int isMQ8(double rawValue) {

  // RvRo
  double RvRo = rawValue * (3.3 / 1023);

  return (pow(4.7,( ((log(RvRo)-H2Curve[1])/H2Curve[2]) + H2Curve[0])));
  
}
// Carbon Monoxide & Flammable Gas Sensor - MQ-9
int isMQ9(double rawValue) {

  double RvRo = rawValue * 3.3 / 4095;

  double ppm = 3.027*exp(1.0698*( RvRo ));
  return ppm;
  
}
// Carbon Monoxide Gas Sensor - MQ-7
int isMQ7(double rawValue) {

  double RvRo = rawValue * 3.3 / 4095;

  double ppm = 3.027*exp(1.0698*( RvRo ));
  return ppm;
  
}
// Alcohol Gas Sensor - MQ-3
int isMQ3(double rawValue) {

  double RvRo = rawValue * 3.3 / 4095;

  double bac = RvRo * 0.21;
  return bac;
  
}

getPIR.ino

// PIR Motion
// Setup PIR
void setupPIR() {

  // Setup PIR Montion
  pinMode(iMotion, INPUT_PULLUP);
  
}
// isPIR Motion
void isPIR() {

  // Proximity
  proximity = digitalRead(iMotion);
  if (proximity == LOW) 
  {

    // PIR Motion Sensor's LOW, Motion is detected
    Det = "Motion Yes";

  }
  else
  {

    // PIR Motion Sensor's HIGH
    Det = "No";
    
  }
  
}

getRGBLCDShield.ino

// Adafruit RGB LCD Shield
// Setup RGB LCD Shield
void isSetupRGBLCDShield() {

  // Adafruit RGB LCD Shield
  // Set up the LCD's number of columns and rows: 
  RGBLCDShield.begin(16, 2);

  // Set the cursor to column 0, line 0
  RGBLCDShield.setBacklight(RED);
  // Don luc 
  RGBLCDShield.setCursor(0,0);
  RGBLCDShield.print("Don Luc");
  // Set the cursor to column 0, line 1
  RGBLCDShield.setCursor(0, 1);
  // Electronics
  RGBLCDShield.print("Electronics");
  // Delay
  delay(5000);
  // Clear
  RGBLCDShield.clear();

  // Set the cursor to column 0, line 0
  RGBLCDShield.setBacklight(TEAL);
  // Version 
  RGBLCDShield.setCursor(0,0);
  RGBLCDShield.print("Version: " + sver);
  // Set the cursor to column 0, line 1
  RGBLCDShield.setCursor(0, 1);
  // Unit ID
  RGBLCDShield.print("Unit ID: " + uid);
  // Delay
  delay(5000);
  // Clear
  RGBLCDShield.clear();
  
}
// isDisplay
void isDisplay() {

  // Momentary Button
  momentaryButton = RGBLCDShield.readButtons();

  switch ( yy ) {
    case 1:
    
      // RHT Temperature and Humidity Sensor
      // Set the cursor to column 0, line 0
      RGBLCDShield.setCursor(0,0);
      // Temperature C
      RGBLCDShield.print( "Temp C: " );
      RGBLCDShield.print( latestTempC );
      // Set the cursor to column 0, line 1
      RGBLCDShield.setCursor(0, 1);
      // Humidity
      RGBLCDShield.print( "Humidity: " );
      RGBLCDShield.print( latestHumidity );

      break;
    case 2:
    
      // PIR Motion Sensor
      // Set the cursor to column 0, line 0
      // PIR Motion Sensor
      RGBLCDShield.setCursor(0,0);
      RGBLCDShield.print( "PIR Motion" );
      // Set the cursor to column 0, line 1
      RGBLCDShield.setCursor(0, 1);
      // Det
      RGBLCDShield.print( Det );
      
      break;
    case 3:

      // Gas Sensors 1
      // Set the cursor to column 0, line 0
      RGBLCDShield.setCursor(0,0);
      // Hydrogen Gas Sensor - MQ-8
      RGBLCDShield.print( "MQ-8: " );
      RGBLCDShield.print( iMQ8ppm );
      // Set the cursor to column 0, line 1
      RGBLCDShield.setCursor(0, 1);
      // Carbon Monoxide & Flammable Gas Sensor - MQ-9
      RGBLCDShield.print( "MQ-9: " );
      RGBLCDShield.print( iMQ9ppm );
      
      break;
    case 4:

      // Gas Sensors 2
      // Set the cursor to column 0, line 0
      RGBLCDShield.setCursor(0,0);
      // Carbon Monoxide Gas Sensor - MQ-7
      RGBLCDShield.print( "MQ-7: " );
      RGBLCDShield.print( iMQ7ppm );
      // Set the cursor to column 0, line 1
      RGBLCDShield.setCursor(0, 1);
      // Alcohol Gas Sensor - MQ-3
      RGBLCDShield.print( "MQ-3: " );
      RGBLCDShield.print( iMQ3ppm );
      
      break;
    case 5:

      // Don luc Electronics
      // Set the cursor to column 0, line 0
      // Don luc 
      RGBLCDShield.setCursor(0,0);
      RGBLCDShield.print("Don Luc");
      // Set the cursor to column 0, line 1
      RGBLCDShield.setCursor(0, 1);
      // Electronics
      RGBLCDShield.print("Electronics");
      
      break;
    default:

      // Don luc Electronics
      yy = 5;
      RGBLCDShield.setBacklight(RED);
      // Set the cursor to column 0, line 0
      // Don luc 
      RGBLCDShield.setCursor(0,0);
      RGBLCDShield.print("Don Luc");
      // Set the cursor to column 0, line 1
      RGBLCDShield.setCursor(0, 1);
      // Electronics
      RGBLCDShield.print("Electronics");

   }
   
   if ( momentaryButton ) {
    
    if ( momentaryButton & BUTTON_UP ) {
      
      yy = 1;
      // RHT Temperature and Humidity Sensor
      RGBLCDShield.setBacklight(GREEN);
      
    }
    
    if ( momentaryButton & BUTTON_DOWN ) {
      
      yy = 2;
      // PIR Motion Sensor
      RGBLCDShield.setBacklight(VIOLET);
      
    }
    
    if ( momentaryButton & BUTTON_LEFT ) {
      
      yy = 3;
      // Gas Sensors 1
      RGBLCDShield.setBacklight(TEAL);
      
    }
    
    if ( momentaryButton & BUTTON_RIGHT ) {

      yy = 4;
      // Gas Sensors 2
      RGBLCDShield.setBacklight(YELLOW);
    }
    
    if ( momentaryButton & BUTTON_SELECT ) {

      yy = 5;
      // Don luc Electronics
      RGBLCDShield.setBacklight(RED);
   
    }
    
  }
  
}

getRHT.ino

// RHT Temperature and Humidity Sensor
// setup RHT Temperature and Humidity Sensor
void setupRTH03() {

  // RHT Temperature and Humidity Sensor
  // Call rht.begin() to initialize the sensor and our data pin
  rht.begin(RHT03_DATA_PIN);
  
}
// RHT Temperature and Humidity Sensor
void isRHT03(){

  // Call rht.update() to get new humidity and temperature values from the sensor.
  int updateRet = rht.update();

  // The humidity(), tempC(), and tempF() functions can be called -- after 
  // a successful update() -- to get the last humidity and temperature value 
  latestHumidity = rht.humidity();
  latestTempC = rht.tempC();

}

setup.ino

// Setup
void setup()
{
    
  // EEPROM Unique ID
  isUID();
  
  // RHT Temperature and Humidity Sensor
  // Setup RTH03 Temperature and Humidity Sensor
  setupRTH03();

  // PIR Motion
  // Setup PIR
  setupPIR();

  // Initialize digital pin LED_BUILTIN as an output.
  pinMode(LED_BUILTIN, OUTPUT);

  // Adafruit RGB LCD Shield
  isSetupRGBLCDShield();

}

——

People can contact us: https://www.donluc.com/?page_id=1927

Technology Experience

  • Single-Board Microcontrollers (PIC, Arduino, Raspberry Pi,Espressif, etc…)
  • IoT
  • Robotics
  • Camera and Video Capture Receiver Stationary, Wheel/Tank and Underwater Vehicle
  • Unmanned Vehicles Terrestrial and Marine
  • Research & Development (R & D)
  • Desktop Applications (Windows, OSX, Linux, Multi-OS, Multi-Tier, etc…)
  • Mobile Applications (Android, iOS, Blackberry, Windows Mobile, Windows CE, etc…)
  • Web Applications (LAMP, Scripting, Java, ASP, ASP.NET, RoR, Wakanda, etc…)
  • Social Media Programming & Integration (Facebook, Twitter, YouTube, Pinterest, etc…)
  • Content Management Systems (WordPress, Drupal, Joomla, Moodle, etc…)
  • Bulletin Boards (phpBB, SMF, Vanilla, jobberBase, etc…)
  • eCommerce (WooCommerce, OSCommerce, ZenCart, PayPal Shopping Cart, etc…)

Instructor and E-Mentor

  • PIC Microcontrollers
  • Arduino
  • Raspberry Pi
  • Espressif
  • Robotics
  • DOS, Windows, OSX, Linux, iOS, Android, Multi-OS
  • Linux-Apache-PHP-MySQL

Follow Us

J. Luc Paquin – Curriculum Vitae – 2021 English & Español
https://www.jlpconsultants.com/luc/

Web: https://www.donluc.com/
Web: https://www.jlpconsultants.com/
Web: https://www.donluc.com/DLE/
Web: https://www.donluc.com/DLHackster/
Web: https://www.hackster.io/neosteam-labs
Web: https://zoom.us/
Patreon: https://www.patreon.com/DonLucElectronics
Facebook: https://www.facebook.com/neosteam.labs.9/
YouTube: https://www.youtube.com/channel/UC5eRjrGn1CqkkGfZy0jxEdA
Twitter: https://twitter.com/labs_steam
Pinterest: https://www.pinterest.com/NeoSteamLabs/
Instagram: https://www.instagram.com/neosteamlabs/

Don Luc
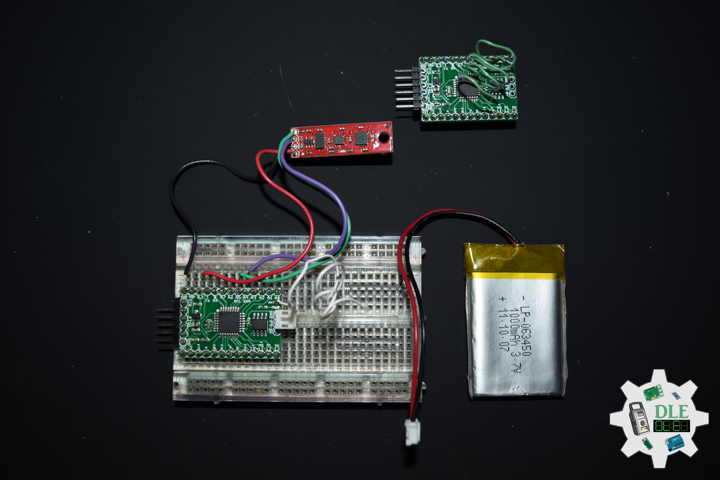
Project #15: Environment – Adafruit PowerBoost – Mk14

——

#DonLucElectronics #DonLuc #Environment #MQ #PIR #RHT03 #ArduinoUNO #Arduino #AdafruitPowerBoost #Project #Programming #Electronics #Microcontrollers #Consultant #VideoBlog

——

Adafruit PowerBoost

——

Adafruit PowerBoost

——

Adafruit PowerBoost

——

Adafruit PowerBoost

——

Adafruit PowerBoost 500 Shield – Rechargeable 5V Power Shield

What’s a project if it’s trapped on your desk? Now you can take your Arduino anywhere you wish with the PowerBoost shield. This stackable shield goes onto your Arduino and provides a slim rechargeable power pack, with a built in battery charger as well as DC/DC booster.

Compatible with Arduino Uno basically any Arduino-pinout-shaped Arduino as only the GND and 5V pins are used. You can stack shields on top, or stack the PowerBoost on top. The PowerBoost shield can run off of any Lithium Ion or Lithium Polymer battery but we suggest our 2000mAh capacity batteries, both of which fits very nicely in the empty space of the shield. Plug in the battery and recharge it via the microUSB jack. When you’re ready to go, just unplug the Arduino from USB or the wall adapter and it will automatically switch over to shield power. Use only Lipoly batteries with protection circuitry.

The onboard boost converter can provide at least 500mA current, and can peak at 1A. There’s an onboard fuse to protect against higher current draws which could damage the boost converter or battery. The boost converter can be damaged by high current spikes and is not recommended for driving motors or robots where the stall current can cause high current spikes. It will let you turn the shield and Arduino power on/off.

Lithium Ion Battery – 3.7v 2000mAh

Lithium ion polymer batteries are thin, light and powerful. The output ranges from 4.2V when completely charged to 3.7V. This battery has a capacity of 2000mAh. If you need a larger battery. The batteries come pre-attached with a genuine 2-pin JST-PH connector as shown and include the necessary protection circuitry. Because they have a genuine JST connector, not a knock-off, the cable wont snag or get stuck in a matching JST jack, they click in and out smoothly.

DL2110Mk01

1 x Arduino UNO – R3
1 x ProtoScrewShield
1 x Adafruit PowerBoost 500 Shield
1 x Lithium Ion Battery – 3.7v 2000mAh
4 x Pololu Carrier for MQ Gas Sensors
1 x SparkFun Hydrogen Gas Sensor – MQ-8
1 x 4.7K Ohm
1 x Pololu Carbon Monoxide & Flammable Gas Sensor – MQ-9
1 x 22k Ohm
1 x SparkFun Carbon Monoxide Gas Sensor – MQ-7
1 x 10K Ohm
1 x SparkFun Alcohol Gas Sensor – MQ-3
1 x 220k Ohm
1 x Temperature and Humidity Sensor- RHT03
1 x PIR Motion Sensor (JST)
1 x SparkFun Solderable Half-Breadboard
1 x SparkFun Cerberus USB Cable

Arduino UNO – R3

RHT – Digital 5
PIR – Digital 7
MQ8 – Analog 0
MQ9 – Analog 1
MQ7 – Analog 2
MQ3 – Analog 3
VIN – +5V
GND – GND

DL2110Mk01p.ino

/* 
***** Don Luc Electronics © *****
Software Version Information
Project #15: Environment – Adafruit PowerBoost – Mk14
10-01
DL2110Mk01p.ino
1 x Arduino UNO - R3
1 x ProtoScrewShield
1 x Adafruit PowerBoost 500 Shield
1 x Lithium Ion Battery - 3.7v 2000mAh
4 x Pololu Carrier for MQ Gas Sensors
1 x SparkFun Hydrogen Gas Sensor - MQ-8
1 x 4.7K Ohm
1 x Pololu Carbon Monoxide & Flammable Gas Sensor - MQ-9
1 x 22k Ohm
1 x SparkFun Carbon Monoxide Gas Sensor - MQ-7
1 x 10K Ohm
1 x SparkFun Alcohol Gas Sensor - MQ-3
1 x 220k Ohm
1 x Temperature and Humidity Sensor - RHT03
1 x PIR Motion Sensor (JST)
1 x SparkFun Solderable Half-Breadboard
1 x SparkFun Cerberus USB Cable
*/

// Include the Library Code
// EEPROM Library to Read and Write EEPROM with Unique ID for Unit
#include <EEPROM.h>
// RHT Temperature and Humidity Sensor
#include <SparkFun_RHT03.h>

// RHT Temperature and Humidity Sensor
// RHT03 data pin Digital 5
const int RHT03_DATA_PIN = 5;
// This creates a RTH03 object, which we'll use to interact with the sensor
RHT03 rht;
float latestHumidity;
float latestTempC;
float latestTempF;

// Gas Sensors MQ
// Hydrogen Gas Sensor - MQ-8
int iMQ8 = A0;
int iMQ8Raw = 0;
int iMQ8ppm = 0;
// Two points are taken from the curve in datasheet.
// With these two points, a line is formed which is
// "approximately equivalent" to the original curve.
float H2Curve[3] = {2.3, 0.93,-1.44};

// Carbon Monoxide & Flammable Gas Sensor - MQ-9
int iMQ9 = A1;
int iMQ9Raw = 0;
int iMQ9ppm = 0;

// Carbon Monoxide Gas Sensor - MQ-7
int iMQ7 = A2;
int iMQ7Raw = 0;
int iMQ7ppm = 0;

// Alcohol Gas Sensor - MQ-3
int iMQ3 = A3;
int iMQ3Raw = 0;
int iMQ3ppm = 0;

// PIR Motion
// Motion detector
const int iMotion = 7;
// Proximity
int proximity = LOW;
String Det = "";

// Software Version Information
String uid = "";
// Version
String sver = "15-14";

void loop()
{
     
  // RHT Temperature and Humidity Sensor
  isRHT03();

  // Gas Sensors MQ
  isGasSensor();

  // isPIR Motion
  isPIR();

  // Delay
  // Turn the LED on HIGH is the voltage level
  digitalWrite(LED_BUILTIN, HIGH);
  // Wait for a 0.5 second
  delay( 500 );
  // Turn the LED off by making the voltage LOW
  digitalWrite(LED_BUILTIN, LOW);
  // Wait for a 0.5 second
  delay( 500 );
 
}

getEEPROM.ino

// EEPROM
// isUID EEPROM Unique ID
void isUID()
{
  
  // Is Unit ID
  uid = "";
  for (int x = 0; x < 5; x++)
  {
    uid = uid + char(EEPROM.read(x));
  }
  
}

getGasSensorMQ.ino

// Gas Sensors MQ
// Gas Sensor
void isGasSensor() {

  // Read in analog value from each gas sensors
  
  // Hydrogen Gas Sensor - MQ-8
  iMQ8Raw = analogRead( iMQ8 );

  // Carbon Monoxide & Flammable Gas Sensor - MQ-9
  iMQ9Raw = analogRead( iMQ9 );  

  // Carbon Monoxide Gas Sensor - MQ-7
  iMQ7Raw = analogRead( iMQ7 );

  // Alcohol Gas Sensor - MQ-3
  iMQ3Raw = analogRead( iMQ3 );
  
  // Caclulate the PPM of each gas sensors

  // Hydrogen Gas Sensor - MQ-8
  iMQ8ppm = isMQ8( iMQ8Raw );

  // Carbon Monoxide & Flammable Gas Sensor - MQ-9
  iMQ9ppm = isMQ9( iMQ9Raw ); 

  // Carbon Monoxide Gas Sensor - MQ-7
  iMQ7ppm = isMQ7( iMQ7Raw ); 

  // Alcohol Gas Sensor - MQ-3
  iMQ3ppm = isMQ3( iMQ3Raw ); 

  // Serial
  // Hydrogen Gas Sensor - MQ-8
  Serial.print( "MQ-8: " );
  Serial.println( iMQ8ppm );
  // Carbon Monoxide & Flammable Gas Sensor - MQ-9
  Serial.print( "MQ-9: " );
  Serial.println( iMQ9ppm );
  // Carbon Monoxide Gas Sensor - MQ-7
  Serial.print( "MQ-7: " );
  Serial.println( iMQ7ppm );
  // Alcohol Gas Sensor - MQ-3 
  Serial.print( "MQ-3: " );
  Serial.println( iMQ3ppm );
  
}
// Hydrogen Gas Sensor - MQ-8 - PPM
int isMQ8(double rawValue) {

  // RvRo
  double RvRo = rawValue * (3.3 / 1023);

  return (pow(4.7,( ((log(RvRo)-H2Curve[1])/H2Curve[2]) + H2Curve[0])));
  
}
// Carbon Monoxide & Flammable Gas Sensor - MQ-9
int isMQ9(double rawValue) {

  double RvRo = rawValue * 3.3 / 4095;

  double ppm = 3.027*exp(1.0698*( RvRo ));
  return ppm;
  
}
// Carbon Monoxide Gas Sensor - MQ-7
int isMQ7(double rawValue) {

  double RvRo = rawValue * 3.3 / 4095;

  double ppm = 3.027*exp(1.0698*( RvRo ));
  return ppm;
  
}
// Alcohol Gas Sensor - MQ-3
int isMQ3(double rawValue) {

  double RvRo = rawValue * 3.3 / 4095;

  double bac = RvRo * 0.21;
  return bac;
  
}

getPIR.ino

// PIR Motion
// Setup PIR
void setupPIR() {

  // Setup PIR Montion
  pinMode(iMotion, INPUT_PULLUP);
  
}
// isPIR Motion
void isPIR() {

  // Proximity
  proximity = digitalRead(iMotion);
  if (proximity == LOW) 
  {

    // PIR Motion Sensor's LOW, Motion is detected
    Det = "Motion Yes";
    // Serial
    Serial.println( Det );
    
  }
  else
  {

    // PIR Motion Sensor's HIGH
    Det = "No";
    // Serial
    Serial.println( Det );
    
  }
  
}

getRHT.ino

// RHT Temperature and Humidity Sensor
// setup RHT Temperature and Humidity Sensor
void setupRTH03() {

  // RHT Temperature and Humidity Sensor
  // Call rht.begin() to initialize the sensor and our data pin
  rht.begin(RHT03_DATA_PIN);
  
}
// RHT Temperature and Humidity Sensor
void isRHT03(){

  // Call rht.update() to get new humidity and temperature values from the sensor.
  int updateRet = rht.update();

  // The humidity(), tempC(), and tempF() functions can be called -- after 
  // a successful update() -- to get the last humidity and temperature value 
  latestHumidity = rht.humidity();
  latestTempC = rht.tempC();
  latestTempF = rht.tempF();

  // Serial
  // RHT Temperature and Humidity Sensor
  // Temperature F
  Serial.print( "Temp F: " );
  Serial.println( latestTempF );
  // Temperature C
  Serial.print( "Temp C: " );
  Serial.println( latestTempC );
  // Humidity
  Serial.print( "Humidity: " );
  Serial.println( latestHumidity );
  
}

setup.ino

// Setup
void setup()
{
    
  // EEPROM Unique ID
  isUID();

  // Serial
  Serial.begin( 9600 );
  
  // RHT Temperature and Humidity Sensor
  // setup RTH03 Humidity and Temperature Sensor
  setupRTH03();

  // PIR Motion
  // Setup PIR
  setupPIR();

  // Initialize digital pin LED_BUILTIN as an output.
  pinMode(LED_BUILTIN, OUTPUT);

  // Don Luc Electronics
  Serial.println( "Don Luc Electronics" );
  // Version
  Serial.println( sver );
  // Is Unit ID
  Serial.println( uid );
  
  delay( 5000 );
  
}

——

People can contact us: https://www.donluc.com/?page_id=1927

Technology Experience

  • Single-Board Microcontrollers (PIC, Arduino, Raspberry Pi,Espressif, etc…)
  • IoT
  • Robotics
  • Camera and Video Capture Receiver Stationary, Wheel/Tank and Underwater Vehicle
  • Unmanned Vehicles Terrestrial and Marine
  • Research & Development (R & D)
  • Desktop Applications (Windows, OSX, Linux, Multi-OS, Multi-Tier, etc…)
  • Mobile Applications (Android, iOS, Blackberry, Windows Mobile, Windows CE, etc…)
  • Web Applications (LAMP, Scripting, Java, ASP, ASP.NET, RoR, Wakanda, etc…)
  • Social Media Programming & Integration (Facebook, Twitter, YouTube, Pinterest, etc…)
  • Content Management Systems (WordPress, Drupal, Joomla, Moodle, etc…)
  • Bulletin Boards (phpBB, SMF, Vanilla, jobberBase, etc…)
  • eCommerce (WooCommerce, OSCommerce, ZenCart, PayPal Shopping Cart, etc…)

Instructor and E-Mentor

  • PIC Microcontrollers
  • Arduino
  • Raspberry Pi
  • Espressif
  • Robotics
  • DOS, Windows, OSX, Linux, iOS, Android, Multi-OS
  • Linux-Apache-PHP-MySQL

Follow Us

J. Luc Paquin – Curriculum Vitae – 2021 English & Español
https://www.jlpconsultants.com/luc/

Web: https://www.donluc.com/
Web: https://www.jlpconsultants.com/
Web: https://www.donluc.com/DLE/
Web: https://www.donluc.com/DLHackster/
Web: https://www.hackster.io/neosteam-labs
Web: https://zoom.us/
Patreon: https://www.patreon.com/DonLucElectronics
Facebook: https://www.facebook.com/neosteam.labs.9/
YouTube: https://www.youtube.com/channel/UC5eRjrGn1CqkkGfZy0jxEdA
Twitter: https://twitter.com/labs_steam
Pinterest: https://www.pinterest.com/NeoSteamLabs/
Instagram: https://www.instagram.com/neosteamlabs/

Don Luc
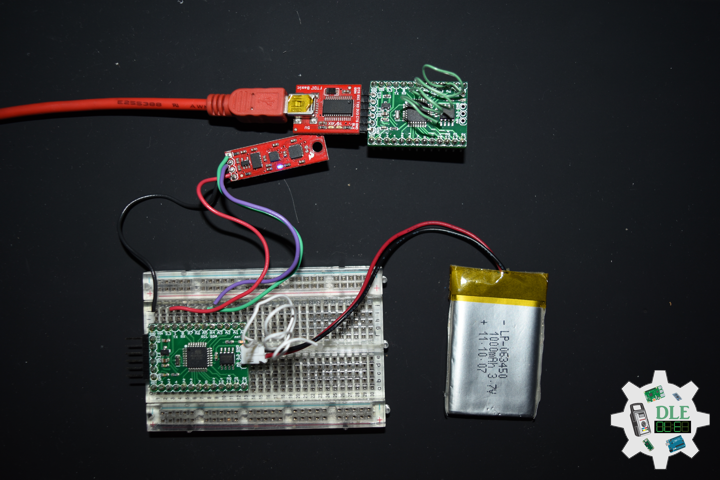
Categories
Archives