Technology
Project #22: Synthesizer – Harmonics – Mk05
——
#DonLucElectronics #DonLuc #Synthesizer #UltrasonicSynth #Mozzi #Arduino #ArduinoProMini #Project #Fritzing #Programming #Electronics #Microcontrollers #Consultant
——
——
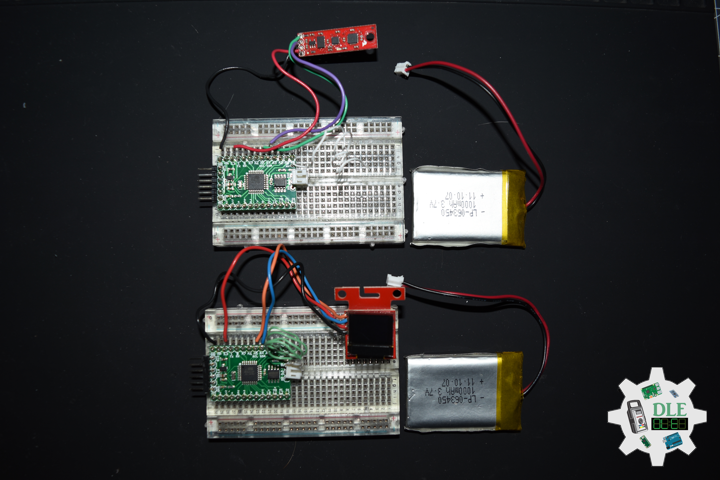
——
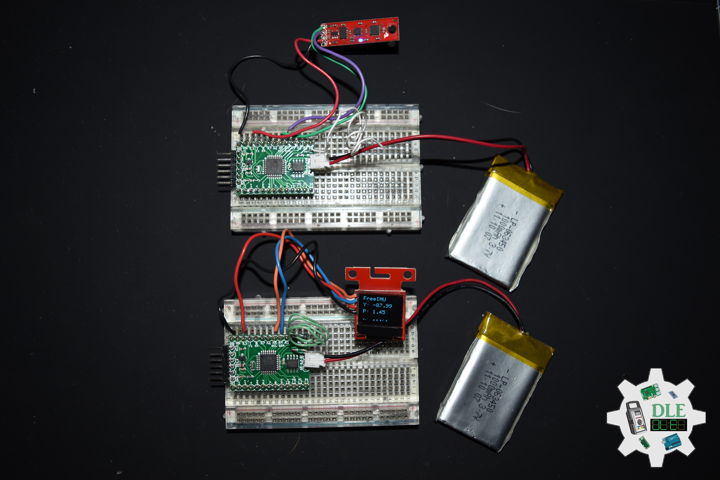
——
Harmonics – Brightness
Nearly all signals contain energy at harmonic frequencies, in addition to the energy at the fundamental frequency. If it contains all the energy in a signal at the fundamental frequency, then that signal is a perfect sine wave. If the signal is not a perfect sine wave, then some energy is contained in the harmonics. Some waveforms contain large amounts of energy at harmonic frequencies.
Ratio
So in the harmonic series, we have a fundamental (pitch/note) and a succession of harmonics that stem from the fundamental which also hold other pitches within themselves.
Arduino – Map
map(value, fromLow, fromHigh, toLow, toHigh)
Re-maps a number from one range to another. That is, a value of fromLow would get mapped to toLow, a value of fromHigh to toHigh, values in-between to values in-between, etc…
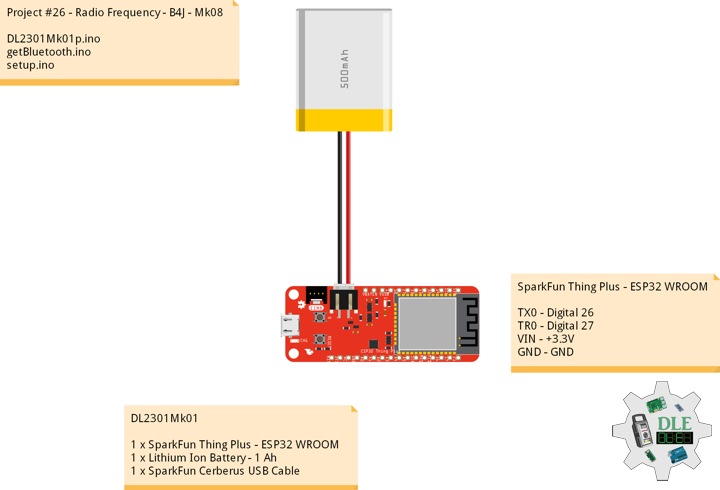
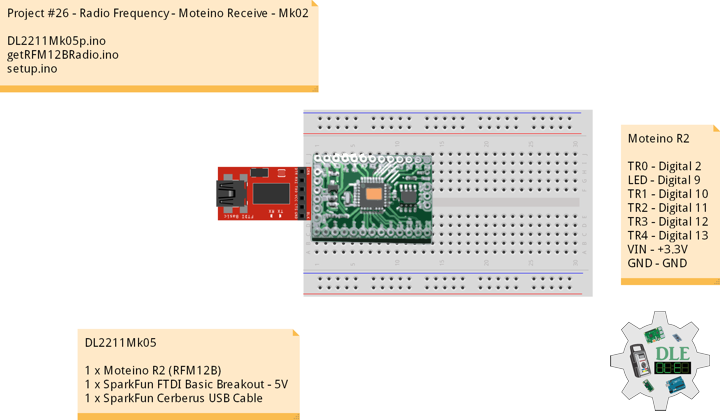
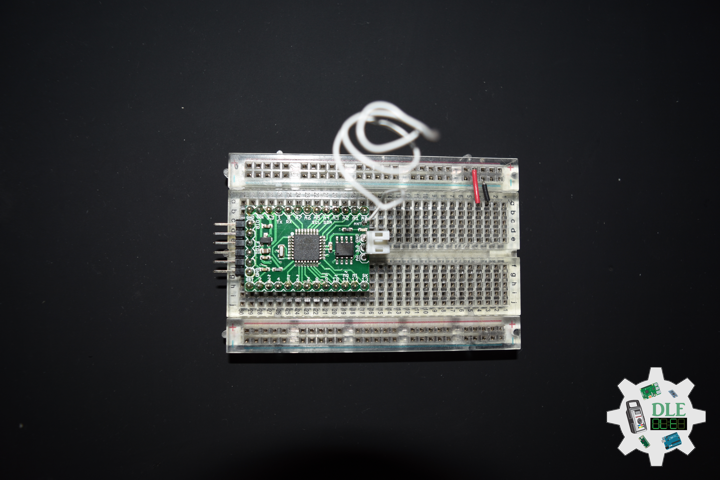
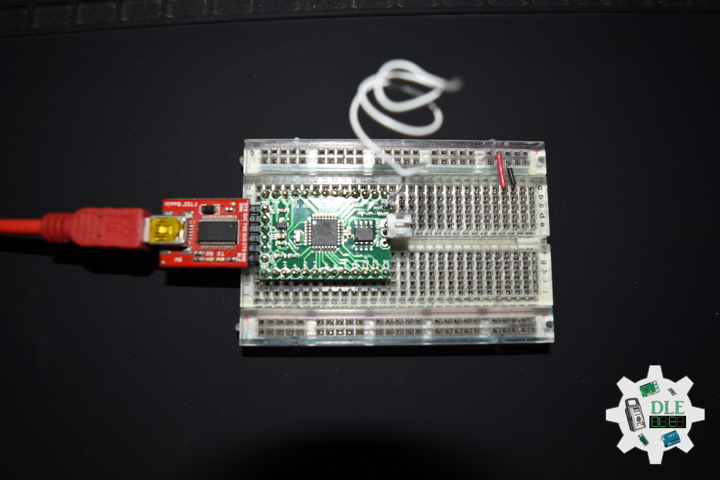
DL2206Mk03
1 x Arduino Pro Mini 328 – 5V/16MHz
2 x HC-SR04 Ultrasonic Sensor
2 x 1M Ohm Potentiometer
2 x Knob
1 x Audio Jack 3.5mm
1 x SparkFun Audio Jack Breakout
1 x SparkFun USB Mini-B Breakout
1 x SPDT Slide Switch
1 x JST Jumper 2 Wire Connector
1 x JST Jumper 3 Wire Connector
1 x Insignia Speakers
1 x SparkFun Solderable Breadboard – Large
1 x SparkFun FTDI Basic Breakout – 5V
1 x SparkFun Cerberus USB Cable
Arduino Pro Mini 328 – 5V/16MHz
Ech – Digital 13
Tri – Digital 12
EcR – Digital 11
TrR – Digital 10
SPK – Digital 9
CAP – Analog A0
CAH – Analog A1
VIN – +5V
GND – GND
——
DL2206Mk03p.ino
/* ***** Don Luc Electronics © ***** Software Version Information Project #22: Synthesizer - Harmonics - Mk05 22-05 DL2206Mk03p.ino 1 x Arduino Pro Mini 328 - 5V/16MHz 2 x HC-SR04 Ultrasonic Sensor 2 x 1M Ohm Potentiometer 2 x Knob 1 x Audio Jack 3.5mm 1 x SparkFun Audio Jack Breakout 1 x SparkFun USB Mini-B Breakout 1 x SPDT Slide Switch 1 x JST Jumper 2 Wire Connector 1 x JST Jumper 3 Wire Connector 1 x Insignia Speakers 1 x SparkFun Solderable Breadboard - Large 1 x SparkFun FTDI Basic Breakout - 5V 1 x SparkFun Cerberus USB Cable */ // Include the Library Code // Mozzi #include <MozziGuts.h> // Oscillator #include <Oscil.h> // Table for Oscils to play #include <tables/cos2048_int8.h> // Smoothing Control #include <Smooth.h> // Maps unpredictable inputs to a range #include <AutoMap.h> // Desired carrier frequency max and min, for AutoMap const int MIN_CARRIER_FREQ = 22; const int MAX_CARRIER_FREQ = 440; // Desired intensity max and min, for AutoMap, note they're inverted for reverse dynamics const int MIN_INTENSITY = 700; const int MAX_INTENSITY = 10; // Desired mod speed max and min, for AutoMap, note they're inverted for reverse dynamics const int MIN_MOD_SPEED = 10000; const int MAX_MOD_SPEED = 1; // Maps unpredictable inputs to a range AutoMap kMapCarrierFreq(0,1023,MIN_CARRIER_FREQ,MAX_CARRIER_FREQ); AutoMap kMapIntensity(0,1023,MIN_INTENSITY,MAX_INTENSITY); AutoMap kMapModSpeed(0,1023,MIN_MOD_SPEED,MAX_MOD_SPEED); // Set the input for the knob to analog pin 0 const int KNOB_PIN = A0; // Set the analog input for fm_intensity int LDR1_PIN; // Set the analog input for mod rate int LDR2_PIN; // Table for Oscils to play Oscil<COS2048_NUM_CELLS, AUDIO_RATE> aCarrier(COS2048_DATA); Oscil<COS2048_NUM_CELLS, AUDIO_RATE> aModulator(COS2048_DATA); Oscil<COS2048_NUM_CELLS, CONTROL_RATE> kIntensityMod(COS2048_DATA); // Harmonics (Brightness) int iModRatio = A1; int mod_ratio; // Carries control info from updateControl to updateAudio long fm_intensity; // Smoothing for intensity to remove clicks on transitions float smoothness = 0.95f; Smooth <long> aSmoothIntensity(smoothness); // Trigger pin 12 to pitch distance sensor const int iTrigPitch = 12; // Echo Receive pin 13 to pitch distance sensor const int iEchoPitch = 13; // Define the useable range of the pitch sensor const int pitchLowThreshold = 45; const int pitchHighThreshold = 2; // Stores the distance measured by the distance sensor float distance = 0; // Trigger pin 10 to rate distance sensor const int iTrigRate = 10; // Echo Receive pin 13 to pitch distance sensor const int iEchoRate = 11; // Define the useable range of the pitch sensor const int rateLowThreshold = 45; const int rateHighThreshold = 2; // Stores the distance measured by the distance sensor float rate = 0; // Mini Speaker int SPK = 9; // Software Version Information String sver = "22-05"; void loop() { // Audio Hook audioHook(); }
getHC-SR04.ino
// HC-SR04 Ultrasonic Sensor // Setup HC-SR04 void setupHCSR04() { // The trigger iTrig Pitch will output pulses of electricity pinMode(iTrigPitch, OUTPUT); // The echo iEcho will measure the duration of pulses coming back from the distance sensor pinMode(iEchoPitch, INPUT); // The trigger iTrig Rate will output pulses of electricity pinMode(iTrigRate, OUTPUT); // The echo iEcho will measure the duration of pulses coming back from the distance sensor pinMode(iEchoRate, INPUT); } // Distance float isDistance() { // Variable to store the time it takes for a ping to bounce off an object float echoTime; // Variable to store the distance calculated from the echo time float calculatedDistance; // Send out an ultrasonic pulse that's 10ms long digitalWrite(iTrigPitch, HIGH); delayMicroseconds(10); digitalWrite(iTrigPitch, LOW); // Use the pulseIn command to see how long it takes for the // pulse to bounce back to the sensor echoTime = pulseIn(iEchoPitch, HIGH); // Calculate the distance of the object that reflected the pulse // (half the bounce time multiplied by the speed of sound) calculatedDistance = echoTime * 0.034 / 2; // Send back the distance that was calculated return calculatedDistance; } // Rate float isRate() { // Variable to store the time it takes for a ping to bounce off an object float echoTime; // Variable to store the distance calculated from the echo time float calculatedDistance; // Send out an ultrasonic pulse that's 10ms long digitalWrite(iTrigRate, HIGH); delayMicroseconds(10); digitalWrite(iTrigRate, LOW); // Use the pulseIn command to see how long it takes for the // pulse to bounce back to the sensor echoTime = pulseIn(iEchoRate, HIGH); // Calculate the distance of the object that reflected the pulse // (half the bounce time multiplied by the speed of sound) // cm = 58.0 calculatedDistance = echoTime * 0.034 / 2; // Send back the distance that was calculated return calculatedDistance; }
getMozzi.ino
// Mozzi // Update Control void updateControl(){ // Variable to store the distance measured by the sensor distance = isDistance(); // Low Threshold if ( distance >= pitchLowThreshold) { // pitchLowThreshold distance = pitchLowThreshold; } // High Threshold if ( distance < pitchHighThreshold){ // pitchHighThreshold distance = pitchHighThreshold; } // Variable to store the distance measured by the sensor rate = isRate(); // Low Threshold if ( rate >= rateLowThreshold) { // rateLowThreshold rate = rateLowThreshold; } // High Threshold if ( rate < rateHighThreshold){ // rateHighThreshold rate = rateHighThreshold; } // Map distance = map(distance, 45, 2, 0, 1023); rate = map(rate, 45, 2, 0, 1023); // Read the knob // Value is 0-1023 int knob_value = mozziAnalogRead(KNOB_PIN); // Read the mod_ratio // Value is 0-1023 mod_ratio = mozziAnalogRead(iModRatio); // Map mod_ratio = map(mod_ratio, 0, 1023, 2, 15); // Map the knob to carrier frequency int carrier_freq = kMapCarrierFreq(knob_value); // Calculate the modulation frequency to stay in ratio int mod_freq = carrier_freq * mod_ratio; // Set the FM oscillator frequencies aCarrier.setFreq(carrier_freq); aModulator.setFreq(mod_freq); // Read the light dependent resistor on the width LDR1_PIN = distance; int LDR1_value = LDR1_PIN; int LDR1_calibrated = kMapIntensity(LDR1_value); // Calculate the fm_intensity // Shift back to range after 8 bit multiply fm_intensity = ((long)LDR1_calibrated * (kIntensityMod.next()+128))>>8; // Read the light dependent resistor on the speed LDR2_PIN = rate; int LDR2_value= LDR2_PIN; // Use a float here for low frequencies float mod_speed = (float)kMapModSpeed(LDR2_value)/1000; kIntensityMod.setFreq(mod_speed); } // Update Audio int updateAudio() { // Update Audio long modulation = aSmoothIntensity.next(fm_intensity) * aModulator.next(); return aCarrier.phMod(modulation); }
setup.ino
// Setup void setup() { // Setup HC-SR04 setupHCSR04(); // Delay delay( 200 ); // Mozzi Start startMozzi(); }
——
People can contact us: https://www.donluc.com/?page_id=1927
Technology Experience
- Single-Board Microcontrollers (PIC, Arduino, Raspberry Pi,Espressif, etc…)
- IoT
- Robotics
- Camera and Video Capture Receiver Stationary, Wheel/Tank and Underwater Vehicle
- Unmanned Vehicles Terrestrial and Marine
- Research & Development (R & D)
Instructor and E-Mentor
- IoT
- PIC Microcontrollers
- Arduino
- Raspberry Pi
- Espressif
- Robotics
Follow Us
J. Luc Paquin – Curriculum Vitae – 2022 English & Español
https://www.jlpconsultants.com/luc/
Web: https://www.donluc.com/
Web: https://www.jlpconsultants.com/
Facebook: https://www.facebook.com/neosteam.labs.9/
YouTube: https://www.youtube.com/channel/UC5eRjrGn1CqkkGfZy0jxEdA
Twitter: https://twitter.com/labs_steam
Pinterest: https://www.pinterest.com/NeoSteamLabs/
Instagram: https://www.instagram.com/neosteamlabs/
Don Luc
Project #22: Synthesizer – UltrasonicSynth – Mk03
——
#DonLucElectronics #DonLuc #Synthesizer #UltrasonicSynth #Arduino #ArduinoProMini #Project #Fritzing #Programming #Electronics #Microcontrollers #Consultant
——
——
——
——
UltrasonicSynth Mozzi
Oscil
Oscil plays a wavetable, cycling through the table to generate an audio or control signal. The frequency of the signal can be set or changed, and the output of an Oscil can be produced with for a simple cycling oscillator, or for a particular sample in the table.
Soundtables
Look-up-tables and python scripts to generate tables or convert sounds. Includes ready-to-use wave tables and a few example samples. Also check out the other scripts in the python folder for templates to use if you want to do your own thing.
Smooth
A simple infinite impulse response low pass filter for smoothing control or audio signals. Smoothness sets how much smoothing the filter will apply to its input. Use a float in the range 0 – 1, where 0 is not very smooth and 0.99 is very smooth.
AutoMap
Automatically map an input value to an output range without knowing the precise range of inputs beforehand.
DL2204Mk01
1 x Arduino Pro Mini 328 – 5V/16MHz
2 x HC-SR04 Ultrasonic Sensor
1 x 1M Ohm Potentiometer
1 x Knob
1 x Audio Jack 3.5mm
1 x SparkFun Audio Jack Breakout
1 x Insignia Speakers
1 x Full-Size Breadboard
1 x Half-Size Breadboard
1 x SparkFun FTDI Basic Breakout – 5V
1 x SparkFun Cerberus USB Cable
Arduino Pro Mini 328 – 5V/16MHz
Ech – Digital 13
Tri – Digital 12
EcR – Digital 11
TrR – Digital 10
SPK – Digital 9
CAP – Analog A0
VIN – +5V
GND – GND
——
DL2206Mk01p.ino
/* ***** Don Luc Electronics © ***** Software Version Information Project #22: Synthesizer - UltrasonicSynth - Mk03 22-03 DL2206Mk01p.ino 1 x Arduino Pro Mini 328 - 5V/16MHz 2 x HC-SR04 Ultrasonic Sensor 1 x 1M Ohm Potentiometer 1 x Knob 1 x Audio Jack 3.5mm 1 x SparkFun Audio Jack Breakout 1 x Insignia Speakers 1 x Full-Size Breadboard 1 x Half-Size Breadboard 1 x SparkFun FTDI Basic Breakout - 5V 1 x SparkFun Cerberus USB Cable */ // Include the Library Code // Mozzi #include <MozziGuts.h> // Oscillator #include <Oscil.h> // Table for Oscils to play #include <tables/cos2048_int8.h> // Smoothing Control #include <Smooth.h> // Maps unpredictable inputs to a range #include <AutoMap.h> // Desired carrier frequency max and min, for AutoMap const int MIN_CARRIER_FREQ = 22; const int MAX_CARRIER_FREQ = 440; // Desired intensity max and min, for AutoMap, note they're inverted for reverse dynamics const int MIN_INTENSITY = 450; const int MAX_INTENSITY = 50; // Desired mod speed max and min, for AutoMap, note they're inverted for reverse dynamics const int MIN_MOD_SPEED = 450; const int MAX_MOD_SPEED = 50; // Maps unpredictable inputs to a range AutoMap kMapCarrierFreq(0,1023,MIN_CARRIER_FREQ,MAX_CARRIER_FREQ); AutoMap kMapIntensity(0,1023,MIN_INTENSITY,MAX_INTENSITY); AutoMap kMapModSpeed(0,1023,MIN_MOD_SPEED,MAX_MOD_SPEED); // Set the input for the knob to analog pin 0 const int KNOB_PIN = A0; // Set the analog input for fm_intensity int LDR1_PIN; // Set the analog input for mod rate int LDR2_PIN; // Table for Oscils to play Oscil<COS2048_NUM_CELLS, AUDIO_RATE> aCarrier(COS2048_DATA); Oscil<COS2048_NUM_CELLS, AUDIO_RATE> aModulator(COS2048_DATA); Oscil<COS2048_NUM_CELLS, CONTROL_RATE> kIntensityMod(COS2048_DATA); // Brightness (harmonics) int mod_ratio = 5; // Carries control info from updateControl to updateAudio long fm_intensity; // Smoothing for intensity to remove clicks on transitions float smoothness = 0.95f; Smooth <long> aSmoothIntensity(smoothness); // Trigger pin 12 to pitch distance sensor const int iTrigPitch = 12; // Echo Receive pin 13 to pitch distance sensor const int iEchoPitch = 13; // Define the useable range of the pitch sensor const int pitchLowThreshold = 450; const int pitchHighThreshold = 50; // Stores the distance measured by the distance sensor float distance = 0; // Trigger pin 10 to rate distance sensor const int iTrigRate = 10; // Echo Receive pin 13 to pitch distance sensor const int iEchoRate = 11; // Define the useable range of the pitch sensor const int rateLowThreshold = 450; const int rateHighThreshold = 50; // Stores the distance measured by the distance sensor float rate = 0; // Mini Speaker int SPK = 9; // Software Version Information String sver = "22-03"; void loop() { // Audio Hook audioHook(); }
getHC-SR04.ino
// HC-SR04 Ultrasonic Sensor // Setup HC-SR04 void setupHCSR04() { // The trigger iTrig Pitch will output pulses of electricity pinMode(iTrigPitch, OUTPUT); // The echo iEcho will measure the duration of pulses coming back from the distance sensor pinMode(iEchoPitch, INPUT); // The trigger iTrig Rate will output pulses of electricity pinMode(iTrigRate, OUTPUT); // The echo iEcho will measure the duration of pulses coming back from the distance sensor pinMode(iEchoRate, INPUT); } // Distance float isDistance() { // Variable to store the time it takes for a ping to bounce off an object float echoTime; // Variable to store the distance calculated from the echo time float calculatedDistance; // Send out an ultrasonic pulse that's 10ms long digitalWrite(iTrigPitch, HIGH); delayMicroseconds(10); digitalWrite(iTrigPitch, LOW); // Use the pulseIn command to see how long it takes for the // pulse to bounce back to the sensor echoTime = pulseIn(iEchoPitch, HIGH); // Calculate the distance of the object that reflected the pulse // (half the bounce time multiplied by the speed of sound) // cm = 58.0 calculatedDistance = echoTime / 58.0; // Send back the distance that was calculated return calculatedDistance; } // Rate float isRate() { // Variable to store the time it takes for a ping to bounce off an object float echoTime; // Variable to store the distance calculated from the echo time float calculatedDistance; // Send out an ultrasonic pulse that's 10ms long digitalWrite(iTrigRate, HIGH); delayMicroseconds(10); digitalWrite(iTrigRate, LOW); // Use the pulseIn command to see how long it takes for the // pulse to bounce back to the sensor echoTime = pulseIn(iEchoRate, HIGH); // Calculate the distance of the object that reflected the pulse // (half the bounce time multiplied by the speed of sound) // cm = 58.0 calculatedDistance = echoTime / 58.0; // Send back the distance that was calculated return calculatedDistance; }
getMozzi.ino
// Mozzi // Update Control void updateControl(){ // Variable to store the distance measured by the sensor distance = isDistance(); // Low Threshold if ( distance >= pitchLowThreshold) { // pitchLowThreshold distance = pitchLowThreshold; } // High Threshold if ( distance < pitchHighThreshold){ // pitchHighThreshold distance = pitchHighThreshold; } // Variable to store the distance measured by the sensor rate = isRate(); // Low Threshold if ( rate >= rateLowThreshold) { // rateLowThreshold rate = rateLowThreshold; } // High Threshold if ( rate < rateHighThreshold){ // rateHighThreshold rate = rateHighThreshold; } // Read the knob // Value is 0-1023 int knob_value = mozziAnalogRead(KNOB_PIN); // Map the knob to carrier frequency int carrier_freq = kMapCarrierFreq(knob_value); // Calculate the modulation frequency to stay in ratio int mod_freq = carrier_freq * mod_ratio; // Set the FM oscillator frequencies aCarrier.setFreq(carrier_freq); aModulator.setFreq(mod_freq); // Read the light dependent resistor on the width LDR1_PIN = distance; int LDR1_value = LDR1_PIN; int LDR1_calibrated = kMapIntensity(LDR1_value); // Calculate the fm_intensity // Shift back to range after 8 bit multiply fm_intensity = ((long)LDR1_calibrated * (kIntensityMod.next()+128))>>8; // Read the light dependent resistor on the speed LDR2_PIN = rate; int LDR2_value= LDR2_PIN; // Use a float here for low frequencies float mod_speed = (float)kMapModSpeed(LDR2_value)/1000; kIntensityMod.setFreq(mod_speed); } // Update Audio int updateAudio() { // Update Audio long modulation = aSmoothIntensity.next(fm_intensity) * aModulator.next(); return aCarrier.phMod(modulation); }
setup.ino
// Setup void setup() { // Setup HC-SR04 setupHCSR04(); // Delay delay( 200 ); // Mozzi Start startMozzi(); }
——
People can contact us: https://www.donluc.com/?page_id=1927
Technology Experience
- Single-Board Microcontrollers (PIC, Arduino, Raspberry Pi,Espressif, etc…)
- IoT
- Robotics
- Camera and Video Capture Receiver Stationary, Wheel/Tank and Underwater Vehicle
- Unmanned Vehicles Terrestrial and Marine
- Research & Development (R & D)
Instructor and E-Mentor
- IoT
- PIC Microcontrollers
- Arduino
- Raspberry Pi
- Espressif
- Robotics
Follow Us
J. Luc Paquin – Curriculum Vitae – 2022 English & Español
https://www.jlpconsultants.com/luc/
Web: https://www.donluc.com/
Web: https://www.jlpconsultants.com/
Facebook: https://www.facebook.com/neosteam.labs.9/
YouTube: https://www.youtube.com/channel/UC5eRjrGn1CqkkGfZy0jxEdA
Twitter: https://twitter.com/labs_steam
Pinterest: https://www.pinterest.com/NeoSteamLabs/
Instagram: https://www.instagram.com/neosteamlabs/
Don Luc
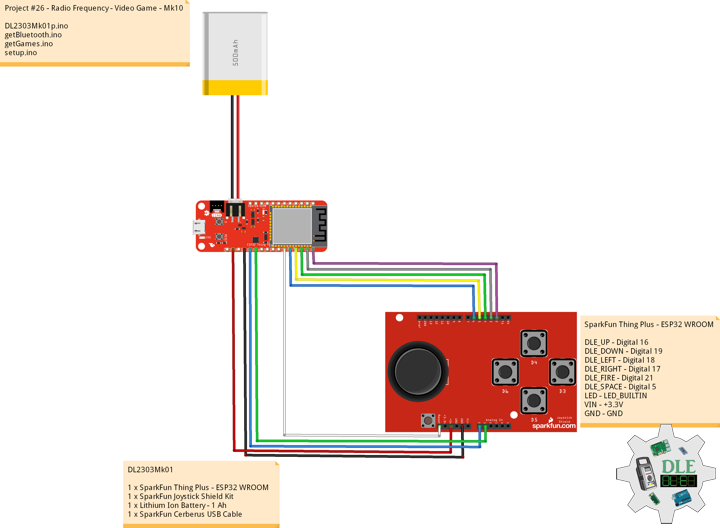
Project #23: E-Textiles – Coin Cell Battery – Mk08
——
#DonLucElectronics #DonLuc #ETextiles #Wearable #FLORA #BME280 #CCS811 #CoinCell #RTC #SD #Arduino #Project #Programming #Electronics #Microcontrollers #Consultant
——
——
——
——
Coin Cell Battery Holder – 2 x CR2032 (Enclosed)
This is a simple coin cell battery holder that can enclose two CR2032 batteries inside itself, and safely kept closed via two phillips head screws. Each battery holder will run batteries in series, output up to 6V, and is equipped with an On/Off slide switch and two 6″ power wires (one positive and one negative) on the back.
DL2205Mk03
1 x FLORA – Version 1.0a
1 x SparkFun Environmental Combo CCS811/BME280
1 x DS3231 Precision RTC FeatherWing
1 x MicroSD card breakout board+
1 x MicroSD card 8 Gb
1 x CR1220 Coin Cell Battery
1 x LED Red
1 x 220 Ohm
1 x Coin Cell Battery Holder – 2 x CR2032
2 x CR2032 Coin Cell Battery
1 x SparkFun Cerberus USB Cable
FLORA – Version 1.0a
CLK – ICSP 3
DO – ICSP 1
DI – ICSP 4
CS – Digital 10
LER – Digital 6
SCL – Digital 3
SDA – Digital 2
VIN – +5V
VIN – +3.3V
GND – GND
——
DL2205Mk03p.ino
/* ***** Don Luc Electronics © ***** Software Version Information Project #23: E-Textiles - Coin Cell Battery - Mk08 23-08 DL2205Mk03p.ino 1 x FLORA - Version 1.0a 1 x SparkFun Environmental Combo CCS811/BME280 1 x DS3231 Precision RTC FeatherWing 1 x MicroSD card breakout board+ 1 x MicroSD card 8 Gb 1 x CR1220 Coin Cell Battery 1 x LED Red 1 x 220 Ohm 1 x Coin Cell Battery Holder - 2 x CR2032 2 x CR2032 Coin Cell Battery 1 x SparkFun Cerberus USB Cable */ // Include the Library Code // Wire #include <Wire.h> // SparkFun BME280 - Humidity, Temperature, Altitude and Barometric Pressure #include <SparkFunBME280.h> // SparkFun CCS811 - eCO2 & tVOC #include <SparkFunCCS811.h> // Date and time DS3231 RTC #include <RTClib.h> // Serial Peripheral Interface (SPI) #include <SPI.h> // Secure Digital (SD Card) #include <SD.h> // SparkFun BME280 - Temperature, Humidity, Altitude and Barometric Pressure BME280 myBME280; // Temperature Celsius float BMEtempC = 0; // Humidity float BMEhumid = 0; // Altitude Meters float BMEaltitudeM = 0; // Barometric Pressure float BMEpressure = 0; // SparkFun CCS811 - eCO2 & tVOC // Default I2C Address #define CCS811_ADDR 0x5B CCS811 myCCS811(CCS811_ADDR); // eCO2 float CCS811CO2 = 0; // TVOC float CCS811TVOC = 0; // Date and time functions using a DS3231 RTC RTC_DS3231 RTC; String sDate; String sTime; // Secure Digital (SD Card) const int chipSelect = 10; String zzzzzz = ""; // LED Red const int iLEDR = 6; // Software Version Information String sver = "23-08"; void loop() { // SparkFun BME280 - Temperature, Humidity, Altitude and Barometric Pressure isBME280(); // SparkFun CCS811 - eCO2 & tVOC isCCS811(); // Dates and Time timeRTC(); // MicroSD Card isSD(); // 1 Seconds delay( 1000 ); }
getBME280.ino
// SparkFun BME280 - Temperature, Humidity, Altitude and Barometric Pressure // isBME280 - Temperature, Humidity, Altitude and Barometric Pressure void isBME280(){ // Temperature Celsius BMEtempC = myBME280.readTempC(); // Humidity BMEhumid = myBME280.readFloatHumidity() ; // Altitude Meters BMEaltitudeM = myBME280.readFloatAltitudeMeters(); // Barometric Pressure BMEpressure = myBME280.readFloatPressure(); }
getCCS811.ino
// CCS811 - eCO2 & tVOC // isCCS811 - eCO2 & tVOC void isCCS811(){ // This sends the temperature & humidity data to the CCS811 myCCS811.setEnvironmentalData(BMEhumid, BMEtempC); // Calling this function updates the global tVOC and eCO2 variables myCCS811.readAlgorithmResults(); // eCO2 Concentration CCS811CO2 = myCCS811.getCO2(); // tVOC Concentration CCS811TVOC = myCCS811.getTVOC(); }
getRTCDS3231.ino
// DS3231 Precision RTC // Setup RTC void setupRTC() { // DS3231 Precision RTC RTC.begin(); if (! RTC.begin()) { while (1); } DateTime now = RTC.now(); if (RTC.lostPower()) { // Following line sets the RTC to the date & time this sketch was compiled RTC.adjust(DateTime(F(__DATE__), F(__TIME__))); // This line sets the RTC with an explicit date & time, for example to set // August 2, 2021 at 13:53:0 you would call: // RTC.adjust(DateTime(2022, 4, 26, 11, 39, 0)); } } // timeRTC void timeRTC() { // DS3231 Precision RTC sDate = ""; sTime = ""; // Date Time DateTime now = RTC.now(); // sData sDate += String(now.year(), DEC); sDate += "/"; sDate += String(now.month(), DEC); sDate += "/"; sDate += String(now.day(), DEC); // sTime sTime += String(now.hour(), DEC); sTime += ":"; sTime += String(now.minute(), DEC); sTime += ":"; sTime += String(now.second(), DEC); }
getSD.ino
// MicroSD Card // MicroSD Setup void setupSD() { // MicroSD Card // See if the card is present and can be initialized: if (!SD.begin(chipSelect)) { // Don't do anything more: while (1); } } // MicroSD Card void isSD() { zzzzzz = ""; // Version|Date|Time|Temperature Celsius|Humidity|Altitude Meters|Barometric Pressure //|eCO2 Concentration|tVOC Concentration| zzzzzz = sver + "|" + sDate + "|" + sTime + "|" + BMEtempC + "|" + BMEhumid + "|" + BMEaltitudeM + "|" + BMEpressure + "|" + CCS811CO2 + "|" + CCS811TVOC + "|"; // Open the file. Note that only one file can be open at a time, // so you have to close this one before opening another. File dataFile = SD.open("DLE22Log.txt", FILE_WRITE); // If the file is available, write to it: if (dataFile) { // Write dataFile.println( zzzzzz ); dataFile.close(); } }
setup.ino
// Setup void setup() { // Delay delay( 100 ); // Set up I2C bus Wire.begin(); // Delay delay( 50 ); // SparkFun BME280 - Temperature, Humidity, Altitude and Barometric Pressure myBME280.begin(); // CCS811 - eCO2 & tVOC myCCS811.begin(); // Setup RTC setupRTC(); //MicroSD Card setupSD(); // LED Red pinMode( iLEDR , OUTPUT); // Turn the LED Red on HIGH digitalWrite( iLEDR , HIGH); }
——
People can contact us: https://www.donluc.com/?page_id=1927
Technology Experience
- Single-Board Microcontrollers (PIC, Arduino, Raspberry Pi,Espressif, etc…)
- IoT
- Robotics
- Camera and Video Capture Receiver Stationary, Wheel/Tank and Underwater Vehicle
- Unmanned Vehicles Terrestrial and Marine
- Research & Development (R & D)
Instructor and E-Mentor
- IoT
- PIC Microcontrollers
- Arduino
- Raspberry Pi
- Espressif
- Robotics
Follow Us
J. Luc Paquin – Curriculum Vitae – 2022 English & Español
https://www.jlpconsultants.com/luc/
Web: https://www.donluc.com/
Web: https://www.jlpconsultants.com/
Facebook: https://www.facebook.com/neosteam.labs.9/
YouTube: https://www.youtube.com/channel/UC5eRjrGn1CqkkGfZy0jxEdA
Twitter: https://twitter.com/labs_steam
Pinterest: https://www.pinterest.com/NeoSteamLabs/
Instagram: https://www.instagram.com/neosteamlabs/
Don Luc
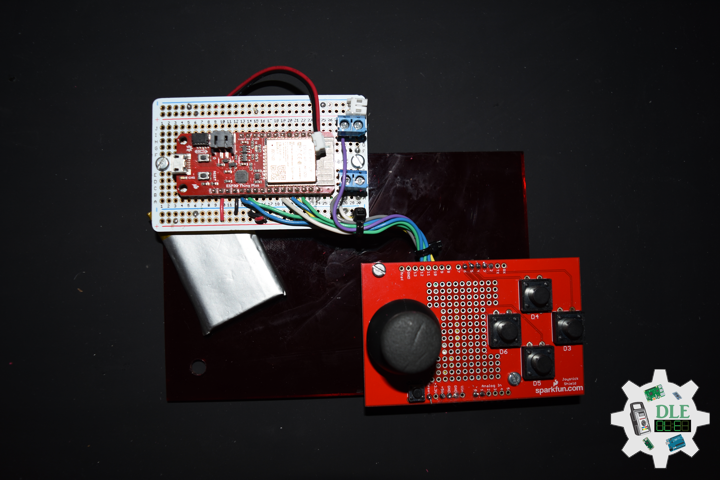
Project #23: E-Textiles – MicroSD Card – Mk07
——
#DonLucElectronics #DonLuc #ETextiles #Wearable #FLORA #BME280 #CCS811 #RTC #SD #Arduino #Project #Programming #Electronics #Microcontrollers #Consultant
——
——
——
——
MicroSD Card Breakout Board+
Not just a simple breakout board, this microSD adapter goes the extra mile designed for ease of use.
- Onboard 5 Volt – 3 Volt regulator provides 150mA for power-hungry cards.
- 3 Volt level shifting means you can use this with ease on either 3 Volt or 5 Volt systems.
- Uses a proper level shifting chip, not resistors, less problems, and faster read/write access.
- Use 3 or 4 digital pins to read and write 8 Gb of storage.
- Activity LED lights up when the SD card is being read or written.
- Push-push socket with card slightly over the edge of the PCB so its easy to insert and remove.
- Comes with 0.1″ header, unattached, so you can get it on a breadboard or use wires your choice.
To use with an Arduino, connect GND to ground, 5 Volt – 3 Volt to 5 Volt – 3 Volt, CLK to pin 13, DO to pin 12, DI to pin 11, and CS to pin 10. Then you can use the Arduino IDE’s SD library which supports FAT and FAT32 SD cards.
DL2205Mk01
1 x FLORA – Version 1.0a
1 x SparkFun Environmental Combo CCS811/BME280
1 x DS3231 Precision RTC FeatherWing
1 x MicroSD card breakout board+
1 x MicroSD card 8 Gb
1 x CR1220 Coin Cell Battery
1 x LED Red
1 x 220 Ohm
1 x SparkFun Cerberus USB Cable
FLORA – Version 1.0a
CLK – ICSP 3
DO – ICSP 1
DI – ICSP 4
CS – Digital 10
LER – Digital 6
SCL – Digital 3
SDA – Digital 2
VIN – +5V
VIN – +3.3V
GND – GND
——
DL2205Mk01p.ino
/* ***** Don Luc Electronics © ***** Software Version Information Project #23: E-Textiles - MicroSD Card - Mk07 23-07 DL2205Mk01p.ino 1 x FLORA - Version 1.0a 1 x SparkFun Environmental Combo CCS811/BME280 1 x DS3231 Precision RTC FeatherWing 1 x MicroSD card breakout board+ 1 x MicroSD card 8 Gb 1 x CR1220 Coin Cell Battery 1 x LED Red 1 x 220 Ohm 1 x SparkFun Cerberus USB Cable */ // Include the Library Code // Wire #include <Wire.h> // SparkFun BME280 - Humidity, Temperature, Altitude and Barometric Pressure #include <SparkFunBME280.h> // SparkFun CCS811 - eCO2 & tVOC #include <SparkFunCCS811.h> // Date and time DS3231 RTC #include <RTClib.h> // Serial Peripheral Interface (SPI) #include <SPI.h> // Secure Digital (SD Card) #include <SD.h> // SparkFun BME280 - Temperature, Humidity, Altitude and Barometric Pressure BME280 myBME280; // Temperature Celsius float BMEtempC = 0; // Humidity float BMEhumid = 0; // Altitude Meters float BMEaltitudeM = 0; // Barometric Pressure float BMEpressure = 0; // SparkFun CCS811 - eCO2 & tVOC // Default I2C Address #define CCS811_ADDR 0x5B CCS811 myCCS811(CCS811_ADDR); // eCO2 float CCS811CO2 = 0; // TVOC float CCS811TVOC = 0; // Date and time functions using a DS3231 RTC RTC_DS3231 RTC; String sDate; String sTime; // Secure Digital (SD Card) const int chipSelect = 10; String zzzzzz = ""; // LED Red const int iLEDR = 6; // Software Version Information String sver = "23-07"; void loop() { // SparkFun BME280 - Temperature, Humidity, Altitude and Barometric Pressure isBME280(); // SparkFun CCS811 - eCO2 & tVOC isCCS811(); // Dates and Time timeRTC(); // MicroSD Card isSD(); // 1 Seconds delay( 1000 ); }
getBME280.ino
// SparkFun BME280 - Temperature, Humidity, Altitude and Barometric Pressure // isBME280 - Temperature, Humidity, Altitude and Barometric Pressure void isBME280(){ // Temperature Celsius BMEtempC = myBME280.readTempC(); // Humidity BMEhumid = myBME280.readFloatHumidity() ; // Altitude Meters BMEaltitudeM = myBME280.readFloatAltitudeMeters(); // Barometric Pressure BMEpressure = myBME280.readFloatPressure(); }
getCCS811.ino
// CCS811 - eCO2 & tVOC // isCCS811 - eCO2 & tVOC void isCCS811(){ // This sends the temperature & humidity data to the CCS811 myCCS811.setEnvironmentalData(BMEhumid, BMEtempC); // Calling this function updates the global tVOC and eCO2 variables myCCS811.readAlgorithmResults(); // eCO2 Concentration CCS811CO2 = myCCS811.getCO2(); // tVOC Concentration CCS811TVOC = myCCS811.getTVOC(); }
getRTCDS3231.ino
// DS3231 Precision RTC // Setup RTC void setupRTC() { // DS3231 Precision RTC RTC.begin(); if (! RTC.begin()) { while (1); } DateTime now = RTC.now(); if (RTC.lostPower()) { // Following line sets the RTC to the date & time this sketch was compiled RTC.adjust(DateTime(F(__DATE__), F(__TIME__))); // This line sets the RTC with an explicit date & time, for example to set // August 2, 2021 at 13:53:0 you would call: // RTC.adjust(DateTime(2022, 4, 26, 11, 39, 0)); } } // timeRTC void timeRTC() { // DS3231 Precision RTC sDate = ""; sTime = ""; // Date Time DateTime now = RTC.now(); // sData sDate += String(now.year(), DEC); sDate += "/"; sDate += String(now.month(), DEC); sDate += "/"; sDate += String(now.day(), DEC); // sTime sTime += String(now.hour(), DEC); sTime += ":"; sTime += String(now.minute(), DEC); sTime += ":"; sTime += String(now.second(), DEC); }
getSD.ino
// MicroSD Card // MicroSD Setup void setupSD() { // MicroSD Card // See if the card is present and can be initialized: if (!SD.begin(chipSelect)) { // Don't do anything more: while (1); } } // MicroSD Card void isSD() { zzzzzz = ""; // Version|Date|Time|Temperature Celsius|Humidity|Altitude Meters|Barometric Pressure //|eCO2 Concentration|tVOC Concentration| zzzzzz = sver + "|" + sDate + "|" + sTime + "|" + BMEtempC + "|" + BMEhumid + "|" + BMEaltitudeM + "|" + BMEpressure + "|" + CCS811CO2 + "|" + CCS811TVOC + "|"; // Open the file. Note that only one file can be open at a time, // so you have to close this one before opening another. File dataFile = SD.open("DLE22Log.txt", FILE_WRITE); // If the file is available, write to it: if (dataFile) { // Write dataFile.println( zzzzzz ); dataFile.close(); } }
setup.ino
// Setup void setup() { // Delay delay( 100 ); // Set up I2C bus Wire.begin(); // Delay delay( 50 ); // SparkFun BME280 - Temperature, Humidity, Altitude and Barometric Pressure myBME280.begin(); // CCS811 - eCO2 & tVOC myCCS811.begin(); // Setup RTC setupRTC(); //MicroSD Card setupSD(); // LED Red pinMode( iLEDR , OUTPUT); // Turn the LED Red on HIGH digitalWrite( iLEDR , HIGH); }
——
People can contact us: https://www.donluc.com/?page_id=1927
Technology Experience
- Single-Board Microcontrollers (PIC, Arduino, Raspberry Pi,Espressif, etc…)
- IoT
- Robotics
- Camera and Video Capture Receiver Stationary, Wheel/Tank and Underwater Vehicle
- Unmanned Vehicles Terrestrial and Marine
- Research & Development (R & D)
Instructor and E-Mentor
- IoT
- PIC Microcontrollers
- Arduino
- Raspberry Pi
- Espressif
- Robotics
Follow Us
J. Luc Paquin – Curriculum Vitae – 2022 English & Español
https://www.jlpconsultants.com/luc/
Web: https://www.donluc.com/
Web: https://www.jlpconsultants.com/
Facebook: https://www.facebook.com/neosteam.labs.9/
YouTube: https://www.youtube.com/channel/UC5eRjrGn1CqkkGfZy0jxEdA
Twitter: https://twitter.com/labs_steam
Pinterest: https://www.pinterest.com/NeoSteamLabs/
Instagram: https://www.instagram.com/neosteamlabs/
Don Luc
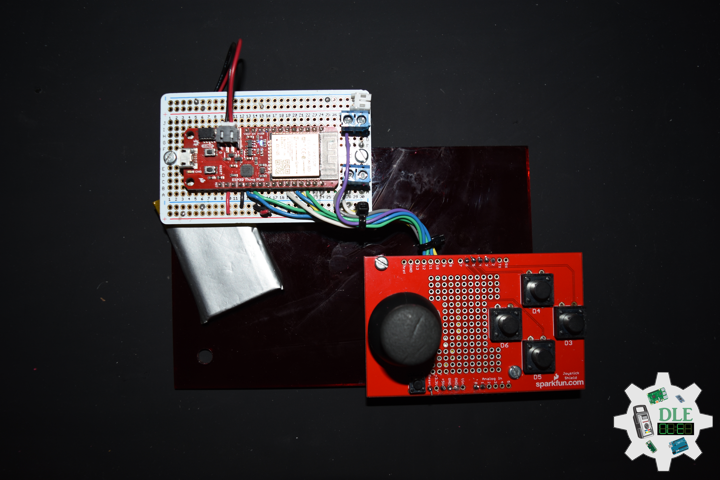
Project #23: E-Textiles – DS3231 Precision RTC – Mk06
——
#DonLucElectronics #DonLuc #ETextiles #Wearable #FLORA #MicroOLED #BME280 #CCS811 #RTC #Arduino #Project #Programming #Electronics #Microcontrollers #Consultant
——
——
——
——
DS3231 Precision RTC FeatherWing
A Feather board without ambition is a Feather board without FeatherWings. This is the DS3231 Precision RTC FeatherWing it adds an extremely accurate I2C-integrated Real Time Clock (RTC) with a Temperature Compensated Crystal Oscillator (TCXO). This RTC is the most precise you can get in a small, low power package.
Most RTCs use an external 32kHz timing crystal that is used to keep time with low current draw. And that’s all well and good, but those crystals have slight drift, particularly when the temperature changes, the temperature changes the oscillation frequency very very very slightly but it does add up. This RTC is in a beefy package because the crystal is inside the chip, and right next to the integrated crystal is a temperature sensor. That sensor compensates for the frequency changes by adding or removing clock ticks so that the timekeeping stays on schedule.
With a CR1220 12mm coin cell plugged into the top of the FeatherWing, you can get years of precision time keeping, even when main power is lost. Great for datalogging and clocks or anything where you need to really know the time.
DL2204Mk06
1 x FLORA – Version 1.0a
1 x SparkFun Micro OLED
1 x SparkFun Environmental Combo CCS811/BME280
1 x DS3231 Precision RTC FeatherWing
1 x CR1220 Coin Cell Battery
1 x RGB Smart NeoPixel
1 x Half-Size Breadboard
1 x SparkFun Cerberus USB Cable
FLORA – Version 1.0a
SDA – Digital 2
SCL – Digital 3
NEO – Digital 6
VIN – +5V
GND – GND
——
DL2204Mk06p.ino
/* ***** Don Luc Electronics © ***** Software Version Information Project #23: E-Textiles - DS3231 Precision RTC - Mk06 23-06 DL2204Mk06p.ino 1 x FLORA - Version 1.0a 1 x SparkFun Micro OLED 1 x SparkFun Environmental Combo CCS811/BME280 1 x DS3231 Precision RTC FeatherWing 1 x CR1220 Coin Cell Battery 1 x RGB Smart NeoPixel 1 x Half-Size Breadboard 1 x SparkFun Cerberus USB Cable */ // Include the Library Code // Wire #include <Wire.h> // NeoPixels #include <Adafruit_NeoPixel.h> // SparkFun Micro OLED #include <SFE_MicroOLED.h> // SparkFun BME280 - Humidity, Temperature, Altitude and Barometric Pressure #include <SparkFunBME280.h> // SparkFun CCS811 - eCO2 & tVOC #include <SparkFunCCS811.h> // Date and time DS3231 RTC #include <RTClib.h> // NeoPixels // On digital pin 6 #define PIN 6 // NeoPixels NUMPIXELS = 1 #define NUMPIXELS 1 // Pixels Adafruit_NeoPixel pixels = Adafruit_NeoPixel(NUMPIXELS, PIN, NEO_GRB + NEO_KHZ800); // Red int red = 0; // Green int green = 0; // Blue int blue = 0; // Neopix int iNeo = 0; // Value int zz = 0; // SparkFun Micro OLED #define PIN_RESET 9 #define DC_JUMPER 1 // I2C declaration MicroOLED oled(PIN_RESET, DC_JUMPER); // SparkFun BME280 - Temperature, Humidity, Altitude and Barometric Pressure BME280 myBME280; // Temperature Celsius float BMEtempC = 0; // Humidity float BMEhumid = 0; // Altitude Meters float BMEaltitudeM = 0; // Barometric Pressure float BMEpressure = 0; // SparkFun CCS811 - eCO2 & tVOC // Default I2C Address #define CCS811_ADDR 0x5B CCS811 myCCS811(CCS811_ADDR); // eCO2 float CCS811CO2 = 0; // TVOC float CCS811TVOC = 0; // Date and time functions using a DS3231 RTC RTC_DS3231 RTC; String sDate; String sTime; // Software Version Information String sver = "23-06"; void loop() { // SparkFun BME280 - Temperature, Humidity, Altitude and Barometric Pressure isBME280(); // SparkFun CCS811 - eCO2 & tVOC isCCS811(); // FLORA isFLORA(); // Dates and Time timeRTC(); // Micro OLED isMicroOLED(); }
getBME280.ino
// SparkFun BME280 - Temperature, Humidity, Altitude and Barometric Pressure // isBME280 - Temperature, Humidity, Altitude and Barometric Pressure void isBME280(){ // Temperature Celsius BMEtempC = myBME280.readTempC(); // Humidity BMEhumid = myBME280.readFloatHumidity() ; // Altitude Meters BMEaltitudeM = myBME280.readFloatAltitudeMeters(); // Barometric Pressure BMEpressure = myBME280.readFloatPressure(); }
getCCS811.ino
// CCS811 - eCO2 & tVOC // isCCS811 - eCO2 & tVOC void isCCS811(){ // This sends the temperature & humidity data to the CCS811 myCCS811.setEnvironmentalData(BMEhumid, BMEtempC); // Calling this function updates the global tVOC and eCO2 variables myCCS811.readAlgorithmResults(); // eCO2 Concentration CCS811CO2 = myCCS811.getCO2(); // tVOC Concentration CCS811TVOC = myCCS811.getTVOC(); }
getFLORA.ino
// FLORA // isFLORA void isFLORA() { // FLORA = Temperature Celsius // BMEtempC // FLORA = Temperature Celsius if ( BMEtempC >= 50 ) { // 40 <= Temperature Celsius < 50~~~ zz = 2; isNUMPIXELS(); } else if ( BMEtempC >= 40 ) { // 30 <= Temperature Celsius < 40 zz = 3; isNUMPIXELS(); } else if ( BMEtempC >= 30 ) { // 20 <= Temperature Celsius < 30 zz = 4; isNUMPIXELS(); } else if ( BMEtempC >= 20 ) { // 10 <= Temperature Celsius < 20 zz = 0; isNUMPIXELS(); } else if ( BMEtempC >= 10 ) { // ~~~0 <= Temperature Celsius < 10 zz = 1; isNUMPIXELS(); } }
getMicroOLED.ino
// SparkFun Micro OLED // Setup Micro OLED void setupMicroOLED() { // Initialize the OLED oled.begin(); // Clear the display's internal memory oled.clear(ALL); // Display what's in the buffer (splashscreen) oled.display(); // Delay 1000 ms delay(1000); // Clear the buffer. oled.clear(PAGE); } // Micro OLED void isMicroOLED() { // Text Display BME280 // Clear the display oled.clear(PAGE); // Set cursor to top-left oled.setCursor(0, 0); // Set font to type 0 oled.setFontType(0); // Temperature Celsius oled.print("T: "); oled.print(BMEtempC, 2); oled.setCursor(0, 10); // Humidity oled.print("H: "); oled.print(BMEhumid, 0); oled.setCursor(0, 20); // Altitude Meters oled.print("A: "); oled.print(BMEaltitudeM, 1); oled.setCursor(0, 30); // Barometric Pressure oled.print("P: "); oled.print(BMEpressure, 0); oled.display(); // Delay delay( 2000 ); // Text Display CCS811 // Clear the display oled.clear(PAGE); // Set cursor to top-left oled.setCursor(0, 0); // Set font to type 0 oled.setFontType(0); // Date oled.setCursor(0, 0); oled.print(sDate); // Time oled.setCursor(0, 10); oled.print(sTime); // eCO2 Concentration oled.setCursor(0, 20); oled.print("C: "); oled.print(CCS811CO2, 0); // tVOC Concentration oled.setCursor(0, 30); oled.print("V: "); oled.print(CCS811TVOC, 0); oled.display(); // Delay delay( 2000 ); }
getNeopix.ino
// NeoPixels // Neopix void isNeopix() { // Pixels pixels.setBrightness( 150 ); // Pixels color takes RGB values, from 0,0,0 up to 255,255,255 pixels.setPixelColor( iNeo, pixels.Color(red,green,blue) ); // This sends the updated pixel color to the hardware pixels.show(); // Delay for a period of time (in milliseconds) delay(50); } // isNUMPIXELS void isNUMPIXELS() { // Neopix Value switch ( zz ) { case 0: // NeoPixels Green // Red red = 0; // Green green = 255; // Blue blue = 0; // Neopix iNeo = 0; isNeopix(); break; case 1: // NeoPixels Blue // Red red = 0; // Green green = 0; // Blue blue = 255; // Neopix iNeo = 0; isNeopix(); break; case 2: // NeoPixels Red // Red red = 255; // Green green = 0; // Blue blue = 0; // Neopix iNeo = 0; isNeopix(); break; case 3: // NeoPixels Yellow // Red red = 255; // Green green = 255; // Blue blue = 0; // Neopix iNeo = 0; isNeopix(); break; case 4: // NeoPixels Magenta // Red red = 255; // Green green = 0; // Blue blue = 255; // Neopix iNeo = 0; isNeopix(); break; case 5: // NeoPixels Cyan // Red red = 0; // Green green = 255; // Blue blue = 255; // Neopix iNeo = 0; isNeopix(); break; case 6: // NeoPixels White // Red red = 255; // Green green = 255; // Blue blue = 255; // Neopix iNeo = 0; isNeopix(); break; } } // isNUMPIXELSoff void isNUMPIXELSoff() { // Black Off // NeoPixels // Red red = 0; // Green green = 0; // Blue blue = 0; isNeopix(); }
getRTCDS3231.ino
// DS3231 Precision RTC // Setup RTC void setupRTC() { // DS3231 Precision RTC RTC.begin(); if (! RTC.begin()) { while (1); } DateTime now = RTC.now(); if (RTC.lostPower()) { // Following line sets the RTC to the date & time this sketch was compiled RTC.adjust(DateTime(F(__DATE__), F(__TIME__))); // This line sets the RTC with an explicit date & time, for example to set // August 2, 2021 at 13:53:0 you would call: // RTC.adjust(DateTime(2022, 4, 26, 11, 39, 0)); } } // timeRTC void timeRTC() { // DS3231 Precision RTC sDate = ""; sTime = ""; // Date Time DateTime now = RTC.now(); // sData sDate += String(now.year(), DEC); sDate += "/"; sDate += String(now.month(), DEC); sDate += "/"; sDate += String(now.day(), DEC); // sTime sTime += String(now.hour(), DEC); sTime += ":"; sTime += String(now.minute(), DEC); sTime += ":"; sTime += String(now.second(), DEC); }
setup.ino
// Setup void setup() { // NeoPixels // This initializes the NeoPixel library pixels.begin(); // Delay for a period of time (in milliseconds) delay(50); // isNUMPIXELS Off isNUMPIXELSoff(); // Set up I2C bus Wire.begin(); // Delay for a period of time (in milliseconds) delay(50); // SparkFun BME280 - Temperature, Humidity, Altitude and Barometric Pressure myBME280.begin(); // CCS811 - eCO2 & tVOC myCCS811.begin(); // Setup RTC setupRTC(); // Setup Micro OLED setupMicroOLED(); }
——
People can contact us: https://www.donluc.com/?page_id=1927
Technology Experience
- Single-Board Microcontrollers (PIC, Arduino, Raspberry Pi,Espressif, etc…)
- IoT
- Robotics
- Camera and Video Capture Receiver Stationary, Wheel/Tank and Underwater Vehicle
- Unmanned Vehicles Terrestrial and Marine
- Research & Development (R & D)
- Desktop Applications (Windows, OSX, Linux, Multi-OS, Multi-Tier, etc…)
- Mobile Applications (Android, iOS, Blackberry, Windows Mobile, Windows CE, etc…)
- Web Applications (LAMP, Scripting, Java, ASP, ASP.NET, RoR, Wakanda, etc…)
- Social Media Programming & Integration (Facebook, Twitter, YouTube, Pinterest, etc…)
- Content Management Systems (WordPress, Drupal, Joomla, Moodle, etc…)
- Bulletin Boards (phpBB, SMF, Vanilla, jobberBase, etc…)
- eCommerce (WooCommerce, OSCommerce, ZenCart, PayPal Shopping Cart, etc…)
Instructor and E-Mentor
- IoT
- PIC Microcontrollers
- Arduino
- Raspberry Pi
- Espressif
- Robotics
- DOS, Windows, OSX, Linux, iOS, Android, Multi-OS
- Linux-Apache-PHP-MySQL
Follow Us
J. Luc Paquin – Curriculum Vitae – 2022 English & Español
https://www.jlpconsultants.com/luc/
Web: https://www.donluc.com/
Web: https://www.jlpconsultants.com/
Facebook: https://www.facebook.com/neosteam.labs.9/
YouTube: https://www.youtube.com/channel/UC5eRjrGn1CqkkGfZy0jxEdA
Twitter: https://twitter.com/labs_steam
Pinterest: https://www.pinterest.com/NeoSteamLabs/
Instagram: https://www.instagram.com/neosteamlabs/
Don Luc
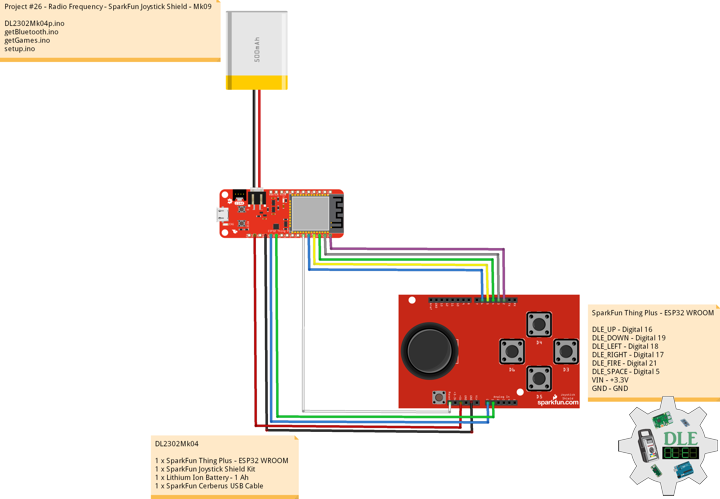
Project #23: E-Textiles – ams CCS811 – Mk05
——
#DonLucElectronics #DonLuc #ETextiles #Wearable #FLORA #MicroOLED #BME280 #CCS811 #Arduino #Project #Programming #Electronics #Microcontrollers #Consultant
——
——
——
——
ams CCS811 Ultra-Low Power Digital Gas Sensor for Monitoring Indoor Air Quality
The CCS811 is an ultra-low power digital gas sensor solution which integrates a metal oxide (MOX) gas sensor to detect a wide range of Volatile Organic Compounds (VOCs) for indoor air quality monitoring with a microcontroller unit (MCU), which includes an Analog-to-Digital converter (ADC), and an I²C interface.
CCS811 is based on ams unique micro-hotplate technology which enables a highly reliable solution for gas sensors, very fast cycle times and a significant reduction in average power consumption. The integrated MCU manages the sensor drive modes and raw sensor data measured while detecting VOCs. The I²C digital interface significantly simplifies the hardware and software design, enabling a faster time to market.
CCS811 supports intelligent algorithms to process raw sensor measurements to output a TVOC value or equivalent CO2 (eCO2) levels, where the main cause of VOCs is from humans. CCS811 supports multiple measurement modes that have been optimised for low-power consumption during an active sensor measurement and idle mode extending battery life in portable applications.
Applications
This device can be mainly used for indoor air quality monitoring in:
- Smartphones
- Wearables
- Home and building automation
- Accessories
DL2204Mk05
1 x FLORA – Version 1.0a
1 x SparkFun Micro OLED
1 x SparkFun Environmental Combo CCS811/BME280
1 x RGB Smart NeoPixel
1 x Half-Size Breadboard
1 x SparkFun Cerberus USB Cable
FLORA – Version 1.0a
NEO – Digital 6
SDA – Analog A2
SCL – Analog A3
VIN – +5V
GND – GND
DL2204Mk05p.ino
/* ***** Don Luc Electronics © ***** Software Version Information Project #23: E-Textiles - ams CCS811 - Mk05 23-05 DL2204Mk05p.ino 1 x FLORA - Version 1.0a 1 x SparkFun Micro OLED 1 x SparkFun Environmental Combo CCS811/BME280 1 x RGB Smart NeoPixel 1 x Half-Size Breadboard 1 x SparkFun Cerberus USB Cable */ // Include the Library Code // Wire #include <Wire.h> // NeoPixels #include <Adafruit_NeoPixel.h> // SparkFun Micro OLED #include <SFE_MicroOLED.h> // SparkFun BME280 - Humidity, Temperature, Altitude and Barometric Pressure #include <SparkFunBME280.h> // SparkFun CCS811 - eCO2 & tVOC #include <SparkFunCCS811.h> // NeoPixels // On digital pin 6 #define PIN 6 // NeoPixels NUMPIXELS = 1 #define NUMPIXELS 1 // Pixels Adafruit_NeoPixel pixels = Adafruit_NeoPixel(NUMPIXELS, PIN, NEO_GRB + NEO_KHZ800); // Red int red = 0; // Green int green = 0; // Blue int blue = 0; // Neopix int iNeo = 0; // Value int zz = 0; // SparkFun Micro OLED #define PIN_RESET 9 #define DC_JUMPER 1 // I2C declaration MicroOLED oled(PIN_RESET, DC_JUMPER); // SparkFun BME280 - Temperature, Humidity, Altitude and Barometric Pressure BME280 myBME280; // Temperature Celsius float BMEtempC = 0; // Humidity float BMEhumid = 0; // Altitude Meters float BMEaltitudeM = 0; // Barometric Pressure float BMEpressure = 0; // SparkFun CCS811 - eCO2 & tVOC // Default I2C Address #define CCS811_ADDR 0x5B CCS811 myCCS811(CCS811_ADDR); // eCO2 float CCS811CO2 = 0; // TVOC float CCS811TVOC = 0; // Software Version Information String sver = "23-05"; void loop() { // SparkFun BME280 - Temperature, Humidity, Altitude and Barometric Pressure isBME280(); // SparkFun CCS811 - eCO2 & tVOC isCCS811(); // FLORA isFLORA(); // Micro OLED isMicroOLED(); }
getBME280.ino
// SparkFun BME280 - Temperature, Humidity, Altitude and Barometric Pressure // isBME280 - Temperature, Humidity, Altitude and Barometric Pressure void isBME280(){ // Temperature Celsius BMEtempC = myBME280.readTempC(); // Humidity BMEhumid = myBME280.readFloatHumidity(); // Altitude Meters BMEaltitudeM = myBME280.readFloatAltitudeMeters(); // Barometric Pressure BMEpressure = myBME280.readFloatPressure(); }
getCCS811.ino
// CCS811 - eCO2 & tVOC // isCCS811 - eCO2 & tVOC void isCCS811(){ // This sends the temperature & humidity data to the CCS811 myCCS811.setEnvironmentalData(BMEhumid, BMEtempC); // Calling this function updates the global tVOC and eCO2 variables myCCS811.readAlgorithmResults(); // eCO2 Concentration CCS811CO2 = myCCS811.getCO2(); // tVOC Concentration CCS811TVOC = myCCS811.getTVOC(); }
getFLORA.ino
// FLORA // isFLORA void isFLORA() { // FLORA = Temperature Celsius // BMEtempC // FLORA = Temperature Celsius if ( BMEtempC >= 50 ) { // 40 <= Temperature Celsius < 50~~~ zz = 2; isNUMPIXELS(); } else if ( BMEtempC >= 40 ) { // 30 <= Temperature Celsius < 40 zz = 3; isNUMPIXELS(); } else if ( BMEtempC >= 30 ) { // 20 <= Temperature Celsius < 30 zz = 4; isNUMPIXELS(); } else if ( BMEtempC >= 20 ) { // 10 <= Temperature Celsius < 20 zz = 0; isNUMPIXELS(); } else if ( BMEtempC >= 10 ) { // ~~~0 <= Temperature Celsius < 10 zz = 1; isNUMPIXELS(); } }
getMicroOLED.ino
// SparkFun Micro OLED // Setup Micro OLED void setupMicroOLED() { // Initialize the OLED oled.begin(); // Clear the display's internal memory oled.clear(ALL); // Display what's in the buffer (splashscreen) oled.display(); // Delay 1000 ms delay(1000); // Clear the buffer. oled.clear(PAGE); } // Micro OLED void isMicroOLED() { // Text Display BME280 // Clear the display oled.clear(PAGE); // Set cursor to top-left oled.setCursor(0, 0); // Set font to type 0 oled.setFontType(0); // Temperature Celsius oled.print("T: "); oled.print(BMEtempC); oled.setCursor(0, 10); // Humidity oled.print("H: "); oled.print(BMEhumid); oled.setCursor(0, 20); // Altitude Meters oled.print("A: "); oled.print(BMEaltitudeM); oled.setCursor(0, 30); // Barometric Pressure oled.print("P: "); oled.print(BMEpressure); oled.display(); // Delay delay( 2000 ); // Text Display CCS811 // Clear the display oled.clear(PAGE); // Set cursor to top-left oled.setCursor(0, 0); // Set font to type 0 oled.setFontType(0); // eCO2 Concentration oled.print("eCO2"); oled.setCursor(0, 10); oled.print(CCS811CO2); // tVOC Concentration oled.setCursor(0, 20); oled.print("tVOC"); oled.setCursor(0, 30); oled.print(CCS811TVOC); oled.display(); // Delay delay( 2000 ); }
getNeopix.ino
// NeoPixels // Neopix void isNeopix() { // Pixels pixels.setBrightness( 150 ); // Pixels color takes RGB values, from 0,0,0 up to 255,255,255 pixels.setPixelColor( iNeo, pixels.Color(red,green,blue) ); // This sends the updated pixel color to the hardware pixels.show(); // Delay for a period of time (in milliseconds) delay(50); } // isNUMPIXELS void isNUMPIXELS() { // Neopix Value switch ( zz ) { case 0: // NeoPixels Green // Red red = 0; // Green green = 255; // Blue blue = 0; // Neopix iNeo = 0; isNeopix(); break; case 1: // NeoPixels Blue // Red red = 0; // Green green = 0; // Blue blue = 255; // Neopix iNeo = 0; isNeopix(); break; case 2: // NeoPixels Red // Red red = 255; // Green green = 0; // Blue blue = 0; // Neopix iNeo = 0; isNeopix(); break; case 3: // NeoPixels Yellow // Red red = 255; // Green green = 255; // Blue blue = 0; // Neopix iNeo = 0; isNeopix(); break; case 4: // NeoPixels Magenta // Red red = 255; // Green green = 0; // Blue blue = 255; // Neopix iNeo = 0; isNeopix(); break; case 5: // NeoPixels Cyan // Red red = 0; // Green green = 255; // Blue blue = 255; // Neopix iNeo = 0; isNeopix(); break; case 6: // NeoPixels White // Red red = 255; // Green green = 255; // Blue blue = 255; // Neopix iNeo = 0; isNeopix(); break; } } // isNUMPIXELSoff void isNUMPIXELSoff() { // Black Off // NeoPixels // Red red = 0; // Green green = 0; // Blue blue = 0; isNeopix(); }
setup.ino
// Setup void setup() { // NeoPixels // This initializes the NeoPixel library pixels.begin(); // Delay for a period of time (in milliseconds) delay(50); // isNUMPIXELS Off isNUMPIXELSoff(); // Set up I2C bus Wire.begin(); // Delay for a period of time (in milliseconds) delay(50); // SparkFun BME280 - Temperature, Humidity, Altitude and Barometric Pressure myBME280.begin(); // CCS811 - eCO2 & tVOC myCCS811.begin(); // Setup Micro OLED setupMicroOLED(); }
——
People can contact us: https://www.donluc.com/?page_id=1927
Technology Experience
- Single-Board Microcontrollers (PIC, Arduino, Raspberry Pi,Espressif, etc…)
- IoT
- Robotics
- Camera and Video Capture Receiver Stationary, Wheel/Tank and Underwater Vehicle
- Unmanned Vehicles Terrestrial and Marine
- Research & Development (R & D)
- Desktop Applications (Windows, OSX, Linux, Multi-OS, Multi-Tier, etc…)
- Mobile Applications (Android, iOS, Blackberry, Windows Mobile, Windows CE, etc…)
- Web Applications (LAMP, Scripting, Java, ASP, ASP.NET, RoR, Wakanda, etc…)
- Social Media Programming & Integration (Facebook, Twitter, YouTube, Pinterest, etc…)
- Content Management Systems (WordPress, Drupal, Joomla, Moodle, etc…)
- Bulletin Boards (phpBB, SMF, Vanilla, jobberBase, etc…)
- eCommerce (WooCommerce, OSCommerce, ZenCart, PayPal Shopping Cart, etc…)
Instructor and E-Mentor
- IoT
- PIC Microcontrollers
- Arduino
- Raspberry Pi
- Espressif
- Robotics
- DOS, Windows, OSX, Linux, iOS, Android, Multi-OS
- Linux-Apache-PHP-MySQL
Follow Us
J. Luc Paquin – Curriculum Vitae – 2022 English & Español
https://www.jlpconsultants.com/luc/
Web: https://www.donluc.com/
Web: https://www.jlpconsultants.com/
Facebook: https://www.facebook.com/neosteam.labs.9/
YouTube: https://www.youtube.com/channel/UC5eRjrGn1CqkkGfZy0jxEdA
Twitter: https://twitter.com/labs_steam
Pinterest: https://www.pinterest.com/NeoSteamLabs/
Instagram: https://www.instagram.com/neosteamlabs/
Don Luc
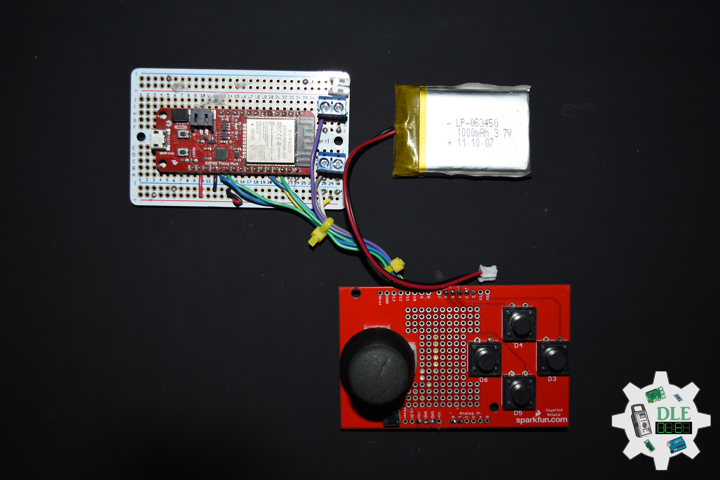
Project #23: E-Textiles – Bosch Sensortec BME280 – Mk04
——
#DonLucElectronics #DonLuc #ETextiles #Wearable #FLORA #MicroOLED #BME280 #Arduino #Project #Programming #Electronics #Microcontrollers #Consultant
——
——
——
——
Bosch Sensortec BME280 – Combined Humidity And Pressure Sensor
The BME280 is as combined digital humidity, pressure and temperature sensor based on proven sensing principles. Its small dimensions and its low power consumption allow the implementation in battery driven devices such as handsets, GPS modules or watches. The BME280 is register and performance compatible to the Bosch Sensortec BMP280 digital pressure sensor. The BME280 achieves high performance in all applications requiring humidity and pressure measurement. These emerging applications of home automation control, in-door navigation, E-Textiles, fitness as well as GPS refinement require a high accuracy and a low TCO at the same time. The humidity sensor provides an extremely fast response time for fast context awareness applications and high overall accuracy over a wide temperature range. The integrated temperature sensor has been optimized for lowest noise and highest resolution. Its output is used for temperature compensation of the pressure and humidity sensors and can also be used for estimation of the ambient temperature. The sensor provides both SPI and I²C interfaces.
Typical Application
- Context awareness, e.g. skin detection, room change detection
- Fitness monitoring / well-being
- Warning regarding dryness or high temperatures
- Measurement of volume and air flow
- Home automation control
- Control heating, venting, air conditioning (HVAC)
- Internet of Things
- GPS enhancement (e.g. time-to-first-fix improvement, dead reckoning, slope detection)
- Indoor navigation (e.g. change of floor detection, elevator detection)
- Outdoor navigation, leisure and sports applications
- Weather forecast
- Vertical velocity indication (rise/sink speed)
- E-Textiles and Wearable
Target Devices
- Handsets such as mobile phones, tablet PCs, GPS devices
- Navigation systems
- Gaming (e.g flying toys)
- Camera (DSC, video)
- Home weather stations
- Flying toys
- Watches
- E-Textiles
- Wearable
DL2204Mk04
1 x FLORA – Version 1.0a
1 x SparkFun Micro OLED
1 x SparkFun Environmental Combo CCS811/BME280
1 x RGB Smart NeoPixel
1 x Half-Size Breadboard
1 x SparkFun Cerberus USB Cable
FLORA – Version 1.0a
NEO – Digital 6
SDA – Analog A2
SCL – Analog A3
VIN – +5V
GND – GND
DL2204Mk04p.ino
/* ***** Don Luc Electronics © ***** Software Version Information Project #23: E-Textiles - BME280 - Mk04 23-04 DL2204Mk04p.ino 1 x FLORA - Version 1.0a 1 x SparkFun Micro OLED 1 x SparkFun Environmental Combo CCS811/BME280 1 x RGB Smart NeoPixel 1 x Half-Size Breadboard 1 x SparkFun Cerberus USB Cable */ // Include the Library Code // Wire #include <Wire.h> // NeoPixels #include <Adafruit_NeoPixel.h> // SparkFun Micro OLED #include <SFE_MicroOLED.h> // SparkFun BME280 - Humidity, Temperature, Altitude and Barometric Pressure #include <SparkFunBME280.h> // NeoPixels // On digital pin 6 #define PIN 6 // NeoPixels NUMPIXELS = 1 #define NUMPIXELS 1 // Pixels Adafruit_NeoPixel pixels = Adafruit_NeoPixel(NUMPIXELS, PIN, NEO_GRB + NEO_KHZ800); // Red int red = 0; // Green int green = 0; // Blue int blue = 0; // Neopix int iNeo = 0; // Value int zz = 0; // SparkFun Micro OLED #define PIN_RESET 9 #define DC_JUMPER 1 // I2C declaration MicroOLED oled(PIN_RESET, DC_JUMPER); // SparkFun BME280 - Temperature, Humidity, Altitude and Barometric Pressure BME280 myBME280; // Temperature Celsius float BMEtempC = 0; // Humidity float BMEhumid = 0; // Altitude Meters float BMEaltitudeM = 0; // Barometric Pressure float BMEpressure = 0; // Software Version Information String sver = "23-04"; void loop() { // SparkFun BME280 - Temperature, Humidity, Altitude and Barometric Pressure isBME280(); // FLORA isFLORA(); // Micro OLED isMicroOLED(); // Delay delay( 1000 ); }
getBME280.ino
// SparkFun BME280 - Temperature, Humidity, Altitude and Barometric Pressure // isBME280 - Temperature, Humidity, Altitude and Barometric Pressure void isBME280(){ // Temperature Celsius BMEtempC = myBME280.readTempC(); // Humidity BMEhumid = myBME280.readFloatHumidity(); // Altitude Meters BMEaltitudeM = myBME280.readFloatAltitudeMeters(); // Barometric Pressure BMEpressure = myBME280.readFloatPressure(); }
getFLORA.ino
// FLORA // isFLORA void isFLORA() { // FLORA = Temperature Celsius // BMEtempC // FLORA = Temperature Celsius if ( BMEtempC >= 50 ) { // 40 <= Temperature Celsius < 50~~~ zz = 2; isNUMPIXELS(); } else if ( BMEtempC >= 40 ) { // 30 <= Temperature Celsius < 40 zz = 3; isNUMPIXELS(); } else if ( BMEtempC >= 30 ) { // 20 <= Temperature Celsius < 30 zz = 4; isNUMPIXELS(); } else if ( BMEtempC >= 20 ) { // 10 <= Temperature Celsius < 20 zz = 0; isNUMPIXELS(); } else if ( BMEtempC >= 10 ) { // ~~~0 <= Temperature Celsius < 10 zz = 1; isNUMPIXELS(); } }
getMicroOLED.ino
// SparkFun Micro OLED // Setup Micro OLED void setupMicroOLED() { // Initialize the OLED oled.begin(); // Clear the display's internal memory oled.clear(ALL); // Display what's in the buffer (splashscreen) oled.display(); // Delay 1000 ms delay(1000); // Clear the buffer. oled.clear(PAGE); } // Micro OLED void isMicroOLED() { // Text Display BME280 // Clear the display oled.clear(PAGE); // Set cursor to top-left oled.setCursor(0, 0); // Set font to type 0 oled.setFontType(0); // Temperature Celsius oled.print("T: "); oled.print(BMEtempC); oled.setCursor(0, 10); // Humidity oled.print("H: "); oled.print(BMEhumid); oled.setCursor(0, 20); // Altitude Meters oled.print("A: "); oled.print(BMEaltitudeM); oled.setCursor(0, 30); // Barometric Pressure oled.print("P: "); oled.print(BMEpressure); oled.display(); }
getNeopix.ino
// NeoPixels // Neopix void isNeopix() { // Pixels pixels.setBrightness( 150 ); // Pixels color takes RGB values, from 0,0,0 up to 255,255,255 pixels.setPixelColor( iNeo, pixels.Color(red,green,blue) ); // This sends the updated pixel color to the hardware pixels.show(); // Delay for a period of time (in milliseconds) delay(50); } // isNUMPIXELS void isNUMPIXELS() { // Neopix Value switch ( zz ) { case 0: // NeoPixels Green // Red red = 0; // Green green = 255; // Blue blue = 0; // Neopix iNeo = 0; isNeopix(); break; case 1: // NeoPixels Blue // Red red = 0; // Green green = 0; // Blue blue = 255; // Neopix iNeo = 0; isNeopix(); break; case 2: // NeoPixels Red // Red red = 255; // Green green = 0; // Blue blue = 0; // Neopix iNeo = 0; isNeopix(); break; case 3: // NeoPixels Yellow // Red red = 255; // Green green = 255; // Blue blue = 0; // Neopix iNeo = 0; isNeopix(); break; case 4: // NeoPixels Magenta // Red red = 255; // Green green = 0; // Blue blue = 255; // Neopix iNeo = 0; isNeopix(); break; case 5: // NeoPixels Cyan // Red red = 0; // Green green = 255; // Blue blue = 255; // Neopix iNeo = 0; isNeopix(); break; case 6: // NeoPixels White // Red red = 255; // Green green = 255; // Blue blue = 255; // Neopix iNeo = 0; isNeopix(); break; } } // isNUMPIXELSoff void isNUMPIXELSoff() { // Black Off // NeoPixels // Red red = 0; // Green green = 0; // Blue blue = 0; isNeopix(); }
setup.ino
// Setup void setup() { // NeoPixels // This initializes the NeoPixel library pixels.begin(); // Delay for a period of time (in milliseconds) delay(50); // isNUMPIXELS Off isNUMPIXELSoff(); // Set up I2C bus Wire.begin(); // Delay for a period of time (in milliseconds) delay(50); // SparkFun BME280 - Temperature, Humidity, Altitude and Barometric Pressure myBME280.begin(); // Setup Micro OLED setupMicroOLED(); }
——
People can contact us: https://www.donluc.com/?page_id=1927
Technology Experience
- Single-Board Microcontrollers (PIC, Arduino, Raspberry Pi,Espressif, etc…)
- IoT
- Robotics
- Camera and Video Capture Receiver Stationary, Wheel/Tank and Underwater Vehicle
- Unmanned Vehicles Terrestrial and Marine
- Research & Development (R & D)
- Desktop Applications (Windows, OSX, Linux, Multi-OS, Multi-Tier, etc…)
- Mobile Applications (Android, iOS, Blackberry, Windows Mobile, Windows CE, etc…)
- Web Applications (LAMP, Scripting, Java, ASP, ASP.NET, RoR, Wakanda, etc…)
- Social Media Programming & Integration (Facebook, Twitter, YouTube, Pinterest, etc…)
- Content Management Systems (WordPress, Drupal, Joomla, Moodle, etc…)
- Bulletin Boards (phpBB, SMF, Vanilla, jobberBase, etc…)
- eCommerce (WooCommerce, OSCommerce, ZenCart, PayPal Shopping Cart, etc…)
Instructor and E-Mentor
- IoT
- PIC Microcontrollers
- Arduino
- Raspberry Pi
- Espressif
- Robotics
- DOS, Windows, OSX, Linux, iOS, Android, Multi-OS
- Linux-Apache-PHP-MySQL
Follow Us
J. Luc Paquin – Curriculum Vitae – 2022 English & Español
https://www.jlpconsultants.com/luc/
Web: https://www.donluc.com/
Web: https://www.jlpconsultants.com/
Facebook: https://www.facebook.com/neosteam.labs.9/
YouTube: https://www.youtube.com/channel/UC5eRjrGn1CqkkGfZy0jxEdA
Twitter: https://twitter.com/labs_steam
Pinterest: https://www.pinterest.com/NeoSteamLabs/
Instagram: https://www.instagram.com/neosteamlabs/
Don Luc
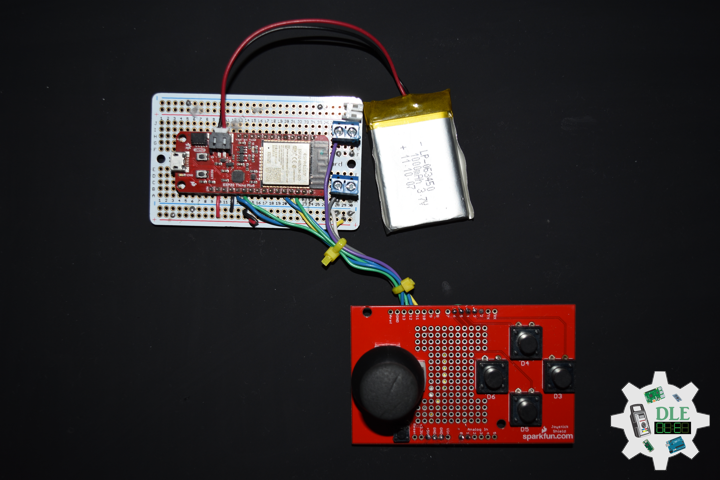
Project #23: E-Textiles – SparkFun Micro OLED – Mk03
——
#DonLucElectronics #DonLuc #ETextiles #Wearable #FLORA #MicroOLED #Arduino #Project #Programming #Electronics #Microcontrollers #Consultant
——
——
——
——
SparkFun Micro OLED Breakout (Qwiic)
The SparkFun Qwiic Micro OLED Breakout is a Qwiic-enabled version of our popular Micro OLED display. The small monochrome, blue-on-black OLED screen presents incredibly clear images for your viewing pleasure. It’s micro, but it still packs a punch the OLED display is crisp, and you can fit a deceivingly large amount of graphics on there. This breakout is perfect for adding graphics to your next project and displaying diagnostic information without resorting to a serial output, all with the ease of use of our own Qwiic Connect System.
This version of the Micro OLED Breakout is exactly the size of its non-Qwiic sibling, featuring a screen that is 64 pixels wide and 48 pixels tall and measuring 0.66 inch across. But it has also been equipped with two Qwiic connectors, making it ideal for I2C operations. We’ve also added two mounting holes and a convenient Qwiic cable holder incorporated into a detachable tab on the board that can be easily removed thanks to a v-scored edge. We’ve even made sure to include an I2C pull-up jumper and ADDR jumper on the back of the board, so if you have your own I2C pull-ups or need to change the I2C address of the board, you have options.
DL2204Mk03
1 x FLORA – Version 1.0a
1 x SparkFun Micro OLED
1 x RGB Smart NeoPixel
1 x Half-Size Breadboard
1 x SparkFun Cerberus USB Cable
FLORA – Version 1.0a
NEO – Digital 6
SDA – Analog A2
SCL – Analog A3
VIN – +5V
GND – GND
——
DL2204Mk03p.ino
/* ***** Don Luc Electronics © ***** Software Version Information Project #23: E-Textiles - SparkFun Micro OLED - Mk03 23-03 DL2204Mk03p.ino 1 x FLORA - Version 1.0a 1 x SparkFun Micro OLED 1 x RGB Smart NeoPixel 1 x Half-Size Breadboard 1 x SparkFun Cerberus USB Cable */ // Include the Library Code // Wire #include <Wire.h> // NeoPixels #include <Adafruit_NeoPixel.h> // SparkFun Micro OLED #include <SFE_MicroOLED.h> // FLORA // Color String sVal; // NeoPixels // On digital pin 6 #define PIN 6 // NeoPixels NUMPIXELS = 1 #define NUMPIXELS 1 // Pixels Adafruit_NeoPixel pixels = Adafruit_NeoPixel(NUMPIXELS, PIN, NEO_GRB + NEO_KHZ800); // Red int red = 0; // Green int green = 0; // Blue int blue = 0; // Neopix int iNeo = 0; // Value int zz = 0; // SparkFun Micro OLED #define PIN_RESET 9 #define DC_JUMPER 1 // I2C declaration MicroOLED oled(PIN_RESET, DC_JUMPER); // Software Version Information String sver = "23-03"; void loop() { // FLORA isFLORA(); // Micro OLED isMicroOLED(); // Delay delay( 3000 ); }
getFLORA.ino
// FLORA // isFLORA void isFLORA() { // FLORA = zz => Neopix // FLORA = sVal => Color if ( zz == 0 ) { sVal = "Green"; isNUMPIXELS(); zz = 1; } else if ( zz == 1 ) { sVal = "Blue"; isNUMPIXELS(); zz = 2; } else if ( zz == 2 ) { sVal = "Red"; isNUMPIXELS(); zz = 3; } else if ( zz == 3 ) { sVal = "Yellow"; isNUMPIXELS(); zz = 4; } else if ( zz == 4 ) { sVal = "Magenta"; isNUMPIXELS(); zz = 5; } else if ( zz == 5 ) { sVal = "Cyan"; isNUMPIXELS(); zz = 6; } else if ( zz == 6 ) { sVal = "White"; isNUMPIXELS(); zz = 0; } }
getMicroOLED.ino
// SparkFun Micro OLED // Setup Micro OLED void setupMicroOLED() { // Initialize the OLED oled.begin(); // Clear the display's internal memory oled.clear(ALL); // Display what's in the buffer (splashscreen) oled.display(); // Delay 1000 ms delay(1000); // Clear the buffer. oled.clear(PAGE); } // Micro OLED void isMicroOLED() { // Clear the display oled.clear(PAGE); // Set cursor to top-left oled.setCursor(0, 0); // Set font to type 1 oled.setFontType(1); // Print sVal oled.print(sVal); oled.display(); }
getNeopix.ino
// NeoPixels // Neopix void isNeopix() { // Pixels pixels.setBrightness( 255 ); // Pixels color takes RGB values, from 0,0,0 up to 255,255,255 pixels.setPixelColor( iNeo, pixels.Color(red,green,blue) ); // This sends the updated pixel color to the hardware pixels.show(); // Delay for a period of time (in milliseconds) delay(50); } // isNUMPIXELS void isNUMPIXELS() { // Neopix Value switch ( zz ) { case 0: // NeoPixels Green // Red red = 0; // Green green = 255; // Blue blue = 0; // Neopix iNeo = 0; isNeopix(); break; case 1: // NeoPixels Blue // Red red = 0; // Green green = 0; // Blue blue = 255; // Neopix iNeo = 0; isNeopix(); break; case 2: // NeoPixels Red // Red red = 255; // Green green = 0; // Blue blue = 0; // Neopix iNeo = 0; isNeopix(); break; case 3: // NeoPixels Yellow // Red red = 255; // Green green = 255; // Blue blue = 0; // Neopix iNeo = 0; isNeopix(); break; case 4: // NeoPixels Magenta // Red red = 255; // Green green = 0; // Blue blue = 255; // Neopix iNeo = 0; isNeopix(); break; case 5: // NeoPixels Cyan // Red red = 0; // Green green = 255; // Blue blue = 255; // Neopix iNeo = 0; isNeopix(); break; case 6: // NeoPixels White // Red red = 255; // Green green = 255; // Blue blue = 255; // Neopix iNeo = 0; isNeopix(); break; } } // isNUMPIXELSoff void isNUMPIXELSoff() { // Black Off // NeoPixels // Red red = 0; // Green green = 0; // Blue blue = 0; isNeopix(); }
setup.ino
// Setup void setup() { // NeoPixels // This initializes the NeoPixel library pixels.begin(); // Delay for a period of time (in milliseconds) delay(50); // isNUMPIXELS Off isNUMPIXELSoff(); // Set up I2C bus Wire.begin(); // Delay for a period of time (in milliseconds) delay(50); // Setup Micro OLED setupMicroOLED(); }
——
People can contact us: https://www.donluc.com/?page_id=1927
Technology Experience
- Single-Board Microcontrollers (PIC, Arduino, Raspberry Pi,Espressif, etc…)
- IoT
- Robotics
- Camera and Video Capture Receiver Stationary, Wheel/Tank and Underwater Vehicle
- Unmanned Vehicles Terrestrial and Marine
- Research & Development (R & D)
- Desktop Applications (Windows, OSX, Linux, Multi-OS, Multi-Tier, etc…)
- Mobile Applications (Android, iOS, Blackberry, Windows Mobile, Windows CE, etc…)
- Web Applications (LAMP, Scripting, Java, ASP, ASP.NET, RoR, Wakanda, etc…)
- Social Media Programming & Integration (Facebook, Twitter, YouTube, Pinterest, etc…)
- Content Management Systems (WordPress, Drupal, Joomla, Moodle, etc…)
- Bulletin Boards (phpBB, SMF, Vanilla, jobberBase, etc…)
- eCommerce (WooCommerce, OSCommerce, ZenCart, PayPal Shopping Cart, etc…)
Instructor and E-Mentor
- IoT
- PIC Microcontrollers
- Arduino
- Raspberry Pi
- Espressif
- Robotics
- DOS, Windows, OSX, Linux, iOS, Android, Multi-OS
- Linux-Apache-PHP-MySQL
Follow Us
J. Luc Paquin – Curriculum Vitae – 2022 English & Español
https://www.jlpconsultants.com/luc/
Web: https://www.donluc.com/
Web: https://www.jlpconsultants.com/
Facebook: https://www.facebook.com/neosteam.labs.9/
YouTube: https://www.youtube.com/channel/UC5eRjrGn1CqkkGfZy0jxEdA
Twitter: https://twitter.com/labs_steam
Pinterest: https://www.pinterest.com/NeoSteamLabs/
Instagram: https://www.instagram.com/neosteamlabs/
Don Luc
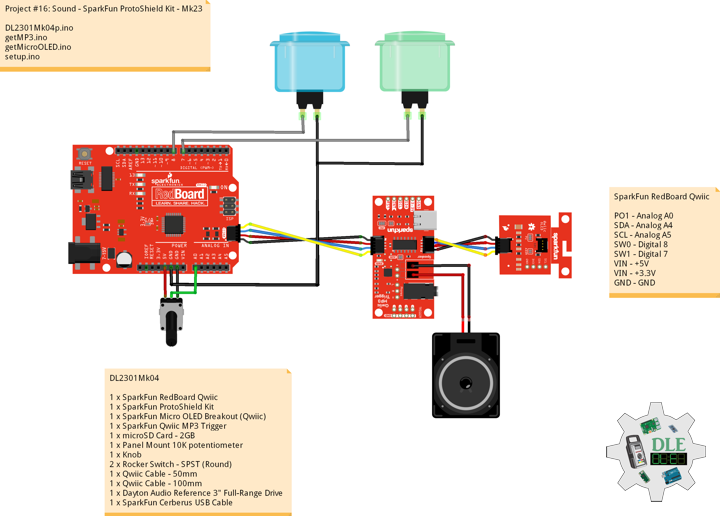
Project #23: E-Textiles – FLORA – Mk02
——
#DonLucElectronics #DonLuc #ETextiles #Wearable #FLORA #Arduino #Project #Programming #Electronics #Microcontrollers #Consultant
——
——
——
——
FLORA – Wearable Electronic Platform – Version 1.0a
FLORA is Adafruit’s fully-featured wearable electronics platform. It’s a round, sewable, Arduino-compatible microcontroller designed to empower amazing wearables projects. The FLORA family also has the best stainless steel threads, sensors, GPS modules and chainable LED NeoPixels, perfect accessories for the FLORA main board. It’s built around the Atmega32u4 chip, which has built-in USB support, is wearable Arduino / Arduino-compatible.
The FLORA has built-in USB support. Built in USB means you plug it in to program it, it just shows up, all you need is a Mini-B USB cable, no additional purchases are needed. The FLORA has USB HID support, so it can act like a mouse or keyboard to attach directly to computers.
FLORA has a small but easy to use onboard reset button to reboot the system. The power supply is designed to be flexible and easy to use. Can be used with LiIon/LiPoly, LiFe, alkaline or rechargeable NiMh/NiCad batteries of any size. The FLORA does not have a LiPo charger included by design, this allows safe use with multiple battery types and reduces risk of fire as it is not recommended to charge these batteries on fabric. We suggest one of our micro-lipo chargers if you want to use LiPo batteries with FLORA.
FLORA has onboard power switch connected to 2A power FET for safe and efficient battery on/off control, so you can power quite a bit without burning out your switch. The FLORA has an onboard 3.3v 250mA regulator with a protection diode and USB fuse so that the microcontroller voltage is consistent and can power common 3.3v modules and sensors.
FLORA
- FLORA is fabric friendly, all the components on board are flush to the PCB and won’t snag delicate garments.
- FLORA is extremely beginner-friendly. it is difficult to destroy the FLORA by connecting a battery backwards due to polarized connector and protection diodes.
- The FLORA has 4 indicator LEDs: power good, digital signal LED for bootloader feedback, data rx/tx. Also onboard is an ICSP connector for easy reprograming for advanced users.
- There are 14 sewing tap pads for attachment and electrical connections. Data buses are interleaved with power and ground pads for easy module and sensor attachments without worrying about overlapping traces which are not possible with conductive thread.
DL2204Mk01
1 x FLORA – Version 1.0a
1 x RGB Smart NeoPixel
1 x Half-Size Breadboard
1 x SparkFun Cerberus USB Cable
FLORA – Version 1.0a
NEO – Digital 6
VIN – +5V
GND – GND
DL2204Mk01p.ino
/* ***** Don Luc Electronics © ***** Software Version Information Project #23: E-Textiles - FLORA - Wearable Electronic Platform - Mk02 23-02 DL2204Mk02p.ino 1 x FLORA - Version 1.0a 1 x RGB Smart NeoPixel 1 x Half-Size Breadboard 1 x SparkFun Cerberus USB Cable */ // Include the Library Code // NeoPixels #include <Adafruit_NeoPixel.h> // NeoPixels // On digital pin 6 #define PIN 6 // NeoPixels NUMPIXELS = 1 #define NUMPIXELS 1 // Pixels Adafruit_NeoPixel pixels = Adafruit_NeoPixel(NUMPIXELS, PIN, NEO_GRB + NEO_KHZ800); // Red int red = 0; // Green int green = 0; // Blue int blue = 0; // Neopix int iNeo = 0; // Value int zz = 0; // Software Version Information String sver = "23-02"; void loop() { // FLORA isFLORA(); delay( 2000 ); }
getFLORA.ino
// FLORA // isFLORA void isFLORA() { // FLORA = zz => Neopix if ( zz == 0 ) { isNUMPIXELS(); zz = 1; } else if ( zz == 1 ) { isNUMPIXELS(); zz = 2; } else if ( zz == 2 ) { isNUMPIXELS(); zz = 3; } else if ( zz == 3 ) { isNUMPIXELS(); zz = 4; } else if ( zz == 4 ) { isNUMPIXELS(); zz = 5; } else if ( zz == 5 ) { isNUMPIXELS(); zz = 6; } else if ( zz == 6 ) { isNUMPIXELS(); zz = 0; } }
getNeopix.ino
// NeoPixels // Neopix void isNeopix() { // Pixels pixels.setBrightness( 255 ); // Pixels color takes RGB values, from 0,0,0 up to 255,255,255 pixels.setPixelColor( iNeo, pixels.Color(red,green,blue) ); // This sends the updated pixel color to the hardware pixels.show(); // Delay for a period of time (in milliseconds) delay(50); } // isNUMPIXELS void isNUMPIXELS() { // Neopix Value switch ( zz ) { case 0: // NeoPixels Green // Red red = 0; // Green green = 255; // Blue blue = 0; // Neopix iNeo = 0; isNeopix(); break; case 1: // NeoPixels Blue // Red red = 0; // Green green = 0; // Blue blue = 255; // Neopix iNeo = 0; isNeopix(); break; case 2: // NeoPixels Red // Red red = 255; // Green green = 0; // Blue blue = 0; // Neopix iNeo = 0; isNeopix(); break; case 3: // NeoPixels Yellow // Red red = 255; // Green green = 255; // Blue blue = 0; // Neopix iNeo = 0; isNeopix(); break; case 4: // NeoPixels Magenta // Red red = 255; // Green green = 0; // Blue blue = 255; // Neopix iNeo = 0; isNeopix(); break; case 5: // NeoPixels Cyan // Red red = 0; // Green green = 255; // Blue blue = 255; // Neopix iNeo = 0; isNeopix(); break; case 6: // NeoPixels White // Red red = 255; // Green green = 255; // Blue blue = 255; // Neopix iNeo = 0; isNeopix(); break; } } // isNUMPIXELSoff void isNUMPIXELSoff() { // Black Off // NeoPixels // Red red = 0; // Green green = 0; // Blue blue = 0; isNeopix(); }
setup.ino
// Setup void setup() { // NeoPixels // This initializes the NeoPixel library pixels.begin(); // Delay for a period of time (in milliseconds) delay(50); // isNUMPIXELS Off isNUMPIXELSoff(); }
——
People can contact us: https://www.donluc.com/?page_id=1927
Technology Experience
- Single-Board Microcontrollers (PIC, Arduino, Raspberry Pi,Espressif, etc…)
- IoT
- Robotics
- Camera and Video Capture Receiver Stationary, Wheel/Tank and Underwater Vehicle
- Unmanned Vehicles Terrestrial and Marine
- Research & Development (R & D)
- Desktop Applications (Windows, OSX, Linux, Multi-OS, Multi-Tier, etc…)
- Mobile Applications (Android, iOS, Blackberry, Windows Mobile, Windows CE, etc…)
- Web Applications (LAMP, Scripting, Java, ASP, ASP.NET, RoR, Wakanda, etc…)
- Social Media Programming & Integration (Facebook, Twitter, YouTube, Pinterest, etc…)
- Content Management Systems (WordPress, Drupal, Joomla, Moodle, etc…)
- Bulletin Boards (phpBB, SMF, Vanilla, jobberBase, etc…)
- eCommerce (WooCommerce, OSCommerce, ZenCart, PayPal Shopping Cart, etc…)
Instructor and E-Mentor
- IoT
- PIC Microcontrollers
- Arduino
- Raspberry Pi
- Espressif
- Robotics
- DOS, Windows, OSX, Linux, iOS, Android, Multi-OS
- Linux-Apache-PHP-MySQL
Follow Us
J. Luc Paquin – Curriculum Vitae – 2022 English & Español
https://www.jlpconsultants.com/luc/
Web: https://www.donluc.com/
Web: https://www.jlpconsultants.com/
Facebook: https://www.facebook.com/neosteam.labs.9/
YouTube: https://www.youtube.com/channel/UC5eRjrGn1CqkkGfZy0jxEdA
Twitter: https://twitter.com/labs_steam
Pinterest: https://www.pinterest.com/NeoSteamLabs/
Instagram: https://www.instagram.com/neosteamlabs/
Don Luc
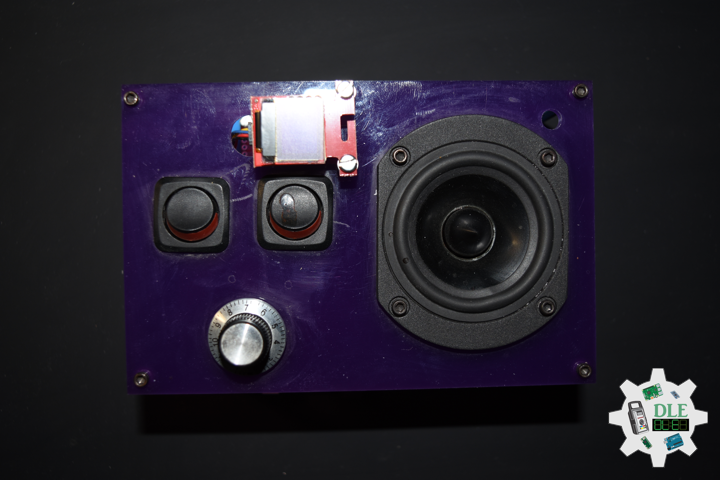
Project #22: Synthesizer – Theremin – Mk02
——
#DonLucElectronics #DonLuc #Synthesizer #Theremin #Arduino #ArduinoProMini #Project #Fritzing #Programming #Electronics #Microcontrollers #Consultant
——
——
——
——
Theremin
The theremin was invented in 1920 by a Russian physicist named Lev Termen. Today, this marvelous instrument is once again in the musical spotlight. Besides looking like no other instrument, the theremin is unique in that it is played without being touched.
Two antennas protrude from the theremin, one controlling pitch, and the other controlling volume. As a hand approaches the vertical antenna, the pitch gets higher. Approaching the horizontal antenna makes the volume softer. Because there is no physical contact with the instrument, playing the theremin in a precise melodic way requires practiced skill and keen attention to pitch. The electric signals from the theremin are amplified and sent to a loudspeaker.
In the late 1920’s, RCA produced approximately 500 theremins, manufactured by General Electric and Westinghouse. Today, it is estimated that only half of these still exist. The spooky sound of the theremin was used in several movie soundtracks during the 1950’s and 1960’s. Electronic music pioneer Robert Moog built theremins long before he built synthesizers. In the 1960’s, he produced such models as the wedge-shaped Vanguard theremin and the shoebox shaped Moog Melodia theremin. It provided background mood music for such sci-fi classics. During the 60’s and 70’s, bands such as Lothar and the Hand People, the Bonzo Doo Dah Dog Band, and Led Zeppelin brought the theremin into the public eye for a short time.
Theremin + Arduino Pro Mini + Ultrasonic Sensor + Mozzi
Arduino Pro Mini does not come with connectors populated so that you can solder in any connector or wire with any orientation you need. This is the ultrasonic distance sensor. This economical sensor provides 2cm to 400cm of non-contact measurement functionality. The ultrasonic range detectors replace the antenna of the traditional Theremin. Control the frequency (pitch) of the output. Operation of the sensor is straightforward. The Arduino sends a digital pulse to the TRIG pin of the sensor causing it to emit a burst of high frequency audio. If an echo is detected the sensor toggles the ECHO pin which is monitored by the Arduino. By measuring the time delay between the outgoing pulse and returning echo we can calculate the distance. As sound takes 29 microseconds to travel one cm, and must travel out and back, we can divide the time to the echo by 5.8 to get the distance in mm. The project uses the Mozzi audio library to generate a sine table for oscillator which is sent to the output.
DL2203Mk01
1 x Arduino Pro Mini 328 – 5V/16MHz
1 x SparkFun FTDI Basic Breakout – 5V
1 x HC-SR04 Ultrasonic Sensor
1 x Audio Jack 3.5mm
1 x SparkFun Audio Jack Breakout
1 x Hamburger Mini Speaker
1 x Full-Size Breadboard
1 x SparkFun Cerberus USB Cable
Arduino Pro Mini 328 – 5V/16MHz – Receiver
Ech – Digital 13
Tri – Digital 12
SPK – Digital 9
VIN – +5V
GND – GND
DL2203Mk01p.ino
/* ***** Don Luc Electronics © ***** Software Version Information Project #22: Synthesizer - Theremin - Mk02 22-02 DL2203Mk01p.ino 1 x Arduino Pro Mini 328 - 5V/16MHz 1 x SparkFun FTDI Basic Breakout - 5V 1 x HC-SR04 Ultrasonic Sensor 1 x Audio Jack 3.5mm 1 x SparkFun Audio Jack Breakout 1 x Hamburger Mini Speaker 1 x Full-Size Breadboard 1 x SparkFun Cerberus USB Cable */ // Include the Library Code // Mozzi #include <MozziGuts.h> // Oscillator template #include <Oscil.h> // Sine table for oscillator #include <tables/sin2048_int8.h> // Rolling Average #include <RollingAverage.h> // Control Delay #include <ControlDelay.h> // Control Rate #define CONTROL_RATE 64 // Echo Cells unsigned int echo_cells_1 = 32; unsigned int echo_cells_2 = 60; unsigned int echo_cells_3 = 127; // Contro lDelay = 2 seconds ControlDelay <128, int> kDelay; // Oscils to compare bumpy to averaged control input Oscil <SIN2048_NUM_CELLS, AUDIO_RATE> aSin0(SIN2048_DATA); Oscil <SIN2048_NUM_CELLS, AUDIO_RATE> aSin1(SIN2048_DATA); Oscil <SIN2048_NUM_CELLS, AUDIO_RATE> aSin2(SIN2048_DATA); Oscil <SIN2048_NUM_CELLS, AUDIO_RATE> aSin3(SIN2048_DATA); // RollingAverage <number_type, how_many_to_average> myThing // How many to average has to be power of 2 RollingAverage <int, 32> kAverage; int averaged; // Trigger pin 12 to pitch distance sensor const int iTrigPitch = 12; // Echo Receive pin 13 to pitch distance sensor const int iEchoPitch = 13; // Stores the distance measured by the distance sensor float distance = 0; // Mini Speaker int SPK = 9; // Set the input for the volume // Volume level from updateControl() to updateAudio() byte vol; // Software Version Information String sver = "22-02"; void loop() { // Audio Hook audioHook(); }
getHC-SR04.ino
// HC-SR04 Ultrasonic Sensor // Setup HC-SR04 void setupHCSR04() { // The trigger iTrig will output pulses of electricity pinMode(iTrigPitch, OUTPUT); // The echo iEcho will measure the duration of pulses coming back from the distance sensor pinMode(iEchoPitch, INPUT); } // Distance float isDistance() { // Variable to store the time it takes for a ping to bounce off an object float echoTime; // Variable to store the distance calculated from the echo time float calculatedDistance; // Send out an ultrasonic pulse that's 10ms long digitalWrite(iTrigPitch, HIGH); delayMicroseconds(10); digitalWrite(iTrigPitch, LOW); // Use the pulseIn command to see how long it takes for the // pulse to bounce back to the sensor echoTime = pulseIn(iEchoPitch, HIGH); // Calculate the distance of the object that reflected the pulse // (half the bounce time multiplied by the speed of sound) // cm = 58.0 calculatedDistance = echoTime / 58.0; // Send back the distance that was calculated return calculatedDistance; }
getMozzi.ino
// Mozzi // Update Control void updateControl(){ // Volume vol = 255; // Variable to store the distance measured by the sensor distance = isDistance(); int bumpy_input = distance; // Averaged averaged = kAverage.next(bumpy_input); aSin0.setFreq(averaged); aSin1.setFreq(kDelay.next(averaged)); aSin2.setFreq(kDelay.read(echo_cells_2)); aSin3.setFreq(kDelay.read(echo_cells_3)); } // Update Audio int updateAudio() { // Update Audio return 3*((int)aSin0.next()+aSin1.next()+(aSin2.next()>>1) +(aSin3.next()>>2)) >>3; }
setup.ino
// Setup void setup() { // Setup HC-SR04 setupHCSR04(); // Echo Cells 1 kDelay.set(echo_cells_1); // Mozzi Start startMozzi(); }
——
People can contact us: https://www.donluc.com/?page_id=1927
Technology Experience
- Single-Board Microcontrollers (PIC, Arduino, Raspberry Pi,Espressif, etc…)
- IoT
- Robotics
- Camera and Video Capture Receiver Stationary, Wheel/Tank and Underwater Vehicle
- Unmanned Vehicles Terrestrial and Marine
- Research & Development (R & D)
- Desktop Applications (Windows, OSX, Linux, Multi-OS, Multi-Tier, etc…)
- Mobile Applications (Android, iOS, Blackberry, Windows Mobile, Windows CE, etc…)
- Web Applications (LAMP, Scripting, Java, ASP, ASP.NET, RoR, Wakanda, etc…)
- Social Media Programming & Integration (Facebook, Twitter, YouTube, Pinterest, etc…)
- Content Management Systems (WordPress, Drupal, Joomla, Moodle, etc…)
- Bulletin Boards (phpBB, SMF, Vanilla, jobberBase, etc…)
- eCommerce (WooCommerce, OSCommerce, ZenCart, PayPal Shopping Cart, etc…)
Instructor and E-Mentor
- IoT
- PIC Microcontrollers
- Arduino
- Raspberry Pi
- Espressif
- Robotics
- DOS, Windows, OSX, Linux, iOS, Android, Multi-OS
- Linux-Apache-PHP-MySQL
Follow Us
J. Luc Paquin – Curriculum Vitae – 2022 English & Español
https://www.jlpconsultants.com/luc/
Web: https://www.donluc.com/
Web: https://www.jlpconsultants.com/
Facebook: https://www.facebook.com/neosteam.labs.9/
YouTube: https://www.youtube.com/channel/UC5eRjrGn1CqkkGfZy0jxEdA
Twitter: https://twitter.com/labs_steam
Pinterest: https://www.pinterest.com/NeoSteamLabs/
Instagram: https://www.instagram.com/neosteamlabs/
Don Luc