The Alpha Geek – Geeking Out

Consultant

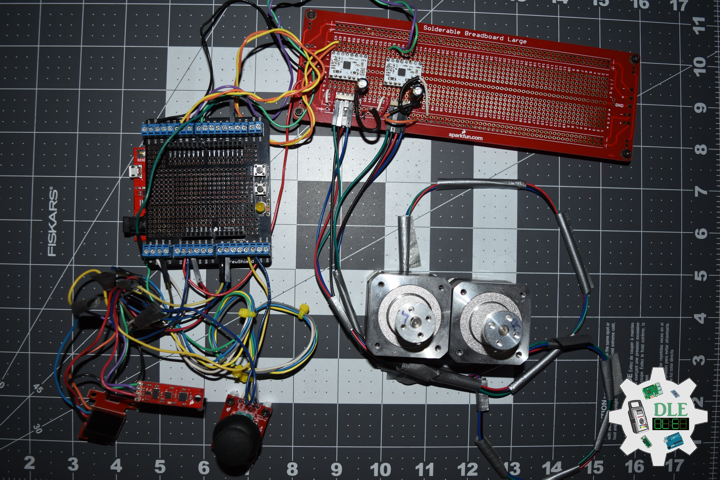
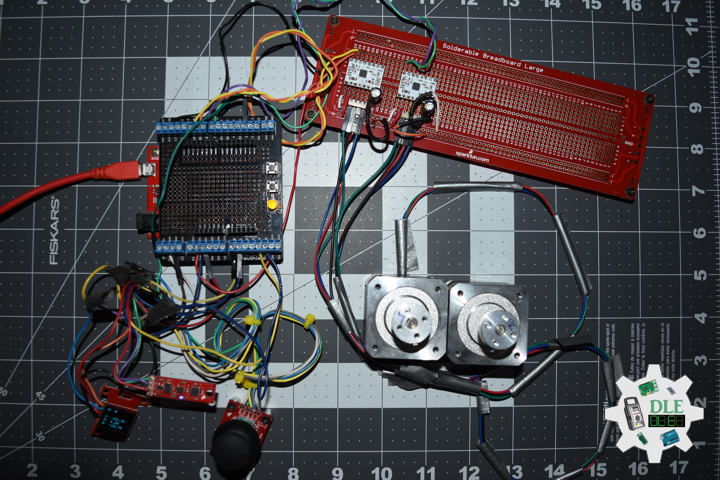
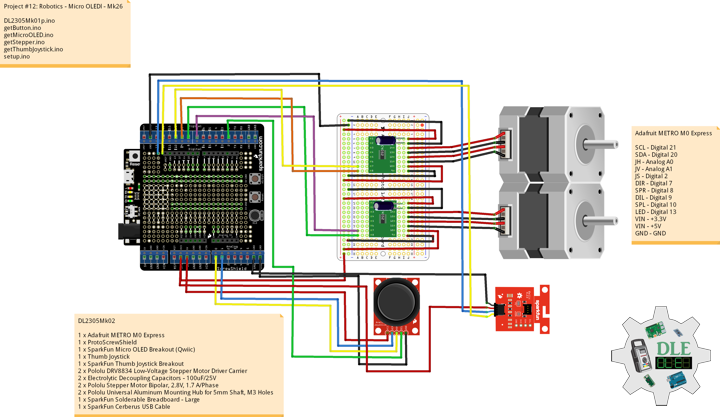
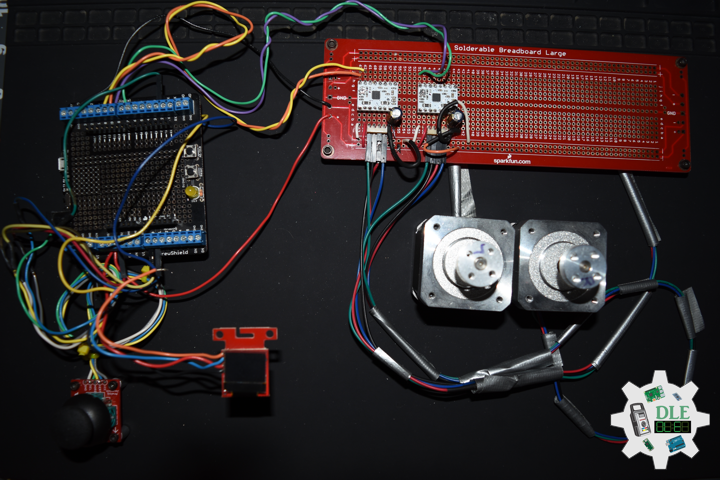
Project #25 – Movement – Gyroscope L3G4200D – Mk03

——

#DonLucElectronics #DonLuc #SparkFunRedBoard #Movement #Gyroscope #Arduino #Project #Fritzing #Programming #Electronics #Microcontrollers #Consultant

——

Gyroscope

——

Gyroscope

——

Gyroscope

——

Gyroscope

A gyroscope is a device used for measuring or maintaining orientation and angular velocity.It is a spinning wheel or disc in which the axis of rotation is free to assume any orientation by itself. When rotating, the orientation of this axis is unaffected by tilting or rotation of the mounting, according to the conservation of angular momentum.

Gyroscopes based on other operating principles also exist, such as the microchip-packaged MEMS gyroscopes found in electronic devices, solid-state ring lasers, fibre optic gyroscopes, and the extremely sensitive quantum gyroscope. MEMS gyroscopes are popular in some consumer electronics, such as smartphones.

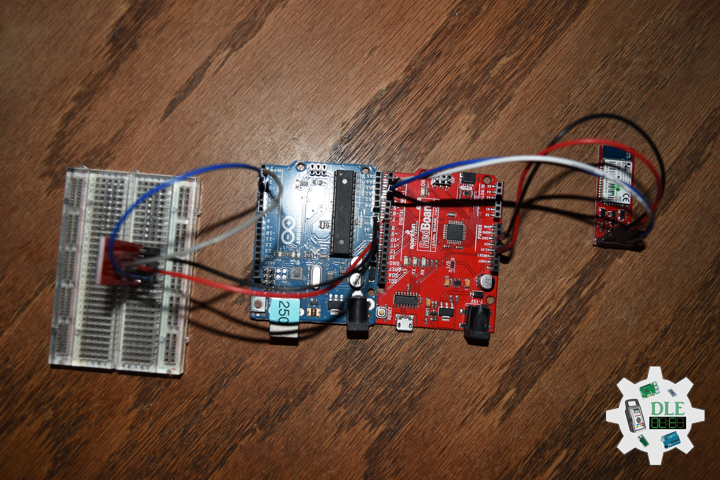
SparkFun Tri-Axis Gyro Breakout – L3G4200D

This is a breakout board for the L3G4200D low-power three-axis angular rate sensor. The L3G4200D is a MEMS motion sensor and has a full scale of ±250 or ±500 or ±2000 dps and is capable of measuring rates with a user selectable bandwidth. These work great in gaming and virtual reality input devices, GPS navigation systems and robotics.

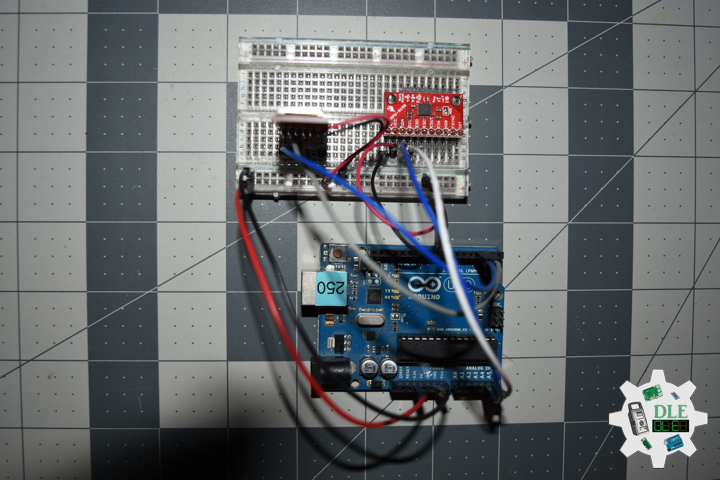
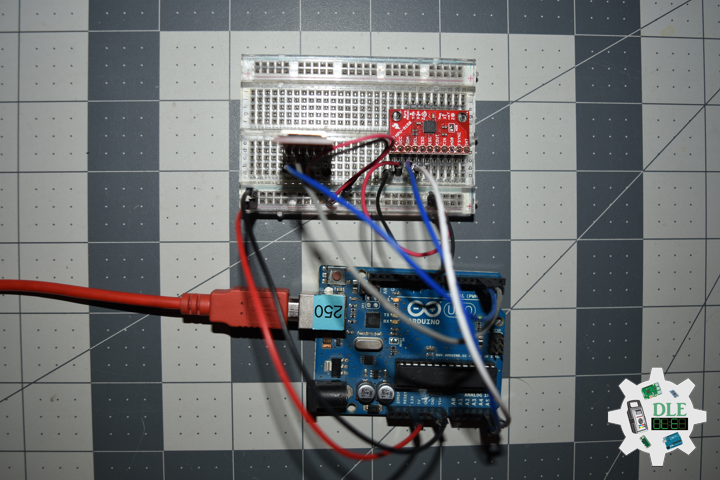
DL2210Mk07

1 x SparkFun RedBoard Qwiic
1 x SparkFun Micro OLED (Qwiic)
1 x Qwiic Cable – 100mm
1 x SparkFun Tri-Axis Gyro Breakout – L3G4200D
1 x SparkFun Cerberus USB Cable

SparkFun RedBoard Qwiic

SDA – Analog A4
SCL – Analog A5
VIN – +3.3V
GND – GND

DL2210Mk07p.ino

/* ***** Don Luc Electronics © *****
Software Version Information
Project #25 - Movement - Gyroscope L3G4200D - Mk03
25-02
DL2210Mk06p.ino
1 x SparkFun RedBoard Qwiic
1 x SparkFun Micro OLED (Qwiic)
1 x Qwiic Cable - 100mm
1 x SparkFun Tri-Axis Gyro Breakout - L3G4200D
1 x SparkFun Cerberus USB Cable
*/

// Include the Library Code
// Two Wire Interface (TWI/I2C)
#include <Wire.h>
// SparkFun Micro OLED
#include <SFE_MicroOLED.h>
// Gyroscope
#include <L3G4200D.h>

// Gyroscope
L3G4200D gyroscope;

// Timers
unsigned long timer = 0;
float timeStep = 0.01;

// Pitch, Roll and Yaw values
float pitch = 0;
float roll = 0;
float yaw = 0;

// SparkFun Micro OLED
#define PIN_RESET 9
#define DC_JUMPER 1
// I2C declaration
MicroOLED oled(PIN_RESET, DC_JUMPER);

// Software Version Information
String sver = "25-03";

void loop() {

  // Gyroscope
  isGyroscope(),
  
  // Micro OLED
  isMicroOLED();

  // Wait to full timeStep period
  delay((timeStep*1000) - (millis() - timer));
  
}

getGyroscope.ino

// L3G4200D Triple Axis Gyroscope
// Setup Gyroscope
void isSetupGyroscope() {

  // Setup Gyroscope
  // Set scale 2000 dps and 400HZ Output data rate (cut-off 50)
  while(!gyroscope.begin(L3G4200D_SCALE_2000DPS, L3G4200D_DATARATE_400HZ_50))
  {
    // Could not find a valid L3G4200D sensor, check wiring!
    delay(500);
    
  }

  // Calibrate gyroscope. The calibration must be at rest.
  // If you don't want calibrate, comment this line.
  gyroscope.calibrate(100);
  
}
// L3G4200D Gyroscope
void isGyroscope(){

  // Timer
  timer = millis();

  // Read normalized values
  Vector norm = gyroscope.readNormalize();

  // Calculate Pitch, Roll and Yaw
  pitch = pitch + norm.YAxis * timeStep;
  roll = roll + norm.XAxis * timeStep;
  yaw = yaw + norm.ZAxis * timeStep;

}

getMicroOLED.ino

// SparkFun Micro OLED
// Setup Micro OLED
void isSetupMicroOLED() {

  // Initialize the OLED
  oled.begin();
  // Clear the display's internal memory
  oled.clear(ALL);
  // Display what's in the buffer (splashscreen)
  oled.display();

  // Delay 1000 ms
  delay(1000);

  // Clear the buffer.
  oled.clear(PAGE);
  
}
// Micro OLED
void isMicroOLED() {

  // Text Display Gyroscope
  // Clear the display
  oled.clear(PAGE);
  // Set cursor to top-left
  oled.setCursor(0, 0);
  // Set font to type 0
  oled.setFontType(0);
  // Gyroscope
  oled.print("Gyro");
  oled.setCursor(0, 12);
  // X
  oled.print("Pit: ");
  oled.print(pitch);
  oled.setCursor(0, 25);
  // Y
  oled.print("Rol: ");
  oled.print(roll);
  oled.setCursor(0, 39);
  // Z
  oled.print("Yaw: ");
  oled.print(yaw);
  oled.display();

}

setup.ino

// Setup
void setup() {

  // Give display time to power on
  delay(100);
  
  // Set up I2C bus
  Wire.begin();

  // Setup Micro OLED
  isSetupMicroOLED();

  // L3G4200D Gyroscope
  isSetupGyroscope();

}

——

People can contact us: https://www.donluc.com/?page_id=1927

Technology Experience

  • Single-Board Microcontrollers (PIC, Arduino, Raspberry Pi,Espressif, etc…)
  • IoT
  • Wireless (Radio Frequency, Bluetooth, WiFi, Etc…)
  • Robotics
  • Camera and Video Capture Receiver Stationary, Wheel/Tank and Underwater Vehicle
  • Unmanned Vehicles Terrestrial and Marine
  • Machine Learning
  • RTOS
  • Research & Development (R & D)

Instructor and E-Mentor

  • IoT
  • PIC Microcontrollers
  • Arduino
  • Raspberry Pi
  • Espressif
  • Robotics

Follow Us

Luc Paquin – Curriculum Vitae – 2022
https://www.donluc.com/luc/

Web: https://www.donluc.com/
Facebook: https://www.facebook.com/neosteam.labs.9/
YouTube: https://www.youtube.com/channel/UC5eRjrGn1CqkkGfZy0jxEdA
Twitter: https://twitter.com/labs_steam
Pinterest: https://www.pinterest.com/NeoSteamLabs/
Instagram: https://www.instagram.com/neosteamlabs/

Don Luc

Project #25 – Movement – Accelerometer ADXL335 – Mk02

——

#DonLucElectronics #DonLuc #SparkFunRedBoard #Movement #Accelerometer #Arduino #Project #Fritzing #Programming #Electronics #Microcontrollers #Consultant

——

Accelerometer ADXL335

——

Accelerometer ADXL335

——

Accelerometer ADXL335

——

Accelerometer

An accelerometer is a tool that measures proper acceleration. Proper acceleration is the acceleration of a body in its own instantaneous rest frame, this is different from coordinate acceleration, which is acceleration in a fixed coordinate system. For example, an accelerometer at rest on the surface of the Earth will measure an acceleration due to Earth’s gravity, straight upwards 9.81 m/s2. By contrast, accelerometers in free fall, falling toward the center of the Earth at a rate of about 9.81 m/s2, will measure zero.

Accelerometers have many uses in industry and science. Highly sensitive accelerometers are used in inertial navigation systems for aircraft and missiles. Vibration in rotating machines is monitored by accelerometers. They are used in tablet computers and digital cameras so that images on screens are always displayed upright. In unmanned aerial vehicles, accelerometers help to stabilise flight. Micromachined microelectromechanical systems accelerometers are increasingly present in portable electronic devices and video-game controllers, to detect changes in the positions of these devices.

SparkFun Triple Axis Accelerometer Breakout – ADXL335

Breakout board for the 3 axis ADXL335 from Analog Devices. This is the latest in a long, proven line of analog sensors, the holy grail of accelerometers. The ADXL335 is a triple axis MEMS accelerometer with extremely low noise and power consumption, only 320uA. The sensor has a full sensing range of +/-3g. There is no on-board regulation, provided power should be between 1.8 and 3.6VDC. Board comes fully assembled and tested with external components installed. The included 0.1uF capacitors set the bandwidth of each axis to 50Hz.

DL2210Mk06

1 x SparkFun RedBoard Qwiic
1 x SparkFun Micro OLED (Qwiic)
1 x Qwiic Cable – 100mm
1 x SparkFun Triple Axis Accelerometer Breakout – ADXL335
1 x SparkFun Cerberus USB Cable

SparkFun RedBoard Qwiic

ACX – Analog A0
ACY – Analog A1
ACZ – Analog A2
SDA – Analog A4
SCL – Analog A5
VIN – +3.3V
GND – GND

——

DL2210Mk06p.ino

/* ***** Don Luc Electronics © *****
Software Version Information
Project #25 - Movement - Accelerometer ADXL335 - Mk02
25-02
DL2210Mk06p.ino
1 x SparkFun RedBoard Qwiic
1 x SparkFun Micro OLED (Qwiic)
1 x Qwiic Cable - 100mm
1 x SparkFun Triple Axis Accelerometer Breakout - ADXL335
1 x SparkFun Cerberus USB Cable
*/

// Include the Library Code
// Two Wire Interface (TWI/I2C)
#include <Wire.h>
// SparkFun Micro OLED
#include <SFE_MicroOLED.h>

// Accelerometer
int iX = A0;
int iY = A1;
int iZ = A2;
// Accelerometer
int X = 0;
int Y = 0;
int Z = 0;

// SparkFun Micro OLED
#define PIN_RESET 9
#define DC_JUMPER 1
// I2C declaration
MicroOLED oled(PIN_RESET, DC_JUMPER);

// Software Version Information
String sver = "25-02";

void loop() {

  // Accelerometer
  isAccelerometer(),
  
  // Micro OLED
  isMicroOLED();

  // One delay in between reads
  delay(1000);
  
}

getAccelerometer.ino

// Accelerometer
// Accelerometer
void isAccelerometer(){

  // Accelerometer X, Y, Z
  // X
  X = analogRead(iX);
  // Y
  Y = analogRead(iY);
  // Z
  Z = analogRead(iZ);

}

getMicroOLED.ino

// SparkFun Micro OLED
// Setup Micro OLED
void isSetupMicroOLED() {

  // Initialize the OLED
  oled.begin();
  // Clear the display's internal memory
  oled.clear(ALL);
  // Display what's in the buffer (splashscreen)
  oled.display();

  // Delay 1000 ms
  delay(1000);

  // Clear the buffer.
  oled.clear(PAGE);
  
}
// Micro OLED
void isMicroOLED() {

  // Text Display Accelerometer
  // Clear the display
  oled.clear(PAGE);
  // Set cursor to top-left
  oled.setCursor(0, 0);
  // Set font to type 0
  oled.setFontType(0);
  // Magnetometer
  oled.print("Accel");
  oled.setCursor(0, 12);
  // X
  oled.print("X: ");
  oled.print(X);
  oled.setCursor(0, 25);
  // Y
  oled.print("Y: ");
  oled.print(Y);
  oled.setCursor(0, 39);
  // Z
  oled.print("Z: ");
  oled.print(Z);
  oled.display();

}

setup.ino

// Setup
void setup() {

  // Give display time to power on
  delay(100);
  
  // Set up I2C bus
  Wire.begin();

  // Setup Micro OLED
  isSetupMicroOLED();
  
}

——

People can contact us: https://www.donluc.com/?page_id=1927

Technology Experience

  • Single-Board Microcontrollers (PIC, Arduino, Raspberry Pi,Espressif, etc…)
  • IoT
  • Wireless (Radio Frequency, Bluetooth, WiFi, Etc…)
  • Robotics
  • Camera and Video Capture Receiver Stationary, Wheel/Tank and Underwater Vehicle
  • Unmanned Vehicles Terrestrial and Marine
  • Machine Learning
  • RTOS
  • Research & Development (R & D)

Instructor and E-Mentor

  • IoT
  • PIC Microcontrollers
  • Arduino
  • Raspberry Pi
  • Espressif
  • Robotics

Follow Us

Luc Paquin – Curriculum Vitae – 2022
https://www.donluc.com/luc/

Web: https://www.donluc.com/
Facebook: https://www.facebook.com/neosteam.labs.9/
YouTube: https://www.youtube.com/channel/UC5eRjrGn1CqkkGfZy0jxEdA
Twitter: https://twitter.com/labs_steam
Pinterest: https://www.pinterest.com/NeoSteamLabs/
Instagram: https://www.instagram.com/neosteamlabs/

Don Luc
Project #25 – Movement – Sensors – Mk01

——

#DonLucElectronics #DonLuc #SparkFunRedBoard #Movement #Magnetometer #Arduino #Project #Fritzing #Programming #Electronics #Microcontrollers #Consultant

——

Sensors

——

Sensors

——

Sensors

——

Movement

Accelerometers, gyroscopes, and magnetometers are the three main sensors we use for detecting motion and orientation. We can sense motion with an accelerometer.

Accelerometers are used to measure acceleration, that means linear motion in X, Y or Z. They can be used to detect when they are being moved around, detect motion, shock or vibration. They can also be used to detect gravitational pull in order to detect orientation or tilt.

Gyroscopes are used to measure rotational motion in X, Y or Z. They are often paired with accelerometers for inertial guidance systems, 3D motion capture and inverted pendulum type applications.

Magnetometers can sense where the strongest magnetic force is coming from, generally used to detect magnetic north, but can also be used for measuring magnetic fields. When combined with accelerometers and gyroscopes you can stabilize orientation calculations and also determine orientation with respect to the Earth.

Many 6-DoF sensors, which combine accelerometer and gyroscope or compass, accelerometer and magnetometer, and 9-DoF sensors that have 9DoF IMU accelerometers and gyroscopes and magnetometers.

DL2210Mk05

1 x SparkFun RedBoard Qwiic
1 x SparkFun Micro OLED (Qwiic)
1 x Qwiic Cable – 100mm
1 x SparkFun Triple Axis Magnetometer Breakout – HMC5883L
1 x SparkFun Cerberus USB Cable

SparkFun RedBoard Qwiic

SDA – Analog A4
SCL – Analog A5
VIN – +3.3V
GND – GND

DL2210Mk05p.ino

/* ***** Don Luc Electronics © *****
Software Version Information
Project #25 - Movement - Sensors - Mk01
25-01
DL2210Mk05p.ino
1 x SparkFun RedBoard Qwiic
1 x SparkFun Micro OLED (Qwiic)
1 x Qwiic Cable - 100mm
1 x SparkFun Triple Axis Magnetometer Breakout - HMC5883L
1 x SparkFun Cerberus USB Cable
*/

// Include the Library Code
// Two Wire Interface (TWI/I2C)
#include <Wire.h>
// Triple Axis Magnetometer
#include <HMC5883L.h>
// SparkFun Micro OLED
#include <SFE_MicroOLED.h>

// Triple Axis Magnetometer
HMC5883L compass;

// SparkFun Micro OLED
#define PIN_RESET 9
#define DC_JUMPER 1
// I2C declaration
MicroOLED oled(PIN_RESET, DC_JUMPER);

// Triple Axis Magnetometer
int X = 0;
int Y = 0;
int Z = 0;

// Software Version Information
String sver = "25-01";

void loop() {

  // Triple Axis Magnetometer
  isMagnetometer(),
  
  // Micro OLED
  isMicroOLED();

  // One delay in between reads
  delay(1000);
  
}

getMagnetometer.ino

// Magnetometer
// Setup Magnetometer
void isSetupMagnetometer(){

  // Magnetometer Serial
  // Initialize HMC5883L
  while (!compass.begin())
  {
    delay(500);
  }

  // Set measurement range
  // +/- 1.30 Ga: HMC5883L_RANGE_1_3GA (default)
  compass.setRange(HMC5883L_RANGE_1_3GA);

  // Set measurement mode
  // Continuous-Measurement: HMC5883L_CONTINOUS (default)
  compass.setMeasurementMode(HMC5883L_CONTINOUS);
 
  // Set data rate
  // 15.00Hz: HMC5883L_DATARATE_15HZ (default)
  compass.setDataRate(HMC5883L_DATARATE_15HZ);

  // Set number of samples averaged
  // 1 sample:  HMC5883L_SAMPLES_1 (default)
  compass.setSamples(HMC5883L_SAMPLES_1);
  
}
// Magnetometer
void isMagnetometer(){

  // Vector Norm
  Vector norm = compass.readNormalize();
  // Vector X, Y, Z
  // X Normalize
  X = norm.XAxis;
  // Y Normalize
  Y = norm.YAxis;
  // Z Normalize
  Z = norm.ZAxis;

}

getMicroOLED.ino

// SparkFun Micro OLED
// Setup Micro OLED
void isSetupMicroOLED() {

  // Initialize the OLED
  oled.begin();
  // Clear the display's internal memory
  oled.clear(ALL);
  // Display what's in the buffer (splashscreen)
  oled.display();

  // Delay 1000 ms
  delay(1000);

  // Clear the buffer.
  oled.clear(PAGE);
  
}
// Micro OLED
void isMicroOLED() {

  // Text Display Magnetometer
  // Clear the display
  oled.clear(PAGE);
  // Set cursor to top-left
  oled.setCursor(0, 0);
  // Set font to type 0
  oled.setFontType(0);
  // Magnetometer
  oled.print("Magneto");
  oled.setCursor(0, 12);
  // X Normalize
  oled.print("X: ");
  oled.print(X);
  oled.setCursor(0, 25);
  // Y Normalize
  oled.print("Y: ");
  oled.print(Y);
  oled.setCursor(0, 39);
  // Z Normalize
  oled.print("Z: ");
  oled.print(Z);
  oled.display();

}

setup.ino

// Setup
void setup() {

  // Give display time to power on
  delay(100);
  
  // Set up I2C bus
  Wire.begin();

  // Setup Triple Axis Magnetometer
  isSetupMagnetometer();

  // Setup Micro OLED
  isSetupMicroOLED();
  
}

——

People can contact us: https://www.donluc.com/?page_id=1927

Technology Experience

  • Single-Board Microcontrollers (PIC, Arduino, Raspberry Pi,Espressif, etc…)
  • IoT
  • Wireless (Radio Frequency, Bluetooth, WiFi, Etc…)
  • Robotics
  • Camera and Video Capture Receiver Stationary, Wheel/Tank and Underwater Vehicle
  • Unmanned Vehicles Terrestrial and Marine
  • Machine Learning
  • RTOS
  • Research & Development (R & D)

Instructor and E-Mentor

  • IoT
  • PIC Microcontrollers
  • Arduino
  • Raspberry Pi
  • Espressif
  • Robotics

Follow Us

J. Luc Paquin – Curriculum Vitae – 2022 English & Español
https://www.jlpconsultants.com/luc/

Web: https://www.donluc.com/
Web: https://www.jlpconsultants.com/
Facebook: https://www.facebook.com/neosteam.labs.9/
YouTube: https://www.youtube.com/channel/UC5eRjrGn1CqkkGfZy0jxEdA
Twitter: https://twitter.com/labs_steam
Pinterest: https://www.pinterest.com/NeoSteamLabs/
Instagram: https://www.instagram.com/neosteamlabs/

Don Luc
Project #24 – RTOS – Bluetooth – Mk03

——

#DonLucElectronics #DonLuc #ESP32 #RTOS #FreeRTOS #Bluetooth #ThumbJoystick #Keyboard #Arduino #Project #Fritzing #Programming #Electronics #Microcontrollers #Consultant

——

Bluetooth

——

Bluetooth

——

Bluetooth

——

Joystick

A joystick is an input device consisting of a stick that pivots on a base and reports its angle or direction to the device it is controlling. Joysticks are often used to control video games, and usually have one or more push-buttons whose state can also be read by the computer. A popular variation of the joystick used on modern video game consoles is the analog stick. Joysticks are also used for controlling machines such as cranes, trucks, underwater unmanned vehicles, wheelchairs, surveillance cameras, and zero turning radius lawn mowers. This is a joystick very similar to the analog joysticks on PS2 controllers. Directional movements are simply two potentiometers, one for each axis. Pots are 10k Ohm each. This joystick also has a select button that is actuated when the joystick is pressed down.

DL2210Mk04

1 x Adafruit HUZZAH32 – ESP32 Feather
1 x Lithium Ion Battery – 2500mAh
1 x Thumb Joystick
1 x SparkFun Thumb Joystick Breakout
1 x SparkFun Cerberus USB Cable

ESP32 Feather

JY0 – Analog A0
JY1 – Analog A5
SE0 – Digital 12
LED – Digital 13
VIN – +3.3V
GND – GND

——

DL2210Mk04p.ino

/* ***** Don Luc Electronics © *****
Software Version Information
Project #24 - RTOS - Bluetooth - Mk03
24-03
DL2210Mk04p.ino
1 x Adafruit HUZZAH32 – ESP32 Feather
1 x Lithium Ion Battery - 2500mAh
1 x Thumb Joystick
1 x SparkFun Thumb Joystick Breakout
1 x SparkFun Cerberus USB Cable
*/

// Include the Library Code
// FreeRTOS ESP32
#if CONFIG_FREERTOS_UNICORE
#define ARDUINO_RUNNING_CORE 0
#else
#define ARDUINO_RUNNING_CORE 1
#endif
// ESP32 BLE Keyboard
#include <BleKeyboard.h>

// ESP32 BLE Keyboard
BleKeyboard bleKeyboard;

// Connections to joystick
// Vertical
const int VERT = A0;
// Horizontal
const int HORIZ = A5;
// Pushbutton
const int SEL = 12;
// Initialize variables for analog and digital values
int vertical;
int horizontal;
int selec;

// Led Built In
#ifndef LED_BUILTIN
#define LED_BUILTIN 13
#endif

// Define two tasks for Blink
void isTaskBlink( void *pvParameters );

// Software Version Information
String sver = "24-03";

void loop() {

  // ESP32 BLE Keyboard
  if(bleKeyboard.isConnected()) {

    // Thumb Joystick
    isThumbJoystick();

  }

  // Delay
  delay( 1000 );
  
}

getTasks.ino

// Tasks
// Setup Task
void isSetupTask(){

  // Now set up two tasks to run independently
  // TaskBlink
  xTaskCreatePinnedToCore(
    isTaskBlink
    ,  "TaskBlink"   // A name just for humans
    ,  1024  // This stack size can be checked & adjusted by reading.
    ,  NULL
    ,  2  // Priority, with 2 being the highest, and 0 being the lowest.
    ,  NULL 
    ,  ARDUINO_RUNNING_CORE);

  // Now the task scheduler, which takes over control of scheduling individual tasks,
  // is automatically started.
  
}
// This is a Task Blink
void isTaskBlink(void *pvParameters)
{
  
  (void) pvParameters;

  // Blink
  // Turns on an LED on for 2 second, then off for 2 second, repeatedly

  // Initialize digital LED_BUILTIN on pin 13 as an output.
  pinMode(LED_BUILTIN, OUTPUT);

  // A Task shall never return or exit
  for (;;) 
  {
    
    // Turn the LED on (HIGH is the voltage level)
    digitalWrite(LED_BUILTIN, HIGH);
    // One tick delay in between reads
    vTaskDelay(2000);
    // Turn the LED off by making the voltage LOW
    digitalWrite(LED_BUILTIN, LOW);
    // One tick delay in between reads
    vTaskDelay(2000);
    
  }
  
}

getThumbJoystick.ino

// Thumb Joystick
void isThumbJoystick() {

  // Read all values from the joystick
  // Joystick was sitting around 2047 for the vertical and horizontal values
  // Will be 0-4095
  // Vertical
  vertical = analogRead(VERT);
  if (vertical == 4095) {

    // Volume Up
    bleKeyboard.write(KEY_MEDIA_VOLUME_UP);
    
  } else if (vertical == 0) {

    // Volume Down
    bleKeyboard.write(KEY_MEDIA_VOLUME_DOWN);
    
  }
  // Horizontal
  // Will be 0-4095
  horizontal = analogRead(HORIZ);
  if (horizontal == 4095) {

    // Previous Track
    bleKeyboard.write(KEY_MEDIA_PREVIOUS_TRACK);
    
  } else if (horizontal == 0) {

    // Next Track
    bleKeyboard.write(KEY_MEDIA_NEXT_TRACK);
    
  }
  // Will be HIGH (1) if not pressed, and LOW (0) if pressed
  selec = digitalRead(SEL);
  if (selec == 0) {

    // Play/Pause media key
    bleKeyboard.write(KEY_MEDIA_PLAY_PAUSE);
    
  }

}

setup.ino

// Setup
void setup() {

  // Make the SEL line an input
  pinMode(SEL, INPUT_PULLUP);

  // ESP32 BLE Keyboard
  bleKeyboard.begin();

  // Setup Task
  isSetupTask();
  
}

——

People can contact us: https://www.donluc.com/?page_id=1927

Technology Experience

  • Single-Board Microcontrollers (PIC, Arduino, Raspberry Pi,Espressif, etc…)
  • IoT
  • Wireless (Radio Frequency, Bluetooth, WiFi, Etc…)
  • Robotics
  • Camera and Video Capture Receiver Stationary, Wheel/Tank and Underwater Vehicle
  • Unmanned Vehicles Terrestrial and Marine
  • Machine Learning
  • RTOS
  • Research & Development (R & D)

Instructor and E-Mentor

  • IoT
  • PIC Microcontrollers
  • Arduino
  • Raspberry Pi
  • Espressif
  • Robotics

Follow Us

J. Luc Paquin – Curriculum Vitae – 2022 English & Español
https://www.jlpconsultants.com/luc/

Web: https://www.donluc.com/
Web: https://www.jlpconsultants.com/
Facebook: https://www.facebook.com/neosteam.labs.9/
YouTube: https://www.youtube.com/channel/UC5eRjrGn1CqkkGfZy0jxEdA
Twitter: https://twitter.com/labs_steam
Pinterest: https://www.pinterest.com/NeoSteamLabs/
Instagram: https://www.instagram.com/neosteamlabs/

Don Luc
Project #24 – RTOS – Magnetometers HMC5883L – Mk02

——

#DonLucElectronics #DonLuc #SparkFunRedBoard #RTOS #FreeRTOS #Magnetometer #Arduino #Project #Fritzing #Programming #Electronics #Microcontrollers #Consultant

——

Magnetometers HMC5883L

——

Magnetometers HMC5883L

——

Magnetometers HMC5883L

——

SparkFun Triple Axis Magnetometer Breakout – HMC5883L

This is a breakout board for Honeywell’s HMC5883L, a 3-axis digital compass. Communication with the HMC5883L is simple and all done through an I2C interface. There is no on-board regulator, so a regulated voltage of 2.16-3.6VDC should be supplied. The breakout board includes the HMC5883L sensor and all filtering capacitors as shown. The power and 2-wire interface pins are all broken out to a 0.1″ pitch header.

Magnetometers have a wide range of uses. The most common include using the chip as a digital compass to sense direction or using them to detect ferrous (magnetic) metals. Magnetic fields and current go hand-in-hand. When current flows through a wire, a magnetic field is created. This is the basic principle behind electromagnets. This is also the principle used to measure magnetic fields with a magnetometer. The direction of Earth’s magnetic fields affects the flow of electrons in the sensor, and those changes in current can be measured and calculated to derive a compass heading or other useful information.

DL2210Mk03

1 x SparkFun RedBoard Qwiic
1 x SparkFun Triple Axis Magnetometer Breakout – HMC5883L
1 x SparkFun Cerberus USB Cable

SparkFun RedBoard Qwiic

SDA – Analog A4
SCL – Analog A5
VIN – +3.3V
GND – GND

DL2210Mk03p.ino

/* ***** Don Luc Electronics © *****
Software Version Information
Project #24 - RTOS - Magnetometer - Mk02
24-02
DL2210Mk03p.ino
1 x SparkFun RedBoard Qwiic
1 x SparkFun Triple Axis Magnetometer Breakout - HMC5883L
1 x SparkFun Cerberus USB Cable
*/

// Include the Library Code
// FreeRTOS
#include <Arduino_FreeRTOS.h>
// Two Wire Interface (TWI/I2C)
#include <Wire.h>
// Triple Axis Magnetometer
#include <HMC5883L.h>

// Define two tasks for Triple Axis Magnetometer
void isTaskMagnetometer( void *pvParameters );

// Software Version Information
String sver = "24-02";

void loop() {

  // Empty. Things are done in Tasks.
  
}

getTasks.ino

// Tasks
// Setup Task
void isSetupTask(){

  // Now set up one tasks to run independently
  // Magnetometer
  //xTaskCreatePinnedToCore(
  xTaskCreate(
    isTaskMagnetometer
    ,  "Magnetometer"
    ,  128  // Stack size
    ,  NULL
    ,  1  // Priority
    ,  NULL);

  // Now the task scheduler, which takes over control of scheduling individual tasks,
  // is automatically started.
  
}
// This is a Task Magnetometer Serial
void isTaskMagnetometer(void *pvParameters)
{
  
  (void) pvParameters;
  
  // Triple Axis Magnetometer
  HMC5883L compass;

  // Magnetometer Serial
  // Initialize HMC5883L
  Serial.println("Initialize HMC5883L");
  while (!compass.begin())
  {
    Serial.println("Could not find a valid HMC5883L sensor, check wiring!");
    delay(500);
  }

  // Set measurement range
  // +/- 1.30 Ga: HMC5883L_RANGE_1_3GA (default)
  compass.setRange(HMC5883L_RANGE_1_3GA);

  // Set measurement mode
  // Continuous-Measurement: HMC5883L_CONTINOUS (default)
  compass.setMeasurementMode(HMC5883L_CONTINOUS);
 
  // Set data rate
  // 15.00Hz: HMC5883L_DATARATE_15HZ (default)
  compass.setDataRate(HMC5883L_DATARATE_15HZ);

  // Set number of samples averaged
  // 1 sample:  HMC5883L_SAMPLES_1 (default)
  compass.setSamples(HMC5883L_SAMPLES_1);

  for (;;)
  {
    
    // Vector Norm
    Vector norm = compass.readNormalize();
    // Vector X, Y, Z
    Serial.print("Xnorm = ");
    Serial.print(norm.XAxis);
    Serial.print(" Ynorm = ");
    Serial.print(norm.YAxis);
    Serial.print(" ZNorm = ");
    Serial.print(norm.ZAxis);
    Serial.println();  
    // One tick delay in between reads
    vTaskDelay(500);
    
  }
  
}

setup.ino

// Setup
void setup() {

  // Initialize serial communication
  // at 9600 bits per second:
  Serial.begin(9600);

  // Setup Task
  isSetupTask();
  
}

——

People can contact us: https://www.donluc.com/?page_id=1927

Technology Experience

  • Single-Board Microcontrollers (PIC, Arduino, Raspberry Pi,Espressif, etc…)
  • IoT
  • Robotics
  • Camera and Video Capture Receiver Stationary, Wheel/Tank and Underwater Vehicle
  • Unmanned Vehicles Terrestrial and Marine
  • Research & Development (R & D)

Instructor and E-Mentor

  • IoT
  • PIC Microcontrollers
  • Arduino
  • Raspberry Pi
  • Espressif
  • Robotics

Follow Us

J. Luc Paquin – Curriculum Vitae – 2022 English & Español
https://www.jlpconsultants.com/luc/

Web: https://www.donluc.com/
Web: https://www.jlpconsultants.com/
Facebook: https://www.facebook.com/neosteam.labs.9/
YouTube: https://www.youtube.com/channel/UC5eRjrGn1CqkkGfZy0jxEdA
Twitter: https://twitter.com/labs_steam
Pinterest: https://www.pinterest.com/NeoSteamLabs/
Instagram: https://www.instagram.com/neosteamlabs/

Don Luc
Project #24 – RTOS – FreeRTOS – Mk01

——

#DonLucElectronics #DonLuc #ESP32 #RTOS #FreeRTOS #Arduino #Project #Fritzing #Programming #Electronics #Microcontrollers #Consultant

——

FreeRTOS

——

FreeRTOS

——

FreeRTOS

——

Real-Time Operating System

A real-time operating system (RTOS) is an operating system for real-time applications that processes data and events that have critically defined time constraints. A RTOS is distinct from a time-sharing operating system, such as Unix, which manages the sharing of system resources with a scheduler, data buffers, or fixed task prioritization in a multitasking or multiprogramming environment. Processing time requirements need to be fully understood and bound rather than just kept as a minimum. All processing must occur within the defined constraints. Real-time operating systems are event-driven and preemptive, meaning the OS is capable of monitoring the relevant priority of competing tasks, and make changes to the task priority. Event-driven systems switch between tasks based on their priorities, while time-sharing systems switch the task based on clock interrupts.

FreeRTOS

FreeRTOS is a real-time operating system kernel for embedded devices that has been ported to 35 microcontroller platforms. It is distributed under the MIT License. FreeRTOS is designed to be small and simple. It is mostly written in the C programming language to make it easy to port and maintain. It also comprises a few assembly language functions where needed, mostly in architecture-specific scheduler routines.

FreeRTOS is ideally suited to deeply embedded real-time applications that use microcontrollers or small microprocessors. This type of application normally includes a mix of both hard and soft real-time requirements. Soft real-time requirements are those that state a time deadline, but breaching the deadline would not render the system useless. For example, responding to keystrokes too slowly might make a system seem annoyingly unresponsive without actually making it unusable.

DL2210Mk02

1 x Adafruit HUZZAH32 – ESP32 Feather
1 x 100K Potentiometer
1 x Knob
1 x SparkFun Cerberus USB Cable

ESP32 Feather

PO0 – Analog A0
LED – Digital 13
VIN – +3.3V
GND – GND

DL2210Mk02p.ino

/* ***** Don Luc Electronics © *****
Software Version Information
Project #24 - RTOS - FreeRTOS - Mk01
24-01
DL2210Mk02p.ino
1 x Adafruit HUZZAH32 – ESP32 Feather
1 x 100K Potentiometer
1 x Knob
1 x SparkFun Cerberus USB Cable
*/

// Include the Library Code
// FreeRTOS ESP32
#if CONFIG_FREERTOS_UNICORE
#define ARDUINO_RUNNING_CORE 0
#else
#define ARDUINO_RUNNING_CORE 1
#endif

// Led Built In
#ifndef LED_BUILTIN
#define LED_BUILTIN 13
#endif

// Define two tasks for Blink & AnalogRead
void isTaskBlink( void *pvParameters );
void isTaskAnalogReadA0( void *pvParameters );

// Software Version Information
String sver = "24-01";

void loop() {

  // Empty
  // Things are done in Tasks
  
}

getTasks.ino

// Tasks
// This is a Task Blink
void isTaskBlink(void *pvParameters)
{
  
  (void) pvParameters;

  // Blink
  // Turns on an LED on for 2 second, then off for 2 second, repeatedly

  // Initialize digital LED_BUILTIN on pin 13 as an output.
  pinMode(LED_BUILTIN, OUTPUT);

  // A Task shall never return or exit
  for (;;) 
  {
    
    // Turn the LED on (HIGH is the voltage level)
    digitalWrite(LED_BUILTIN, HIGH);
    // One tick delay in between reads
    vTaskDelay(2000);
    // Turn the LED off by making the voltage LOW
    digitalWrite(LED_BUILTIN, LOW);
    // One tick delay in between reads
    vTaskDelay(2000);
    
  }
  
}
// This is a Task Analog Read Serial
void isTaskAnalogReadA0(void *pvParameters)
{
  
  (void) pvParameters;
  
  // Analog Read Serial
  // Reads an analog input on pin A0, prints the result to the serial monitor

  for (;;)
  {
    
    // Read the input on analog pin A0
    int sensorValueA0 = analogRead(A0);
    // Print out the value you read
    Serial.print( "Pot A0: " );
    Serial.println(sensorValueA0);
    // One tick delay (15ms) in between reads for stability
    vTaskDelay(100);
    
  }
  
}

setup.ino

// Setup
void setup() {

  // Initialize serial communication
  // at 115200 bits per second
  Serial.begin(115200);
  
  // Now set up two tasks to run independently
  // TaskBlink
  xTaskCreatePinnedToCore(
    isTaskBlink
    ,  "TaskBlink"   // A name just for humans
    ,  1024  // This stack size can be checked & adjusted by reading.
    ,  NULL
    ,  2  // Priority, with 2 being the highest, and 0 being the lowest.
    ,  NULL 
    ,  ARDUINO_RUNNING_CORE);
  
  // AnalogReadA0
  xTaskCreatePinnedToCore(
    isTaskAnalogReadA0
    ,  "AnalogReadA0"
    ,  1024  // Stack size
    ,  NULL
    ,  1  // Priority
    ,  NULL 
    ,  ARDUINO_RUNNING_CORE);

  // Now the task scheduler, which takes over control of scheduling individual tasks,
  // is automatically started.
  
}

——

People can contact us: https://www.donluc.com/?page_id=1927

Technology Experience

  • Single-Board Microcontrollers (PIC, Arduino, Raspberry Pi,Espressif, etc…)
  • IoT
  • Robotics
  • Camera and Video Capture Receiver Stationary, Wheel/Tank and Underwater Vehicle
  • Unmanned Vehicles Terrestrial and Marine
  • Research & Development (R & D)

Instructor and E-Mentor

  • IoT
  • PIC Microcontrollers
  • Arduino
  • Raspberry Pi
  • Espressif
  • Robotics

Follow Us

J. Luc Paquin – Curriculum Vitae – 2022 English & Español
https://www.jlpconsultants.com/luc/

Web: https://www.donluc.com/
Web: https://www.jlpconsultants.com/
Facebook: https://www.facebook.com/neosteam.labs.9/
YouTube: https://www.youtube.com/channel/UC5eRjrGn1CqkkGfZy0jxEdA
Twitter: https://twitter.com/labs_steam
Pinterest: https://www.pinterest.com/NeoSteamLabs/
Instagram: https://www.instagram.com/neosteamlabs/

Don Luc
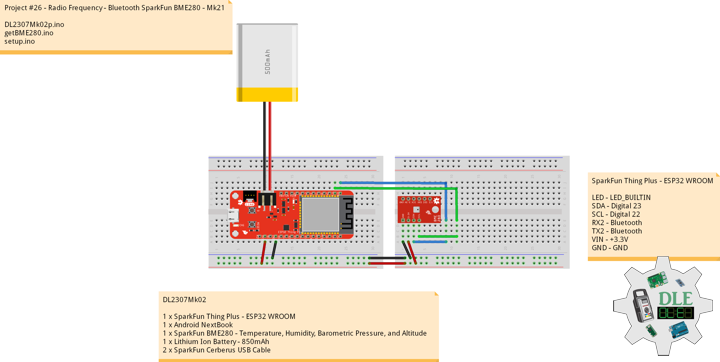
Project #16: Sound – Bluetooth – Mk21

——

#DonLucElectronics #DonLuc #ESP32 #Bluetooth #ThumbJoystick #Keyboard #Arduino #Project #Fritzing #Programming #Electronics #Microcontrollers #Consultant

——

Bluetooth

——

Bluetooth

——

Bluetooth

——

Bluetooth

Bluetooth is a short-range wireless technology standard that is used for exchanging data between fixed and mobile devices over short distances and building personal area networks. It employs UHF radio waves in the ISM bands, from 2.402 GHz to 2.48 GHz. It is mainly used as an alternative to wire connections, to exchange files between nearby portable devices, computer and connect cell phones and music players with wireless headphones. In the most widely used mode, transmission power is limited to 2.5 milliwatts, giving it a very short range of up to 10 metres.

DL2210Mk01

1 x Adafruit HUZZAH32 – ESP32 Feather
1 x Lithium Ion Battery – 2500mAh
1 x Thumb Joystick
1 x SparkFun Thumb Joystick Breakout
1 x SparkFun Cerberus USB Cable

ESP32 Feather

JY0 – Analog A0
JY1 – Analog A5
SE0 – Digital 13
VIN – +3.3V
GND – GND

——

DL2210Mk01p.ino

/* ***** Don Luc Electronics © *****
Software Version Information
Project #16: Sound - Bluetooth - Mk21
16-21
DL2210Mk01p.ino
1 x Adafruit HUZZAH32 – ESP32 Feather
1 x Lithium Ion Battery - 2500mAh
1 x Thumb Joystick
1 x SparkFun Thumb Joystick Breakout
1 x SparkFun Cerberus USB Cable
*/

// Include the Library Code
// ESP32 BLE Keyboard
#include <BleKeyboard.h>

// ESP32 BLE Keyboard
BleKeyboard bleKeyboard;

// Connections to joystick
// Vertical
const int VERT = A0;
// Horizontal
const int HORIZ = A5;
// Pushbutton
const int SEL = 13;
// Initialize variables for analog and digital values
int vertical;
int horizontal;
int selec;

// Software Version Information
String sver = "16-21";

void loop() {

  // ESP32 BLE Keyboard
  if(bleKeyboard.isConnected()) {

    // Thumb Joystick
    isThumbJoystick();

  }

  // Delay
  delay( 1000 );
  
}

getThumbJoystick.ino

// Thumb Joystick
void isThumbJoystick() {

  // Read all values from the joystick
  // Joystick was sitting around 2047 for the vertical and horizontal values
  // Will be 0-4095
  // Vertical
  vertical = analogRead(VERT);
  if (vertical == 4095) {

    // Volume Up
    bleKeyboard.write(KEY_MEDIA_VOLUME_UP);
    
  } else if (vertical == 0) {

    // Volume Down
    bleKeyboard.write(KEY_MEDIA_VOLUME_DOWN);
    
  }
  // Horizontal
  // Will be 0-4095
  horizontal = analogRead(HORIZ);
  if (horizontal == 4095) {

    // Previous Track
    bleKeyboard.write(KEY_MEDIA_PREVIOUS_TRACK);
    
  } else if (horizontal == 0) {

    // Next Track
    bleKeyboard.write(KEY_MEDIA_NEXT_TRACK);
    
  }
  // Will be HIGH (1) if not pressed, and LOW (0) if pressed
  selec = digitalRead(SEL);
  if (selec == 0) {

    // Play/Pause media key
    bleKeyboard.write(KEY_MEDIA_PLAY_PAUSE);
    
  }

}

setup.ino

// Setup
void setup() {

  // Make the SEL line an input
  pinMode(SEL, INPUT_PULLUP);

  // ESP32 BLE Keyboard
  bleKeyboard.begin();
  
}

——

People can contact us: https://www.donluc.com/?page_id=1927

Technology Experience

  • Single-Board Microcontrollers (PIC, Arduino, Raspberry Pi,Espressif, etc…)
  • IoT
  • Robotics
  • Camera and Video Capture Receiver Stationary, Wheel/Tank and Underwater Vehicle
  • Unmanned Vehicles Terrestrial and Marine
  • Research & Development (R & D)

Instructor and E-Mentor

  • IoT
  • PIC Microcontrollers
  • Arduino
  • Raspberry Pi
  • Espressif
  • Robotics

Follow Us

J. Luc Paquin – Curriculum Vitae – 2022 English & Español
https://www.jlpconsultants.com/luc/

Web: https://www.donluc.com/
Web: https://www.jlpconsultants.com/
Facebook: https://www.facebook.com/neosteam.labs.9/
YouTube: https://www.youtube.com/channel/UC5eRjrGn1CqkkGfZy0jxEdA
Twitter: https://twitter.com/labs_steam
Pinterest: https://www.pinterest.com/NeoSteamLabs/
Instagram: https://www.instagram.com/neosteamlabs/

Don Luc
Project #21 – Nixie – Stopwatch – Mk04

——

#DonLucElectronics #DonLuc #NixieTube #Nixie #ArduiNIX #ArduinoMega2560 #Arduino #Project #Fritzing #Programming #Electronics #Microcontrollers #Consultant

——

Stopwatch

——

Stopwatch

——

Stopwatch

——

Stopwatch

A stopwatch is a timepiece designed to measure the amount of time that elapses between its activation and deactivation. In manual timing, the clock is started and stopped by a person pressing a button. The timing functions are traditionally controlled by two buttons on the case. Pressing the top button starts the timer running, and pressing the button a second time stops it, leaving the elapsed time displayed. A press of the second button then resets the stopwatch to zero. The second button is also used to record split times or lap times. When the split time button is pressed while the watch is running it allows the elapsed time to that point to be read, but the watch mechanism continues running to record total elapsed time. Pressing the split button a second time allows the watch to resume display of total time.

DL2209Mk04

1 x Arduino Mega 2560 R2
1 x ArduiNIX V3 Tube Driver Shield Kit
1 x IN-17×8 V1 Tube Board Kit
1 x Anode / Cathode Connector Cable Set
1 x DS3231 Precision RTC FeatherWing
1 x CR1220 12mm Coin Cell Battery
2 x Rocker Switch – SPST
5 x 10K Ohm
1 x Momentary Button – Panel Mount (Blue)
2 x Momentary Button – Panel Mount (Black)
1 x SparkFun ProtoShield
1 x 9V 1000mA Power Supply
1 x SparkFun Cerberus USB Cable

Arduino Mega 2560 R2

SN2 – 2
SN3 – 3
SN4 – 4
SN5 – 5
SN6 – 6
SN7 – 7
SN8 – 8
SN9 – 9
AN10 – 10
AN11 – 11
AN12 – 12
AN13 – 13
SDA – 20
SCL – 21
RO0 – 53
RO1 – 51
MB0 = 49
MB1 = 47
MB2 = 45
VIN – +3.3V
VIN – +5V
VIN – +9V
GND – GND

DL2209Mk04p.ino

/* ***** Don Luc Electronics © *****
Software Version Information
Project #21 - Nixie - Stopwatch - Mk04
21-04
DL2209Mk04p.ino
1 x Arduino Mega 2560 R2
1 x ArduiNIX V3 Tube Driver Shield Kit
1 x IN-17x8 V1 Tube Board Kit
1 x Anode / Cathode Connector Cable Set
1 x DS3231 Precision RTC FeatherWing
1 x CR1220 12mm Coin Cell Battery
2 x Rocker Switch - SPST
5 x 10K Ohm
1 x Momentary Button - Panel Mount (Blue)
2 x Momentary Button - Panel Mount (Black)
1 x 9V 1000mA Power Supply
1 x SparkFun Cerberus USB Cable
*/

// Include the Library Code
// Wire you to communicate with I2C/TWI devices
// Date and Time DS3231 RTC
#include "RTClib.h"

// SN74141 (1)
int ledPin_0_a = 2;                
int ledPin_0_b = 3;
int ledPin_0_c = 4;
int ledPin_0_d = 5;

// SN74141 (2)
int ledPin_1_a = 6;                
int ledPin_1_b = 7;
int ledPin_1_c = 8;
int ledPin_1_d = 9;

// Anode pins
int ledPin_a_1 = 10;
int ledPin_a_2 = 11;
int ledPin_a_3 = 12;
int ledPin_a_4 = 13;

// Fade
float fadeMax = 0.1f;
float fadeStep = 0.1f;
// Number Array
int NumberArray[8]={0,0,0,0,0,0,0,0};
int currNumberArray[8]={0,0,0,0,0,0,0,0};
float NumberArrayFadeInValue[8]={0.0f,0.0f,0.0f,0.0f,0.0f,0.0f,0.0f,0.0f};
float NumberArrayFadeOutValue[8]={5.0f,5.0f,5.0f,5.0f,5.0f,5.0f,5.0f,5.0f};

// Date and time functions using a DS3231 RTC
RTC_DS3231 RTC;

// Rocker Switch - SPST
// Rocker Switch 0
const int iRO0 = 53;
// State
int iRO0State = 0;
// Rocker Switch 1
const int iRO1 = 51;
// State
int iRO1State = 0;

// Momentary Button
const int iStartP = 49;
const int iStopP = 47;
const int iResetP = 45;

// Setting hours, minutes, secound and miliseconds to 0
int iH = 0;
int iM = 0;
int iS = 0;
int iMS = 0;
int iMSS = 0;

// Defines starting points
int iStart = 0;
int iStop1 = 0;
int iReset = 0;

// Get the high and low order values for hours,min,seconds. 
int lowerHours = 0;
int upperHours = 0;
int lowerMins = 0;
int upperMins = 0;
int lowerSeconds = 0;
int upperSeconds = 0;
int lowerMiliseconds = 0;
int upperMiliseconds = 0;

// Software Version Information
String sver = "21-04";

void loop() {

  // Read the state of the Switch value
  iRO1State = digitalRead(iRO1);
  
  // If it is the Switch State is HIGH
  if (iRO1State == HIGH) {
  
    // Stopwatch
    isStart();

  } else {

    // Date ans Time
    isTimeRTC();
    
  }

}

getDisplayFadeNumber.ino

// Display Fade Number
void DisplayFadeNumberString()
{
 
  // Anode channel 1 - numerals 0,4
  SetSN74141Chips(currNumberArray[0],currNumberArray[4]);   
  digitalWrite(ledPin_a_1, HIGH);   
  delay(NumberArrayFadeOutValue[0]);
  SetSN74141Chips(NumberArray[0],NumberArray[4]);   
  delay(NumberArrayFadeInValue[0]);
  digitalWrite(ledPin_a_1, LOW);
  
  // Anode channel 2 - numerals 1,5
  SetSN74141Chips(currNumberArray[1],currNumberArray[5]);   
  digitalWrite(ledPin_a_2, HIGH);   
  delay(NumberArrayFadeOutValue[1]);
  SetSN74141Chips(NumberArray[1],NumberArray[5]);   
  delay(NumberArrayFadeInValue[1]);
  digitalWrite(ledPin_a_2, LOW);
  
  // Anode channel 3 - numerals 2,6
  SetSN74141Chips(currNumberArray[2],currNumberArray[6]);   
  digitalWrite(ledPin_a_3, HIGH);   
  delay(NumberArrayFadeOutValue[2]);
  SetSN74141Chips(NumberArray[2],NumberArray[6]);   
  delay(NumberArrayFadeInValue[2]);
  digitalWrite(ledPin_a_3, LOW);
  
  // Anode channel 4 - numerals 3,7
  SetSN74141Chips(currNumberArray[3],currNumberArray[7]);   
  digitalWrite(ledPin_a_4, HIGH);   
  delay(NumberArrayFadeOutValue[3]);
  SetSN74141Chips(NumberArray[3],NumberArray[7]);   
  delay(NumberArrayFadeInValue[3]);
  digitalWrite(ledPin_a_4, LOW);
  
  // Loop thru and update all the arrays, and fades.
  for( int i = 0 ; i < 8 ; i ++ ) //equal to & of digits
  {
    if( NumberArray[i] != currNumberArray[i] )
    {
      NumberArrayFadeInValue[i] += fadeStep;
      NumberArrayFadeOutValue[i] -= fadeStep;
  
      if( NumberArrayFadeInValue[i] >= fadeMax )
      {
        NumberArrayFadeInValue[i] = 2.0f;
        NumberArrayFadeOutValue[i] = 4.0f; //affects the refresh cycle
        currNumberArray[i] = NumberArray[i];
      }
    }
  }
  
}

getRTCDS3231.ino

// DS3231 Precision RTC
// Setup RTC
void setupRTC() {

  // DS3231 Precision RTC   
  RTC.begin();
  if (! RTC.begin() ) {
    while (1) delay(10);
  }

  if (RTC.lostPower()) {
    
    // Following line sets the RTC to the date & time this sketch was compiled
    RTC.adjust(DateTime(F(__DATE__), F(__TIME__)));
    // This line sets the RTC with an explicit date & time, for example to set
    // August 2, 2021 at 13:53:0 you would call:
    // RTC.adjust(DateTime(2022, 4, 26, 11, 39, 0));
    
  }
  
}
// Date ans Time - isTimeRTC
void isTimeRTC() {

  // Date and Time
  DateTime now = RTC.now();

  // Read the state of the Switch value
  iRO0State = digitalRead(iRO0);
  
  // If it is the Switch State is HIGH
  if (iRO0State == HIGH) {


    // Get the high and low order values for hours, minute, seconds
    int lowerHours = now.hour() % 10;
    int upperHours = now.hour() - lowerHours;
    int lowerMins = now.minute() % 10;
    int upperMins = now.minute() - lowerMins;
    int lowerSeconds = now.second() % 10;
    int upperSeconds = now.second() - lowerSeconds;
    
    // 10 >= hours, minute, seconds
    if( upperSeconds >= 10 )   upperSeconds = upperSeconds / 10;
    if( upperMins >= 10 )      upperMins = upperMins / 10;
    if( upperHours >= 10 )     upperHours = upperHours / 10;
    if( upperHours == 0 && lowerHours == 0 )
    {
      
      upperHours = 1;
      lowerHours = 2;
      
    }

    // Fill in the Number array used to display on the Nixie tubes
    NumberArray[7] = upperHours;
    NumberArray[6] = lowerHours;
    NumberArray[5] = 0;
    NumberArray[4] = upperMins;
    NumberArray[3] = lowerMins;
    NumberArray[2] = 0;
    NumberArray[1] = upperSeconds; 
    NumberArray[0] = lowerSeconds;

  } else {

    // Get the high and low order values for year, month, day
    int iYear = now.year() - 2000;
    int lowerYear = iYear % 10;
    int upperYear = iYear - lowerYear;
    int lowerMonth = now.month() % 10;
    int upperMonth = now.month() - lowerMonth;
    int lowerDay = now.day() % 10;
    int upperDay = now.day() - lowerDay;

    // 10 >= year, month, day
    if( upperDay >= 10 )   upperDay = upperDay / 10;
    if( upperMonth >= 10 )      upperMonth = upperMonth / 10;
    if( upperYear >= 10 )     upperYear = upperYear / 10;

    // Fill in the Number array used to display on the Nixie tubes
    NumberArray[7] = 2;
    NumberArray[6] = 0;
    NumberArray[5] = upperYear;
    NumberArray[4] = lowerYear;
    NumberArray[3] = upperMonth;
    NumberArray[2] = lowerMonth;
    NumberArray[1] = upperDay; 
    NumberArray[0] = lowerDay;
  
  }
  
  // Display
  DisplayFadeNumberString();
  
}

getSN74141.ino

// SN74141
// SN74141 : Truth Table
//D C B A #
//L,L,L,L 0
//L,L,L,H 1
//L,L,H,L 2
//L,L,H,H 3
//L,H,L,L 4
//L,H,L,H 5
//L,H,H,L 6
//L,H,H,H 7
//H,L,L,L 8
//H,L,L,H 9
// isSetupSN74141
void isSetupSN74141(){

  pinMode(ledPin_0_a, OUTPUT);      
  pinMode(ledPin_0_b, OUTPUT);      
  pinMode(ledPin_0_c, OUTPUT);      
  pinMode(ledPin_0_d, OUTPUT);    
  
  pinMode(ledPin_1_a, OUTPUT);      
  pinMode(ledPin_1_b, OUTPUT);      
  pinMode(ledPin_1_c, OUTPUT);      
  pinMode(ledPin_1_d, OUTPUT);      
  
  pinMode(ledPin_a_1, OUTPUT);      
  pinMode(ledPin_a_2, OUTPUT);      
  pinMode(ledPin_a_3, OUTPUT);   
  pinMode(ledPin_a_4, OUTPUT);    

}
// SetSN74141Chips
void SetSN74141Chips( int num2, int num1 )
{
  
  // Set defaults
  // Will display a zero.
  int a = 0;
  int b = 0;
  int c = 0;
  int d = 0;
  
  // Load the a,b,c,d.. to send to the SN74141 IC (1)
  switch( num1 )
  {
    case 0:
      a=0;
      b=0;
      c=0;
      d=0;
      break;
    case 1:
      a=1;
      b=0;
      c=0;
      d=0;
      break;
    case 2:
      a=0;
      b=1;
      c=0;
      d=0;
      break;
    case 3:
      a=1;
      b=1;
      c=0;
      d=0;
      break;
    case 4:
      a=0;
      b=0;
      c=1;
      d=0;
      break;
    case 5:
      a=1;
      b=0;
      c=1;
      d=0;
      break;
    case 6: 
      a=0;
      b=1;
      c=1;
      d=0;
      break;
    case 7:
      a=1;
      b=1;
      c=1;
      d=0;
      break;
    case 8:
      a=0;
      b=0;
      c=0;
      d=1;
      break;
    case 9:
      a=1;
      b=0;
      c=0;
      d=1;
      break;
    default:
      a=1;
      b=1;
      c=1;
      d=1;
      break;
  }  
  
  // Write to output pins.
  digitalWrite(ledPin_0_d, d);
  digitalWrite(ledPin_0_c, c);
  digitalWrite(ledPin_0_b, b);
  digitalWrite(ledPin_0_a, a);

  // Load the a,b,c,d.. to send to the SN74141 IC (2)
  switch( num2 )
  {
    case 0:
      a=0;
      b=0;
      c=0;
      d=0;
      break;
    case 1:
      a=1;
      b=0;
      c=0;
      d=0;
      break;
    case 2:
      a=0;
      b=1;
      c=0;
      d=0;
      break;
    case 3:
      a=1;
      b=1;
      c=0;
      d=0;
      break;
    case 4:
      a=0;
      b=0;
      c=1;
      d=0;
      break;
    case 5:
      a=1;
      b=0;
      c=1;
      d=0;
      break;
    case 6:
      a=0;
      b=1;
      c=1;
      d=0;
      break;
    case 7:
      a=1;
      b=1;
      c=1;
      d=0;
      break;
    case 8:
      a=0;
      b=0;
      c=0;
      d=1;
      break;
    case 9:
      a=1;
      b=0;
      c=0;
      d=1;
      break;
    default:
      a=1;
      b=1;
      c=1;
      d=1;
      break;
  }
  
  // Write to output pins
  digitalWrite(ledPin_1_d, d);
  digitalWrite(ledPin_1_c, c);
  digitalWrite(ledPin_1_b, b);
  digitalWrite(ledPin_1_a, a);
  
}

getStopwatch.ino

// Stopwatch
// Setup Stopwatch
void isSetupStopwatch(){

  // Switch
  pinMode(iRO0, INPUT);
  pinMode(iRO1, INPUT);

  // Momentary Button
  pinMode(iStartP, INPUT);
  pinMode(iStopP, INPUT);
  pinMode(iResetP, INPUT);
  
}
// Start
void isStart()
{

  // Reading buton state iStart
  iStart = digitalRead(iStartP);
  if(iStart == HIGH) 
  {

    // Calls the isStopWatch function
    isStopWatch();

 }

}
// Stop Watch
void isStopWatch()
{

  // Miliseconds
  iMS = iMS + 10;     
  if(iMS == 600)           
  {
   
    iMS = 0;
    iMSS = 0;
    iS = iS + 1;
    
  } else if (iMS == 60) { // 1

    iMSS = iMSS + 1;
    
  } else if (iMS == 120) { // 2

    iMSS = iMSS + 1;
    
  } else if (iMS == 180) { //3 

    iMSS = iMSS + 1;
    
  } else if (iMS == 240) { // 4

    iMSS = iMSS + 1;
    
  } else if (iMS == 300) { // 5

    iMSS = iMSS + 1;
    
  } else if (iMS == 360) { // 6

    iMSS = iMSS + 1;
    
  } else if (iMS == 420) { // 7

    iMSS = iMSS + 1;
    
  } else if (iMS == 480) { // 8

    iMSS = iMSS + 1;
    
  } else if (iMS == 540) { // 9

    iMSS = iMSS + 1;
    
  }
  // If state for counting up minutes
  if( iS == 60)
  { 
  
    iS = 0;
    iM = iM + 1;
    
  }
  // If state for counting up hours
  if( iM == 60)
  {  
    
    iM = 0;
    iH = iH + 01;
    
  }

  // Get the high and low order values for hours, minute, seconds, Miliseconds
  int lowerHours = iH % 10;
  int upperHours = iH - lowerHours;
  int lowerMins = iM % 10;
  int upperMins = iM - lowerMins;
  int lowerSeconds = iS % 10;
  int upperSeconds = iS - lowerSeconds;
  int lowerMiliseconds = iMSS;
  int upperMiliseconds = iMSS - lowerMiliseconds;
    
  // 10 >= hours, minute, seconds, Miliseconds
  if( upperSeconds >= 10 )   upperSeconds = upperSeconds / 10;
  if( upperMins >= 10 )      upperMins = upperMins / 10;
  if( upperHours >= 10 )     upperHours = upperHours / 10;

  // Fill in the Number array used to display on the Nixie tubes
  NumberArray[7] = upperHours;
  NumberArray[6] = lowerHours;
  NumberArray[5] = upperMins;
  NumberArray[4] = lowerMins;
  NumberArray[3] = upperSeconds;
  NumberArray[2] = lowerSeconds;
  NumberArray[1] = lowerMiliseconds; 
  NumberArray[0] = lowerMiliseconds;

  // Display
  DisplayFadeNumberString();
    
  // Reading buton state Stop
  iStop1 = digitalRead(iStopP);
  // Checking if button is pressed
  if(iStop1 == HIGH)
  {
    
    // Calls the isStopwatchStop function
    isStopwatchStop();
    
  }
  else
  {

    // Calls the isStopWatch function
    isStopWatch();
    
  }
  
}
// Stopwatch Stop
void isStopwatchStop()
{

  // Get the high and low order values for hours, minute, seconds, Miliseconds
  int lowerHours = iH % 10;
  int upperHours = iH - lowerHours;
  int lowerMins = iM % 10;
  int upperMins = iM - lowerMins;
  int lowerSeconds = iS % 10;
  int upperSeconds = iS - lowerSeconds;
  int lowerMiliseconds = iMSS;
  int upperMiliseconds = iMSS - lowerMiliseconds;
    
  // 10 >= hours, minute, seconds, Miliseconds
  if( upperSeconds >= 10 )   upperSeconds = upperSeconds / 10;
  if( upperMins >= 10 )      upperMins = upperMins / 10;
  if( upperHours >= 10 )     upperHours = upperHours / 10;
 
  // Fill in the Number array used to display on the Nixie tubes
  NumberArray[7] = upperHours;
  NumberArray[6] = lowerHours;
  NumberArray[5] = upperMins;
  NumberArray[4] = lowerMins;
  NumberArray[3] = upperSeconds;
  NumberArray[2] = lowerSeconds;
  NumberArray[1] = lowerMiliseconds; 
  NumberArray[0] = lowerMiliseconds;

  // Display
  DisplayFadeNumberString();
  
  // Reading buton state iStart
  iStart = digitalRead(iStartP);
  if(iStart == HIGH)
  {
    
    // Calls the isStopWatch function 
    isStopWatch();

  } 
  // Reading buton state
  iReset = digitalRead(iResetP);
  if(iReset == HIGH)
  {
   
     // Calls the isStopwatchReset function
     isStopwatchReset();
     loop();
   
  }
  if(iReset == LOW)
  {
    
    // Calls the isStopwatchStop function
    isStopwatchStop();
    
  }

}
// Stopwatch Reset
void isStopwatchReset()
{

   // Seting hours to 0
   iH = 0;
   // Seting minutes to 0
   iM = 0;
   // Seting seconds to 0
   iS = 0;
   // Seting miliseconds to 0
   iMS = 0;
   // Seting miliseconds to 0
   iMSS = 0;
   
   // Fill in the Number array used to display on the Nixie tubes
   NumberArray[7] = 0;
   NumberArray[6] = 0;
   NumberArray[5] = 0;
   NumberArray[4] = 0;
   NumberArray[3] = 0;
   NumberArray[2] = 0;
   NumberArray[1] = 0; 
   NumberArray[0] = 0;
   // Display
   DisplayFadeNumberString();
   // Exiting the program and returning to the point where entered the program
   return;
   
}

setup.ino

// Setup
void setup() {

  // isSetupSN74141
  isSetupSN74141();

  // Setup Stopwatch
  isSetupStopwatch();

  // Setup RTC
  setupRTC();

}

——

People can contact us: https://www.donluc.com/?page_id=1927

Technology Experience

  • Single-Board Microcontrollers (PIC, Arduino, Raspberry Pi,Espressif, etc…)
  • IoT
  • Robotics
  • Camera and Video Capture Receiver Stationary, Wheel/Tank and Underwater Vehicle
  • Unmanned Vehicles Terrestrial and Marine
  • Research & Development (R & D)

Instructor and E-Mentor

  • IoT
  • PIC Microcontrollers
  • Arduino
  • Raspberry Pi
  • Espressif
  • Robotics

Follow Us

J. Luc Paquin – Curriculum Vitae – 2022 English & Español
https://www.jlpconsultants.com/luc/

Web: https://www.donluc.com/
Web: https://www.jlpconsultants.com/
Facebook: https://www.facebook.com/neosteam.labs.9/
YouTube: https://www.youtube.com/channel/UC5eRjrGn1CqkkGfZy0jxEdA
Twitter: https://twitter.com/labs_steam
Pinterest: https://www.pinterest.com/NeoSteamLabs/
Instagram: https://www.instagram.com/neosteamlabs/

Don Luc
Project #21 – Nixie – DS3231 Precision RTC – Mk03

——

#DonLucElectronics #DonLuc #NixieTube #Nixie #ArduiNIX #ArduinoUNO #Arduino #Project #Fritzing #Programming #Electronics #Microcontrollers #Consultant

——

DS3231 Precision RTC

——

DS3231 Precision RTC

——

DS3231 Precision RTC

——

DS3231 Precision RTC FeatherWing

The datasheet for the DS3231 explains that this part is an extremely accurate I²C – Integrated RTC TCXO – crystal. This Real Time Clock (RTC) is the most precise you can get in a small, low power package. Most RTC’s use an external 32kHz timing crystal that is used to keep time with low current draw. That’s all well and good, but those crystals have slight drift, particularly when the temperature changes, the temperature changes the oscillation frequency very slightly but it does add up. This RTC is in a beefy package because the crystal is inside the chip. And right next to the integrated crystal is a temperature sensor. That sensor compensates for the frequency changes by adding or removing clock ticks so that the time keeping stays on schedule.

This is the finest RTC you can get, and now we have it in a compact, breadboard friendly breakout. With a coin cell plugged into the back, you can get years of precision time keeping, even when main power is lost. Great for datalogging and clocks, or anything where you need to really know the time.

DL2209Mk03

1 x Arduino Mega 2560 R2
1 x ArduiNIX V3 Tube Driver Shield Kit
1 x IN-17×8 V1 Tube Board Kit
1 x Anode / Cathode Connector Cable Set
1 x DS3231 Precision RTC FeatherWing
1 x CR1220 12mm Coin Cell Battery
1 x Rocker Switch – SPST
1 x 10K Ohm
1 x SparkFun ProtoShield
1 x 9V 1000mA Power Supply
1 x SparkFun Cerberus USB Cable

Arduino Mega 2560 R2

SN2 – 2
SN3 – 3
SN4 – 4
SN5 – 5
SN6 – 6
SN7 – 7
SN8 – 8
SN9 – 9
AN10 – 10
AN11 – 11
AN12 – 12
AN13 – 13
VI14 – 14
VI15 – 15
SDA – 20
SCL – 21
RO0 – 53
VIN – +3.3V
VIN – +5V
VIN – +9V
GND – GND

DL2209Mk03p.ino

/* ***** Don Luc Electronics © *****
Software Version Information
Project #21 - Nixie - DS3231 Precision RTC - Mk03
21-03
DL2209Mk03p.ino
1 x Arduino Mega 2560 R2
1 x ArduiNIX V3 Tube Driver Shield Kit
1 x IN-17x8 V1 Tube Board Kit
1 x Anode / Cathode Connector Cable Set
1 x DS3231 Precision RTC FeatherWing
1 x CR1220 12mm Coin Cell Battery
1 x Rocker Switch - SPST
1 x 10K Ohm
1 x 9V 1000mA Power Supply
1 x SparkFun Cerberus USB Cable
*/

// Include the Library Code
// Wire you to communicate with I2C/TWI devices
// Date and Time DS3231 RTC
#include "RTClib.h"

// SN74141 (1)
int ledPin_0_a = 2;                
int ledPin_0_b = 3;
int ledPin_0_c = 4;
int ledPin_0_d = 5;

// SN74141 (2)
int ledPin_1_a = 6;                
int ledPin_1_b = 7;
int ledPin_1_c = 8;
int ledPin_1_d = 9;

// Anode pins
int ledPin_a_1 = 10;
int ledPin_a_2 = 11;
int ledPin_a_3 = 12;
int ledPin_a_4 = 13;

// NOTE: Grounding on virtual pins 14 and 15 
// (analog pins 0 and 1) will set the Hour and Mins.
int iVirtual14 = 14;
int iVirtual15 = 15;

// Fade
float fadeMax = 0.1f;
float fadeStep = 0.1f;
// Number Array
int NumberArray[8]={0,0,0,0,0,0,0,0};
int currNumberArray[8]={0,0,0,0,0,0,0,0};
float NumberArrayFadeInValue[8]={0.0f,0.0f,0.0f,0.0f,0.0f,0.0f,0.0f,0.0f};
float NumberArrayFadeOutValue[8]={5.0f,5.0f,5.0f,5.0f,5.0f,5.0f,5.0f,5.0f};

// Date and time functions using a DS3231 RTC
RTC_DS3231 RTC;

// Rocker Switch - SPST
int iRO0 = 53;
// State
int iRO0State = 0;

// Software Version Information
String sver = "21-03";

void loop() {

  // timeRTC
  timeRTC();

}

getDisplayFadeNumber.ino

// Display Fade Number
void DisplayFadeNumberString()
{
 
  // Anode channel 1 - numerals 0,4
  SetSN74141Chips(currNumberArray[0],currNumberArray[4]);   
  digitalWrite(ledPin_a_1, HIGH);   
  delay(NumberArrayFadeOutValue[0]);
  SetSN74141Chips(NumberArray[0],NumberArray[4]);   
  delay(NumberArrayFadeInValue[0]);
  digitalWrite(ledPin_a_1, LOW);
  
  // Anode channel 2 - numerals 1,5
  SetSN74141Chips(currNumberArray[1],currNumberArray[5]);   
  digitalWrite(ledPin_a_2, HIGH);   
  delay(NumberArrayFadeOutValue[1]);
  SetSN74141Chips(NumberArray[1],NumberArray[5]);   
  delay(NumberArrayFadeInValue[1]);
  digitalWrite(ledPin_a_2, LOW);
  
  // Anode channel 3 - numerals 2,6
  SetSN74141Chips(currNumberArray[2],currNumberArray[6]);   
  digitalWrite(ledPin_a_3, HIGH);   
  delay(NumberArrayFadeOutValue[2]);
  SetSN74141Chips(NumberArray[2],NumberArray[6]);   
  delay(NumberArrayFadeInValue[2]);
  digitalWrite(ledPin_a_3, LOW);
  
  // Anode channel 4 - numerals 3,7
  SetSN74141Chips(currNumberArray[3],currNumberArray[7]);   
  digitalWrite(ledPin_a_4, HIGH);   
  delay(NumberArrayFadeOutValue[3]);
  SetSN74141Chips(NumberArray[3],NumberArray[7]);   
  delay(NumberArrayFadeInValue[3]);
  digitalWrite(ledPin_a_4, LOW);
  
  // Loop thru and update all the arrays, and fades.
  for( int i = 0 ; i < 8 ; i ++ ) //equal to & of digits
  {
    if( NumberArray[i] != currNumberArray[i] )
    {
      NumberArrayFadeInValue[i] += fadeStep;
      NumberArrayFadeOutValue[i] -= fadeStep;
  
      if( NumberArrayFadeInValue[i] >= fadeMax )
      {
        NumberArrayFadeInValue[i] = 2.0f;
        NumberArrayFadeOutValue[i] = 4.0f; //affects the refresh cycle
        currNumberArray[i] = NumberArray[i];
      }
    }
  }
  
}

getRTCDS3231.ino

// DS3231 Precision RTC
// Setup RTC
void setupRTC() {

  // DS3231 Precision RTC   
  RTC.begin();
  if (! RTC.begin() ) {
    while (1) delay(10);
  }

  if (RTC.lostPower()) {
    
    // Following line sets the RTC to the date & time this sketch was compiled
    RTC.adjust(DateTime(F(__DATE__), F(__TIME__)));
    // This line sets the RTC with an explicit date & time, for example to set
    // August 2, 2021 at 13:53:0 you would call:
    // RTC.adjust(DateTime(2022, 4, 26, 11, 39, 0));
    
  }
  
}
// timeRTC
void timeRTC() {

  // Date and Time
  DateTime now = RTC.now();

  // Read the state of the Switch value
  iRO0State = digitalRead(iRO0);
  
  // If it is the Switch State is HIGH
  if (iRO0State == HIGH) {


    // Get the high and low order values for hours, minute, seconds
    int lowerHours = now.hour() % 10;
    int upperHours = now.hour() - lowerHours;
    int lowerMins = now.minute() % 10;
    int upperMins = now.minute() - lowerMins;
    int lowerSeconds = now.second() % 10;
    int upperSeconds = now.second() - lowerSeconds;
    
    // 10 >= hours, minute, seconds
    if( upperSeconds >= 10 )   upperSeconds = upperSeconds / 10;
    if( upperMins >= 10 )      upperMins = upperMins / 10;
    if( upperHours >= 10 )     upperHours = upperHours / 10;
    if( upperHours == 0 && lowerHours == 0 )
    {
      
      upperHours = 1;
      lowerHours = 2;
      
    }

    // Fill in the Number array used to display on the Nixie tubes
    NumberArray[7] = upperHours;
    NumberArray[6] = lowerHours;
    NumberArray[5] = 0;
    NumberArray[4] = upperMins;
    NumberArray[3] = lowerMins;
    NumberArray[2] = 0;
    NumberArray[1] = upperSeconds; 
    NumberArray[0] = lowerSeconds;

  } else {

    // Get the high and low order values for year, month, day
    int iYear = now.year() - 2000;
    int lowerYear = iYear % 10;
    int upperYear = iYear - lowerYear;
    int lowerMonth = now.month() % 10;
    int upperMonth = now.month() - lowerMonth;
    int lowerDay = now.day() % 10;
    int upperDay = now.day() - lowerDay;

    // 10 >= year, month, day
    if( upperDay >= 10 )   upperDay = upperDay / 10;
    if( upperMonth >= 10 )      upperMonth = upperMonth / 10;
    if( upperYear >= 10 )     upperYear = upperYear / 10;

    // Fill in the Number array used to display on the Nixie tubes
    NumberArray[7] = 2;
    NumberArray[6] = 0;
    NumberArray[5] = upperYear;
    NumberArray[4] = lowerYear;
    NumberArray[3] = upperMonth;
    NumberArray[2] = lowerMonth;
    NumberArray[1] = upperDay; 
    NumberArray[0] = lowerDay;
  
  }
  
  // Display
  DisplayFadeNumberString();
  
}

getSN74141.ino

// SN74141
// SN74141 : Truth Table
//D C B A #
//L,L,L,L 0
//L,L,L,H 1
//L,L,H,L 2
//L,L,H,H 3
//L,H,L,L 4
//L,H,L,H 5
//L,H,H,L 6
//L,H,H,H 7
//H,L,L,L 8
//H,L,L,H 9
// isSetupSN74141
void isSetupSN74141(){

  pinMode(ledPin_0_a, OUTPUT);      
  pinMode(ledPin_0_b, OUTPUT);      
  pinMode(ledPin_0_c, OUTPUT);      
  pinMode(ledPin_0_d, OUTPUT);    
  
  pinMode(ledPin_1_a, OUTPUT);      
  pinMode(ledPin_1_b, OUTPUT);      
  pinMode(ledPin_1_c, OUTPUT);      
  pinMode(ledPin_1_d, OUTPUT);      
  
  pinMode(ledPin_a_1, OUTPUT);      
  pinMode(ledPin_a_2, OUTPUT);      
  pinMode(ledPin_a_3, OUTPUT);   
  pinMode(ledPin_a_4, OUTPUT);    
 
  // NOTE: Grounding on virtual pins 14 and 15 
  // (analog pins 0 and 1) will set the Hour and Mins.
  // Set the vertual pin 14 (pin 0 on the analog inputs )
  pinMode( iVirtual14, INPUT );
  // Set pin 14 as a pull up resistor.
  digitalWrite(iVirtual14, HIGH);
  // Set the vertual pin 15 (pin 1 on the analog inputs )
  pinMode( iVirtual15, INPUT );
  // Set pin 15 as a pull up resistor.
  digitalWrite(iVirtual15, HIGH);
  
}
// SetSN74141Chips
void SetSN74141Chips( int num2, int num1 )
{
  
  // Set defaults
  // Will display a zero.
  int a = 0;
  int b = 0;
  int c = 0;
  int d = 0;
  
  // Load the a,b,c,d.. to send to the SN74141 IC (1)
  switch( num1 )
  {
    case 0:
      a=0;
      b=0;
      c=0;
      d=0;
      break;
    case 1:
      a=1;
      b=0;
      c=0;
      d=0;
      break;
    case 2:
      a=0;
      b=1;
      c=0;
      d=0;
      break;
    case 3:
      a=1;
      b=1;
      c=0;
      d=0;
      break;
    case 4:
      a=0;
      b=0;
      c=1;
      d=0;
      break;
    case 5:
      a=1;
      b=0;
      c=1;
      d=0;
      break;
    case 6: 
      a=0;
      b=1;
      c=1;
      d=0;
      break;
    case 7:
      a=1;
      b=1;
      c=1;
      d=0;
      break;
    case 8:
      a=0;
      b=0;
      c=0;
      d=1;
      break;
    case 9:
      a=1;
      b=0;
      c=0;
      d=1;
      break;
    default:
      a=1;
      b=1;
      c=1;
      d=1;
      break;
  }  
  
  // Write to output pins.
  digitalWrite(ledPin_0_d, d);
  digitalWrite(ledPin_0_c, c);
  digitalWrite(ledPin_0_b, b);
  digitalWrite(ledPin_0_a, a);

  // Load the a,b,c,d.. to send to the SN74141 IC (2)
  switch( num2 )
  {
    case 0:
      a=0;
      b=0;
      c=0;
      d=0;
      break;
    case 1:
      a=1;
      b=0;
      c=0;
      d=0;
      break;
    case 2:
      a=0;
      b=1;
      c=0;
      d=0;
      break;
    case 3:
      a=1;
      b=1;
      c=0;
      d=0;
      break;
    case 4:
      a=0;
      b=0;
      c=1;
      d=0;
      break;
    case 5:
      a=1;
      b=0;
      c=1;
      d=0;
      break;
    case 6:
      a=0;
      b=1;
      c=1;
      d=0;
      break;
    case 7:
      a=1;
      b=1;
      c=1;
      d=0;
      break;
    case 8:
      a=0;
      b=0;
      c=0;
      d=1;
      break;
    case 9:
      a=1;
      b=0;
      c=0;
      d=1;
      break;
    default:
      a=1;
      b=1;
      c=1;
      d=1;
      break;
  }
  
  // Write to output pins
  digitalWrite(ledPin_1_d, d);
  digitalWrite(ledPin_1_c, c);
  digitalWrite(ledPin_1_b, b);
  digitalWrite(ledPin_1_a, a);
  
}

setup.ino

// Setup
void setup() {

  // isSetupSN74141
  isSetupSN74141();

  // Switch
  pinMode(iRO0, INPUT);

  // Setup RTC
  setupRTC();

}

——

People can contact us: https://www.donluc.com/?page_id=1927

Technology Experience

  • Single-Board Microcontrollers (PIC, Arduino, Raspberry Pi,Espressif, etc…)
  • IoT
  • Robotics
  • Camera and Video Capture Receiver Stationary, Wheel/Tank and Underwater Vehicle
  • Unmanned Vehicles Terrestrial and Marine
  • Research & Development (R & D)

Instructor and E-Mentor

  • IoT
  • PIC Microcontrollers
  • Arduino
  • Raspberry Pi
  • Espressif
  • Robotics

Follow Us

J. Luc Paquin – Curriculum Vitae – 2022 English & Español
https://www.jlpconsultants.com/luc/

Web: https://www.donluc.com/
Web: https://www.jlpconsultants.com/
Facebook: https://www.facebook.com/neosteam.labs.9/
YouTube: https://www.youtube.com/channel/UC5eRjrGn1CqkkGfZy0jxEdA
Twitter: https://twitter.com/labs_steam
Pinterest: https://www.pinterest.com/NeoSteamLabs/
Instagram: https://www.instagram.com/neosteamlabs/

Don Luc
Project #21 – Nixie – ArduiNIX – Mk02

——

#DonLucElectronics #DonLuc #NixieTube #Nixie #ArduiNIX #ArduinoUNO #Arduino #Project #Fritzing #Programming #Electronics #Microcontrollers #Consultant

——

ArduiNIX

——

ArduiNIX

——

ArduiNIX

——

ArduiNIX

——

ArduiNIX

The ArduiNIX is an Arduino compatible shield which plugs right onto the top of the Arduino UNO board. ArduiNIX takes care of stepping power from 9 VDC wall adapter power supply up to a maximum of approximately 250 VDC to drive any and all Nixie tubes. ArduiNIX also provides Multiplexed display for up to 80 elements by using 4 anode channels and 20 cathode channels. Multiplexing increases the life expectancy of your Nixie tube investment.

Not only does the ArduiNIX provide a Nixie tube platform for standard clock functions, but it is also user programmable, meaning if you can program it using the arduino environment, you can make it happen on your Nixie display. Take special care when working with the ArduiNIX. The ArduiNIX Shield operates at high voltages. Be careful when handling it while it’s powered up. Normally the Arduino is safe to handle, but when used in conjunction with the ArduiNIX, voltages in excess of 200 volts may be achieved. Use caution. An IN-17 x 8 display board, and 8 x Russian IN-17 Nixie tubes.

DL2209Mk02

1 x Arduino UNO
1 x ArduiNIX V3 Tube Driver Shield Kit
1 x IN-17×8 V1 Tube Board Kit
1 x Anode / Cathode Connector Cable Set
1 x 9V 1000mA Power Supply
1 x SparkFun Cerberus USB Cable

Arduino UNO

SN2 – 2
SN3 – 3
SN4 – 4
SN5 – 5
SN6 – 6
SN7 – 7
SN8 – 8
SN9 – 9
AN10 – 10
AN11 – 11
AN12 – 12
AN13 – 13
VI14 – 14
VI15 – 15
VIN – +9V
GND – GND

DL2209Mk02p.ino

/* ***** Don Luc Electronics © *****
Software Version Information
Project #21 - Nixie - ArduiNIX - Mk02
21-02
DL2209Mk02p.ino
1 x Arduino UNO
1 x ArduiNIX V3 Tube Driver Shield Kit
1 x IN-17x8 V1 Tube Board Kit
1 x Anode / Cathode Connector Cable Set
1 x 9V 1000mA Power Supply
1 x SparkFun Cerberus USB Cable
*/

// Include the Library Code

// SN74141 (1)
int ledPin_0_a = 2;                
int ledPin_0_b = 3;
int ledPin_0_c = 4;
int ledPin_0_d = 5;

// SN74141 (2)
int ledPin_1_a = 6;                
int ledPin_1_b = 7;
int ledPin_1_c = 8;
int ledPin_1_d = 9;

// Anode pins
int ledPin_a_1 = 10;
int ledPin_a_2 = 11;
int ledPin_a_3 = 12;
int ledPin_a_4 = 13;

// NOTE: Grounding on virtual pins 14 and 15 
// (analog pins 0 and 1) will set the Hour and Mins.
int iVirtual14 = 14;
int iVirtual15 = 15;

// Fade
float fadeMax = 0.1f;
float fadeStep = 0.1f;
// Number Array
int NumberArray[8]={0,0,0,0,0,0,0,0};
int currNumberArray[8]={0,0,0,0,0,0,0,0};
float NumberArrayFadeInValue[8]={0.0f,0.0f,0.0f,0.0f,0.0f,0.0f,0.0f,0.0f};
float NumberArrayFadeOutValue[8]={5.0f,5.0f,5.0f,5.0f,5.0f,5.0f,5.0f,5.0f};

// Defines
// Sub seconds
long SSECS = 100;
// Milliseconds in a Sec
long SECS = 60;
// 60 Seconds in a Min.
long MINS = 60;
// 60 Mins in an hour
long HOURS = 60 * MINS;
// 24 Hours in a day. > Note: change the 24 to a 12 for non military time.
long DAYS = 12 * HOURS; 

// Time from when we started
long runTime = 0;

// Default time sets. clock will start at 12:34:00.
// This is so we can count the correct order of tubes.
long clockHourSet;
long clockMinSet;
long clockSecSet;
//long clockSSecSet;

int HourButtonPressed = false;
int MinButtonPressed = false;

// Software Version Information
String sver = "21-02";

void loop() {

  // Time
  isTime();
  
}

getDisplayFadeNumber.ino

// Display Fade Number
void DisplayFadeNumberString()
{
 
  // Anode channel 1 - numerals 0,4
  SetSN74141Chips(currNumberArray[0],currNumberArray[4]);   
  digitalWrite(ledPin_a_1, HIGH);   
  delay(NumberArrayFadeOutValue[0]);
  SetSN74141Chips(NumberArray[0],NumberArray[4]);   
  delay(NumberArrayFadeInValue[0]);
  digitalWrite(ledPin_a_1, LOW);
  
    // Anode channel 2 - numerals 1,5
  SetSN74141Chips(currNumberArray[1],currNumberArray[5]);   
  digitalWrite(ledPin_a_2, HIGH);   
  delay(NumberArrayFadeOutValue[1]);
  SetSN74141Chips(NumberArray[1],NumberArray[5]);   
  delay(NumberArrayFadeInValue[1]);
  digitalWrite(ledPin_a_2, LOW);
  
   // Anode channel 3 - numerals 2,6
  SetSN74141Chips(currNumberArray[2],currNumberArray[6]);   
  digitalWrite(ledPin_a_3, HIGH);   
  delay(NumberArrayFadeOutValue[2]);
  SetSN74141Chips(NumberArray[2],NumberArray[6]);   
  delay(NumberArrayFadeInValue[2]);
  digitalWrite(ledPin_a_3, LOW);
  
     // Anode channel 4 - numerals 3,7
  SetSN74141Chips(currNumberArray[3],currNumberArray[7]);   
  digitalWrite(ledPin_a_4, HIGH);   
  delay(NumberArrayFadeOutValue[3]);
  SetSN74141Chips(NumberArray[3],NumberArray[7]);   
  delay(NumberArrayFadeInValue[3]);
  digitalWrite(ledPin_a_4, LOW);
  
  // Loop thru and update all the arrays, and fades.
  for( int i = 0 ; i < 8 ; i ++ ) //equal to & of digits
  {
    if( NumberArray[i] != currNumberArray[i] )
    {
      NumberArrayFadeInValue[i] += fadeStep;
      NumberArrayFadeOutValue[i] -= fadeStep;
  
      if( NumberArrayFadeInValue[i] >= fadeMax )
      {
        NumberArrayFadeInValue[i] = 2.0f;
        NumberArrayFadeOutValue[i] = 4.0f; //affects the refresh cycle
        currNumberArray[i] = NumberArray[i];
      }
    }
  }
  
}

getSN74141.ino

// SN74141
// SN74141 : Truth Table
//D C B A #
//L,L,L,L 0
//L,L,L,H 1
//L,L,H,L 2
//L,L,H,H 3
//L,H,L,L 4
//L,H,L,H 5
//L,H,H,L 6
//L,H,H,H 7
//H,L,L,L 8
//H,L,L,H 9
// isSetupSN74141
void isSetupSN74141(){

  pinMode(ledPin_0_a, OUTPUT);      
  pinMode(ledPin_0_b, OUTPUT);      
  pinMode(ledPin_0_c, OUTPUT);      
  pinMode(ledPin_0_d, OUTPUT);    
  
  pinMode(ledPin_1_a, OUTPUT);      
  pinMode(ledPin_1_b, OUTPUT);      
  pinMode(ledPin_1_c, OUTPUT);      
  pinMode(ledPin_1_d, OUTPUT);      
  
  pinMode(ledPin_a_1, OUTPUT);      
  pinMode(ledPin_a_2, OUTPUT);      
  pinMode(ledPin_a_3, OUTPUT);   
  pinMode(ledPin_a_4, OUTPUT);    
 
  // NOTE: Grounding on virtual pins 14 and 15 
  // (analog pins 0 and 1) will set the Hour and Mins.
  // Set the vertual pin 14 (pin 0 on the analog inputs )
  pinMode( iVirtual14, INPUT );
  // Set pin 14 as a pull up resistor.
  digitalWrite(iVirtual14, HIGH);
  // Set the vertual pin 15 (pin 1 on the analog inputs )
  pinMode( iVirtual15, INPUT );
  // Set pin 15 as a pull up resistor.
  digitalWrite(iVirtual15, HIGH);
  
}
// SetSN74141Chips
void SetSN74141Chips( int num2, int num1 )
{
  
  // Set defaults
  // Will display a zero.
  int a = 0;
  int b = 0;
  int c = 0;
  int d = 0;
  
  // Load the a,b,c,d.. to send to the SN74141 IC (1)
  switch( num1 )
  {
    case 0:
      a=0;
      b=0;
      c=0;
      d=0;
      break;
    case 1:
      a=1;
      b=0;
      c=0;
      d=0;
      break;
    case 2:
      a=0;
      b=1;
      c=0;
      d=0;
      break;
    case 3:
      a=1;
      b=1;
      c=0;
      d=0;
      break;
    case 4:
      a=0;
      b=0;
      c=1;
      d=0;
      break;
    case 5:
      a=1;
      b=0;
      c=1;
      d=0;
      break;
    case 6: 
      a=0;
      b=1;
      c=1;
      d=0;
      break;
    case 7:
      a=1;
      b=1;
      c=1;
      d=0;
      break;
    case 8:
      a=0;
      b=0;
      c=0;
      d=1;
      break;
    case 9:
      a=1;
      b=0;
      c=0;
      d=1;
      break;
    default:
      a=1;
      b=1;
      c=1;
      d=1;
      break;
  }  
  
  // Write to output pins.
  digitalWrite(ledPin_0_d, d);
  digitalWrite(ledPin_0_c, c);
  digitalWrite(ledPin_0_b, b);
  digitalWrite(ledPin_0_a, a);

  // Load the a,b,c,d.. to send to the SN74141 IC (2)
  switch( num2 )
  {
    case 0:
      a=0;
      b=0;
      c=0;
      d=0;
      break;
    case 1:
      a=1;
      b=0;
      c=0;
      d=0;
      break;
    case 2:
      a=0;
      b=1;
      c=0;
      d=0;
      break;
    case 3:
      a=1;
      b=1;
      c=0;
      d=0;
      break;
    case 4:
      a=0;
      b=0;
      c=1;
      d=0;
      break;
    case 5:
      a=1;
      b=0;
      c=1;
      d=0;
      break;
    case 6:
      a=0;
      b=1;
      c=1;
      d=0;
      break;
    case 7:
      a=1;
      b=1;
      c=1;
      d=0;
      break;
    case 8:
      a=0;
      b=0;
      c=0;
      d=1;
      break;
    case 9:
      a=1;
      b=0;
      c=0;
      d=1;
      break;
    default:
      a=1;
      b=1;
      c=1;
      d=1;
      break;
  }
  
  // Write to output pins
  digitalWrite(ledPin_1_d, d);
  digitalWrite(ledPin_1_c, c);
  digitalWrite(ledPin_1_b, b);
  digitalWrite(ledPin_1_a, a);
  
}

getTime.ino

// Time
void isTime(){

  // Get milliseconds.
  runTime = millis();
  //int ssTime = millis();
  
  int hourInput = digitalRead(iVirtual14);  
  int minInput  = digitalRead(iVirtual15);

  if( hourInput == 0 )
    HourButtonPressed = true;
  if( minInput == 0 )
    MinButtonPressed = true;
  if( HourButtonPressed == true && hourInput == 1 )
  {
    clockHourSet++;
    HourButtonPressed = false;
  }
  if( MinButtonPressed == true && minInput == 1 )
  {
    clockMinSet++;
    MinButtonPressed = false;
  }

  // Get time in seconds.
  // Change this value to speed up or
  // slow down the clock, set to smaller number such as 10, 1, or 100 for debugging
  long time = (runTime) / 1000;
  int sstime = (runTime) / 10;
  // Set time based on offset..
  // long hbump = 60*60*clockHourSet;
  //long sbump = 60*60*60*clockHourSet; //change hourset to secondset
  long hbump = 60*60*clockHourSet;
  long mbump = 60*clockMinSet;
  time += mbump + hbump;

  // Convert time to days,hours,mins,seconds
  long days  = time / DAYS;    time -= days  * DAYS; 
  long hours = time / HOURS;   time -= hours * HOURS; 
  long minutes  = time / MINS;    time -= minutes  * MINS; 
  long seconds  = time;      
//  long sseconds  = 76;// time -= seconds  * SECS;
  long sseconds  = runTime / SECS; time -= sseconds  * SECS; 

  // Get the high and low order values for hours,min,seconds. 
  int lowerHours = hours % 10;
  int upperHours = hours - lowerHours;
  int lowerMins = minutes % 10;
  int upperMins = minutes - lowerMins;
  int lowerSeconds = seconds % 10;
  int upperSeconds = seconds - lowerSeconds;
  int lowerSSeconds = sseconds % 10;
  //- lowerSSeconds;
  int upperSSeconds = lowerSSeconds % 10; upperSSeconds = upperSSeconds /10;
  
  if( upperSSeconds >= 10 )  upperSSeconds = upperSSeconds / 10;
  if( upperSeconds >= 10 )   upperSeconds = upperSeconds / 10;
  if( upperMins >= 10 )      upperMins = upperMins / 10;
  if( upperHours >= 10 )     upperHours = upperHours / 10;
 
  if( upperHours == 0 && lowerHours == 0 )
  {
    upperHours = 1;
    lowerHours = 2;
  }
  
  // Fill in the Number array used to display on the tubes.
  
  NumberArray[7] = upperHours;
  NumberArray[6] = lowerHours;
  NumberArray[5] = upperMins;
  NumberArray[4] = lowerMins;
  NumberArray[3] = upperSeconds;  
  NumberArray[2] = lowerSeconds;
  NumberArray[1] = lowerSSeconds; //upperSSeconds;  
  NumberArray[0] = lowerSSeconds; //lowerSSeconds;
  
  Serial.print(lowerSSeconds);
  Serial.println();
  // Display.
  //DisplayFadeNumberString();
  // Display.
  DisplayFadeNumberString();
  
}

setup.ino

// Setup
void setup() {

  // isSetupSN74141
  isSetupSN74141();

  // Open serial communications
 Serial.begin(9600);

}

——

People can contact us: https://www.donluc.com/?page_id=1927

Technology Experience

  • Single-Board Microcontrollers (PIC, Arduino, Raspberry Pi,Espressif, etc…)
  • IoT
  • Robotics
  • Camera and Video Capture Receiver Stationary, Wheel/Tank and Underwater Vehicle
  • Unmanned Vehicles Terrestrial and Marine
  • Research & Development (R & D)

Instructor and E-Mentor

  • IoT
  • PIC Microcontrollers
  • Arduino
  • Raspberry Pi
  • Espressif
  • Robotics

Follow Us

J. Luc Paquin – Curriculum Vitae – 2022 English & Español
https://www.jlpconsultants.com/luc/

Web: https://www.donluc.com/
Web: https://www.jlpconsultants.com/
Facebook: https://www.facebook.com/neosteam.labs.9/
YouTube: https://www.youtube.com/channel/UC5eRjrGn1CqkkGfZy0jxEdA
Twitter: https://twitter.com/labs_steam
Pinterest: https://www.pinterest.com/NeoSteamLabs/
Instagram: https://www.instagram.com/neosteamlabs/

Don Luc
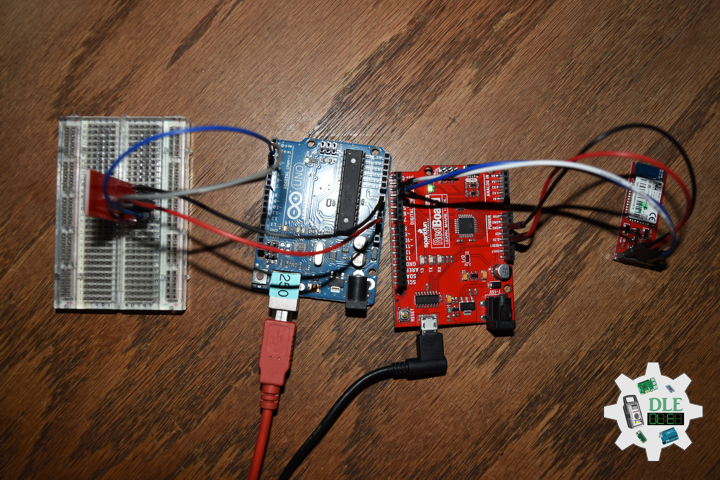
Categories
Archives