——
#DonLucElectronics #DonLuc #Sensors #GPSReceiver #Adafruit #SparkFun #Arduino #Project #Fritzing #Programming #Electronics #Microcontrollers #Consultant
——
——
——
——
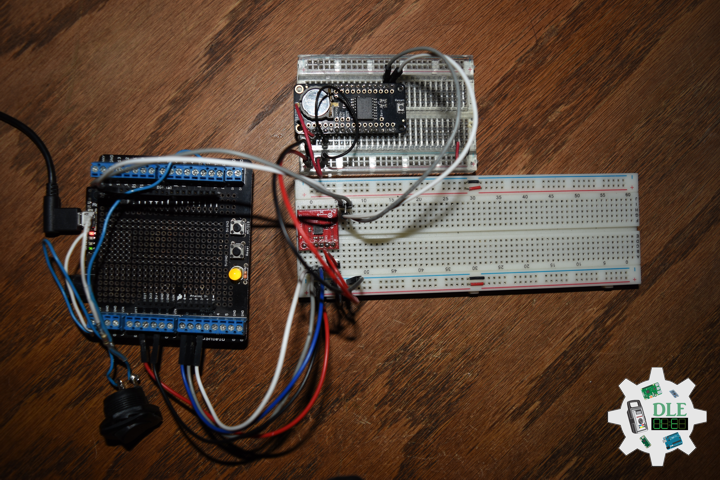
GPS Receiver – GP-20U7
The GP-20U7 is a compact GPS receiver with a built-in high performances All-In-One GPS chipset. The GP-20U7 accurately provides position, velocity, and time readings as well possessing high sensitivity and tracking capabilities. Thanks to the low power consumption this receiver requires, the GP-20U7 is ideal for portable applications such as tablet PCs, smart phones, and other devices requiring positioning capability. This 56-Channel GPS module, that supports a standard NMEA-0183 and uBlox 7 protocol, has low power consumption of 40mA@3.3V (max), an antenna on board, and -162dBm tracking sensitivity. With 56 channels in search mode and 22 channels “All-In-View” tracking, the GP-20U7 is quite the work horse for its size.
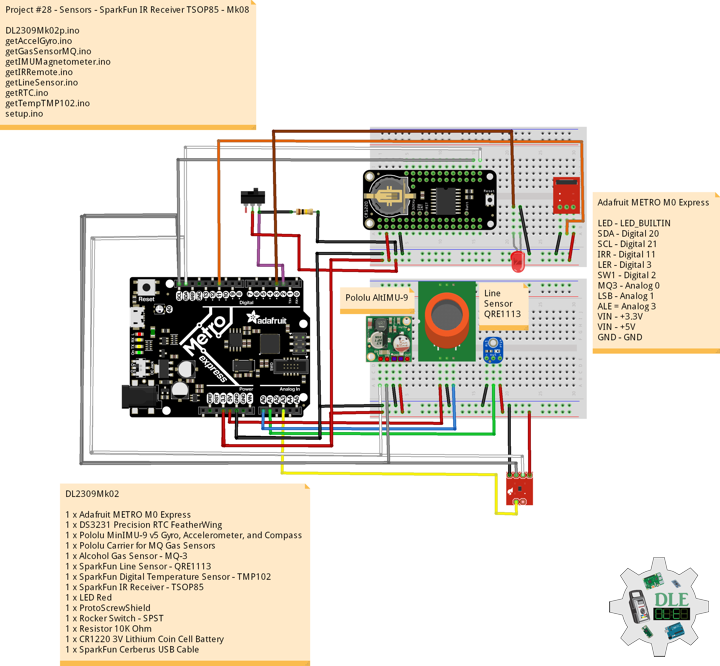
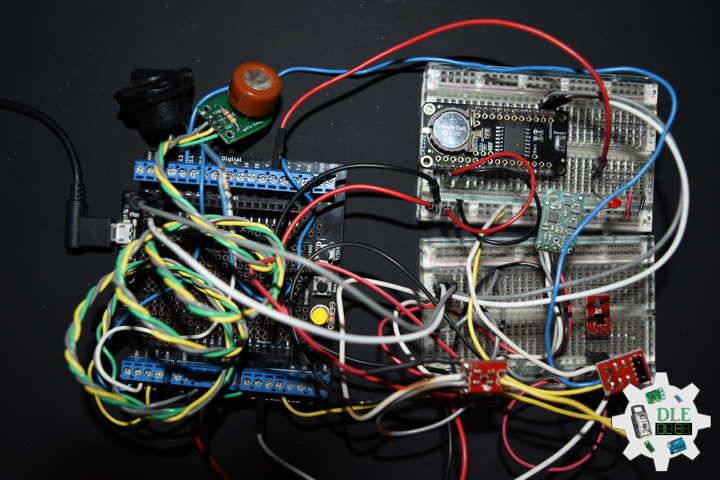
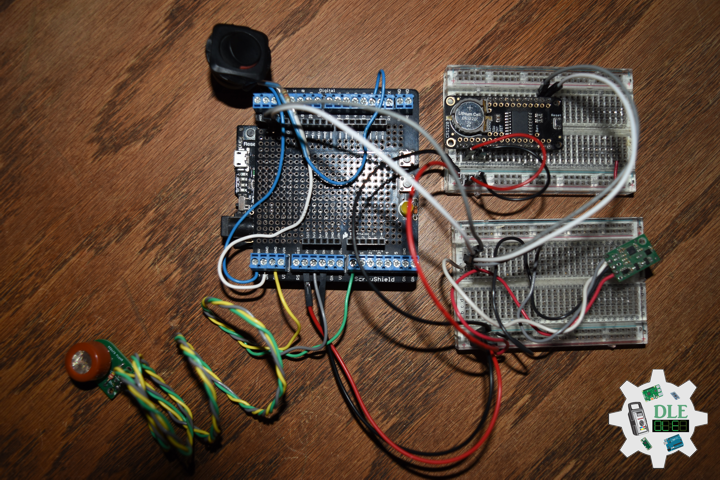
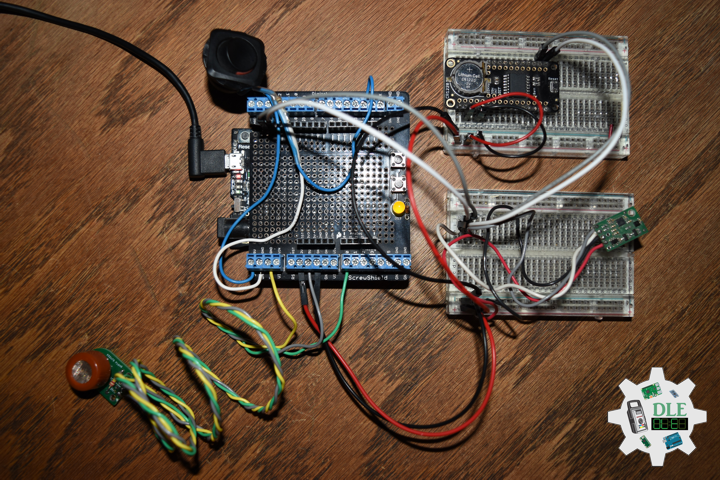
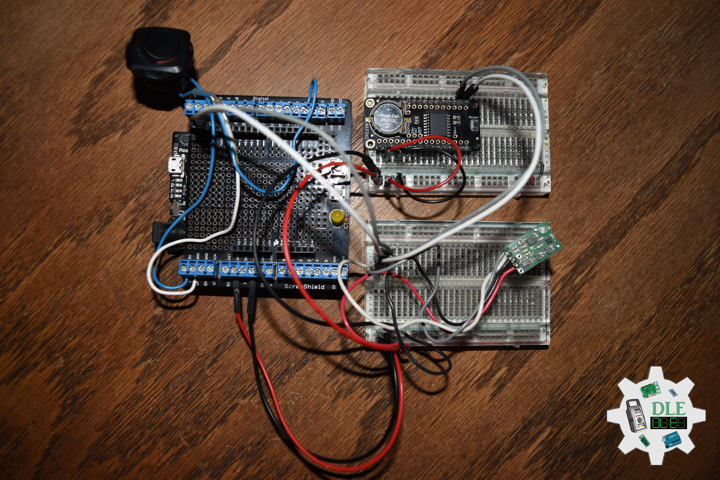
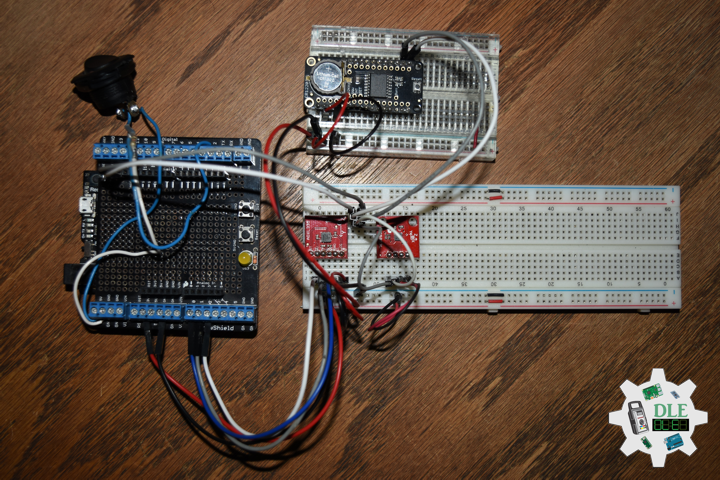
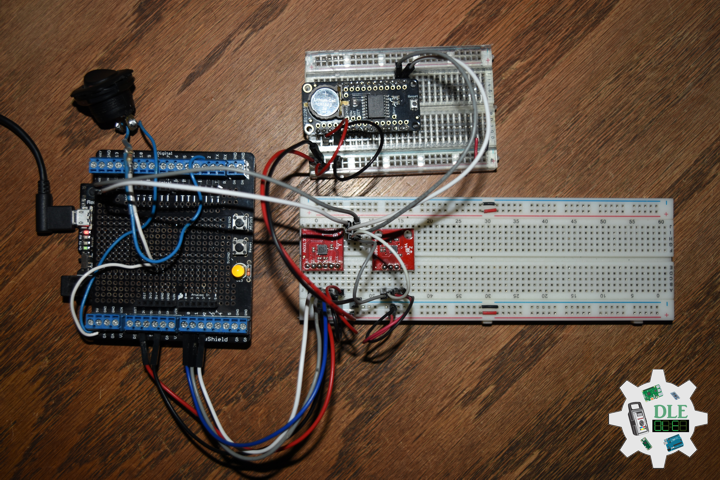
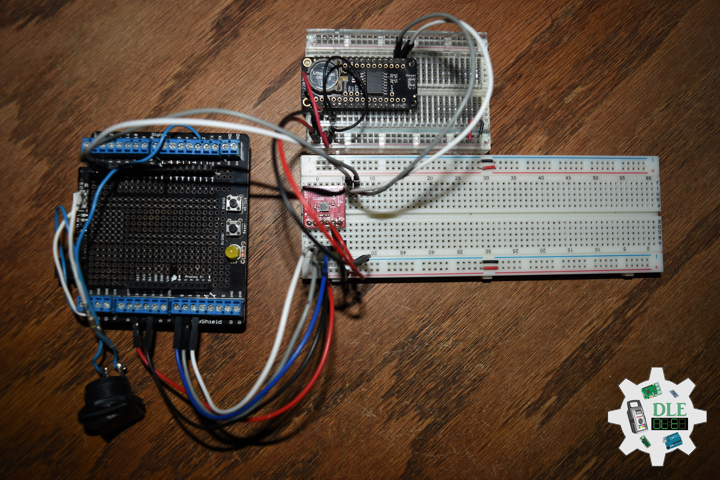
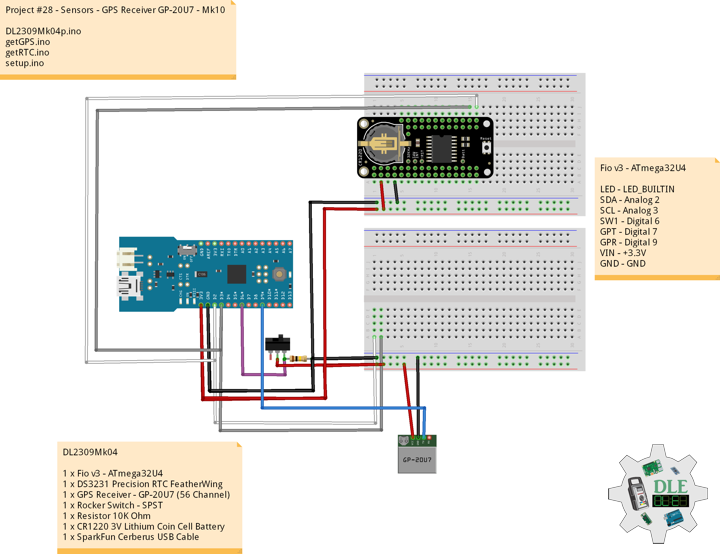
DL2309Mk04
1 x Fio v3 – ATmega32U4
1 x DS3231 Precision RTC FeatherWing
1 x GPS Receiver – GP-20U7 (56 Channel)
1 x Rocker Switch – SPST
1 x Resistor 10K Ohm
1 x CR1220 3V Lithium Coin Cell Battery
1 x SparkFun Cerberus USB Cable
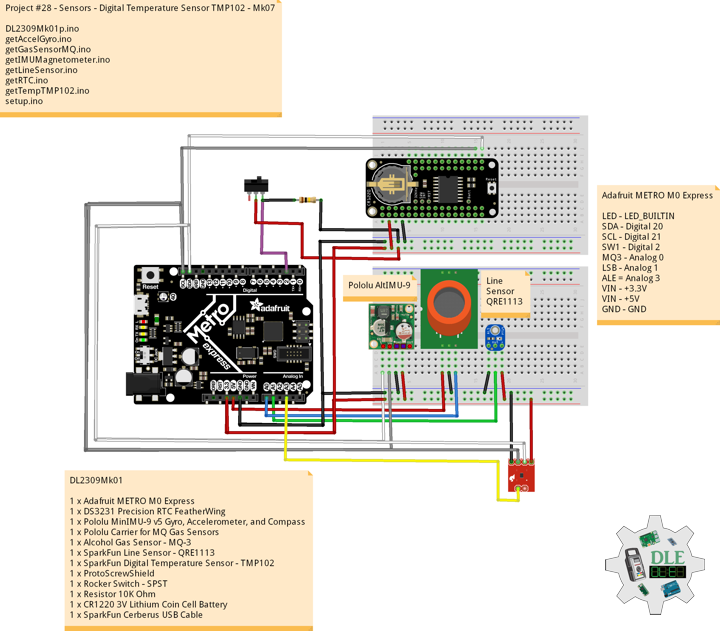
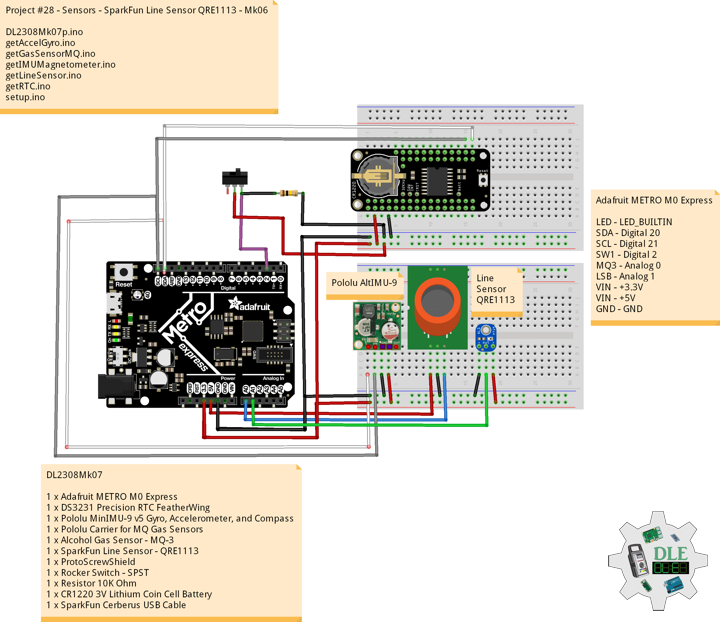
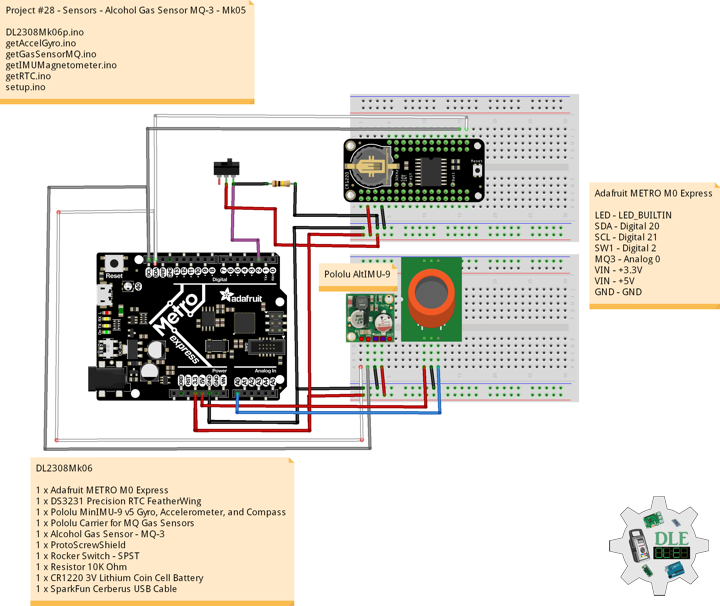
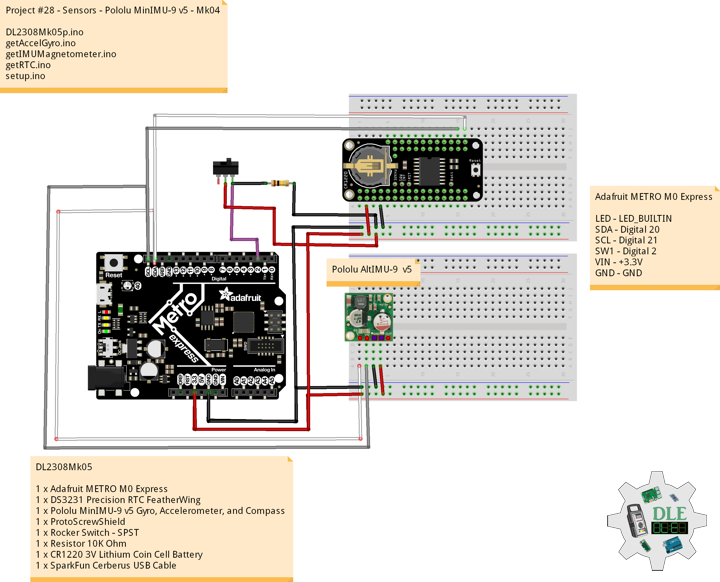
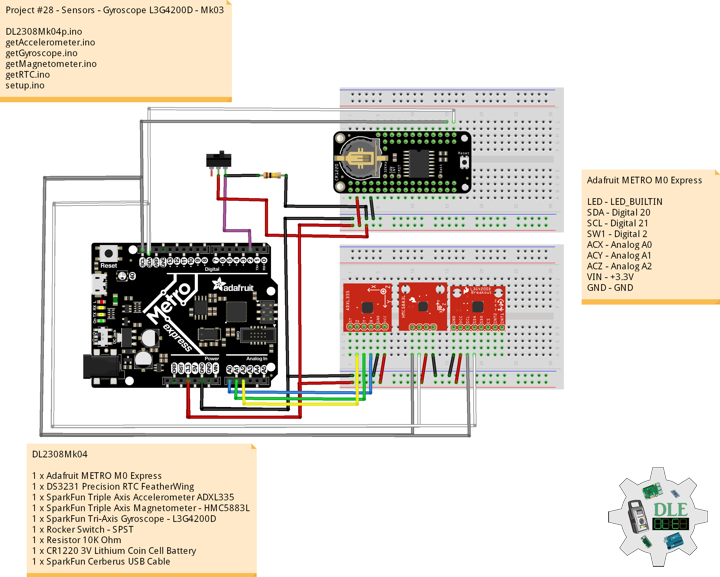
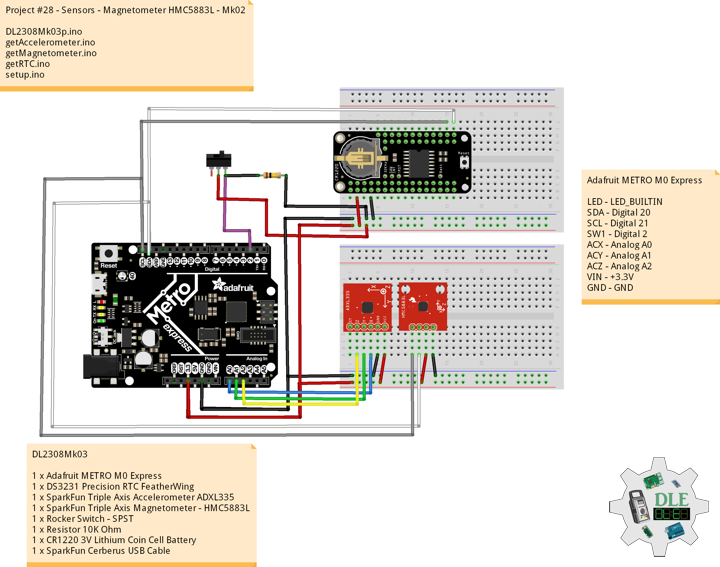
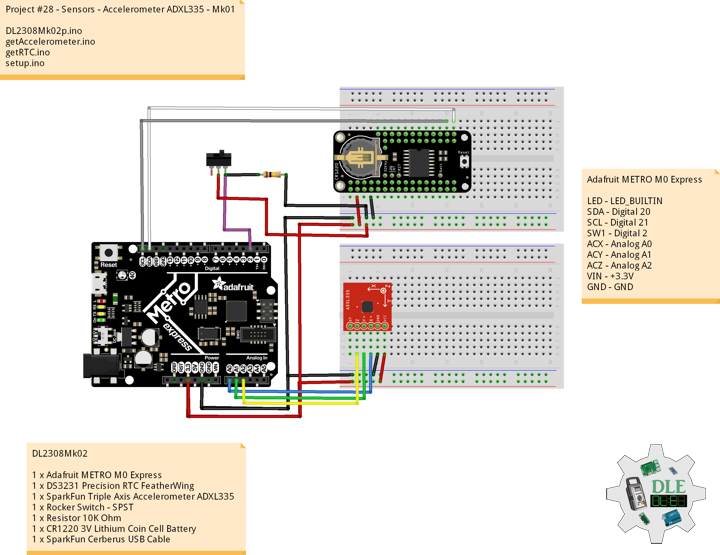
Fio v3 – ATmega32U4
LED – LED_BUILTIN
SDA – Digital 2
SCL – Digital 3
SW1 – Digital 6
GPT – Digital 7
GPR – Digital 9
VIN – +3.3V
GND – GND
——
DL2309Mk04p.ino
/****** Don Luc Electronics © ******
Software Version Information
Project #28 - Sensors - GPS Receiver GP-20U7 - Mk10
28-10
DL2309Mk04p.ino
1 x Fio v3 - ATmega32U4
1 x DS3231 Precision RTC FeatherWing
1 x GPS Receiver - GP-20U7 (56 Channel)
1 x Rocker Switch - SPST
1 x Resistor 10K Ohm
1 x CR1220 3V Lithium Coin Cell Battery
1 x SparkFun Cerberus USB Cable
*/

// Include the Library Code
// DS3231 Precision RTC
#include <RTClib.h>
// Two Wire Interface (TWI/I2C)
#include <Wire.h>
// Keyboard
#include <Keyboard.h>
// GPS Receiver
#include <TinyGPS++.h>
// Software Serial
#include <SoftwareSerial.h>

// Keyboard
String sKeyboard = "";

// DS3231 Precision RTC
RTC_DS3231 rtc;
String dateRTC = "";
String timeRTC = "";

// GPS Receiver
#define gpsRXPIN 9
// This one is unused and doesnt have a conection
#define gpsTXPIN 7
// The TinyGPS++ object
TinyGPSPlus gps;
// Latitude
float TargetLat;
// Longitude
float TargetLon;
// GPS Date, Time
// GPS Date
String TargetDat;
// GPS Time
String TargetTim;
// GPS Status
String GPSSt = "";

// The serial connection to the GPS device
SoftwareSerial tGPS(gpsRXPIN, gpsTXPIN);

// The number of the Rocker Switch pin
int iSwitch = 6;
// Variable for reading the button status
int SwitchState = 0;

// Software Version Information
String sver = "28-10";

void loop() {

  // Date and Time RTC
  isRTC ();

  // isGPS
  isGPS();

  // GPS Keyboard
  isGPSKeyboard();

  // Read the state of the Switch value:
  SwitchState = digitalRead(iSwitch);

  // Check if the button is pressed. If it is, the SwitchState is HIGH:
  if (SwitchState == HIGH) {

     Keyboard.println(sKeyboard);

  }

  // Delay 1 Second
  delay(1000);

}
getGPS.ino
// GPS Receiver
// Setup GPS
void setupGPS() {

  // Setup GPS
  tGPS.begin( 9600 );

}
// isGPS
void isGPS(){

  // Receives NEMA data from GPS receiver
  // This sketch displays information every time a new sentence is correctly encoded
  while ( tGPS.available() > 0)

    if (gps.encode( tGPS.read() ))
    {

       // GPS Vector Pointer Target
       displayInfo();

       // GPS Date, Time
       displayDTS();

    }

  if (millis() > 5000 && gps.charsProcessed() < 10)
  {

     while(true);

  }

}
// GPS Vector Pointer Target
void displayInfo(){

  // Location
  if (gps.location.isValid())
  {

     // Latitude
     TargetLat = gps.location.lat();
     // Longitude
     TargetLon = gps.location.lng();
     // GPS Status 2
     GPSSt = "Yes";

  }
  else
  {

     // GPS Status 0
     GPSSt = "No";
     TargetLat = 0;
     TargetLon = 0;

  }


}
// GPS Date, Time
void displayDTS(){

  // Date
  TargetDat = "";
  if (gps.date.isValid())
  {

     // Date
     // Year
     TargetDat += String(gps.date.year(), DEC);
     TargetDat += "/";
     // Month
     TargetDat += String(gps.date.month(), DEC);
     TargetDat += "/";
     // Day
     TargetDat += String(gps.date.day(), DEC);

  }

  // Time
  TargetTim = "";
  if (gps.time.isValid())
  {

     // Time
     // Hour
     TargetTim += String(gps.time.hour(), DEC);
     TargetTim += ":";
     // Minute
     TargetTim += String(gps.time.minute(), DEC);
     TargetTim += ":";
     // Secound
     TargetTim += String(gps.time.second(), DEC);

  }

}
// GPS Keyboard
void isGPSKeyboard(){

  // GPS Keyboard
  // Keyboard
  // GPS Vector Pointer Target
  sKeyboard = sKeyboard + GPSSt + "|" + String(TargetLat)
  + "|" + String(TargetLon) + "|";

  // Keyboard
  // GPS Date, Time
  sKeyboard = sKeyboard + TargetDat + "|" +
  TargetTim + "|*";

}
getRTC.ino
// Date & Time
// DS3231 Precision RTC
void setupRTC() {

  // DS3231 Precision RTC
  if (! rtc.begin()) {
    //Serial.println("Couldn't find RTC");
    //Serial.flush();
    while (1) delay(10);
  }

  if (rtc.lostPower()) {
    //Serial.println("RTC lost power, let's set the time!");
    // When time needs to be set on a new device, or after a power loss, the
    // following line sets the RTC to the date & time this sketch was compiled
    rtc.adjust(DateTime(F(__DATE__), F(__TIME__)));
    // This line sets the RTC with an explicit date & time, for example to set
    // January 21, 2014 at 3am you would call:
    //rtc.adjust(DateTime(2023, 8, 10, 11, 0, 0));
  }

}
// Date and Time RTC
void isRTC () {

  // Date and Time
  dateRTC = "";
  timeRTC = "";
  DateTime now = rtc.now();

  // Date
  dateRTC = now.year(), DEC;
  dateRTC = dateRTC + "/";
  dateRTC = dateRTC + now.month(), DEC;
  dateRTC = dateRTC + "/";
  dateRTC = dateRTC + now.day(), DEC;

  // Time
  timeRTC = now.hour(), DEC;
  timeRTC = timeRTC + ":";
  timeRTC = timeRTC + now.minute(), DEC;
  timeRTC = timeRTC + ":";
  timeRTC = timeRTC + now.second(), DEC;

  // Keyboard
  sKeyboard = "SEN|" + sver + "|" + String(dateRTC) + "|" +
  String(timeRTC) + "|";

}
setup.ino
// Setup
void setup()
{

  // Give display time to power on
  delay(100);

  // Wire - Inialize I2C Hardware
  Wire.begin();

  // Give display time to power on
  delay(100);

  // Date & Time RTC
  // DS3231 Precision RTC
  setupRTC();

  // Initialize control over the keyboard:
  Keyboard.begin();

  // Give display time to power on
  delay(100);

  // GPS Receiver
  // Setup GPS
  setupGPS();

  // Initialize the Switch pin as an input
  pinMode(iSwitch, INPUT);

  // Initialize digital pin LED_BUILTIN as an output
  pinMode(LED_BUILTIN, OUTPUT);
  // Turn the LED on HIGH
  digitalWrite(LED_BUILTIN, HIGH);

  // Delay 5 Second
  delay( 5000 );

}
——
People can contact us: https://www.donluc.com/?page_id=1927
Technology Experience
- Programming Language
- Single-Board Microcontrollers (PIC, Arduino, Raspberry Pi,Espressif, etc…)
- IoT
- Wireless (Radio Frequency, Bluetooth, WiFi, Etc…)
- Robotics
- Camera and Video Capture Receiver Stationary, Wheel/Tank and Underwater Vehicle
- Unmanned Vehicles Terrestrial and Marine
- Machine Learning
- RTOS
- Research & Development (R & D)
Instructor, E-Mentor, STEAM, and Arts-Based Training
- Programming Language
- IoT
- PIC Microcontrollers
- Arduino
- Raspberry Pi
- Espressif
- Robotics
Follow Us
Luc Paquin – Curriculum Vitae – 2023
https://www.donluc.com/luc/
Web: https://www.donluc.com/
Facebook: https://www.facebook.com/neosteam.labs.9/
YouTube: https://www.youtube.com/@thesass2063
Twitter: https://twitter.com/labs_steam
Pinterest: https://www.pinterest.com/NeoSteamLabs/
Instagram: https://www.instagram.com/neosteamlabs/
Don Luc