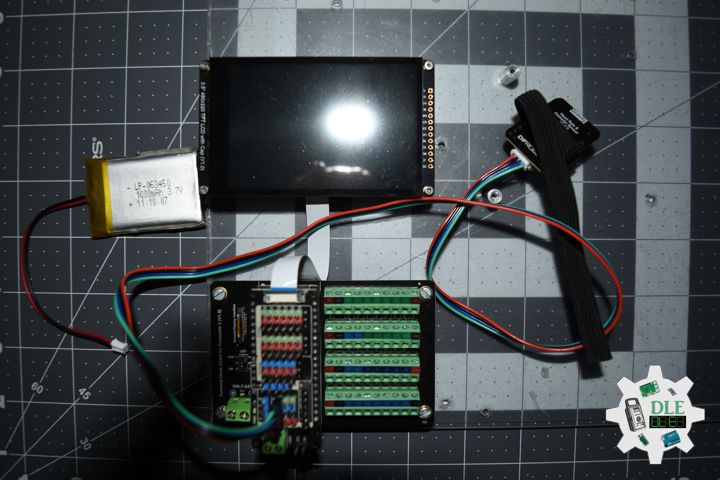
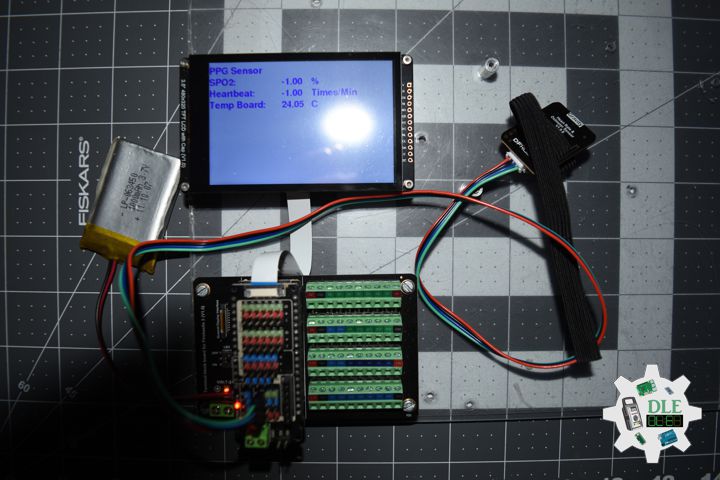
The Alpha Geek – Geeking Out

Consultant

Consultant

1 2 3 16

Patreon: Beginner

——

#DonLucElectronics #DonLuc #Arduino #Project #Patreon #Electronics #Microcontrollers #IoT #Fritzing #Programming #Consultant

——

Patreon: Beginner

——

Patreon: Beginner

——

Patreon: Beginner

——

Patreon: Beginner

Beginner: These beginner-friendly microcontrollers is Arduino Uno are easy to use and program with just a computer or laptop, a USB cable, and some open-source software.

What is Arduino?

Arduino board designs use a variety of microprocessors and controllers. The boards are equipped with sets of digital and analog input/output (I/O) pins that may be interfaced to various expansion boards “Shields” or breadboards and other circuits. The boards feature serial communications interfaces, including Universal Serial Bus (USB) on some models, which are also used for loading programs. Arduino boards are able to read inputs, light on a sensor, a finger on a button, or a Twitter message, and turn it into an output, activating a motor, turning on an LED, publishing something online. You can tell your board what to do by sending a set of instructions to the microcontroller on the board. The microcontrollers can be programmed using the C and C++ programming languages, using a standard API which is also known as the Arduino Programming Language, and the Arduino Software (IDE).

Arduino Software (IDE)

A minimal Arduino C/C++ program consists of only two functions:

setup(): This function is called once when a sketch starts after power-up or reset. It is used to initialize variables, input and output pin modes, and other libraries needed in the sketch.
loop(): After setup() function exits, the loop() function is executed repeatedly in the main program. It controls the board until the board is powered off or is reset. It is analogous to the function while.

DL2412Mk01

1 x SparkFun RedBoard Qwiic
1 x Potentiometer 10K Ohm
1 x ProtoScrewShield
2 x LED
1 x USB Micro-B Cable

SparkFun RedBoard Qwiic

POT – A0
LEDP – 13
LEDG – 12
VIN – +5V
GND – GND

——

DL2412Mk01ppp

DL2412Mk01ppp.ino

/****** Don Luc Electronics © ******/

int iPot = A0;
int iPotVal = 0;
int Threshold = 500;
int iLEDProto = 13;
int iLEDGreen = 12;
String sver = "Beginner";

void setup()
{

  delay(100);

  Serial.begin(57600);
  pinMode(iLEDProto, OUTPUT);
  pinMode(iLEDGreen, OUTPUT);
  delay( 100 );

}

void loop() {

  iPotVal = analogRead( iPot );
  Serial.print("Potentiometer: ");
  if (iPotVal > Threshold) {

    digitalWrite(iLEDProto, LOW);
    Serial.print( "LED Green " );
    Serial.println( iPotVal );
    digitalWrite(iLEDGreen, HIGH);
    
  }
  else {

    digitalWrite(iLEDGreen, LOW);
    Serial.print( "LED Proto " );
    Serial.println( iPotVal );
    digitalWrite(iLEDProto, HIGH);
    
  }
  delay( 100 );

}

——

DL2412Mk01pp

DL2412Mk01pp.ino

/****** Don Luc Electronics © ******
Software Version Information
Patreon: Beginner
Beginner
DL2412Mk01pp.ino
DL2412Mk01
1 x SparkFun RedBoard Qwiic
1 x Potentiometer
1 x ProtoScrewShield
2 x LED
1 x USB Micro-B Cable
*/

// Include the Library Code

// Potentiometer
int iPot = A0;
int iPotVal = 0;
// Change Your Threshold Here
int Threshold = 500;

// LED ProtoScrewShield Yellow
int iLEDProto = 13;

// LED Green
int iLEDGreen = 12;

// Software Version Information
String sver = "Beginner";

// Setup
void setup()
{
 
  // Delay
  delay(100);

  // Serial
  Serial.begin(57600);

  // Initialize the LED iLEDProto
  pinMode(iLEDProto, OUTPUT);

  // Initialize the LED iLEDGreen
  pinMode(iLEDGreen, OUTPUT);

  // Delay 0.1 Second
  delay( 100 );

}
// Loop
void loop() {

  // Potentiometer
  // Connect Potentiometer to Analog 0
  iPotVal = analogRead( iPot );

  // Serial
  Serial.print("Potentiometer: ");

  // Threshold
  if (iPotVal > Threshold) {

    // LEDProto
    digitalWrite(iLEDProto, LOW);
    // Serial
    Serial.print( "LED Green " );
    Serial.println( iPotVal );
    // LEDGreen
    digitalWrite(iLEDGreen, HIGH);
    
  }
  else {
    
    // LEDGreen
    digitalWrite(iLEDGreen, LOW);
    // Serial
    Serial.print( "LED Proto " );
    Serial.println( iPotVal );
    // LEDProto
    digitalWrite(iLEDProto, HIGH);
    
  }

  // Delay 0.1 Second
  delay( 100 );

}

——

DL2412Mk01p

DL2412Mk01p.ino
loop()

getPotentiometer.ino
Attaining => get
Combining Form => is

setup.ino
setup()

DL2412Mk01p

DL2411Mk03p.ino

/****** Don Luc Electronics © ******
Software Version Information
Patreon: Beginner
Beginner
DL2412Mk01p.ino
DL2412Mk01
1 x SparkFun RedBoard Qwiic
1 x Potentiometer
1 x ProtoScrewShield
2 x LED
1 x USB Micro-B Cable
*/

// Include the Library Code

// Potentiometer
int iPot = A0;
int iPotVal = 0;
// Change Your Threshold Here
int Threshold = 500;

// LED ProtoScrewShield Yellow
int iLEDProto = 13;

// LED Green
int iLEDGreen = 12;

// Software Version Information
String sver = "Beginner";

void loop() {

  // Potentiometer
  isPotentiometer();

  // Delay 0.1 Second
  delay( 100 );

}

getPotentiometer.ino

// Potentiometer
// Potentiometer
void isPotentiometer(){

  // Connect Potentiometer to Analog 0
  iPotVal = analogRead( iPot );

  // Serial
  Serial.print("Potentiometer: ");

  // Threshold
  if (iPotVal > Threshold) {

    // LEDProto
    digitalWrite(iLEDProto, LOW);
    // Serial
    Serial.print( "LED Green " );
    Serial.println( iPotVal );
    // LEDGreen
    digitalWrite(iLEDGreen, HIGH);
    
  }
  else {
    
    // LEDGreen
    digitalWrite(iLEDGreen, LOW);
    // Serial
    Serial.print( "LED Proto " );
    Serial.println( iPotVal );
    // LEDProto
    digitalWrite(iLEDProto, HIGH);
    
  }

}

setup.ino

// Setup
void setup()
{
 
  // Delay
  delay(100);

  // Serial
  Serial.begin(57600);

  // Initialize the LED iLEDProto
  pinMode(iLEDProto, OUTPUT);

  // Initialize the LED iLEDGreen
  pinMode(iLEDGreen, OUTPUT);

  // Delay 0.1 Second
  delay( 100 );

}

——

People can contact us: https://www.donluc.com/?page_id=1927

Electronics, IoT, Teacher, Instructor, R&D and Consulting

  • Programming Language
  • Single-Board Microcontrollers (PIC, Arduino, Raspberry Pi, Arm, Silicon Labs, Espressif, Etc…)
  • IoT
  • Wireless (Radio Frequency, Bluetooth, WiFi, Etc…)
  • Robotics
  • Automation
  • Camera and Video Capture Receiver Stationary, Wheel/Tank and Underwater Vehicle
  • Unmanned Vehicles Terrestrial and Marine
  • Machine Learning
  • Artificial Intelligence (AI)
  • RTOS
  • Sensors, eHealth Sensors, Biosensor, and Biometric
  • Research & Development (R & D)
  • Consulting

Follow Us

Luc Paquin – Curriculum Vitae – 2024
https://www.donluc.com/luc/

Web: https://www.donluc.com/
Facebook: https://www.facebook.com/neosteam.labs.9/
YouTube: https://www.youtube.com/@thesass2063
Twitter: https://twitter.com/labs_steam
Pinterest: https://www.pinterest.com/NeoSteamLabs/
Instagram: https://www.instagram.com/neosteamlabs/
Patreon: https://patreon.com/DonLucElectronics59
DFRobot: https://learn.dfrobot.com/user-10186.html
Hackster.io: https://www.hackster.io/neosteam-labs
Elecrow: https://www.elecrow.com/share/sharepj/center/no/760816d385ebb1edc0732fd873bfbf13
TikTok: https://www.tiktok.com/@luc.paquin8
Twitch: https://www.twitch.tv/lucpaquin
LinkedIn: https://www.linkedin.com/in/jlucpaquin/

Don Luc

Project #30 – UNIHIKER – MEMS – Mk07

——

#DonLucElectronics #DonLuc #UNIHIKER #CH4 #VOC #Display #IoT #Project #Debian #Python #Thonny #DFRobot #Fritzing #Programming #Electronics #Microcontrollers #Consultant

——

MEMS

——

MEMS

——

MEMS

——

MEMS

MEMS (Micro-Electromechanical Systems) is the technology of microscopic devices incorporating both electronic and moving parts. MEMS are made up of components between 1 and 100 micrometres in size, and MEMS devices generally range in size from 20 micrometres to a millimetre, although components arranged in arrayscan be more than 1000 mm2. They usually consist of a central unit that processes data, an integrated circuit chip such as microprocessor, and several components that interact with the surroundings, such as microsensors.

DL2410Mk01

1 x UNIHIKER
1 x Fermion: MEMS VOC Gas Detection Sensor
1 x Fermion: MEMS Methane CH4 Gas Detection Sensor
1 x USB Battery Pack
1 x USB 3.1 Cable A to C

UNIHIKER

ADC1 – 21
ADC2 – 22
VIN – +5V
GND – GND

DL2410Mk01p

DL2410Mk01p.py

****** Don Luc Electronics © ******
Software Version Information
Project #30 - UNIHIKER - MEMS - Mk07
30-07
DL2410Mk01.py
DL2410Mk01
1 x UNIHIKER
1 x Fermion: MEMS VOC Gas Detection Sensor
1 x Fermion: MEMS Methane CH4 Gas Detection Sensor
1 x USB Battery Pack
1 x USB 3.1 Cable A to C

-*- coding: utf-8 -*-
"""
# Import the unihiker library
from unihiker import GUI

# Import the time library
import time

# Import the Board module from the pinpong.board package 
from pinpong.board import Board

# Import all modules from the pinpong.extension.unihiker package
from pinpong.extension.unihiker import *

# Initialize the board by selecting the board type and port number;
# if not specified, the program will automatically detect it
Board().begin()

# Initialize pin 21 as analog input mode
# Fermion: MEMS Methane CH4 Gas Detection Sensor
adc0 = Pin(Pin.P21, Pin.ANALOG)

# Initialize pin 22 as analog input mode
# Fermion: MEMS VOC Gas Detection Sensor
adc1 = Pin(Pin.P22, Pin.ANALOG)

# Instantiate the GUI class and create a gui object
gui = GUI()

# Display the initial background image 'DL2410Mk01p'
img = gui.draw_image(x=0, y=0, w=240, h=320, image='DL2410Mk01p.png')

# Fermion: MEMS Methane CH4 Gas Detection Sensor
# Display the initial Fermion: MEMS Methane CH4 Gas Detection Sensor valueCH4
valueCH4 = gui.draw_text(x=30, y=151, text='0', font_size=18)

# MEMS VOC
# Display the initial Fermion: MEMS VOC Gas Detection Sensor valueVOC
valueVOC = gui.draw_text(x=30, y=221, text='0', font_size=18)

while True:

    # Fermion: MEMS Methane CH4 Gas Detection Sensor
    # Read analog value
    CH4Sensor = adc0.read_analog()
    valueCH4.config(text=CH4Sensor)
    
    # Fermion: MEMS VOC Gas Detection Sensor
    # Read analog value
    VOCSensor = adc1.read_analog()
    valueVOC.config(text=VOCSensor)
    
    # Delay for 1 second to keep the screen content displayed for a longer time
    time.sleep(1)

——

People can contact us: https://www.donluc.com/?page_id=1927

Electronics, IoT, Teacher, Instructor, R&D and Consulting

  • Programming Language
  • Single-Board Microcontrollers (PIC, Arduino, Raspberry Pi, Arm, Silicon Labs, Espressif, Etc…)
  • IoT
  • Wireless (Radio Frequency, Bluetooth, WiFi, Etc…)
  • Robotics
  • Automation
  • Camera and Video Capture Receiver Stationary, Wheel/Tank and Underwater Vehicle
  • Unmanned Vehicles Terrestrial and Marine
  • Machine Learning
  • Artificial Intelligence (AI)
  • RTOS
  • Sensors, eHealth Sensors, Biosensor, and Biometric
  • Research & Development (R & D)
  • Consulting

Follow Us

Luc Paquin – Curriculum Vitae – 2024
https://www.donluc.com/luc/

Web: https://www.donluc.com/
Facebook: https://www.facebook.com/neosteam.labs.9/
YouTube: https://www.youtube.com/@thesass2063
Twitter: https://twitter.com/labs_steam
Pinterest: https://www.pinterest.com/NeoSteamLabs/
Instagram: https://www.instagram.com/neosteamlabs/
DFRobot Luc.Paquin: https://edu.dfrobot.com/dashboard/makelogs
Hackster.io: https://www.hackster.io/neosteam-labs
ELECROW: https://www.elecrow.com/share/sharepj/center/no/760816d385ebb1edc0732fd873bfbf13
TikTok: www.tiktok.com/@luc.paquin8
LinkedIn: https://www.linkedin.com/in/jlucpaquin/

Don Luc
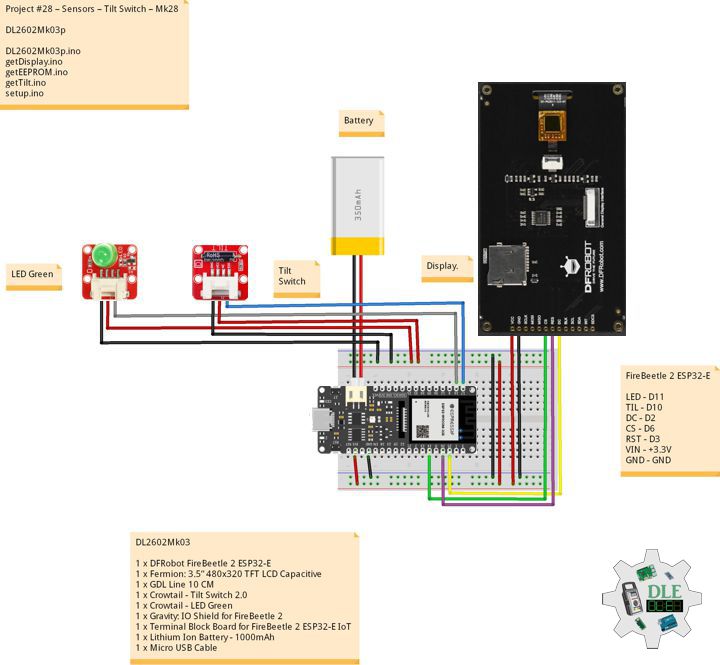
Project #29 – DFRobot – RTC – Mk31

——

#DonLucElectronics #DonLuc #DFRobot #RTC #SD #ASM #SHTC3 #FireBeetle2ESP32C6 #Display #EEPROM #ESP32 #IoT #SparkFun #Adafruit #Arduino #Project #Fritzing #Programming #Electronics #Microcontrollers #Consultant

——

RTC

——

RTC

——

RTC

——

Real-Time Clock

A Real-Time Clock (RTC) is an electronic device, most often in the form of an integrated circuit, that measures the passage of time. Although the term often refers to the devices in personal computers, servers and embedded systems, RTCs are present in almost any electronic device which needs to keep accurate time of day.

Although keeping time can be done without an RTC, using one has benefits:

  • Reliably maintains and provides current time through disruptive system states such as hangs, sleep, reboots, or if given sufficient backup power, full shutdown and hardware reassembly, without the need to have its time set again.
  • Low power consumption, important when running from alternate power.
  • Frees the main system for time-critical tasks.
  • Sometimes more accurate than other methods.

DL2409Mk08

1 x FireBeetle 2 ESP32-C6
1 x Adalogger FeatherWing – RTC + SD
1 x CR1220 3 Volt Lithium Coin Cell Battery
1 x Fermion: SHTC3 Temperature & Humidity Sensor
1 x Fermion: 2.0″ 320×240 IPS TFT LCD
1 x GDL Line 10 CM
1 x Gravity: Analog Soil Moisture Sensor
1 x 3 AAA Battery Holder with On/Off Switch and 2-Pin JST
3 x AAA Battery
1 x SparkFun Solderable Breadboard – Large
1 x USB 3.1 Cable A to C

FireBeetle 2 ESP32-C6

SCL – 20
SDA – 19
ASM – A1
LED – 15
DC – D2
CS – D6
RST – D3
VIN – +3.3V
GND – GND

DL2409Mk08p

DL2409Mk08p.ino

/****** Don Luc Electronics © ******
Software Version Information
Project #29 - DFRobot - RTC - Mk31
29-31
DL2409Mk08p.ino
DL2409Mk08
1 x FireBeetle 2 ESP32-C6
1 x Adalogger FeatherWing - RTC + SD
1 x CR1220 3 Volt Lithium Coin Cell Battery
1 x Fermion: SHTC3 Temperature & Humidity Sensor
1 x Fermion: 2.0" 320x240 IPS TFT LCD
1 x GDL Line 10 CM
1 x Gravity: Analog Soil Moisture Sensor
1 x 3 AAA Battery Holder with On/Off Switch and 2-Pin JST
3 x AAA Battery
1 x SparkFun Solderable Breadboard - Large
1 x USB 3.1 Cable A to C
*/

// Include the Library Code
// EEPROM Library to Read and Write EEPROM
// with Unique ID for Unit
#include "EEPROM.h"
// Arduino
#include <Arduino.h>
// Wire
#include <Wire.h>
// DFRobot Display GDL API
#include <DFRobot_GDL.h>
// Fermion: SHTC3 Temperature & Humidity Sensor
#include"DFRobot_SHTC3.h"
// Date and Time Functions PCF8523 RTC
#include <RTClib.h>

// Date and Time PCF8523 RTC
RTC_PCF8523 rtc;
String dateRTC = "";
String timeRTC = "";

// Fermion: SHTC3 Temperature & Humidity Sensor
DFRobot_SHTC3 SHTC3;
uint32_t id = 0;
float temperature;
float humidity;

// Defined ESP32
#define TFT_DC  D2
#define TFT_CS  D6
#define TFT_RST D3

/*dc=*/ /*cs=*/ /*rst=*/
// DFRobot Display 240x320
DFRobot_ST7789_240x320_HW_SPI screen(TFT_DC, TFT_CS, TFT_RST);

// Gravity: Analog Soil Moisture Sensor
int iSoilMoisture = A1;
int iSoilMoistureVal = 0;
int zz = 0;
// Change Your Threshold Here
int Threshold = 300;
String SM = "";

// LED Green
int iLEDGreen = 15;

// EEPROM Unique ID Information
#define EEPROM_SIZE 64
String uid = "";

// Software Version Information
String sver = "29-31";

void loop() {

  // Date and Time PCF8523 RTC
  isRTC();
  
  // SHTC3 Temperature and Humidity Sensor
  isSHTC3();
  
  // Gravity: Analog Soil Moisture Sensor
  isSoilMoisture();

  // DFRobot Display 240x320 - ASM - Temperature and Humidity - Date and Time
  isDisplayTH();

  // Delay 5 Second
  delay( 5000 );

}

getDisplay.ino

// DFRobot Display 240x320
// DFRobot Display 240x320 - UID
void isDisplayUID() {

    // DFRobot Display 240x320
    // Text Display
    // Text Wrap
    screen.setTextWrap(false);
    // Rotation
    screen.setRotation(3);
    // Fill Screen => black
    screen.fillScreen(0x0000);
    // Text Color => white
    screen.setTextColor(0xffff);
    // Font => Free Mono 9pt
    screen.setFont(&FreeMono9pt7b);
    // TextSize => 1.5
    screen.setTextSize(1.5);
    // DFRobot Display
    screen.setCursor(0, 30);
    screen.println("DFRobot Display");
    // Don Luc Electronics
    screen.setCursor(0, 60);
    screen.println("Don Luc Electronics");
    // Version
    screen.setCursor(0, 90);
    screen.println("Version");
    screen.setCursor(0, 120);
    screen.println( sver );
    // EEPROM
    screen.setCursor(0, 150);
    screen.println("EEPROM");
    screen.setCursor(0, 180);
    screen.println( uid );

}
// DFRobot Display 240x320 - ASM - Temperature and Humidity
void isDisplayTH() {
  
    // DFRobot Display 240x320
    // Text Display
    // Text Wrap
    screen.setTextWrap(false);
    // Rotation
    screen.setRotation(3);
    // Fill Screen => black
    screen.fillScreen(0x0000);
    // Text Color => white
    screen.setTextColor(0xffff);
    // Font => Free Mono 9pt
    screen.setFont(&FreeMono9pt7b);
    // TextSize => 1.5
    screen.setTextSize(1.5);
    // Soil Moisture Sensor
    screen.setCursor(0, 30);
    screen.println("Soil Moisture Sensor");
    // Date and Time
    screen.setCursor(0, 60);
    screen.println( dateRTC + " - " + timeRTC );
    // Gravity: Analog Soil Moisture Sensor
    screen.setCursor(0, 90);
    screen.println( "ASM: " );
    screen.setCursor(60, 90);
    screen.println( iSoilMoistureVal );
    screen.setCursor(0, 120);
    screen.println( SM );
    // SHTC3 Temperature
    screen.setCursor(0, 150);
    screen.println( "Tem: " );
    screen.setCursor(60, 150);
    screen.println( temperature );
    screen.setCursor(120, 150);
    screen.println( "C" );
    // SHTC3 Humidity
    screen.setCursor(0, 180);
    screen.println( "Hum: " );
    screen.setCursor(60, 180);
    screen.println( humidity );
    screen.setCursor(120, 180);
    screen.println( "%RH" );

}

getEEPROM.ino

// EEPROM
// isUID EEPROM Unique ID
void isUID() {
  
  // Is Unit ID
  uid = "";
  for (int x = 0; x < 7; x++)
  {
    uid = uid + char(EEPROM.read(x));
  }
  
}

getRTC.ino

// Date and Time PCF8523 RTC 
// Setup Date and Time PCF8523 RTC 
void isSetupRTC() {

  // Date and Time PCF8523 RTC   
  if (! rtc.begin()) {
    while (1);
  }  
  if (! rtc.initialized()) {
    
    // Following line sets the RTC to the date & time this sketch was compiled
    rtc.adjust(DateTime(F(__DATE__), F(__TIME__)));
    // This line sets the RTC with an explicit date & time, for example to set
    // January 21, 2014 at 3am you would call:
    // rtc.adjust(DateTime(2024, 9, 26, 9, 1, 0));
    
  }

  // When the RTC was stopped and stays connected to the battery, it has
  // to be restarted by clearing the STOP bit. Let's do this to ensure
  // the RTC is running.
  rtc.start();

   // The PCF8523 can be calibrated for:
  //  - Aging adjustment
  //  - Temperature compensation
  //  - Accuracy tuning
  // The offset mode to use, once every two hours or once every minute.
  // The offset Offset value from -64 to +63. 
  // See the Application Note for calculation of offset values.
  // https://www.nxp.com/docs/en/application-note/AN11247.pdf
  // The deviation in parts per million can be calculated over 
  // a period of observation. Both the drift (which can be negative)
  // and the observation period must be in seconds. For accuracy 
  // the variation should be observed over about 1 week.
  // Note: any previous calibration should cancelled prior to 
  // any new observation period.
  // Seconds plus or minus over oservation period - set to 
  // 0 to cancel previous calibration.
  float drift = 43;
  // total obsevation period in seconds (86400 = seconds in 1 day: 
  // 7 days = (7 * 86400) seconds )
  float period_sec = (7 * 86400);
  // Deviation in parts per million (μs)
  float deviation_ppm = (drift / period_sec * 1000000);
  // Use with offset mode PCF8523_TwoHours
  float drift_unit = 4.34;
  //For corrections every min the drift_unit is 4.069 ppm 
  // (use with offset mode PCF8523_OneMinute)
  // float drift_unit = 4.069; 
  int offset = round(deviation_ppm / drift_unit);

}
// Date and Time PCF8523 RTC 
void isRTC () {

  // Date and Time
  DateTime now = rtc.now();
  // Date
  dateRTC = now.year(), DEC; 
  dateRTC = dateRTC + "/";
  dateRTC = dateRTC + now.month(), DEC;
  dateRTC = dateRTC + "/";
  dateRTC = dateRTC + now.day(), DEC;
  // Time
  timeRTC = now.hour(), DEC;
  timeRTC = timeRTC + ":";
  timeRTC = timeRTC + now.minute(), DEC;
  timeRTC = timeRTC + ":";
  timeRTC = timeRTC + now.second(), DEC;
  
}

getSHTC3.ino

// SHTC3 Temperature and Humidity Sensor
// SHTC3
void isSHTC3(){

  // SHTC3 Temperature and Humidity Sensor
  /**
   *    Mode  For configuring sensor working mode    
   *    SHTC3:
           PRECISION_HIGH_CLKSTRETCH_ON Clock Stretching Enabled 
   *       PRECISION_HIGH_CLKSTRETCH_OFF Clock Stretching Disabled 
   *       PRECISION_LOW_CLKSTRETCH_ON Clock Stretching Enabled & Low Power
   *       PRECISION_LOW_CLKSTRETCH_OFF Clock Stretching Disabled & Low Power
   */
  temperature = SHTC3.getTemperature(PRECISION_HIGH_CLKSTRETCH_ON);
  /**
   *    Mode  For configuring sensor working mode 
   *    SHTC3
   *       PRECISION_HIGH_CLKSTRETCH_ON Clock Stretching Enabled 
   *       PRECISION_HIGH_CLKSTRETCH_OFF Clock Stretching Disabled 
   *       PRECISION_LOW_CLKSTRETCH_ON Clock Stretching Enabled & Low Power
   *       PRECISION_LOW_CLKSTRETCH_OFF Clock Stretching Disabled & Low Power
   */
  humidity = SHTC3.getHumidity(PRECISION_HIGH_CLKSTRETCH_OFF);

}

getSoilMoisture.ino

// Gravity: Analog Soil Moisture Sensor
// Soil Moisture
void isSoilMoisture(){

  // Connect Soil Moisture Sensor to Analog 0
  zz = analogRead( iSoilMoisture );

  // iSoilMoistureVal => 0~900 Soil Moisture
  iSoilMoistureVal = map( zz, 0, 4095, 0, 900);

  // Threshold
  if (iSoilMoistureVal > Threshold)

    // 300~950 - Humid Soil
    SM = "Humid Soil";
    
  else {
    
    // 0-300 Dry Soil
    SM = "Dry Soil";

  }

}

setup.ino

// Setup
void setup()
{
  
  // Give display time to power on
  delay(100);

  // EEPROM Size
  EEPROM.begin(EEPROM_SIZE);
  
  // EEPROM Unique ID
  isUID();
  
  // Delay
  delay( 100 );

  // Wire
  Wire.begin();

  // Delay
  delay( 100 );
  
  // DFRobot Display 240x320
  screen.begin();

  // Delay
  delay(100);

  // Fermion: SHTC3 Temperature & Humidity Sensor
  SHTC3.begin();
  /*SHTC3 is set to sleep mode by default. Please wake it up before use. 
  Use SHTC3.sleep() to let SHTC3 enter sleep mode; SHTC3 
  stops working in sleep mode*/
  SHTC3.wakeup();
  
  // Delay
  delay(100);

  // Setup Date and Time PCF8523 RTC 
  isSetupRTC();

  // Date and Time PCF8523 RTC
  isRTC();

  // Delay
  delay(100);

  // Initialize the LED Green
  pinMode(iLEDGreen, OUTPUT);

  // iLEDGreen HIGH
  digitalWrite(iLEDGreen, HIGH );

  // DFRobot Display 240x320 - UID
  // Don Luc Electronics
  // Version
  // EEPROM
  isDisplayUID();

  // Delay 5 Second
  delay( 5000 );

}

——

People can contact us: https://www.donluc.com/?page_id=1927

Electronics, IoT, Teacher, Instructor, R&D and Consulting

  • Programming Language
  • Single-Board Microcontrollers (PIC, Arduino, Raspberry Pi, Arm, Silicon Labs, Espressif, Etc…)
  • IoT
  • Wireless (Radio Frequency, Bluetooth, WiFi, Etc…)
  • Robotics
  • Automation
  • Camera and Video Capture Receiver Stationary, Wheel/Tank and Underwater Vehicle
  • Unmanned Vehicles Terrestrial and Marine
  • Machine Learning
  • Artificial Intelligence (AI)
  • RTOS
  • Sensors, eHealth Sensors, Biosensor, and Biometric
  • Research & Development (R & D)
  • Consulting

Follow Us

Luc Paquin – Curriculum Vitae – 2024
https://www.donluc.com/luc/

Web: https://www.donluc.com/
Facebook: https://www.facebook.com/neosteam.labs.9/
YouTube: https://www.youtube.com/@thesass2063
Twitter: https://twitter.com/labs_steam
Pinterest: https://www.pinterest.com/NeoSteamLabs/
Instagram: https://www.instagram.com/neosteamlabs/
DFRobot Luc.Paquin: https://edu.dfrobot.com/dashboard/makelogs
Hackster.io: https://www.hackster.io/neosteam-labs
ELECROW: https://www.elecrow.com/share/sharepj/center/no/760816d385ebb1edc0732fd873bfbf13
TikTok: www.tiktok.com/@luc.paquin8
LinkedIn: https://www.linkedin.com/in/jlucpaquin/

Don Luc
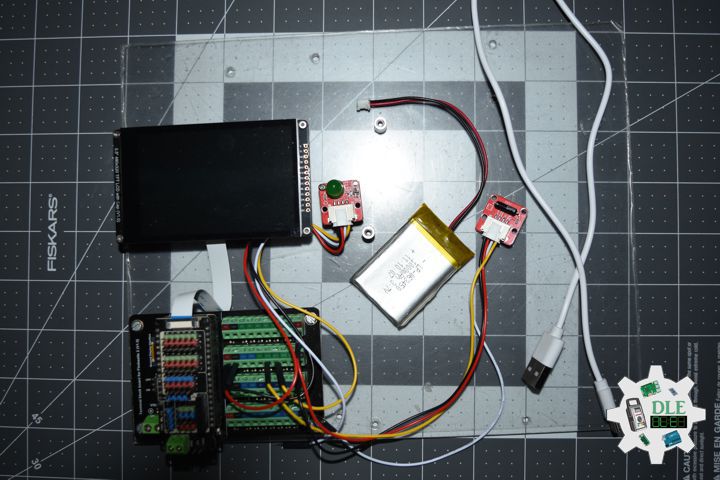
Project #30 – UNIHIKER – MEMS CH4 – Mk06

——

#DonLucElectronics #DonLuc #UNIHIKER #CH4 #Display #IoT #Project #Debian #Python #Thonny #DFRobot #Fritzing #Programming #Electronics #Microcontrollers #Consultant

——

MEMS CH4

——

MEMS CH4

——

MEMS CH4

——

Fermion: MEMS Methane CH4 Gas Detection Sensor

Fermion: MEMS Methane CH4 Gas Detection Sensor employs state-of-the-art micro-electromechanical system (MEMS) technology, endowing the sensor with compact dimensions, low power consumption, minimal heat generation, short preheating time, and swift response recovery. The sensor can qualitatively measure methane gas concentration and is suitable for combustible gas leakage monitoring devices, gas leak detectors, fire/safety detection systems and other applications. Detection range: 1-10000 ppm. It is advisable to preheat the module for at least 24 hours.

DL2409Mk07

1 x UNIHIKER
1 x Fermion: MEMS Methane CH4 Gas Detection Sensor
1 x USB Battery Pack
1 x USB 3.1 Cable A to C

UNIHIKER

ADC – 21
VIN – +5V
GND – GND

DL2409Mk07p

DL2409Mk07p.py

"""
****** Don Luc Electronics © ******
Software Version Information
Project #30 - UNIHIKER - Fermion: MEMS CH4 - Mk06
30-06
DL2409Mk07.py
DL2409Mk07
1 x UNIHIKER
1 x Fermion: MEMS Methane CH4 Gas Detection Sensor
1 x USB Battery Pack
1 x USB 3.1 Cable A to C

-*- coding: utf-8 -*-
"""
# Import the unihiker library
from unihiker import GUI

# Import the time library
import time

# Import the Board module from the pinpong.board package 
from pinpong.board import Board

# Import all modules from the pinpong.extension.unihiker package
from pinpong.extension.unihiker import *

# Initialize the board by selecting the board type and port number;
# if not specified, the program will automatically detect it
Board().begin()

# Initialize pin 21 as analog input mode
# Fermion: MEMS Methane CH4 Gas Detection Sensor
adc0 = Pin(Pin.P21, Pin.ANALOG)

# Instantiate the GUI class and create a gui object
gui = GUI()

# Display the initial background image 'DL2409Mk07p'
img = gui.draw_image(x=0, y=0, w=240, h=320, image='DL2409Mk07p.png')

# Fermion: MEMS Methane CH4 Gas Detection Sensor
# Display the initial Fermion: MEMS Methane CH4 Gas Detection Sensor valueCH4
valueCH4 = gui.draw_text(x=30, y=151, text='0', font_size=18)

while True:

    # Fermion: MEMS Methane CH4 Gas Detection Sensor
    # Read analog value
    CH4Sensor = adc0.read_analog()
    valueCH4.config(text=CH4Sensor)
    
    # Delay for 1 second to keep the screen content displayed for a longer time
    time.sleep(1)

——

People can contact us: https://www.donluc.com/?page_id=1927

Electronics, IoT, Teacher, Instructor, R&D and Consulting

  • Programming Language
  • Single-Board Microcontrollers (PIC, Arduino, Raspberry Pi, Arm, Silicon Labs, Espressif, Etc…)
  • IoT
  • Wireless (Radio Frequency, Bluetooth, WiFi, Etc…)
  • Robotics
  • Automation
  • Camera and Video Capture Receiver Stationary, Wheel/Tank and Underwater Vehicle
  • Unmanned Vehicles Terrestrial and Marine
  • Machine Learning
  • Artificial Intelligence (AI)
  • RTOS
  • Sensors, eHealth Sensors, Biosensor, and Biometric
  • Research & Development (R & D)
  • Consulting

Follow Us

Luc Paquin – Curriculum Vitae – 2024
https://www.donluc.com/luc/

Web: https://www.donluc.com/
Facebook: https://www.facebook.com/neosteam.labs.9/
YouTube: https://www.youtube.com/@thesass2063
Twitter: https://twitter.com/labs_steam
Pinterest: https://www.pinterest.com/NeoSteamLabs/
Instagram: https://www.instagram.com/neosteamlabs/
DFRobot Luc.Paquin: https://edu.dfrobot.com/dashboard/makelogs
Hackster.io: https://www.hackster.io/neosteam-labs
ELECROW: https://www.elecrow.com/share/sharepj/center/no/760816d385ebb1edc0732fd873bfbf13
TikTok: www.tiktok.com/@luc.paquin8
LinkedIn: https://www.linkedin.com/in/jlucpaquin/

Don Luc
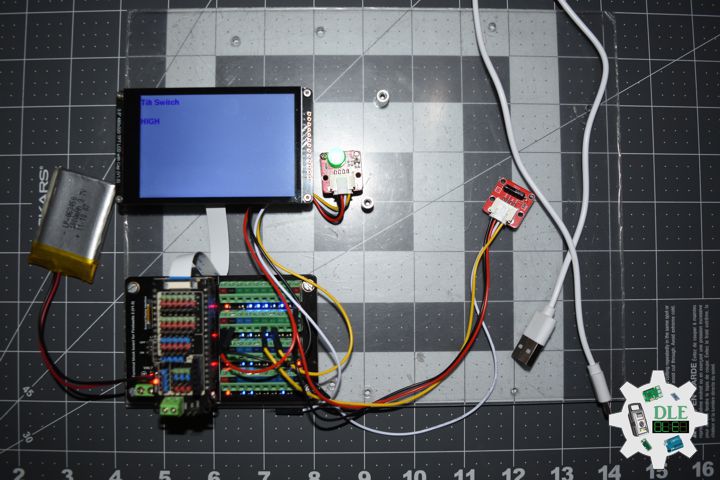
Project #29 – DFRobot – SHTC3 – Mk30

——

#DonLucElectronics #DonLuc #DFRobot #ASM #SHTC3 #FireBeetle2ESP32C6 #Display #EEPROM #ESP32 #IoT #Arduino #Project #Fritzing #Programming #Electronics #Microcontrollers #Consultant

——

SHTC3

——

SHTC3

——

SHTC3

——

Fermion: SHTC3 Temperature and Humidity Sensor

The SHTC3 digital humidity sensor from Sensirion builds on the success of the proven SHTC1 sensor and offers consistent high accuracy within the measuring range. The sensor covers a humidity measurement range of 0 to 100% RH and a temperature detection range of -40 Celsius to 125 Celsius with a typical accuracy of ±2% RH and ±0.2 Celsius. The board supply voltage of 3.3 Volt to 5 Volt and a current consumption below 0.15mA in low power mode make the SHTC3 perfectly suitable for mobile or wireless battery-driven applications.

DL2409Mk06

1 x FireBeetle 2 ESP32-C6
1 x Fermion: SHTC3 Temperature & Humidity Sensor
1 x Fermion: 2.0″ 320×240 IPS TFT LCD
1 x GDL Line 10 CM
1 x Gravity: Analog Soil Moisture Sensor
1 x 3 AAA Battery Holder with On/Off Switch and 2-Pin JST
3 x AAA Battery
1 x SparkFun Solderable Breadboard – Large
1 x USB 3.1 Cable A to C

FireBeetle 2 ESP32-C6

SCL – 20
SDA – 19
ASM – A1
LED – 15
DC – D2
CS – D6
RST – D3
VIN – +3.3V
GND – GND

DL2409Mk06p

DL2409Mk06p.ino

/****** Don Luc Electronics © ******
Software Version Information
Project #29 - DFRobot - SHTC3 - Mk30
29-30
DL2409Mk06p.ino
DL2409Mk06
1 x FireBeetle 2 ESP32-C6
1 x Fermion: SHTC3 Temperature & Humidity Sensor
1 x Fermion: 2.0" 320x240 IPS TFT LCD
1 x GDL Line 10 CM
1 x Gravity: Analog Soil Moisture Sensor
1 x 3 AAA Battery Holder with On/Off Switch and 2-Pin JST
3 x AAA Battery
1 x SparkFun Solderable Breadboard - Large
1 x USB 3.1 Cable A to C
*/

// Include the Library Code
// EEPROM Library to Read and Write EEPROM
// with Unique ID for Unit
#include "EEPROM.h"
// Arduino
#include <Arduino.h>
// Wire
#include <Wire.h>
// DFRobot Display GDL API
#include <DFRobot_GDL.h>
// Fermion: SHTC3 Temperature & Humidity Sensor
#include"DFRobot_SHTC3.h"

// Fermion: SHTC3 Temperature & Humidity Sensor
DFRobot_SHTC3 SHTC3;
uint32_t id = 0;
float temperature;
float humidity;

// Defined ESP32
#define TFT_DC  D2
#define TFT_CS  D6
#define TFT_RST D3

/*dc=*/ /*cs=*/ /*rst=*/
// DFRobot Display 240x320
DFRobot_ST7789_240x320_HW_SPI screen(TFT_DC, TFT_CS, TFT_RST);

// Gravity: Analog Soil Moisture Sensor
int iSoilMoisture = A1;
int iSoilMoistureVal = 0;
int zz = 0;
// Change Your Threshold Here
int Threshold = 300;
String SM = "";

// LED Green
int iLEDGreen = 15;

// EEPROM Unique ID Information
#define EEPROM_SIZE 64
String uid = "";

// Software Version Information
String sver = "29-30";

void loop() {

  // SHTC3 Temperature and Humidity Sensor
  isSHTC3();
  
  // Gravity: Analog Soil Moisture Sensor
  isSoilMoisture();

  // DFRobot Display 240x320 - ASM - Temperature and Humidity
  isDisplayTH();

  // Delay 5 Second
  delay( 5000 );

}

getDisplay.ino

// DFRobot Display 240x320
// DFRobot Display 240x320 - UID
void isDisplayUID() {

    // DFRobot Display 240x320
    // Text Display
    // Text Wrap
    screen.setTextWrap(false);
    // Rotation
    screen.setRotation(3);
    // Fill Screen => black
    screen.fillScreen(0x0000);
    // Text Color => white
    screen.setTextColor(0xffff);
    // Font => Free Mono 9pt
    screen.setFont(&FreeMono9pt7b);
    // TextSize => 1.5
    screen.setTextSize(1.5);
    // DFRobot Display
    screen.setCursor(0, 30);
    screen.println("DFRobot Display");
    // Don Luc Electronics
    screen.setCursor(0, 60);
    screen.println("Don Luc Electronics");
    // Version
    screen.setCursor(0, 90);
    screen.println("Version");
    screen.setCursor(0, 120);
    screen.println( sver );
    // EEPROM
    screen.setCursor(0, 150);
    screen.println("EEPROM");
    screen.setCursor(0, 180);
    screen.println( uid );

}
// DFRobot Display 240x320 - ASM - Temperature and Humidity
void isDisplayTH() {
  
    // DFRobot Display 240x320
    // Text Display
    // Text Wrap
    screen.setTextWrap(false);
    // Rotation
    screen.setRotation(3);
    // Fill Screen => black
    screen.fillScreen(0x0000);
    // Text Color => white
    screen.setTextColor(0xffff);
    // Font => Free Mono 9pt
    screen.setFont(&FreeMono9pt7b);
    // TextSize => 1.5
    screen.setTextSize(1.5);
    // Soil Moisture Sensor
    screen.setCursor(0, 30);
    screen.println("Soil Moisture Sensor");
    // Gravity: Analog Soil Moisture Sensor
    screen.setCursor(0, 60);
    screen.println( "ASM: " );
    screen.setCursor(60, 60);
    screen.println( iSoilMoistureVal );
    screen.setCursor(0, 90);
    screen.println( SM );
    // SHTC3 Temperature
    screen.setCursor(0, 120);
    screen.println( "Tem: " );
    screen.setCursor(60, 120);
    screen.println( temperature );
    screen.setCursor(120, 120);
    screen.println( "C" );
    // SHTC3 Humidity
    screen.setCursor(0, 150);
    screen.println( "Hum: " );
    screen.setCursor(60, 150);
    screen.println( humidity );
    screen.setCursor(120, 150);
    screen.println( "%RH" );

}

getEEPROM.ino

// EEPROM
// isUID EEPROM Unique ID
void isUID() {
  
  // Is Unit ID
  uid = "";
  for (int x = 0; x < 7; x++)
  {
    uid = uid + char(EEPROM.read(x));
  }
  
}

getSHTC3.ino

// SHTC3 Temperature and Humidity Sensor
// SHTC3
void isSHTC3(){

  // SHTC3 Temperature and Humidity Sensor
  /**
   *    Mode  For configuring sensor working mode    
   *    SHTC3:
           PRECISION_HIGH_CLKSTRETCH_ON Clock Stretching Enabled 
   *       PRECISION_HIGH_CLKSTRETCH_OFF Clock Stretching Disabled 
   *       PRECISION_LOW_CLKSTRETCH_ON Clock Stretching Enabled & Low Power
   *       PRECISION_LOW_CLKSTRETCH_OFF Clock Stretching Disabled & Low Power
   */
  temperature = SHTC3.getTemperature(PRECISION_HIGH_CLKSTRETCH_ON);
  /**
   *    Mode  For configuring sensor working mode 
   *    SHTC3
   *       PRECISION_HIGH_CLKSTRETCH_ON Clock Stretching Enabled 
   *       PRECISION_HIGH_CLKSTRETCH_OFF Clock Stretching Disabled 
   *       PRECISION_LOW_CLKSTRETCH_ON Clock Stretching Enabled & Low Power
   *       PRECISION_LOW_CLKSTRETCH_OFF Clock Stretching Disabled & Low Power
   */
  humidity = SHTC3.getHumidity(PRECISION_HIGH_CLKSTRETCH_OFF);

}

getSoilMoisture.ino

// Gravity: Analog Soil Moisture Sensor
// Soil Moisture
void isSoilMoisture(){

  // Connect Soil Moisture Sensor to Analog 0
  zz = analogRead( iSoilMoisture );

  // iSoilMoistureVal => 0~900 Soil Moisture
  iSoilMoistureVal = map( zz, 0, 4095, 0, 900);

  // Threshold
  if (iSoilMoistureVal > Threshold)

    // 300~950 - Humid Soil
    SM = "Humid Soil";
    
  else {
    
    // 0-300 Dry Soil
    SM = "Dry Soil";

  }

}

setup.ino

// Setup
void setup()
{
  
  // Give display time to power on
  delay(100);

  // EEPROM Size
  EEPROM.begin(EEPROM_SIZE);
  
  // EEPROM Unique ID
  isUID();
  
  // Delay
  delay( 100 );

  // Wire
  Wire.begin();

  // Delay
  delay( 100 );
  
  // DFRobot Display 240x320
  screen.begin();

  // Delay
  delay(100);

  // Fermion: SHTC3 Temperature & Humidity Sensor
  SHTC3.begin();
  /*SHTC3 is set to sleep mode by default. Please wake it up before use. 
  Use SHTC3.sleep() to let SHTC3 enter sleep mode; SHTC3 
  stops working in sleep mode*/
  SHTC3.wakeup();
  
  // Delay
  delay(100);

  // Initialize the LED Green
  pinMode(iLEDGreen, OUTPUT);

  // iLEDGreen HIGH
  digitalWrite(iLEDGreen, HIGH );

  // DFRobot Display 240x320 - UID
  // Don Luc Electronics
  // Version
  // EEPROM
  isDisplayUID();

  // Delay 5 Second
  delay( 5000 );

}

——

People can contact us: https://www.donluc.com/?page_id=1927

Electronics, IoT, Teacher, Instructor, R&D and Consulting

  • Programming Language
  • Single-Board Microcontrollers (PIC, Arduino, Raspberry Pi, Arm, Silicon Labs, Espressif, Etc…)
  • IoT
  • Wireless (Radio Frequency, Bluetooth, WiFi, Etc…)
  • Robotics
  • Automation
  • Camera and Video Capture Receiver Stationary, Wheel/Tank and Underwater Vehicle
  • Unmanned Vehicles Terrestrial and Marine
  • Machine Learning
  • Artificial Intelligence (AI)
  • RTOS
  • Sensors, eHealth Sensors, Biosensor, and Biometric
  • Research & Development (R & D)
  • Consulting

Follow Us

Luc Paquin – Curriculum Vitae – 2024
https://www.donluc.com/luc/

Web: https://www.donluc.com/
Facebook: https://www.facebook.com/neosteam.labs.9/
YouTube: https://www.youtube.com/@thesass2063
Twitter: https://twitter.com/labs_steam
Pinterest: https://www.pinterest.com/NeoSteamLabs/
Instagram: https://www.instagram.com/neosteamlabs/
DFRobot Luc.Paquin: https://edu.dfrobot.com/dashboard/makelogs
Hackster.io: https://www.hackster.io/neosteam-labs
ELECROW: https://www.elecrow.com/share/sharepj/center/no/760816d385ebb1edc0732fd873bfbf13
TikTok: www.tiktok.com/@luc.paquin8
LinkedIn: https://www.linkedin.com/in/jlucpaquin/

Don Luc
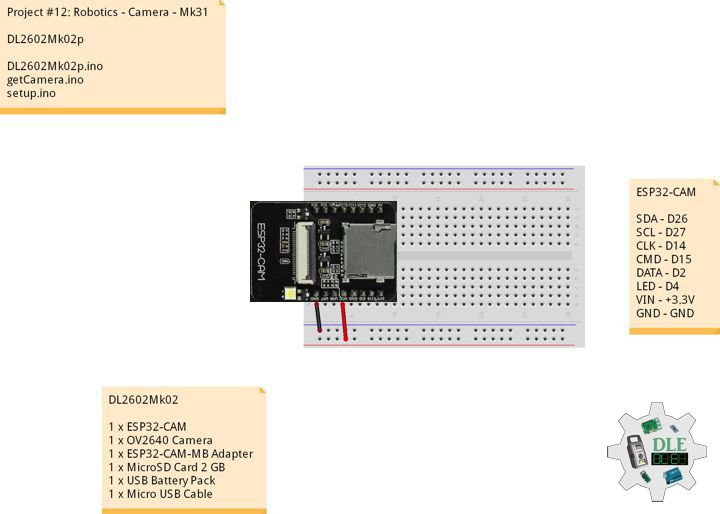
Project #30 – UNIHIKER – MEMS VOC – Mk05

——

#DonLucElectronics #DonLuc #UNIHIKER #VOC #Display #IoT #Project #Debian #Python #Thonny #DFRobot #Fritzing #Programming #Electronics #Microcontrollers #Consultant

——

MEMS VOC

——

MEMS VOC

——

MEMS VOC

——

Fermion: MEMS Volatile Organic Compounds VOC Gas Detection Sensor

Fermion: MEMS Volatile Organic Compounds VOC Gas Sensor employs state-of-the-art microelectromechanical system (MEMS) technology, endowing the sensor with compact dimensions, low power consumption, minimal heat generation, short preheating time, and swift response recovery. The sensor can qualitatively measure VOC gas concentration and is suitable for indoor air quality detection, fresh air system, air purifier and other application scenarios. Kindly remove the protective film before usage. Gas detected: ethanol, formaldehyde, toluene, etc. Detection range: 1-500 ppm. It is advisable to preheat the module for at least 24 hours.

DL2409Mk05

1 x UNIHIKER
1 x Fermion: MEMS VOC Gas Detection Sensor
1 x USB Battery Pack
1 x USB 3.1 Cable A to C

UNIHIKER

ADC – 21
VIN – +5V
GND – GND

DL2409Mk05p

DL2409Mk05p.py

"""
****** Don Luc Electronics © ******
Software Version Information
Project #30 - UNIHIKER - Fermion: MEMS VOC - Mk05
30-05
DL2409Mk05.py
DL2409Mk05
1 x UNIHIKER
1 x Fermion: MEMS VOC Gas Detection Sensor
1 x USB Battery Pack
1 x USB 3.1 Cable A to C

-*- coding: utf-8 -*-
"""
# Import the unihiker library
from unihiker import GUI

# Import the time library
import time

# Import the Board module from the pinpong.board package 
from pinpong.board import Board

# Import all modules from the pinpong.extension.unihiker package
from pinpong.extension.unihiker import *

# Initialize the board by selecting the board type and port number;
# if not specified, the program will automatically detect it
Board().begin()

# Initialize pin 21 as analog input mode
# Fermion: MEMS VOC Gas Detection Sensor
adc0 = Pin(Pin.P21, Pin.ANALOG)

# Instantiate the GUI class and create a gui object
gui = GUI()

# Display the initial background image 'DL2409Mk05p'
img = gui.draw_image(x=0, y=0, w=240, h=320, image='DL2409Mk05p.png')

# MEMS VOC
# Display the initial Fermion: MEMS VOC Gas Detection Sensor valueVOC
valueVOC = gui.draw_text(x=30, y=151, text='0', font_size=18)

while True:

    # Fermion: MEMS VOC Gas Detection Sensor
    # Read analog value
    VOCSensor = adc0.read_analog()
    valueVOC.config(text=VOCSensor)
    
    # Delay for 1 second to keep the screen content displayed for a longer time
    time.sleep(1)

——

People can contact us: https://www.donluc.com/?page_id=1927

Electronics, IoT, Teacher, Instructor, R&D and Consulting

  • Programming Language
  • Single-Board Microcontrollers (PIC, Arduino, Raspberry Pi, Arm, Silicon Labs, Espressif, Etc…)
  • IoT
  • Wireless (Radio Frequency, Bluetooth, WiFi, Etc…)
  • Robotics
  • Automation
  • Camera and Video Capture Receiver Stationary, Wheel/Tank and Underwater Vehicle
  • Unmanned Vehicles Terrestrial and Marine
  • Machine Learning
  • Artificial Intelligence (AI)
  • RTOS
  • Sensors, eHealth Sensors, Biosensor, and Biometric
  • Research & Development (R & D)
  • Consulting

Follow Us

Luc Paquin – Curriculum Vitae – 2024
https://www.donluc.com/luc/

Web: https://www.donluc.com/
Facebook: https://www.facebook.com/neosteam.labs.9/
YouTube: https://www.youtube.com/@thesass2063
Twitter: https://twitter.com/labs_steam
Pinterest: https://www.pinterest.com/NeoSteamLabs/
Instagram: https://www.instagram.com/neosteamlabs/
DFRobot Luc.Paquin: https://edu.dfrobot.com/dashboard/makelogs
Hackster.io: https://www.hackster.io/neosteam-labs
ELECROW: https://www.elecrow.com/share/sharepj/center/no/760816d385ebb1edc0732fd873bfbf13
TikTok: www.tiktok.com/@luc.paquin8
LinkedIn: https://www.linkedin.com/in/jlucpaquin/

Don Luc
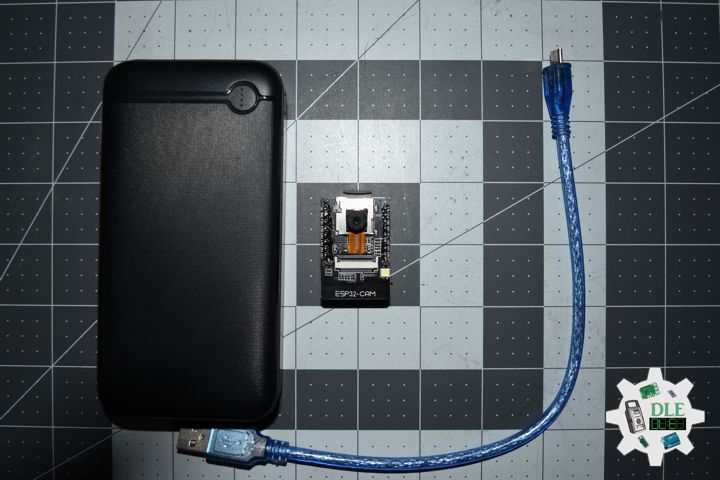
Project #29 – DFRobot – Soil Moisture – Mk29

——

#DonLucElectronics #DonLuc #DFRobot #ASM #FireBeetle2ESP32C6 #Display #EEPROM #ESP32 #IoT #Arduino #Project #Fritzing #Programming #Electronics #Microcontrollers #Consultant

——

Soil Moisture

——

Soil Moisture

——

Soil Moisture

——

Soil Moisture

Soil moisture is the critical parameter in agriculture. If there is a shortage or overabundance of water, plants may die. At the same time, this data depends on many external factors, primarily weather conditions and climate changes. That is why it is so vital to understand the most effective methods for analyzing soil moisture content.

This term refers to the entire quantity of water in the ground’s pores or on its surface. The moisture content of soil depends on such factors as weather, type of land, and plants. The parameter is vital in monitoring soil moisture activities, predicting natural disasters, managing water supply, etc. This data may signal a future flood or water deficit ahead of other indicators.

DL2409Mk04

1 x FireBeetle 2 ESP32-C6
1 x Fermion: 2.0″ 320×240 IPS TFT LCD
1 x GDL Line 10 CM
1 x Gravity: Analog Soil Moisture Sensor
1 x 3 AAA Battery Holder with On/Off Switch and 2-Pin JST
3 x AAA Battery
1 x SparkFun Solderable Breadboard – Large
1 x USB 3.1 Cable A to C

FireBeetle 2 ESP32-C6

ASM – A1
LED – 15
DC – D2
CS – D6
RST – D3
VIN – +3.3V
GND – GND

DL2409Mk04p

DL2409Mk04p.ino

/****** Don Luc Electronics © ******
Software Version Information
Project #29 - DFRobot - Soil Moisture - Mk29
29-29
DL2409Mk04p.ino
DL2409Mk04
1 x FireBeetle 2 ESP32-C6
1 x Fermion: 2.0" 320x240 IPS TFT LCD
1 x GDL Line 10 CM
1 x Gravity: Analog Soil Moisture Sensor
1 x 3 AAA Battery Holder with On/Off Switch and 2-Pin JST
3 x AAA Battery
1 x SparkFun Solderable Breadboard - Large
1 x USB 3.1 Cable A to C
*/

// Include the Library Code
// EEPROM Library to Read and Write EEPROM
// with Unique ID for Unit
#include "EEPROM.h"
// Arduino
#include <Arduino.h>
// Wire
#include <Wire.h>
// DFRobot Display GDL API
#include <DFRobot_GDL.h>

// Defined ESP32
#define TFT_DC  D2
#define TFT_CS  D6
#define TFT_RST D3

/*dc=*/ /*cs=*/ /*rst=*/
// DFRobot Display 240x320
DFRobot_ST7789_240x320_HW_SPI screen(TFT_DC, TFT_CS, TFT_RST);

// Gravity: Analog Soil Moisture Sensor
int iSoilMoisture = A1;
int iSoilMoistureVal = 0;
int zz = 0;
// Change Your Threshold Here
int Threshold = 300;
String SM = "";

// LED Green
int iLEDGreen = 15;

// EEPROM Unique ID Information
#define EEPROM_SIZE 64
String uid = "";

// Software Version Information
String sver = "29-29";

void loop() {

  // Gravity: Analog Soil Moisture Sensor
  isSoilMoisture();

  // DFRobot Display 240x320 - ASM
  isDisplayTH();

  // Delay 5 Second
  delay( 5000 );

}

getDisplay.ino

// DFRobot Display 240x320
// DFRobot Display 240x320 - UID
void isDisplayUID() {

    // DFRobot Display 240x320
    // Text Display
    // Text Wrap
    screen.setTextWrap(false);
    // Rotation
    screen.setRotation(3);
    // Fill Screen => black
    screen.fillScreen(0x0000);
    // Text Color => white
    screen.setTextColor(0xffff);
    // Font => Free Mono 9pt
    screen.setFont(&FreeMono9pt7b);
    // TextSize => 1.5
    screen.setTextSize(1.5);
    // DFRobot Display
    screen.setCursor(0, 30);
    screen.println("DFRobot Display");
    // Don Luc Electronics
    screen.setCursor(0, 60);
    screen.println("Don Luc Electronics");
    // Version
    screen.setCursor(0, 90);
    screen.println("Version");
    screen.setCursor(0, 120);
    screen.println( sver );
    // EEPROM
    screen.setCursor(0, 150);
    screen.println("EEPROM");
    screen.setCursor(0, 180);
    screen.println( uid );

}
// DFRobot Display 240x320 - ASM
void isDisplayTH() {
  
    // DFRobot Display 240x320
    // Text Display
    // Text Wrap
    screen.setTextWrap(false);
    // Rotation
    screen.setRotation(3);
    // Fill Screen => black
    screen.fillScreen(0x0000);
    // Text Color => white
    screen.setTextColor(0xffff);
    // Font => Free Mono 9pt
    screen.setFont(&FreeMono9pt7b);
    // TextSize => 1.5
    screen.setTextSize(1.5);
    // Don Luc Electronics
    screen.setCursor(0, 30);
    screen.println("Soil Moisture Sensor");
    // Gravity: Analog Soil Moisture Sensor
    screen.setCursor(0, 60);
    screen.println( "ASM: " );
    screen.setCursor(60, 60);
    screen.println( iSoilMoistureVal );
    screen.setCursor(0, 90);
    screen.println( SM );

}

getEEPROM.ino

// EEPROM
// isUID EEPROM Unique ID
void isUID() {
  
  // Is Unit ID
  uid = "";
  for (int x = 0; x < 7; x++)
  {
    uid = uid + char(EEPROM.read(x));
  }
  
}

getSoilMoisture.ino

// Gravity: Analog Soil Moisture Sensor
// Soil Moisture
void isSoilMoisture(){

  // Connect Soil Moisture Sensor to Analog 0
  zz = analogRead( iSoilMoisture );

  // iSoilMoistureVal => 0~900 Soil Moisture
  iSoilMoistureVal = map( zz, 0, 4095, 0, 900);

  // Threshold
  if (iSoilMoistureVal > Threshold)

    // 300~950 - Humid Soil
    SM = "Humid Soil";
    
  else {
    
    // 0-300 Dry Soil
    SM = "Dry Soil";

  }

}

setup.ino

// Setup
void setup()
{
  
  // Give display time to power on
  delay(100);

  // EEPROM Size
  EEPROM.begin(EEPROM_SIZE);
  
  // EEPROM Unique ID
  isUID();
  
  // Delay
  delay( 100 );

  // Wire
  Wire.begin();

  // Delay
  delay( 100 );
  
  // DFRobot Display 240x320
  screen.begin();

  // Delay
  delay(100);

  // Initialize the LED Green
  pinMode(iLEDGreen, OUTPUT);

  // iLEDGreen HIGH
  digitalWrite(iLEDGreen, HIGH );

  // DFRobot Display 240x320 - UID
  // Don Luc Electronics
  // Version
  // EEPROM
  isDisplayUID();

  // Delay 5 Second
  delay( 5000 );

}

——

People can contact us: https://www.donluc.com/?page_id=1927

Teacher, Instructor, E-Mentor, R&D and Consulting

  • Programming Language
  • Single-Board Microcontrollers (PIC, Arduino, Raspberry Pi, Arm, Silicon Labs, Espressif, Etc…)
  • IoT
  • Wireless (Radio Frequency, Bluetooth, WiFi, Etc…)
  • Robotics
  • Automation
  • Camera and Video Capture Receiver Stationary, Wheel/Tank and Underwater Vehicle
  • Unmanned Vehicles Terrestrial and Marine
  • Machine Learning
  • Artificial Intelligence (AI)
  • RTOS
  • Sensors, eHealth Sensors, Biosensor, and Biometric
  • Research & Development (R & D)
  • Consulting

Follow Us

Luc Paquin – Curriculum Vitae – 2024
https://www.donluc.com/luc/

Web: https://www.donluc.com/
Facebook: https://www.facebook.com/neosteam.labs.9/
YouTube: https://www.youtube.com/@thesass2063
Twitter: https://twitter.com/labs_steam
Pinterest: https://www.pinterest.com/NeoSteamLabs/
Instagram: https://www.instagram.com/neosteamlabs/
DFRobot Luc.Paquin: https://edu.dfrobot.com/dashboard/makelogs
Hackster.io: https://www.hackster.io/neosteam-labs
LinkedIn: https://www.linkedin.com/in/jlucpaquin/

Don Luc
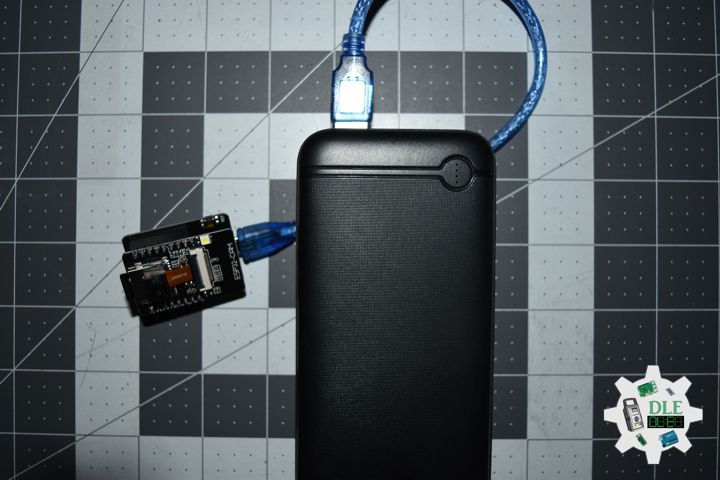
Project #30 – UNIHIKER – Fermion: MEMS Smoke Gas Detection Sensor – Mk04

——

#DonLucElectronics #DonLuc #UNIHIKER #Smoke #Display #IoT #Project #Debian #Python #Thonny #Fritzing #Programming #Electronics #Microcontrollers #Consultant

——

Fermion: MEMS Smoke Gas Detection Sensor

——

Fermion: MEMS Smoke Gas Detection Sensor

——

Fermion: MEMS Smoke Gas Detection Sensor

——

Fermion: MEMS Smoke Gas Detection Sensor

Fermion: MEMS Smoke Gas Detection Sensor employs state-of-the-art microelectromechanical system (MEMS) technology, endowing the sensor with compact dimensions, low power consumption, minimal heat generation, short preheating time, and swift response recovery. The sensor can measure smoke concentration qualitatively and is suitable for smoke alarm and other application scenarios. Kindly remove the protective film before usage. It is advisable to preheat the module for at least 24 hours. Detection range: 10-1000 ppm.

DL2409Mk03

1 x UNIHIKER
1 x Fermion: MEMS Smoke Gas Detection Sensor
1 x USB Battery Pack
1 x USB 3.1 Cable A to C

UNIHIKER

ADC – 21
VIN – +5V
GND – GND

DL2409Mk03p

"""
****** Don Luc Electronics © ******
Software Version Information
Project #30 - UNIHIKER - Fermion: MEMS Smoke Gas Detection Sensor - Mk04
30-04
DL2409Mk03.py
DL2409Mk03
1 x UNIHIKER
1 x Fermion: MEMS Smoke Gas Detection Sensor
1 x USB Battery Pack
1 x USB 3.1 Cable A to C

-*- coding: utf-8 -*-
"""
# Import the unihiker library
from unihiker import GUI

# Import the time library
import time

# Import the Board module from the pinpong.board package 
from pinpong.board import Board

# Import all modules from the pinpong.extension.unihiker package
from pinpong.extension.unihiker import *

# Initialize the board by selecting the board type and port number;
# if not specified, the program will automatically detect it
Board().begin()

# Initialize pin 21 as analog input mode
# Fermion: MEMS Smoke Gas Detection Sensor
adc0 = Pin(Pin.P21, Pin.ANALOG)

# Instantiate the GUI class and create a gui object
gui = GUI()

# Display the initial background image 'DL2409Mk03p'
img = gui.draw_image(x=0, y=0, w=240, h=320, image='DL2409Mk03p.png')

# MEMS Smoke Gas
# Display the initial Fermion: MEMS Smoke Gas Detection Sensor valueSmoke
valueSmoke = gui.draw_text(x=30, y=151, text='0', font_size=18)

while True:

    # Fermion: MEMS Smoke Gas Detection Sensor
    # Read analog value
    AnalogSmokeSensor = adc0.read_analog()
    valueSmoke.config(text=AnalogSmokeSensor)
    
    # Delay for 1 second to keep the screen content displayed for a longer time
    time.sleep(1)

People can contact us: https://www.donluc.com/?page_id=1927

Teacher, Instructor, E-Mentor, R&D and Consulting

  • Programming Language
  • Single-Board Microcontrollers (PIC, Arduino, Raspberry Pi, Arm, Silicon Labs, Espressif, Etc…)
  • IoT
  • Wireless (Radio Frequency, Bluetooth, WiFi, Etc…)
  • Robotics
  • Automation
  • Camera and Video Capture Receiver Stationary, Wheel/Tank and Underwater Vehicle
  • Unmanned Vehicles Terrestrial and Marine
  • Machine Learning
  • Artificial Intelligence (AI)
  • RTOS
  • Sensors, eHealth Sensors, Biosensor, and Biometric
  • Research & Development (R & D)
  • Consulting

Follow Us

Luc Paquin – Curriculum Vitae – 2024
https://www.donluc.com/luc/

Web: https://www.donluc.com/
Facebook: https://www.facebook.com/neosteam.labs.9/
YouTube: https://www.youtube.com/@thesass2063
Twitter: https://twitter.com/labs_steam
Pinterest: https://www.pinterest.com/NeoSteamLabs/
Instagram: https://www.instagram.com/neosteamlabs/
DFRobot Luc.Paquin: https://edu.dfrobot.com/dashboard/makelogs
Hackster.io: https://www.hackster.io/neosteam-labs
LinkedIn: https://www.linkedin.com/in/jlucpaquin/

Don Luc
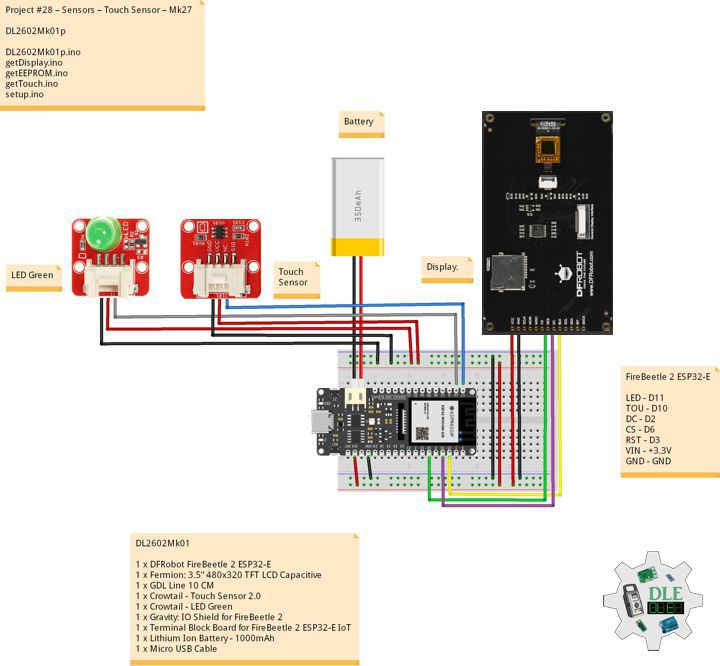
Project #29 – DFRobot – Soil Moisture Sensor – Mk28

——

#DonLucElectronics #DonLuc #DFRobot #ASM #Smoke #CH4 #VOC #SHTC3 #SD #FireBeetle2ESP32E #Display #EEPROM #ESP32 #IoT #Arduino #Project #Fritzing #Programming #Electronics #Microcontrollers #Consultant

——

Soil Moisture Sensor

——

Soil Moisture Sensor

——

Soil Moisture Sensor

——

Gravity: Analog Soil Moisture Sensor

A soil moisture sensor can read the amount of moisture present in the soil surrounding it. It’s an ideal for monitoring an urban garden, or your pet plant’s water level. This is a must have component for a IOT garden / Agriculture. The new soil moisture sensor uses Immersion Gold which protects the nickel from oxidation. Electroless nickel immersion gold has several advantages over more conventional surface platings such as HASL, including excellent surface planarity, good oxidation resistance, and usability for untreated contact surfaces such as membrane switches and contact points. This soil moisture arduino sensor uses the two probes to pass current through the soil, and then it reads that resistance to get the moisture level. More water makes the soil conduct electricity more easily, while dry soil conducts electricity poorly. This sensor will be helpful to remind you to water your indoor plants or to monitor the soil moisture in your garden.

DL2409Mk02

1 x DFRobot FireBeetle 2 ESP32-E
1 x Gravity: Analog Soil Moisture Sensor
1 x Adafruit MicroSD card breakout board+
1 x MicroSD 2 GB
1 x Fermion: MEMS Smoke Gas Detection Sensor
1 x Fermion: MEMS Methane CH4 Gas Detection Sensor
1 x Fermion: MEMS VOC Gas Detection Sensor
1 x Fermion: SHTC3 Temperature and Humidity Sensor
1 x Fermion: 2.0″ 320×240 IPS TFT LCD
1 x GDL Line 10 CM
1 x Lithium Ion Battery – 1000mAh
1 x Switch
1 x USB 3.1 Cable A to C

FireBeetle 2 ESP32-E

VOC – A1
CH4 – A2
SMO – A3
ASM – A4
LED – 2
SCK – 18
MOSI – 23
MISO – 19
CS – 13
SCL – 22
SDA – 21
DC – D2
CS – D6
RST – D3
VIN – +3.3V
GND – GND

DL2409Mk02p

DL2409Mk02p.ino

/****** Don Luc Electronics © ******
Software Version Information
Project #29 - DFRobot - Soil Moisture Sensor - Mk28
29-28
DL2409Mk02p.ino
DL2409Mk02
1 x DFRobot FireBeetle 2 ESP32-E
1 x Gravity: Analog Soil Moisture Sensor
1 x Adafruit MicroSD card breakout board+
1 x MicroSD 2 GB
1 x Fermion: MEMS Smoke Gas Detection Sensor
1 x Fermion: MEMS Methane CH4 Gas Detection Sensor
1 x Fermion: MEMS VOC Gas Detection Sensor
1 x Fermion: SHTC3 Temperature and Humidity Sensor
1 x Fermion: 2.0" 320x240 IPS TFT LCD
1 x GDL Line 10 CM
1 x Lithium Ion Battery - 1000mAh
1 x Switch
1 x USB 3.1 Cable A to C
*/

// Include the Library Code
// EEPROM Library to Read and Write EEPROM
// with Unique ID for Unit
#include "EEPROM.h"
// DFRobot Display GDL API
#include <DFRobot_GDL.h>
// Arduino
#include <Arduino.h>
// Wire
#include <Wire.h>
// SHTC3 Temperature and Humidity Sensor
#include "SHTSensor.h"
// SD Card
#include "FS.h"
#include "SD.h"
#include "SPI.h"

// Gravity: Analog Soil Moisture Sensor
int iSoilMoisture = A4;
int iSoilMoistureVal = 0;
int zz = 0;

// MEMS Smoke Gas
int iSensorSmoke = A3;
int iSensorValueSmoke = 0;
int z = 0;

// MEMS CH4 Gas
int iSensorCH4 = A2;
int iSensorValueCH4 = 0;
int y = 0;

// MEMS VOC Gas
int iSensorVOC = A1;
int iSensorValueVOC = 0;
int x = 0;

// MicroSD Card
const int chipSelect = 13;
String zzzzzz = "";

// SHTC3 Temperature and Humidity Sensor
SHTSensor sht;
// Temperature
float T;
// Humidity
float H;

// Defined ESP32
#define TFT_DC  D2
#define TFT_CS  D6
#define TFT_RST D3

/*dc=*/ /*cs=*/ /*rst=*/
// DFRobot Display 240x320
DFRobot_ST7789_240x320_HW_SPI screen(TFT_DC, TFT_CS, TFT_RST);

// LED Green
int iLEDGreen = 2;

// EEPROM Unique ID Information
#define EEPROM_SIZE 64
String uid = "";

// Software Version Information
String sver = "29-28";

void loop() {

  // Gravity: Analog Soil Moisture Sensor
  isSoilMoisture();
  
  // MEMS Smoke Gas
  isSmoke();
  
  // MEMS CH4 Gas
  isCH4();
  
  // MEMS VOC Gas
  isVOC();
  
  // SHTC3 Temperature and Humidity Sensor
  isSHTC3();

  // DFRobot Display 240x320 - Temperature and Humidity, VOC, CH4, Smoke
  isDisplayTH();

  // MicroSD Card
  isSD();

  // Delay 5 Second
  delay( 5000 );

}

getCH4.ino

// MEMS CH4 Gas
// is CH4
void isCH4(){

  // MEMS CH4 Gas
  y = analogRead( iSensorCH4 );
  iSensorValueCH4 = map(y, 1, 4095, 1, 10000);
  
}

getDisplay.ino

// DFRobot Display 240x320
// DFRobot Display 240x320 - UID
void isDisplayUID() {

    // DFRobot Display 240x320
    // Text Display
    // Text Wrap
    screen.setTextWrap(false);
    // Rotation
    screen.setRotation(3);
    // Fill Screen => black
    screen.fillScreen(0x0000);
    // Text Color => white
    screen.setTextColor(0xffff);
    // Font => Free Mono 9pt
    screen.setFont(&FreeMono9pt7b);
    // TextSize => 1.5
    screen.setTextSize(1.5);
    // DFRobot Display
    screen.setCursor(0, 30);
    screen.println("DFRobot Display");
    // Don Luc Electronics
    screen.setCursor(0, 60);
    screen.println("Don Luc Electronics");
    // Version
    screen.setCursor(0, 90);
    screen.println("Version");
    screen.setCursor(0, 120);
    screen.println( sver );
    // EEPROM
    screen.setCursor(0, 150);
    screen.println("EEPROM");
    screen.setCursor(0, 180);
    screen.println( uid );

}
// DFRobot Display 240x320 - Temperature and Humidity, VOC, CH4, Smoke
void isDisplayTH() {
  
    // DFRobot Display 240x320
    // Text Display
    // Text Wrap
    screen.setTextWrap(false);
    // Rotation
    screen.setRotation(3);
    // Fill Screen => black
    screen.fillScreen(0x0000);
    // Text Color => white
    screen.setTextColor(0xffff);
    // Font => Free Mono 9pt
    screen.setFont(&FreeMono9pt7b);
    // TextSize => 1.5
    screen.setTextSize(1.5);
    // Don Luc Electronics
    screen.setCursor(0, 30);
    screen.println("Don Luc Electronics");
    // Temperature
    screen.setCursor(0, 60);
    screen.println( "Temp: " );
    screen.setCursor(60, 60);
    screen.println( T );
    screen.setCursor(130, 60);
    screen.println("Celsius");
    // Humidity
    screen.setCursor(0, 90);
    screen.println("Humi: ");
    screen.setCursor(60, 90);
    screen.println( H );
    screen.setCursor(130, 90);
    screen.println("% RH");
    // MEMS VOC Gas
    screen.setCursor(0, 120);
    screen.println( "VOC: " );
    screen.setCursor(60, 120);
    screen.println( iSensorValueVOC );
    screen.setCursor(130, 120);
    screen.println("ppm");
    // MEMS CH4 Gas
    screen.setCursor(0, 150);
    screen.println( "CH4: " );
    screen.setCursor(60, 150);
    screen.println( iSensorValueCH4 );
    screen.setCursor(130, 150);
    screen.println("ppm");
    // MEMS Smoke Gas
    screen.setCursor(0, 180);
    screen.println( "SMO: " );
    screen.setCursor(60, 180);
    screen.println( iSensorValueSmoke );
    screen.setCursor(130, 180);
    screen.println("ppm");
    // Gravity: Analog Soil Moisture Sensor
    screen.setCursor(0, 210);
    screen.println( "ASM: " );
    screen.setCursor(60, 210);
    screen.println( iSoilMoistureVal );
    screen.setCursor(130, 210);

}

getEEPROM.ino

// EEPROM
// isUID EEPROM Unique ID
void isUID() {
  
  // Is Unit ID
  uid = "";
  for (int x = 0; x < 7; x++)
  {
    uid = uid + char(EEPROM.read(x));
  }
  
}

getSD.ino

// MicroSD Card
// MicroSD Setup
void isSetupSD() {

    // MicroSD Card
    pinMode( chipSelect , OUTPUT );
    if(!SD.begin( chipSelect )){
        ;  
        return;
    }
    
    uint8_t cardType = SD.cardType();

    // CARD NONE
    if(cardType == CARD_NONE){
        ; 
        return;
    }

    // SD Card Type
    if(cardType == CARD_MMC){
        ; 
    } else if(cardType == CARD_SD){
        ; 
    } else if(cardType == CARD_SDHC){
        ; 
    } else {
        ; 
    } 

    // Size
    uint64_t cardSize = SD.cardSize() / (1024 * 1024);
 
}
// MicroSD Card
void isSD() {

  zzzzzz = "";

  //DFR|EEPROM Unique ID|Version|
  //Temperature C|% RH|VOC|CH4|Smoke|Soil Moisture|*\r
  zzzzzz = "DFR|" + uid + "|" + sver + "|"
  + String( T ) + "|" + String( H ) + "|"
  + String( iSensorValueVOC ) + "|" + String( iSensorValueCH4 ) + "|"
  + String( iSensorValueSmoke ) + "|" + String( iSoilMoistureVal ) + "|*\r";;

  // msg + 1
  char msg[zzzzzz.length() + 1];

  zzzzzz.toCharArray(msg, zzzzzz.length() + 1);

  // Append File
  appendFile(SD, "/dfrdata.txt", msg );
  
}
// List Dir
void listDir(fs::FS &fs, const char * dirname, uint8_t levels){
    
    // List Dir
    dirname;
    
    File root = fs.open(dirname);
    
    if(!root){
        return;
    }
    
    if(!root.isDirectory()){
        return;
    }

    File file = root.openNextFile();
    
    while(file){
        if(file.isDirectory()){
            file.name();
            if(levels){
                listDir(fs, file.name(), levels -1);
            }
        } else {
            file.name();
            file.size();
        }
        file = root.openNextFile();
    }
    
}
// Write File
void writeFile(fs::FS &fs, const char * path, const char * message){
    
    // Write File
    path;
    
    File file = fs.open(path, FILE_WRITE);
    
    if(!file){
        return;
    }
    
    if(file.print(message)){
        ;  
    } else {
        ;  
    }
    
    file.close();
    
}
// Append File
void appendFile(fs::FS &fs, const char * path, const char * message){
    
    // Append File
    path;
    
    File file = fs.open(path, FILE_APPEND);
    
    if(!file){
        return;
    }
    
    if(file.print(message)){
        ;  
    } else {
        ;  
    }
    
    file.close();
    
}

getSHTC3.ino

// SHTC3 Temperature and Humidity Sensor
// SHTC3
void isSHTC3(){

  // SHTC3 Temperature and Humidity Sensor
  if (sht.readSample()) {
     
     // Temperature
     T = sht.getTemperature();
     // Humidity
     H = sht.getHumidity();

  }

}

getSmoke.ino

// Smoke
// isSmoke
void isSmoke(){

  // MEMS Smoke Gas
  z = analogRead( iSensorSmoke );
  iSensorValueSmoke = map(x, 1, 4095, 1, 1000);
  
}

getSoilMoisture.ino

// Gravity: Analog Soil Moisture Sensor
// Soil Moisture
void isSoilMoisture(){

  // Connect Soil Moisture Sensor to Analog 4
  zz = analogRead( iSoilMoisture );

  // iSoilMoistureVal => 0~900 Soil Moisture
  iSoilMoistureVal = map( zz, 0, 4095, 0, 900);

}

getVOC.ino

// MEMS VOC Gas
// is VOC
void isVOC(){

  // MEMS VOC Gas
  x = analogRead( iSensorVOC );
  iSensorValueVOC = map(x, 1, 4095, 1, 500);
  
}

setup.ino

// Setup
void setup()
{
  
  // Give display time to power on
  delay(100);

  // EEPROM Size
  EEPROM.begin(EEPROM_SIZE);
  
  // EEPROM Unique ID
  isUID();
  
  // Delay
  delay( 100 );

  // Wire
  Wire.begin();

  // Delay
  delay( 100 );

  // SHTC3 Temperature and Humidity Sensor
  sht.init();
  // SHT3x
  sht.setAccuracy(SHTSensor::SHT_ACCURACY_MEDIUM);

  // Delay
  delay( 100 );
  
  // DFRobot Display 240x320
  screen.begin();

  // Delay
  delay(100);

  // MicroSD Card
  isSetupSD();

  // Initialize the LED Green
  pinMode(iLEDGreen, OUTPUT);

  // iLEDGreen HIGH
  digitalWrite(iLEDGreen, HIGH );

  // DFRobot Display 240x320 - UID
  // Don Luc Electronics
  // Version
  // EEPROM
  isDisplayUID();

  // Delay 5 Second
  delay( 5000 );

}

——

People can contact us: https://www.donluc.com/?page_id=1927

Teacher, Instructor, E-Mentor, R&D and Consulting

  • Programming Language
  • Single-Board Microcontrollers (PIC, Arduino, Raspberry Pi, Arm, Silicon Labs, Espressif, Etc…)
  • IoT
  • Wireless (Radio Frequency, Bluetooth, WiFi, Etc…)
  • Robotics
  • Automation
  • Camera and Video Capture Receiver Stationary, Wheel/Tank and Underwater Vehicle
  • Unmanned Vehicles Terrestrial and Marine
  • Machine Learning
  • Artificial Intelligence (AI)
  • RTOS
  • Sensors, eHealth Sensors, Biosensor, and Biometric
  • Research & Development (R & D)
  • Consulting

Follow Us

Luc Paquin – Curriculum Vitae – 2024
https://www.donluc.com/luc/

Web: https://www.donluc.com/
Facebook: https://www.facebook.com/neosteam.labs.9/
YouTube: https://www.youtube.com/@thesass2063
Twitter: https://twitter.com/labs_steam
Pinterest: https://www.pinterest.com/NeoSteamLabs/
Instagram: https://www.instagram.com/neosteamlabs/
DFRobot Luc.Paquin: https://edu.dfrobot.com/dashboard/makelogs
Hackster.io: https://www.hackster.io/neosteam-labs
LinkedIn: https://www.linkedin.com/in/jlucpaquin/

Don Luc
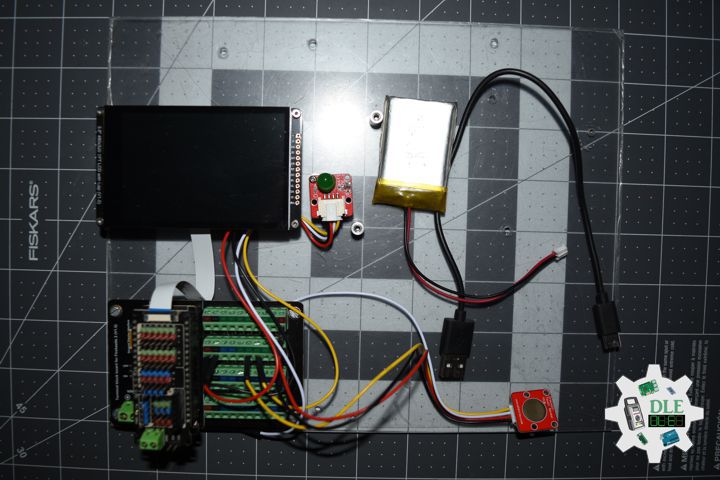
Project #30 – UNIHIKER – Gravity: Analog Ambient Light Sensor – Mk03

——

#DonLucElectronics #DonLuc #UNIHIKER #AmbientLight #Display #IoT #Project #Debian #Python #Thonny #Programming #Electronics #Microcontrollers #Consultant

——

Gravity: Analog Ambient Light Sensor

——

Gravity: Analog Ambient Light Sensor

——

Gravity: Analog Ambient Light Sensor

——

Gravity: Analog Ambient Light Sensor

This Gravity: Analog ambient light sensor can assist you in detecting light density and provide an analog voltage signal to the controller as feedback. Additionally, you have the ability to trigger other components within your project by setting voltage thresholds. To facilitate easier usage of the ambient light sensor, this product is designed with a universal Gravity interface that can be plugged in without requiring soldering. Two screw holes allow you to fasten it to any desired location. Making messy DuPont wires and complex connections a thing of the past and enabling you to focus your energy on your creative designs.

DL2408Mk07

1 x UNIHIKER
1 x Gravity: Analog Ambient Light Sensor
1 x USB Battery Pack
1 x USB 3.1 Cable A to C

UNIHIKER

ADC – 21
VIN – +5V
GND – GND

DL2408Mk07p

DL2408Mk07p.py

"""
****** Don Luc Electronics © ******
Software Version Information
Project #30 - UNIHIKER - Gravity: Analog Ambient Light Sensor - Mk03
30-03
DL2408Mk07.py
DL2408Mk07
1 x UNIHIKER
1 x Gravity: Analog Ambient Light Sensor
1 x USB Battery Pack
1 x USB 3.1 Cable A to C

-*- coding: utf-8 -*-
"""
# Import the unihiker library
from unihiker import GUI

# Import the time library
import time

# Import the Board module from the pinpong.board package 
from pinpong.board import Board

# Import all modules from the pinpong.extension.unihiker package
from pinpong.extension.unihiker import *

# Initialize the board by selecting the board type and port number;
# if not specified, the program will automatically detect it
Board().begin()

# Initialize pin 21 as analog input mode
# Gravity: Analog Ambient Light Sensor
adc0 = Pin(Pin.P21, Pin.ANALOG)

# Instantiate the GUI class and create a gui object
gui = GUI()

# Display the initial background image 'DL2408Mk07p'
img = gui.draw_image(x=0, y=0, w=240, h=320, image='DL2408Mk07p.png')

# Ambient Light Sensor
# Display the initial Ambient Light Sensor valueLight
valueLight = gui.draw_text(x=30, y=151, text='0', font_size=18)

# Gravity: Analog Ambient Light Sensor
# Display the initial Gravity: Analog Ambient Light Sensor valueAnalogLight
valueAnalogLight = gui.draw_text(x=30, y=221, text='0', font_size=18)

while True:
    
    # Ambient Light Sensor
    # Read the light value
    AmbientLightSensor = light.read()
    # Update the displayed light value
    valueLight.config(text=AmbientLightSensor)
    
    # Gravity: Analog Ambient Light Sensor
    # Read analog value
    AnalogAmbientLightSensor = adc0.read_analog()
    valueAnalogLight.config(text=AnalogAmbientLightSensor)

    # Delay for 1 second to keep the screen content displayed for a longer time
    time.sleep(1)

People can contact us: https://www.donluc.com/?page_id=1927

Teacher, Instructor, E-Mentor, R&D and Consulting

  • Programming Language
  • Single-Board Microcontrollers (PIC, Arduino, Raspberry Pi, Arm, Silicon Labs, Espressif, Etc…)
  • IoT
  • Wireless (Radio Frequency, Bluetooth, WiFi, Etc…)
  • Robotics
  • Automation
  • Camera and Video Capture Receiver Stationary, Wheel/Tank and Underwater Vehicle
  • Unmanned Vehicles Terrestrial and Marine
  • Machine Learning
  • Artificial Intelligence (AI)
  • RTOS
  • Sensors, eHealth Sensors, Biosensor, and Biometric
  • Research & Development (R & D)
  • Consulting

Follow Us

Luc Paquin – Curriculum Vitae – 2024
https://www.donluc.com/luc/

Web: https://www.donluc.com/
Facebook: https://www.facebook.com/neosteam.labs.9/
YouTube: https://www.youtube.com/@thesass2063
Twitter: https://twitter.com/labs_steam
Pinterest: https://www.pinterest.com/NeoSteamLabs/
Instagram: https://www.instagram.com/neosteamlabs/
DFRobot Luc.Paquin: https://edu.dfrobot.com/dashboard/makelogs
Hackster.io: https://www.hackster.io/neosteam-labs
LinkedIn: https://www.linkedin.com/in/jlucpaquin/

Don Luc
1 2 3 16
Categories
Archives