Pololu
Pololu
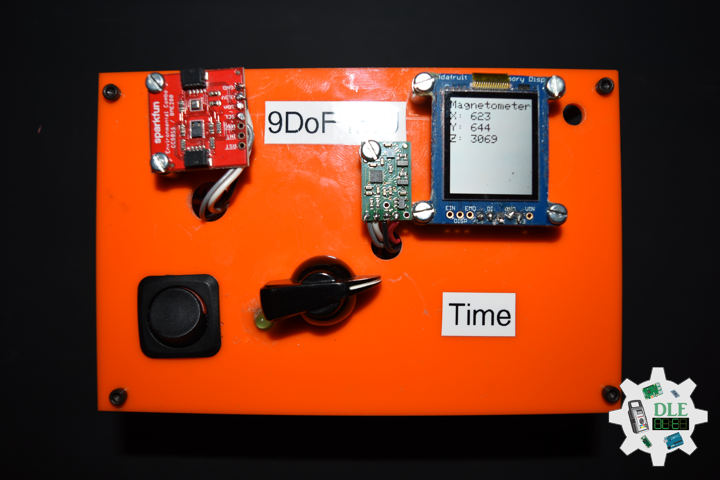
Project #28 – Sensors – Pololu MinIMU-9 v5 – Mk04
——
#DonLucElectronics #DonLuc #Sensors #MinIMU9 #Pololu #Adafruit #SparkFun #Arduino #Project #Fritzing #Programming #Electronics #Microcontrollers #Consultant
——
——
——
——
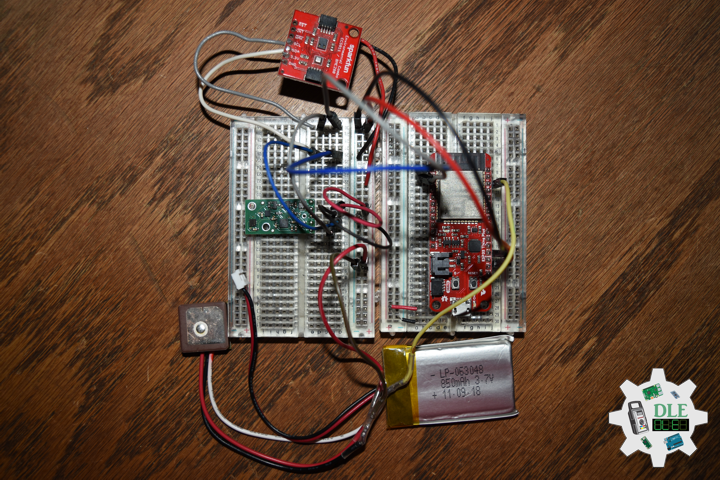
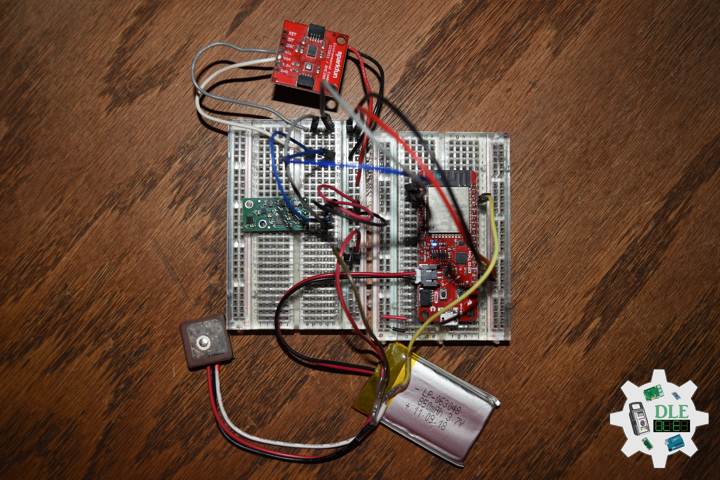
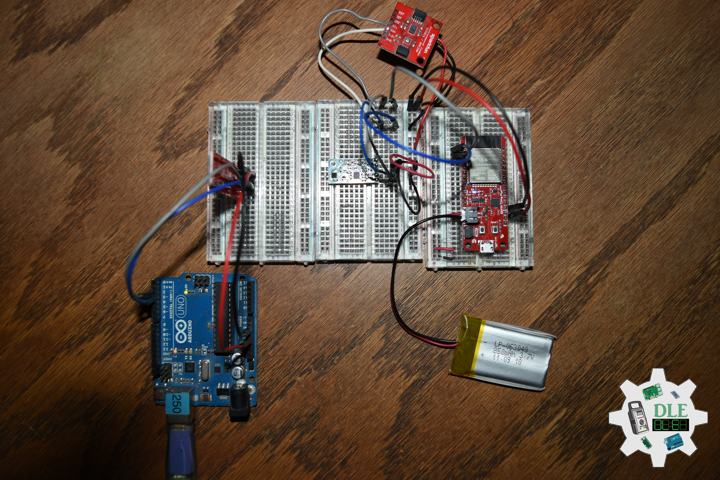
Pololu MinIMU-9 v5 Gyro, Accelerometer, and Compass (LSM6DS33 and LIS3MDL Carrier)
The Pololu MinIMU-9 v5 is an inertial measurement unit (IMU) that packs an LSM6DS33 3-axis gyro and 3-axis accelerometer and an LIS3MDL 3-axis magnetometer onto a tiny 0.8″ × 0.5″ board. An I²C interface accesses nine independent rotation, acceleration, and magnetic measurements that can be used to calculate the sensor’s absolute orientation. The MinIMU-9 v5 board includes a voltage regulator and a level-shifting circuit that allow operation from 2.5 to 5.5 Volt.
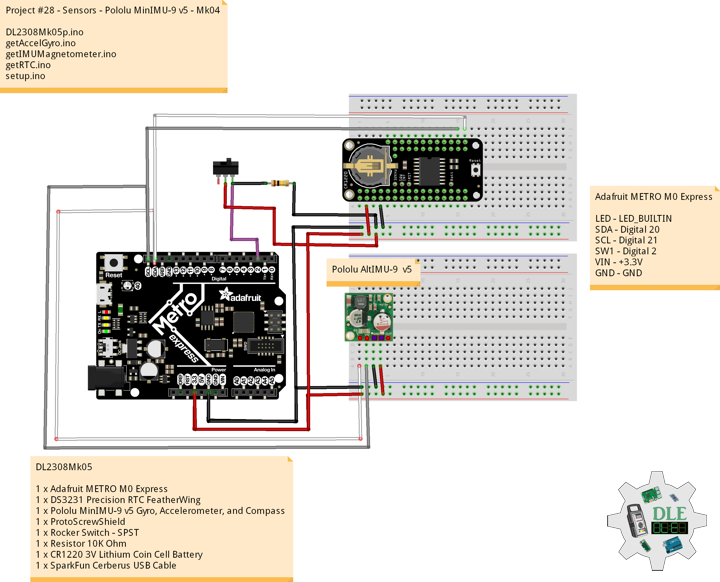
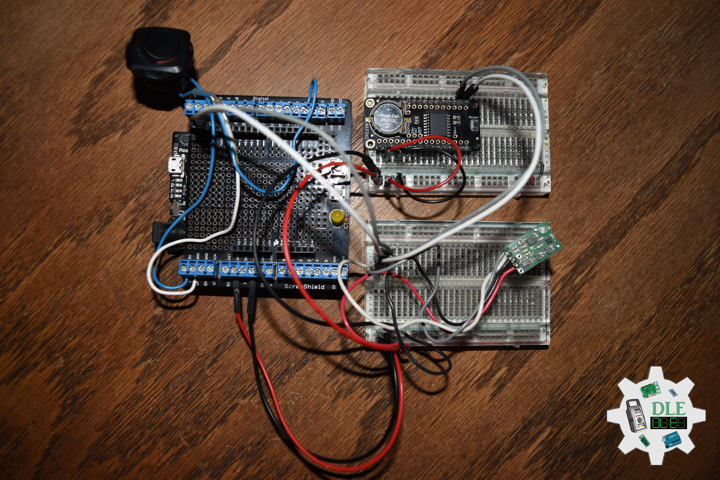
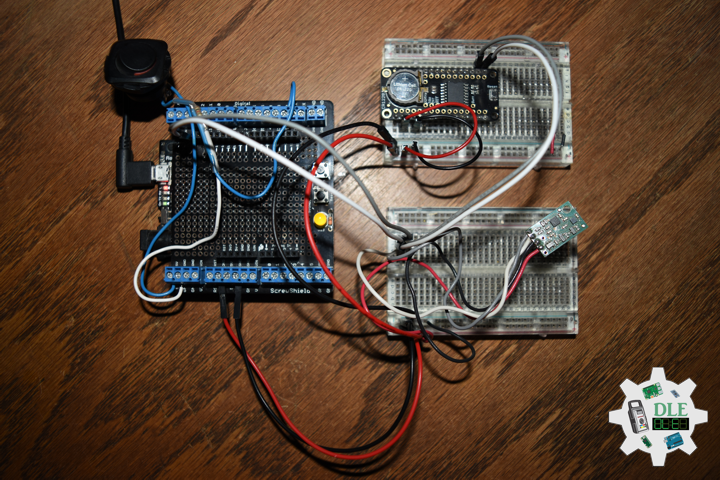
DL2308Mk05
1 x Adafruit METRO M0 Express
1 x DS3231 Precision RTC FeatherWing
1 x Pololu MinIMU-9 v5 Gyro, Accelerometer, and Compass
1 x ProtoScrewShield
1 x Rocker Switch – SPST
1 x Resistor 10K Ohm
1 x CR1220 3V Lithium Coin Cell Battery
1 x SparkFun Cerberus USB Cable
Adafruit METRO M0 Express
LED – LED_BUILTIN
SDA – Digital 20
SCL – Digital 21
SW1 – Digital 2
VIN – +3.3V
GND – GND
——
DL2308Mk05p.ino
/****** Don Luc Electronics © ****** Software Version Information Project #28 - Sensors - Pololu MinIMU-9 v5 - Mk04 28-04 DL2308Mk05p.ino 1 x Adafruit METRO M0 Express 1 x DS3231 Precision RTC FeatherWing 1 x Pololu MinIMU-9 v5 Gyro, Accelerometer, and Compass 1 x ProtoScrewShield 1 x Rocker Switch - SPST 1 x Resistor 10K Ohm 1 x CR1220 3V Lithium Coin Cell Battery 1 x SparkFun Cerberus USB Cable */ // Include the Library Code // DS3231 Precision RTC #include <RTClib.h> // Two Wire Interface (TWI/I2C) #include <Wire.h> // Keyboard #include <Keyboard.h> // Includes and variables for IMU integration // STMicroelectronics LSM6DS33 Gyroscope and Accelerometer #include <LSM6.h> // STMicroelectronics LIS3MDL Magnetometer #include <LIS3MDL.h> // Keyboard String sKeyboard = ""; // DS3231 Precision RTC RTC_DS3231 rtc; String dateRTC = ""; String timeRTC = ""; // Pololu 9DoF IMU // STMicroelectronics LSM6DS33 Gyroscope and Accelerometer LSM6 imu; // Accelerometer and Gyroscopes // Accelerometer int imuAX; int imuAY; int imuAZ; // Gyroscopes int imuGX; int imuGY; int imuGZ; // STMicroelectronics LIS3MDL Magnetometer LIS3MDL mag; // Magnetometer int magX; int magY; int magZ; // The number of the pushbutton pin int iButton = 2; // Variable for reading the button status int buttonState = 0; // Software Version Information String sver = "28-04"; void loop() { // Date and Time RTC isRTC (); // Pololu Accelerometer and Gyroscopes isIMU(); // Pololu Magnetometer isMag(); // Read the state of the button value: buttonState = digitalRead(iButton); // Check if the button is pressed. If it is, the buttonState is HIGH: if (buttonState == HIGH) { Keyboard.println(sKeyboard); } // Delay 1 Second delay(1000); }
getAccelGyro.ino
// Accelerometer and Gyroscopes // Setup IMU void setupIMU() { // Setup IMU imu.init(); // Default imu.enableDefault(); } // Accelerometer and Gyroscopes void isIMU() { // Accelerometer and Gyroscopes imu.read(); // Accelerometer x, y, z imuAX = imu.a.x; imuAY = imu.a.y; imuAZ = imu.a.z; // Gyroscopes x, y, z imuGX = imu.g.x; imuGY = imu.g.y; imuGZ = imu.g.z; sKeyboard = sKeyboard + String(imuAX) + "|" + String(imuAY) + "|" + String(imuAZ) + "|"; sKeyboard = sKeyboard + String(imuGX) + "|" + String(imuGY) + "|" + String(imuGZ) + "|"; }
getIMUMagnetometer.ino
// IMU Magnetometer // Setup Magnetometer void setupMag() { // Setup Magnetometer mag.init(); // Default mag.enableDefault(); } // Magnetometer void isMag() { // Magnetometer mag.read(); // Magnetometer x, y, z magX = mag.m.x; magY = mag.m.y; magZ = mag.m.z; sKeyboard = sKeyboard + String(magX) + "|" + String(magY) + "|" + String(magZ) + "|*"; }
getRTC.ino
// Date & Time // DS3231 Precision RTC void setupRTC() { // DS3231 Precision RTC if (! rtc.begin()) { //Serial.println("Couldn't find RTC"); //Serial.flush(); while (1) delay(10); } if (rtc.lostPower()) { //Serial.println("RTC lost power, let's set the time!"); // When time needs to be set on a new device, or after a power loss, the // following line sets the RTC to the date & time this sketch was compiled rtc.adjust(DateTime(F(__DATE__), F(__TIME__))); // This line sets the RTC with an explicit date & time, for example to set // January 21, 2014 at 3am you would call: //rtc.adjust(DateTime(2023, 8, 10, 11, 0, 0)); } } // Date and Time RTC void isRTC () { // Date and Time dateRTC = ""; timeRTC = ""; DateTime now = rtc.now(); // Date dateRTC = now.year(), DEC; dateRTC = dateRTC + "/"; dateRTC = dateRTC + now.month(), DEC; dateRTC = dateRTC + "/"; dateRTC = dateRTC + now.day(), DEC; // Time timeRTC = now.hour(), DEC; timeRTC = timeRTC + ":"; timeRTC = timeRTC + now.minute(), DEC; timeRTC = timeRTC + ":"; timeRTC = timeRTC + now.second(), DEC; sKeyboard = "SEN|" + sver + "|" + String(dateRTC) + "|" + String(timeRTC) + "|"; }
setup.ino
// Setup void setup() { // Give display time to power on delay(100); // Wire - Inialize I2C Hardware Wire.begin(); // Give display time to power on delay(100); // Date & Time RTC // DS3231 Precision RTC setupRTC(); // Initialize control over the keyboard: Keyboard.begin(); // Pololu Setup IMU setupIMU(); // Pololu Setup Magnetometer setupMag(); // Initialize the button pin as an input pinMode(iButton, INPUT); // Initialize digital pin LED_BUILTIN as an output pinMode(LED_BUILTIN, OUTPUT); // Turn the LED on HIGH digitalWrite(LED_BUILTIN, HIGH); // Delay 5 Second delay( 5000 ); }
——
People can contact us: https://www.donluc.com/?page_id=1927
Technology Experience
- Programming Language
- Single-Board Microcontrollers (PIC, Arduino, Raspberry Pi,Espressif, etc…)
- IoT
- Wireless (Radio Frequency, Bluetooth, WiFi, Etc…)
- Robotics
- Camera and Video Capture Receiver Stationary, Wheel/Tank and Underwater Vehicle
- Unmanned Vehicles Terrestrial and Marine
- Machine Learning
- RTOS
- Research & Development (R & D)
Instructor, E-Mentor, STEAM, and Arts-Based Training
- Programming Language
- IoT
- PIC Microcontrollers
- Arduino
- Raspberry Pi
- Espressif
- Robotics
Follow Us
Luc Paquin – Curriculum Vitae – 2023
https://www.donluc.com/luc/
Web: https://www.donluc.com/
Facebook: https://www.facebook.com/neosteam.labs.9/
YouTube: https://www.youtube.com/@thesass2063
Twitter: https://twitter.com/labs_steam
Pinterest: https://www.pinterest.com/NeoSteamLabs/
Instagram: https://www.instagram.com/neosteamlabs/
Don Luc
Project #26 – Radio Frequency – Bluetooth Serial Terminal for Windows 10 – Mk25
——
#DonLucElectronics #DonLuc #RadioFrequency #Bluetooth #GPS #SparkFun #BME280 #CCS811 #IMU #Arduino #Project #Fritzing #Programming #Electronics #Microcontrollers #Consultant
——
——
——
——
Bluetooth Serial Terminal for Windows 10
You can use this App to communicate with Serial Bluetooth devices like the RN-42, ESP32, that are used for arduino projects and other custom projects. Make sure to pair the device first in PC Settings.
- Use the rfcomm protocol to communicate with serial bluetooth devices.
- You can send and recieve data in either hex or string format.
- UI more responsive while updating terminal.
- Bytes that do not have proper ascii mapping are converted to space characters.
- Transmit data is displayed on terminal if it is successfully sent.
- Communicate with Serial Bluetooth devices.
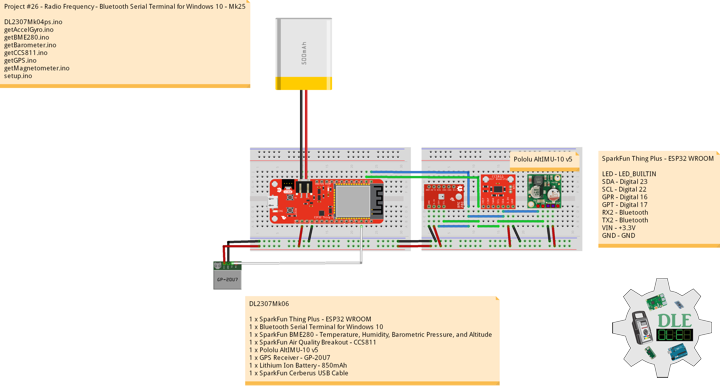
DL2307Mk06
1 x SparkFun Thing Plus – ESP32 WROOM
1 x Bluetooth Serial Terminal for Windows 10
1 x SparkFun BME280 – Temperature, Humidity, Barometric Pressure, and Altitude
1 x SparkFun Air Quality Breakout – CCS811
1 x Pololu AltIMU-10 v5
1 x GPS Receiver – GP-20U7
1 x Lithium Ion Battery – 850mAh
1 x SparkFun Cerberus USB Cable
SparkFun Thing Plus – ESP32 WROOM
LED – LED_BUILTIN
SDA – Digital 23
SCL – Digital 22
GPR – Digital 16
GPT – Digital 17
RX2 – Bluetooth
TX2 – Bluetooth
VIN – +3.3V
GND – GND
——
DL2307Mk06ps.ino
/* ***** Don Luc Electronics © ***** Software Version Information Project #26 - Radio Frequency - Bluetooth Serial Terminal for Windows 10 - Mk25 26-25 DL2307Mk06p.ino 1 x SparkFun Thing Plus - ESP32 WROOM 1 x Bluetooth Serial Terminal for Windows 10 1 x SparkFun BME280 - Temperature, Humidity, Barometric Pressure, and Altitude 1 x SparkFun Air Quality Breakout - CCS811 1 x Pololu AltIMU-10 v5 1 x GPS Receiver - GP-20U7 1 x Lithium Ion Battery - 85mAh 1 x SparkFun Cerberus USB Cable */ // Include the Library Code // Bluetooth Serial #include "BluetoothSerial.h" #if !defined(CONFIG_BT_ENABLED) || !defined(CONFIG_BLUEDROID_ENABLED) #error Bluetooth is not enabled! Please run `make menuconfig` to and enable it #endif // Two Wire Interface (TWI/I2C) #include <Wire.h> // SparkFun BME280 - Temperature, Humidity, Barometric Pressure, and Altitude #include <SparkFunBME280.h> // SparkFun CCS811 - eCO2 & tVOC #include <SparkFunCCS811.h> // Includes and variables for IMU integration // STMicroelectronics LSM6DS33 gyroscope and accelerometer #include <LSM6.h> // STMicroelectronics LIS3MDL magnetometer #include <LIS3MDL.h> // STMicroelectronics LPS25H digital barometer #include <LPS.h> // GPS Receiver #include <TinyGPS++.h> // ESP32 Hardware Serial #include <HardwareSerial.h> // Bluetooth Serial BluetoothSerial SerialBT; // SparkFun BME280 - Temperature, Humidity, Barometric Pressure, and Altitude BME280 myBME280; float BMEtempC = 0; float BMEhumid = 0; float BMEpressure = 0; float BMEaltitudeM = 0; String FullString = ""; // SparkFun CCS811 - eCO2 & tVOC // Default I2C Address #define CCS811_ADDR 0x5B CCS811 myCCS811(CCS811_ADDR); float CCS811CO2 = 0; float CCS811TVOC = 0; String FullStringA = ""; // 9DoF IMU // STMicroelectronics LSM6DS33 gyroscope and accelerometer LSM6 imu; // Accelerometer and Gyroscopes // Accelerometer int imuAX; int imuAY; int imuAZ; String FullStringB = ""; // Gyroscopes int imuGX; int imuGY; int imuGZ; String FullStringC = ""; // STMicroelectronics LIS3MDL magnetometer LIS3MDL mag; // Magnetometer int magX; int magY; int magZ; String FullStringD = ""; // STMicroelectronics LPS25H digital barometer LPS ps; // Digital Barometer float pressure; float altitude; float temperature; String FullStringF = ""; // ESP32 HardwareSerial HardwareSerial tGPS(2); // GPS Receiver #define gpsRXPIN 16 // This one is unused and doesnt have a conection #define gpsTXPIN 17 // The TinyGPS++ object TinyGPSPlus gps; // Latitude float TargetLat; // Longitude float TargetLon; String FullStringG = ""; // GPS Date, Time, Speed, Altitude // GPS Date String TargetDat; // GPS Time String TargetTim; // GPS Speeds M/S String TargetSMS; // GPS Speeds Km/h String TargetSKH; // GPS Altitude Meters String TargetALT; // GPS Status String GPSSt = ""; String FullStringH = ""; // Software Version Information String sver = "26-25"; void loop() { // SparkFun BME280 - Temperature, Humidity, Barometric Pressure, and Altitude isBME280(); // SparkFun CCS811 - eCO2 & tVOC isCCS811(); // Accelerometer and Gyroscopes isIMU(); // Magnetometer isMag(); // Barometer isBarometer(); // isGPS isGPS(); // Delay 1 sec delay(1000); }
getAccelGyro.ino
// Accelerometer and Gyroscopes // Setup IMU void setupIMU() { // Setup IMU imu.init(); // Default imu.enableDefault(); } // Accelerometer and Gyroscopes void isIMU() { // Accelerometer and Gyroscopes imu.read(); // Accelerometer x, y, z imuAX = imu.a.x; imuAY = imu.a.y; imuAZ = imu.a.z; // Gyroscopes x, y, z imuGX = imu.g.x; imuGY = imu.g.y; imuGZ = imu.g.z; // FullString B FullStringB = "Accelerometer X = " + String(imuAX) + " Accelerometer Y = " + String(imuAY) + " Accelerometer Z = " + String(imuAZ) + "\r\n"; // FullStringB Bluetooth Serial + Serial for(int i = 0; i < FullStringB.length(); i++) { // Bluetooth Serial SerialBT.write(FullStringB.c_str()[i]); // Serial Serial.write(FullStringB.c_str()[i]); } // FullString C FullStringC = "Gyroscopes X = " + String(imuGX) + " Gyroscopes Y = " + String(imuGY) + " Gyroscopes Z = " + String(imuGZ) + "\r\n"; // FullStringC Bluetooth Serial + Serial for(int i = 0; i < FullStringC.length(); i++) { // Bluetooth Serial SerialBT.write(FullStringC.c_str()[i]); // Serial Serial.write(FullStringC.c_str()[i]); } }
getBME280.ino
// SparkFun BME280 - Temperature, Humidity, Barometric Pressure, and Altitude // isBME280 - Temperature, Humidity, Barometric Pressure, and Altitude void isBME280(){ // Temperature Celsius BMEtempC = myBME280.readTempC(); // Humidity BMEhumid = myBME280.readFloatHumidity(); // Barometric Pressure BMEpressure = myBME280.readFloatPressure(); // Altitude Meters BMEaltitudeM = (myBME280.readFloatAltitudeMeters(), 2); // FullString FullString = "Temperature = " + String(BMEtempC,2) + " Humidity = " + String(BMEhumid,2) + " Barometric = " + String(BMEpressure,2) + " Altitude Meters = " + String(BMEaltitudeM,2) + "\r\n"; // FullString Bluetooth Serial + Serial for(int i = 0; i < FullString.length(); i++) { // Bluetooth Serial SerialBT.write(FullString.c_str()[i]); // Serial Serial.write(FullString.c_str()[i]); } }
getBarometer.ino
// STMicroelectronics LPS25H digital barometer // Setup Barometer void isSetupBarometer(){ // Setup Barometer ps.init(); // Default ps.enableDefault(); } // Barometer void isBarometer(){ // Barometer pressure = ps.readPressureMillibars(); // Altitude Meters altitude = ps.pressureToAltitudeMeters(pressure); // Temperature Celsius temperature = ps.readTemperatureC(); // FullStringF FullStringF = "Barometer = " + String(pressure,2) + " Altitude Meters = " + String(altitude,2) + " Temperature Celsius = " + String(temperature,2) + "\r\n"; // FullStringF Bluetooth Serial + Serial for(int i = 0; i < FullStringF.length(); i++) { // Bluetooth Serial SerialBT.write(FullStringF.c_str()[i]); // Serial Serial.write(FullStringF.c_str()[i]); } }
getCCS811.ino
// CCS811 - eCO2 & tVOC // isCCS811 - eCO2 & tVOC void isCCS811(){ // This sends the temperature & humidity data to the CCS811 myCCS811.setEnvironmentalData(BMEhumid, BMEtempC); // Calling this function updates the global tVOC and eCO2 variables myCCS811.readAlgorithmResults(); // eCO2 Concentration CCS811CO2 = myCCS811.getCO2(); // tVOC Concentration CCS811TVOC = myCCS811.getTVOC(); // FullStringA FullStringA = "TVOCs = " + String(CCS811TVOC,2) + " eCO2 = " + String(CCS811CO2,2) + "\r\n"; // FullStringA Bluetooth Serial + Serial for(int i = 0; i < FullStringA.length(); i++) { // Bluetooth Serial SerialBT.write(FullStringA.c_str()[i]); // Serial Serial.write(FullStringA.c_str()[i]); } }
getGPS.ino
// GPS Receiver // Setup GPS void setupGPS() { // Setup GPS tGPS.begin( 9600 , SERIAL_8N1 , gpsRXPIN , gpsTXPIN ); } // isGPS void isGPS(){ // Receives NEMA data from GPS receiver // This sketch displays information every time a new sentence is correctly encoded while ( tGPS.available() > 0) if (gps.encode( tGPS.read() )) { // GPS Vector Pointer Target displayInfo(); // GPS Date, Time, Speed, Altitude displayDTS(); } if (millis() > 5000 && gps.charsProcessed() < 10) { while(true); } } // GPS Vector Pointer Target void displayInfo(){ // Location if (gps.location.isValid()) { // Latitude TargetLat = gps.location.lat(); // Longitude TargetLon = gps.location.lng(); // GPS Status 2 GPSSt = "Yes"; // FullStringG FullStringG = "Latitude = " + String(TargetLat) + " Longitude = " + String(TargetLon) + "\r\n"; // FullStringG Bluetooth Serial + Serial for(int i = 0; i < FullStringG.length(); i++) { // Bluetooth Serial SerialBT.write(FullStringG.c_str()[i]); // Serial Serial.write(FullStringG.c_str()[i]); } } else { // GPS Status 0 GPSSt = "No"; } } // GPS Date, Time, Speed, Altitude void displayDTS(){ // Date TargetDat = ""; if (gps.date.isValid()) { // Date // Year TargetDat += String(gps.date.year(), DEC); TargetDat += "/"; // Month TargetDat += String(gps.date.month(), DEC); TargetDat += "/"; // Day TargetDat += String(gps.date.day(), DEC); // FullStringH FullStringH = "Date = " + String(TargetDat) + "\r\n"; // FullStringH Bluetooth Serial + Serial for(int i = 0; i < FullStringH.length(); i++) { // Bluetooth Serial SerialBT.write(FullStringH.c_str()[i]); // Serial Serial.write(FullStringH.c_str()[i]); } } // Time TargetTim = ""; if (gps.time.isValid()) { // Time // Hour TargetTim += String(gps.time.hour(), DEC); TargetTim += ":"; // Minute TargetTim += String(gps.time.minute(), DEC); TargetTim += ":"; // Secound TargetTim += String(gps.time.second(), DEC); // FullStringH FullStringH = "Time = " + String(TargetTim) + "\r\n"; // FullStringH Bluetooth Serial + Serial for(int i = 0; i < FullStringH.length(); i++) { // Bluetooth Serial SerialBT.write(FullStringH.c_str()[i]); // Serial Serial.write(FullStringH.c_str()[i]); } } // Speed TargetSMS = ""; TargetSKH = ""; if (gps.speed.isValid()) { // Speed // M/S int x = gps.speed.mps(); TargetSMS = String( x, DEC); // Km/h int y = gps.speed.kmph(); TargetSKH = String( y, DEC); // FullStringH FullStringH = "Speed = " + String(TargetSMS) + "\r\n"; // FullStringH Bluetooth Serial + Serial for(int i = 0; i < FullStringH.length(); i++) { // Bluetooth Serial SerialBT.write(FullStringH.c_str()[i]); // Serial Serial.write(FullStringH.c_str()[i]); } } // Altitude TargetALT = ""; if (gps.altitude.isValid()) { // Altitude // Meters int z = gps.altitude.meters(); TargetALT = String( z, DEC); // FullStringH FullStringH = "Altitude = " + String(TargetALT) + "\r\n"; // FullStringH Bluetooth Serial + Serial for(int i = 0; i < FullStringH.length(); i++) { // Bluetooth Serial SerialBT.write(FullStringH.c_str()[i]); // Serial Serial.write(FullStringH.c_str()[i]); } } }
getMagnetometer.ino
// Magnetometer // Setup Magnetometer void setupMag() { // Setup Magnetometer mag.init(); // Default mag.enableDefault(); } // Magnetometer void isMag() { // Magnetometer mag.read(); // Magnetometer x, y, z magX = mag.m.x; magY = mag.m.y; magZ = mag.m.z; // FullString D FullStringD = "Magnetometer X = " + String(magX) + " Magnetometer Y = " + String(magY) + " Magnetometer Z = " + String(magZ) + "\r\n"; // FullStringD Bluetooth Serial + Serial for(int i = 0; i < FullStringD.length(); i++) { // Bluetooth Serial SerialBT.write(FullStringD.c_str()[i]); // Serial Serial.write(FullStringD.c_str()[i]); } }
setup.ino
// Setup void setup() { // Serial Begin Serial.begin(115200); Serial.println("Starting BLE work!"); // Bluetooth Serial SerialBT.begin("Don Luc Electronics"); Serial.println("Bluetooth Started! Ready to pair..."); // Give display time to power on delay(100); // Wire - Inialize I2C Hardware Wire.begin(); // Give display time to power on delay(100); // SparkFun BME280 - Temperature, Humidity, Barometric Pressure, and Altitude myBME280.begin(); // CCS811 - eCO2 & tVOC myCCS811.begin(); // Setup IMU setupIMU(); // Setup Magnetometer setupMag(); // Setup Barometer isSetupBarometer(); // GPS Receiver // Setup GPS setupGPS(); // Initialize digital pin LED_BUILTIN as an output pinMode(LED_BUILTIN, OUTPUT); // Turn the LED on HIGH digitalWrite(LED_BUILTIN, HIGH); }
——
People can contact us: https://www.donluc.com/?page_id=1927
Technology Experience
- Programming Language
- Single-Board Microcontrollers (PIC, Arduino, Raspberry Pi,Espressif, etc…)
- IoT
- Wireless (Radio Frequency, Bluetooth, WiFi, Etc…)
- Robotics
- Camera and Video Capture Receiver Stationary, Wheel/Tank and Underwater Vehicle
- Unmanned Vehicles Terrestrial and Marine
- Machine Learning
- RTOS
- Research & Development (R & D)
Instructor, E-Mentor, STEAM, and Arts-Based Training
- Programming Language
- IoT
- PIC Microcontrollers
- Arduino
- Raspberry Pi
- Espressif
- Robotics
Follow Us
Luc Paquin – Curriculum Vitae – 2023
https://www.donluc.com/luc/
Web: https://www.donluc.com/
Facebook: https://www.facebook.com/neosteam.labs.9/
YouTube: https://www.youtube.com/@thesass2063
Twitter: https://twitter.com/labs_steam
Pinterest: https://www.pinterest.com/NeoSteamLabs/
Instagram: https://www.instagram.com/neosteamlabs/
Don Luc
Project #26 – Radio Frequency – Bluetooth Pololu AltIMU-10 – Mk23
——
#DonLucElectronics #DonLuc #RadioFrequency #Bluetooth #SparkFun #BME280 #CCS811 #IMU #Arduino #Project #Fritzing #Programming #Electronics #Microcontrollers #Consultant
——
——
——
——
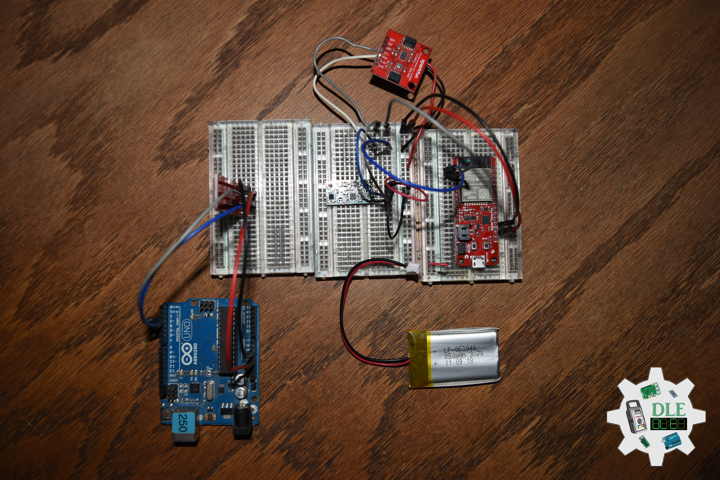
AltIMU-10 v5 Gyro, Accelerometer, Compass, and Altimeter
The Pololu AltIMU-10 v5 is an inertial measurement unit (IMU) and altimeter that features the same LSM6DS33 gyro and accelerometer and LIS3MDL magnetometer as the MinIMU-9 v5, and adds an LPS25H digital barometer. An I²C interface accesses ten independent pressure, rotation, acceleration, and magnetic measurements that can be used to calculate the sensor’s altitude and absolute orientation. The Pololu AltIMU-10 v5 is a compact board that combines ST’s LSM6DS33 3-axis gyroscope and 3-axis accelerometer, LIS3MDL 3-axis magnetometer, and LPS25H digital barometer to form an inertial measurement unit (IMU) and altimeter.
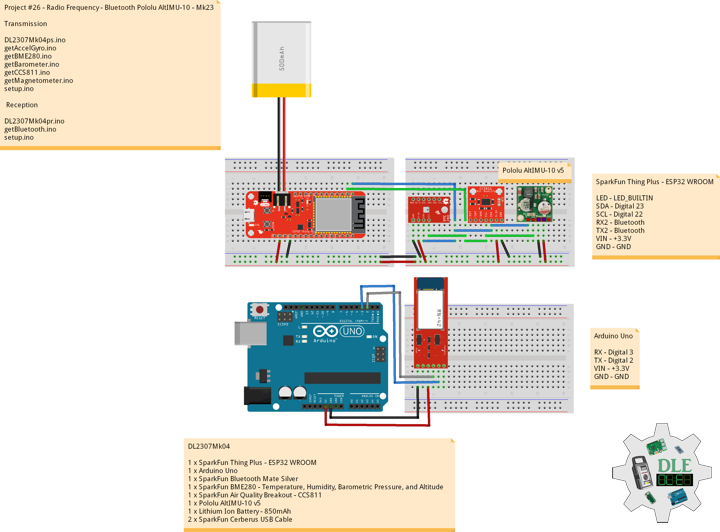
DL2307Mk04
1 x SparkFun Thing Plus – ESP32 WROOM
1 x Arduino Uno
1 x SparkFun Bluetooth Mate Silver
1 x SparkFun BME280 – Temperature, Humidity, Barometric Pressure, and Altitude
1 x SparkFun Air Quality Breakout – CCS811
1 x Pololu AltIMU-10 v5
1 x Lithium Ion Battery – 850mAh
2 x SparkFun Cerberus USB Cable
SparkFun Thing Plus – ESP32 WROOM
LED – LED_BUILTIN
SDA – Digital 23
SCL – Digital 22
RX2 – Bluetooth
TX2 – Bluetooth
VIN – +3.3V
GND – GND
——
DL2307Mk04ps.ino
/* ***** Don Luc Electronics © ***** Software Version Information Project #26 - Radio Frequency - Bluetooth Pololu AltIMU-10 - Mk23 26-23 DL2307Mk04pr.ino 1 x SparkFun Thing Plus - ESP32 WROOM 1 x Arduino Uno 1 x SparkFun Bluetooth Mate Silver 1 x SparkFun BME280 - Temperature, Humidity, Barometric Pressure, and Altitude 1 x SparkFun Air Quality Breakout - CCS811 1 x Pololu AltIMU-10 v5 1 x Lithium Ion Battery - 85mAh 2 x SparkFun Cerberus USB Cable */ // Include the Library Code // Bluetooth Serial #include "BluetoothSerial.h" #if !defined(CONFIG_BT_ENABLED) || !defined(CONFIG_BLUEDROID_ENABLED) #error Bluetooth is not enabled! Please run `make menuconfig` to and enable it #endif // Two Wire Interface (TWI/I2C) #include <Wire.h> // SparkFun BME280 - Temperature, Humidity, Barometric Pressure, and Altitude #include <SparkFunBME280.h> // SparkFun CCS811 - eCO2 & tVOC #include <SparkFunCCS811.h> // Includes and variables for IMU integration // STMicroelectronics LSM6DS33 gyroscope and accelerometer #include <LSM6.h> // STMicroelectronics LIS3MDL magnetometer #include <LIS3MDL.h> // STMicroelectronics LPS25H digital barometer #include <LPS.h> // Bluetooth Serial BluetoothSerial SerialBT; // SparkFun BME280 - Temperature, Humidity, Barometric Pressure, and Altitude BME280 myBME280; float BMEtempC = 0; float BMEhumid = 0; float BMEpressure = 0; float BMEaltitudeM = 0; String FullString = ""; // SparkFun CCS811 - eCO2 & tVOC // Default I2C Address #define CCS811_ADDR 0x5B CCS811 myCCS811(CCS811_ADDR); float CCS811CO2 = 0; float CCS811TVOC = 0; String FullStringA = ""; // 9DoF IMU // STMicroelectronics LSM6DS33 gyroscope and accelerometer LSM6 imu; // Accelerometer and Gyroscopes // Accelerometer int imuAX; int imuAY; int imuAZ; String FullStringB = ""; // Gyroscopes int imuGX; int imuGY; int imuGZ; String FullStringC = ""; // STMicroelectronics LIS3MDL magnetometer LIS3MDL mag; // Magnetometer int magX; int magY; int magZ; String FullStringD = ""; // STMicroelectronics LPS25H digital barometer LPS ps; // Digital Barometer float pressure; float altitude; float temperature; String FullStringF = ""; // Software Version Information String sver = "26-23"; void loop() { // SparkFun BME280 - Temperature, Humidity, Barometric Pressure, and Altitude isBME280(); // SparkFun CCS811 - eCO2 & tVOC isCCS811(); // Accelerometer and Gyroscopes isIMU(); // Magnetometer isMag(); // Barometer isBarometer(); // Delay 1 sec delay(1000); }
getAccelGyro.ino
// Accelerometer and Gyroscopes // Setup IMU void setupIMU() { // Setup IMU imu.init(); // Default imu.enableDefault(); } // Accelerometer and Gyroscopes void isIMU() { // Accelerometer and Gyroscopes imu.read(); // Accelerometer x, y, z imuAX = imu.a.x; imuAY = imu.a.y; imuAZ = imu.a.z; // Gyroscopes x, y, z imuGX = imu.g.x; imuGY = imu.g.y; imuGZ = imu.g.z; // FullString B FullStringB = "Accelerometer X = " + String(imuAX) + " Accelerometer Y = " + String(imuAY) + " Accelerometer Z = " + String(imuAZ) + "\r\n"; // FullStringB Bluetooth Serial + Serial for(int i = 0; i < FullStringB.length(); i++) { // Bluetooth Serial SerialBT.write(FullStringB.c_str()[i]); // Serial Serial.write(FullStringB.c_str()[i]); } // FullString C FullStringC = "Gyroscopes X = " + String(imuGX) + " Gyroscopes Y = " + String(imuGY) + " Gyroscopes Z = " + String(imuGZ) + "\r\n"; // FullStringC Bluetooth Serial + Serial for(int i = 0; i < FullStringC.length(); i++) { // Bluetooth Serial SerialBT.write(FullStringC.c_str()[i]); // Serial Serial.write(FullStringC.c_str()[i]); } }
getBME280.ino
// SparkFun BME280 - Temperature, Humidity, Barometric Pressure, and Altitude // isBME280 - Temperature, Humidity, Barometric Pressure, and Altitude void isBME280(){ // Temperature Celsius BMEtempC = myBME280.readTempC(); // Humidity BMEhumid = myBME280.readFloatHumidity(); // Barometric Pressure BMEpressure = myBME280.readFloatPressure(); // Altitude Meters BMEaltitudeM = (myBME280.readFloatAltitudeMeters(), 2); // FullString FullString = "Temperature = " + String(BMEtempC,2) + " Humidity = " + String(BMEhumid,2) + " Barometric = " + String(BMEpressure,2) + " Altitude Meters = " + String(BMEaltitudeM,2) + "\r\n"; // FullString Bluetooth Serial + Serial for(int i = 0; i < FullString.length(); i++) { // Bluetooth Serial SerialBT.write(FullString.c_str()[i]); // Serial Serial.write(FullString.c_str()[i]); } }
getBarometer.ino
// STMicroelectronics LPS25H digital barometer // Setup Barometer void isSetupBarometer(){ // Setup Barometer ps.init(); // Default ps.enableDefault(); } // Barometer void isBarometer(){ // Barometer pressure = ps.readPressureMillibars(); // Altitude Meters altitude = ps.pressureToAltitudeMeters(pressure); // Temperature Celsius temperature = ps.readTemperatureC(); // FullStringF FullStringF = "Barometer = " + String(pressure,2) + " Altitude Meters = " + String(altitude,2) + " Temperature Celsius = " + String(temperature,2) + "\r\n"; // FullStringF Bluetooth Serial + Serial for(int i = 0; i < FullStringF.length(); i++) { // Bluetooth Serial SerialBT.write(FullStringF.c_str()[i]); // Serial Serial.write(FullStringF.c_str()[i]); } }
getCCS811.ino
// CCS811 - eCO2 & tVOC // isCCS811 - eCO2 & tVOC void isCCS811(){ // This sends the temperature & humidity data to the CCS811 myCCS811.setEnvironmentalData(BMEhumid, BMEtempC); // Calling this function updates the global tVOC and eCO2 variables myCCS811.readAlgorithmResults(); // eCO2 Concentration CCS811CO2 = myCCS811.getCO2(); // tVOC Concentration CCS811TVOC = myCCS811.getTVOC(); // FullStringA FullStringA = "TVOCs = " + String(CCS811TVOC,2) + " eCO2 = " + String(CCS811CO2,2) + "\r\n"; // FullStringA Bluetooth Serial + Serial for(int i = 0; i < FullStringA.length(); i++) { // Bluetooth Serial SerialBT.write(FullStringA.c_str()[i]); // Serial Serial.write(FullStringA.c_str()[i]); } }
getMagnetometer.ino
// Magnetometer // Setup Magnetometer void setupMag() { // Setup Magnetometer mag.init(); // Default mag.enableDefault(); } // Magnetometer void isMag() { // Magnetometer mag.read(); // Magnetometer x, y, z magX = mag.m.x; magY = mag.m.y; magZ = mag.m.z; // FullString D FullStringD = "Magnetometer X = " + String(magX) + " Magnetometer Y = " + String(magY) + " Magnetometer Z = " + String(magZ) + "\r\n"; // FullStringD Bluetooth Serial + Serial for(int i = 0; i < FullStringD.length(); i++) { // Bluetooth Serial SerialBT.write(FullStringD.c_str()[i]); // Serial Serial.write(FullStringD.c_str()[i]); } }
setup.ino
// Setup void setup() { // Serial Begin Serial.begin(9600); Serial.println("Starting BLE work!"); // Bluetooth Serial SerialBT.begin("Don Luc Electronics"); Serial.println("Bluetooth Started! Ready to pair..."); // Give display time to power on delay(100); // Wire - Inialize I2C Hardware Wire.begin(); // Give display time to power on delay(100); // SparkFun BME280 - Temperature, Humidity, Barometric Pressure, and Altitude myBME280.begin(); // CCS811 - eCO2 & tVOC myCCS811.begin(); // Setup IMU setupIMU(); // Setup Magnetometer setupMag(); // Setup Barometer isSetupBarometer(); // Initialize digital pin LED_BUILTIN as an output pinMode(LED_BUILTIN, OUTPUT); // Turn the LED on HIGH digitalWrite(LED_BUILTIN, HIGH); }
——
Arduino Uno
RX – Digital 3
TX – Digital 2
VIN – +3.3V
GND – GND
——
DL2307Mk04pr.ino
/* ***** Don Luc Electronics © ***** Software Version Information Project #26 - Radio Frequency - Bluetooth Pololu AltIMU-10 - Mk23 26-23 DL2307Mk04pr.ino 1 x Arduino Uno 1 x SparkFun RedBoard Qwiic 1 x SparkFun Bluetooth Mate Silver 1 x SparkFun BME280 - Temperature, Humidity, Barometric Pressure, and Altitude 1 x SparkFun Air Quality Breakout - CCS811 1 x Pololu AltIMU-10 v5 1 x Lithium Ion Battery - 85mAh 2 x SparkFun Cerberus USB Cable */ // Include the Library Code // Software Serial #include <SoftwareSerial.h> // Software Serial // TX-O pin of bluetooth mate, Arduino D2 int bluetoothTx = 2; // RX-I pin of bluetooth mate, Arduino D3 int bluetoothRx = 3; // Bluetooth SoftwareSerial bluetooth(bluetoothTx, bluetoothRx); // BTA //String BTA = "0006664FDC9E"; // Software Version Information String sver = "26-23"; void loop() { // isBluetooth isBluetooth(); }
getBluetooth.ino
// Bluetooth // Setup Bluetooth void isSetupBluetooth(){ // Setup Bluetooth // Begin the serial monitor at 9600bps Serial.begin(9600); // Bluetooth // The Bluetooth Mate defaults to 115200bps bluetooth.begin(115200); // Print three times individually bluetooth.print("$"); bluetooth.print("$"); bluetooth.print("$"); // Enter command mode // Short delay, wait for the Mate to send back CMD delay(100); // Temporarily Change the baudrate to 9600, no parity bluetooth.println("U,9600,N"); // 115200 can be too fast at times for NewSoftSerial to relay the data reliably // Start bluetooth serial at 9600 bluetooth.begin(9600); } // isBluetooth void isBluetooth() { // If the bluetooth sent any characters if(bluetooth.available()) { // Send any characters the bluetooth prints to the serial monitor Serial.print((char)bluetooth.read()); } // If stuff was typed in the serial monitor if(Serial.available()) { // Send any characters the Serial monitor prints to the bluetooth bluetooth.print((char)Serial.read()); } }
setup.ino
// Setup void setup() { // Setup Bluetooth isSetupBluetooth(); }
——
People can contact us: https://www.donluc.com/?page_id=1927
Technology Experience
- Programming Language
- Single-Board Microcontrollers (PIC, Arduino, Raspberry Pi,Espressif, etc…)
- IoT
- Wireless (Radio Frequency, Bluetooth, WiFi, Etc…)
- Robotics
- Camera and Video Capture Receiver Stationary, Wheel/Tank and Underwater Vehicle
- Unmanned Vehicles Terrestrial and Marine
- Machine Learning
- RTOS
- Research & Development (R & D)
Instructor, E-Mentor, STEAM, and Arts-Based Training
- Programming Language
- IoT
- PIC Microcontrollers
- Arduino
- Raspberry Pi
- Espressif
- Robotics
Follow Us
Luc Paquin – Curriculum Vitae – 2023
https://www.donluc.com/luc/
Web: https://www.donluc.com/
Facebook: https://www.facebook.com/neosteam.labs.9/
YouTube: https://www.youtube.com/@thesass2063
Twitter: https://twitter.com/labs_steam
Pinterest: https://www.pinterest.com/NeoSteamLabs/
Instagram: https://www.instagram.com/neosteamlabs/
Don Luc
Project #12: Robotics – 9DOF – Mk27
——
#DonLucElectronics #DonLuc #Robotics #Magnetometer #Accelerometer #Gyroscope #MicroOLED # #Arduino #Project #Fritzing #Programming #Electronics #Microcontrollers #Consultant
——
——
——
——
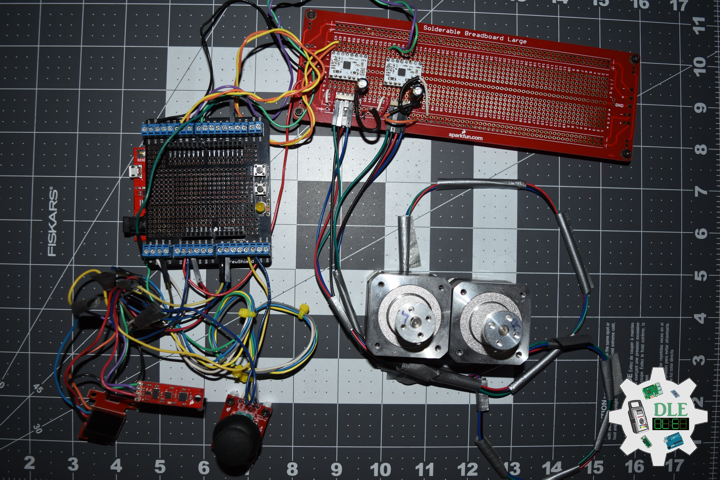
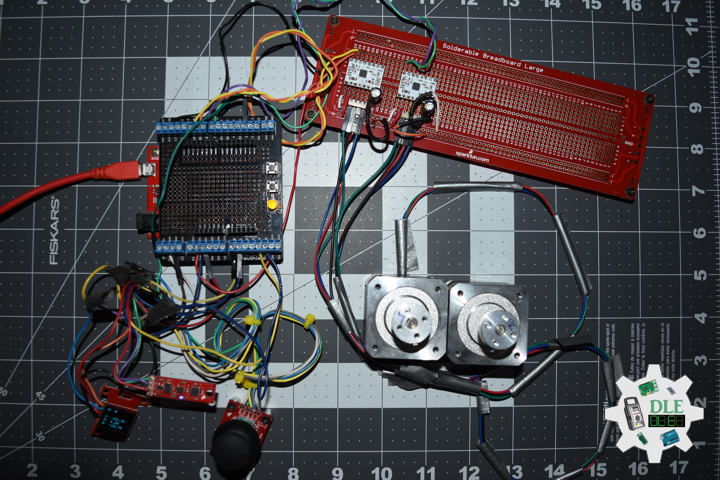
SparkFun 9 Degrees of Freedom – Sensor Stick
The SparkFun 9DOF Sensor Stick is a very small sensor board with 9 degrees of freedom. It includes the ADXL345 accelerometer, the HMC5883L magnetometer, and the ITG-3200 MEMS gyro. The “Stick” has a simple I2C interface and a mounting hole for attaching it to your project. Also, the board is a mere allowing it to be easily mounted in just about any application.
DL2305Mk03
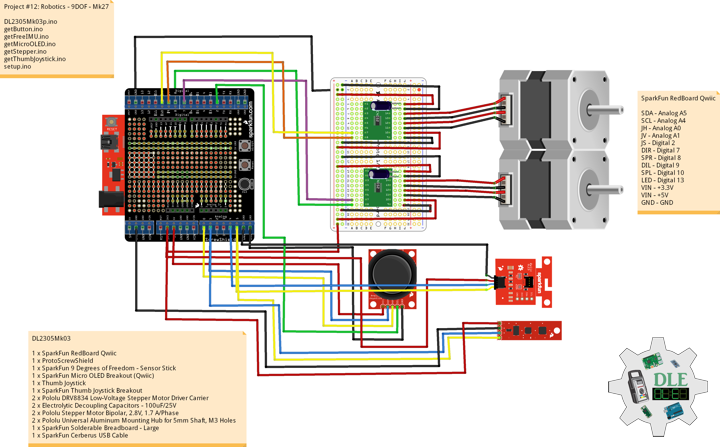
1 x SparkFun RedBoard Qwiic
1 x ProtoScrewShield
1 x SparkFun 9 Degrees of Freedom – Sensor Stick
1 x SparkFun Micro OLED Breakout (Qwiic)
1 x Thumb Joystick
1 x SparkFun Thumb Joystick Breakout
2 x Pololu DRV8834 Low-Voltage Stepper Motor Driver Carrier
2 x Electrolytic Decoupling Capacitors – 100uF/25V
2 x Pololu Stepper Motor Bipolar, 2.8V, 1.7 A/Phase
2 x Pololu Universal Aluminum Mounting Hub for 5mm Shaft, M3 Holes
1 x SparkFun Solderable Breadboard – Large
1 x SparkFun Cerberus USB Cable
SparkFun RedBoard Qwiic
SDA – Analog A5
SCL – Analog A4
JH – Analog A0
JV – Analog A1
JS – Digital 2
DIR – Digital 7
SPR – Digital 8
DIL – Digital 9
SPL – Digital 10
LED – Digital 13
VIN – +3.3V
VIN – +5V
GND – GND
——
DL2305Mk03p.ino
/* ***** Don Luc Electronics © ***** Software Version Information Project #12: Robotics - 9DOF - Mk27 12-27 DL2305Mk03p.ino 1 x SparkFun RedBoard Qwiic 1 x ProtoScrewShield 1 x SparkFun 9 Degrees of Freedom - Sensor Stick 1 x SparkFun Micro OLED Breakout (Qwiic) 1 x Thumb Joystick 1 x SparkFun Thumb Joystick Breakout 2 x Pololu DRV8834 Low-Voltage Stepper Motor Driver Carrier 2 x Electrolytic Decoupling Capacitors - 100uF/25V 2 x Pololu Stepper Motor Bipolar, 2.8V, 1.7 A/Phase 2 x Pololu Universal Aluminum Mounting Hub for 5mm Shaft, M3 Holes 1 x SparkFun Solderable Breadboard - Large 1 x SparkFun Cerberus USB Cable */ // Include the Library Code // Arduino #include <Arduino.h> // DRV8834 Stepper Motor Driver #include <BasicStepperDriver.h> #include <MultiDriver.h> // Wire communicate with I2C / TWI devices #include <Wire.h> // SparkFun Micro OLED #include <SFE_MicroOLED.h> // Accelerometer #include <ADXL345.h> // Magnetometer #include <HMC58X3.h> // MEMS Gyroscope #include <ITG3200.h> // Debug #include "DebugUtils.h" // FreeIMU #include <CommunicationUtils.h> #include <FreeIMU.h> // DRV8834 Stepper Motor Driver // Stepper motor steps per revolution. // Most steppers are 200 steps or 1.8 degrees/step #define MOTOR_STEPS 200 // Target RPM for X axis stepper motor #define MOTOR_X_RPM 800 // Target RPM for Y axis stepper motor #define MOTOR_Y_RPM 800 // Since microstepping is set externally, // make sure this matches the selected mode // If it doesn't, the motor will move at a // different RPM than chosen // 1=full step, 2=half step etc. #define MICROSTEPS 1 // X Stepper motor #define DIR_X 7 #define STEP_X 8 // Y Stepper motor #define DIR_Y 9 #define STEP_Y 10 // BasicStepperDriver BasicStepperDriver stepperX(MOTOR_STEPS, DIR_X, STEP_X); BasicStepperDriver stepperY(MOTOR_STEPS, DIR_Y, STEP_Y); // Pick one of the two controllers below // each motor moves independently MultiDriver controller(stepperX, stepperY); // Joystick #define JH A0 #define JV A1 #define JS 2 // Variable for reading the button int JSState = 0; // Adjusted Value int adjustedValue = 0; int adjustedValue2 = 0; // LED Yellow int iLED = 13; // SparkFun Micro OLED #define PIN_RESET 9 #define DC_JUMPER 1 // I2C declaration MicroOLED oled(PIN_RESET, DC_JUMPER); // Set the FreeIMU object FreeIMU my3IMU = FreeIMU(); // Yaw Pitch Roll float ypr[3]; float Yaw = 0; float Pitch = 0; float Roll = 0; // Software Version Information String sver = "12-27"; void loop() { // Button isButton(); // Joystick isThumbJoystick(); // Stepper isStepper(); // isFreeIMU isFreeIMU(); // Micro OLED isMicroOLED(); }
getButton.ino
// Button // Button Setup void isButtonSetup() { // Make the button line an input pinMode(JS, INPUT_PULLUP); // Initialize digital pin iLED as an output pinMode(iLED, OUTPUT); } // Button void isButton(){ // Read the state of the button JSState = digitalRead(JS); // Check if the button is pressed. // If it is, the JSState is HIGH: if (JSState == HIGH) { // Button // Turn the LED on HIGH digitalWrite(iLED, HIGH); } else { // Button // Turn the LED on LOW digitalWrite(iLED, LOW); } }
getFreeIMU.ino
// FreeIMU // isFreeIMUSetup void isFreeIMUSetup(){ // Pause delay(5); // Initialize IMU my3IMU.init(); // Pause delay(5); } // isFreeIMU void isFreeIMU(){ // FreeIMU // Yaw Pitch Roll my3IMU.getYawPitchRoll(ypr); // Yaw Yaw = ypr[0]; // Pitch Pitch = ypr[1]; // Roll Roll = ypr[2]; }
getMicroOLED.ino
// SparkFun Micro OLED // Micro OLED Setup void isMicroOLEDSetup() { // Initialize the OLED oled.begin(); // Clear the display's internal memory oled.clear(ALL); // Display what's in the buffer (Splash Screen SparkFun) oled.display(); // Delay 1000 ms delay(1000); // Clear the buffer. oled.clear(PAGE); } // Micro OLED void isMicroOLED() { // Text Display FreeIMU // Clear the display oled.clear(PAGE); // Set cursor to top-left oled.setCursor(0, 0); // Set font to type 0 oled.setFontType(0); // Horizontal oled.print("H: "); oled.print( adjustedValue ); // Vertical oled.setCursor(0, 11); oled.print("V: "); oled.print( adjustedValue2 ); // Yaw oled.setCursor(0, 21); oled.print("Y: "); oled.print(Yaw); // Pitch oled.setCursor(0, 31); oled.print("P: "); oled.print(Pitch); // Roll oled.setCursor(0, 41); oled.print("R: "); oled.print(Roll); oled.display(); }
getStepper.ino
// Stepper // isStepperSetup void isStepperSetup() { // Set stepper target motors RPM. stepperX.begin(MOTOR_X_RPM, MICROSTEPS); stepperY.begin(MOTOR_Y_RPM, MICROSTEPS); } // Stepper void isStepper() { // Stepper => Controller rotate controller.rotate(adjustedValue, adjustedValue2); }
getThumbJoystick.ino
// Thumb Joystick void isThumbJoystick() { // Joystick JH // Horizontal // Joystick Pot Values JH int potValue = analogRead(JH); int potValues = 0; // Adjusted Value potValues = map(potValue, 0, 1023, 1000, -1000); if (potValues > 300) { adjustedValue = potValues; } else if (potValues < -300) { adjustedValue = potValues; } else { adjustedValue = 0; } // Joystick JV // Vertical // Joystick Pot Values JV int potValue2 = analogRead(JV); int potValues2 = 0; // Adjusted Value2 potValues2 = map(potValue2, 0, 1023, 1000, -1000); if (potValues2 > 300) { adjustedValue2 = potValues2; } else if (potValues2 < -300) { adjustedValue2 = potValues2; } else { adjustedValue2 = 0; } }
setup.ino
// Setup void setup() { // Wire communicate with I2C / TWI devices Wire.begin(); // Setup Micro OLED isMicroOLEDSetup(); // isFreeIMUSetup isFreeIMUSetup(); // Button Setup isButtonSetup(); // DRV8834 Stepper Motor Driver isStepperSetup(); }
——
People can contact us: https://www.donluc.com/?page_id=1927
Technology Experience
- Programming Language
- Single-Board Microcontrollers (PIC, Arduino, Raspberry Pi,Espressif, etc…)
- IoT
- Wireless (Radio Frequency, Bluetooth, WiFi, Etc…)
- Robotics
- Camera and Video Capture Receiver Stationary, Wheel/Tank and Underwater Vehicle
- Unmanned Vehicles Terrestrial and Marine
- Machine Learning
- RTOS
- Research & Development (R & D)
Instructor, E-Mentor, STEAM, and Arts-Based Training
- Programming Language
- IoT
- PIC Microcontrollers
- Arduino
- Raspberry Pi
- Espressif
- Robotics
Follow Us
Luc Paquin – Curriculum Vitae – 2023
https://www.donluc.com/luc/
Web: https://www.donluc.com/
Facebook: https://www.facebook.com/neosteam.labs.9/
YouTube: https://www.youtube.com/@thesass2063
Twitter: https://twitter.com/labs_steam
Pinterest: https://www.pinterest.com/NeoSteamLabs/
Instagram: https://www.instagram.com/neosteamlabs/
Don Luc
Project #12: Robotics – Micro OLED – Mk26
——
#DonLucElectronics #DonLuc #Robotics #MicroOLED #AdafruitMETROM0Express #Arduino #Project #Fritzing #Programming #Electronics #Microcontrollers #Consultant
——
——
——
——-
Micro OLED
Micro OLED displays are silicon-based OLED display that use a monocrystalline silicon wafer as the actively driven backplane, so it is easier to achieve high PPI (Pixel Density), a high degree of integration, and small size. This ensures they are easy to carry, have good anti-seismic performance, and have ultra-low power consumption.
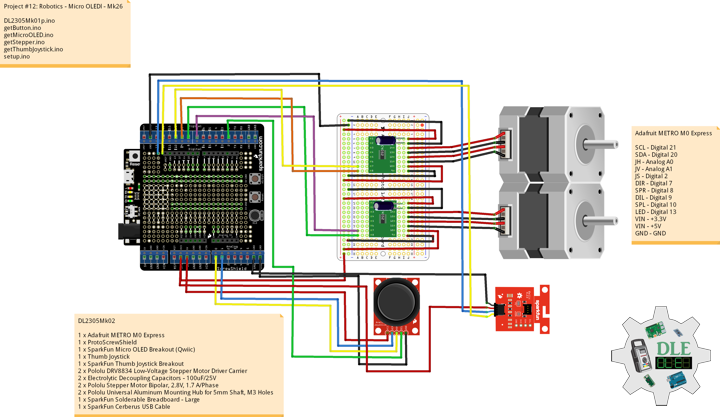
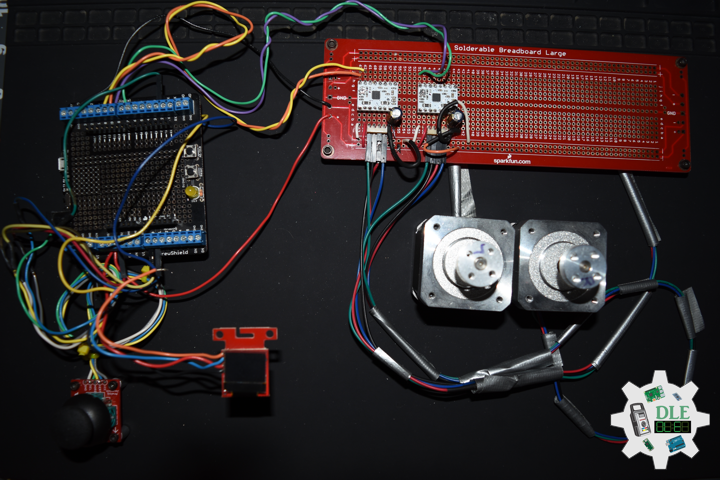
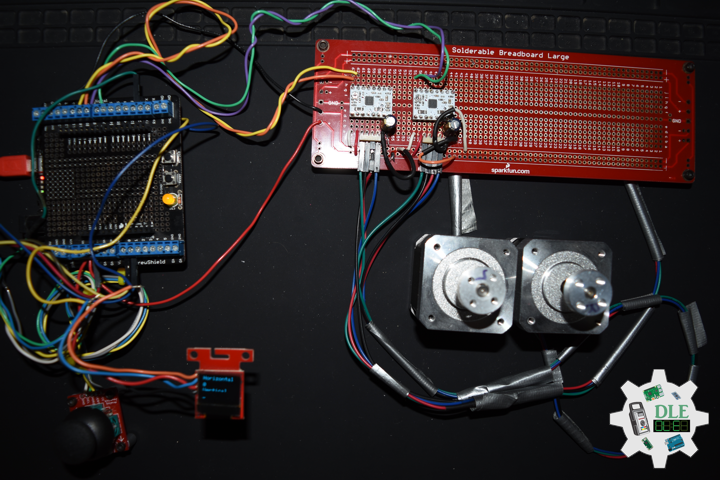
DL2305Mk02
1 x Adafruit METRO M0 Express
1 x ProtoScrewShield
1 x SparkFun Micro OLED Breakout (Qwiic)
1 x Thumb Joystick
1 x SparkFun Thumb Joystick Breakout
2 x Pololu DRV8834 Low-Voltage Stepper Motor Driver Carrier
2 x Electrolytic Decoupling Capacitors – 100uF/25V
2 x Pololu Stepper Motor Bipolar, 2.8V, 1.7 A/Phase
2 x Pololu Universal Aluminum Mounting Hub for 5mm Shaft, M3 Holes
1 x SparkFun Solderable Breadboard – Large
1 x SparkFun Cerberus USB Cable
Adafruit METRO M0 Express
SCL – Digital 21
SDA – Digital 20
JH – Analog A0
JV – Analog A1
JS – Digital 2
DIR – Digital 7
SPR – Digital 8
DIL – Digital 9
SPL – Digital 10
LED – Digital 13
VIN – +3.3V
VIN – +5V
GND – GND
——
DL2305Mk02p.ino
/* ***** Don Luc Electronics © ***** Software Version Information Project #12: Robotics - Micro OLED - Mk26 12-26 DL2305Mk02p.ino 1 x Adafruit METRO M0 Express 1 x ProtoScrewShield 1 x SparkFun Micro OLED Breakout (Qwiic) 1 x Thumb Joystick 1 x SparkFun Thumb Joystick Breakout 2 x Pololu DRV8834 Low-Voltage Stepper Motor Driver Carrier 2 x Electrolytic Decoupling Capacitors - 100uF/25V 2 x Pololu Stepper Motor Bipolar, 2.8V, 1.7 A/Phase 2 x Pololu Universal Aluminum Mounting Hub for 5mm Shaft, M3 Holes 1 x SparkFun Solderable Breadboard - Large 1 x SparkFun Cerberus USB Cable */ // Include the Library Code // Arduino #include <Arduino.h> // DRV8834 Stepper Motor Driver #include <BasicStepperDriver.h> #include <MultiDriver.h> // Wire communicate with I2C / TWI devices #include <Wire.h> // SparkFun Micro OLED #include <SFE_MicroOLED.h> // DRV8834 Stepper Motor Driver // Stepper motor steps per revolution. // Most steppers are 200 steps or 1.8 degrees/step #define MOTOR_STEPS 200 // Target RPM for X axis stepper motor #define MOTOR_X_RPM 800 // Target RPM for Y axis stepper motor #define MOTOR_Y_RPM 800 // Since microstepping is set externally, // make sure this matches the selected mode // If it doesn't, the motor will move at a // different RPM than chosen // 1=full step, 2=half step etc. #define MICROSTEPS 1 // X Stepper motor #define DIR_X 7 #define STEP_X 8 // Y Stepper motor #define DIR_Y 9 #define STEP_Y 10 // BasicStepperDriver BasicStepperDriver stepperX(MOTOR_STEPS, DIR_X, STEP_X); BasicStepperDriver stepperY(MOTOR_STEPS, DIR_Y, STEP_Y); // Pick one of the two controllers below // each motor moves independently MultiDriver controller(stepperX, stepperY); // Joystick #define JH A0 #define JV A1 #define JS 2 // Variable for reading the button int JSState = 0; // Adjusted Value int adjustedValue = 0; int adjustedValue2 = 0; // LED Yellow int iLED = 13; // SparkFun Micro OLED #define PIN_RESET 9 #define DC_JUMPER 1 // I2C declaration MicroOLED oled(PIN_RESET, DC_JUMPER); // Software Version Information String sver = "12-26"; void loop() { // Button isButton(); // Joystick isThumbJoystick(); // Stepper isStepper(); // Micro OLED isMicroOLED(); }
getButton.ino
// Button // Button Setup void isButtonSetup() { // Make the button line an input pinMode(JS, INPUT_PULLUP); // Initialize digital pin iLED as an output pinMode(iLED, OUTPUT); } // Button void isButton(){ // Read the state of the button JSState = digitalRead(JS); // Check if the button is pressed. // If it is, the JSState is HIGH: if (JSState == HIGH) { // Button // Turn the LED on HIGH digitalWrite(iLED, HIGH); } else { // Button // Turn the LED on LOW digitalWrite(iLED, LOW); } }
getMicroOLED.ino
// SparkFun Micro OLED // Setup Micro OLED void isMicroOLEDSetup() { // Initialize the OLED oled.begin(); // Clear the display's internal memory oled.clear(ALL); // Display what's in the buffer (Splash Screen SparkFun) oled.display(); // Delay 1000 ms delay(1000); // Clear the buffer. oled.clear(PAGE); } // Micro OLED void isMicroOLED() { // Text Display FreeIMU // Clear the display oled.clear(PAGE); // Set cursor to top-left oled.setCursor(0, 0); // Set font to type 0 oled.setFontType(0); // Horizontal oled.print("Horizontal"); // Horizontal oled.setCursor(0, 13); oled.print( adjustedValue ); // Vertical oled.setCursor(0, 24); oled.print("Vertical"); // Vertical oled.setCursor(0, 37); oled.print( adjustedValue2 ); oled.display(); }
getStepper.ino
// Stepper // isStepperSetup void isStepperSetup() { // Set stepper target motors RPM. stepperX.begin(MOTOR_X_RPM, MICROSTEPS); stepperY.begin(MOTOR_Y_RPM, MICROSTEPS); } // Stepper void isStepper() { // Stepper => Controller rotate controller.rotate(adjustedValue, adjustedValue2); }
getThumbJoystick.ino
// Thumb Joystick void isThumbJoystick() { // Joystick JH // Horizontal // Joystick Pot Values JH int potValue = analogRead(JH); int potValues = 0; // Adjusted Value potValues = map(potValue, 0, 1023, 1000, -1000); if (potValues > 300) { adjustedValue = potValues; } else if (potValues < -300) { adjustedValue = potValues; } else { adjustedValue = 0; } // Joystick JV // Vertical // Joystick Pot Values JV int potValue2 = analogRead(JV); int potValues2 = 0; // Adjusted Value2 potValues2 = map(potValue2, 0, 1023, 1000, -1000); if (potValues2 > 300) { adjustedValue2 = potValues2; } else if (potValues2 < -300) { adjustedValue2 = potValues2; } else { adjustedValue2 = 0; } }
setup.ino
// Setup void setup() { // Wire communicate with I2C / TWI devices Wire.begin(); // Setup Micro OLED isMicroOLEDSetup(); // Button Setup isButtonSetup(); // DRV8834 Stepper Motor Driver isStepperSetup(); }
——
People can contact us: https://www.donluc.com/?page_id=1927
Technology Experience
- Programming Language
- Single-Board Microcontrollers (PIC, Arduino, Raspberry Pi,Espressif, etc…)
- IoT
- Wireless (Radio Frequency, Bluetooth, WiFi, Etc…)
- Robotics
- Camera and Video Capture Receiver Stationary, Wheel/Tank and Underwater Vehicle
- Unmanned Vehicles Terrestrial and Marine
- Machine Learning
- RTOS
- Research & Development (R & D)
Instructor, E-Mentor, STEAM, and Arts-Based Training
- Programming Language
- IoT
- PIC Microcontrollers
- Arduino
- Raspberry Pi
- Espressif
- Robotics
Follow Us
Luc Paquin – Curriculum Vitae – 2023
https://www.donluc.com/luc/
Web: https://www.donluc.com/
Facebook: https://www.facebook.com/neosteam.labs.9/
YouTube: https://www.youtube.com/@thesass2063
Twitter: https://twitter.com/labs_steam
Pinterest: https://www.pinterest.com/NeoSteamLabs/
Instagram: https://www.instagram.com/neosteamlabs/
Don Luc
Project #12: Robotics – Multi-Motor Control – Mk25
——
#DonLucElectronics #DonLuc #Robotics #MultiMotorControl #AdafruitMETROM0Express #Arduino #Project #Fritzing #Programming #Electronics #Microcontrollers #Consultant
——
——
——
——
Multi-Motor Control
In order to synchronize the multi-motor system, a novel method for this system based on embedded control terminal. A controller of the strategy with the function of synchronous control is also completed. According to the requirements of this system, a distributed control structure which based on Hierarchical Approach is chosen. The hardware platform of this structure is composed of embedded control terminal motor could be driven independently. The experiment results verified that the multi-motor system is reliable, the control strategy is rational applied this multi-motor system has better dynamic response and higher reliability.
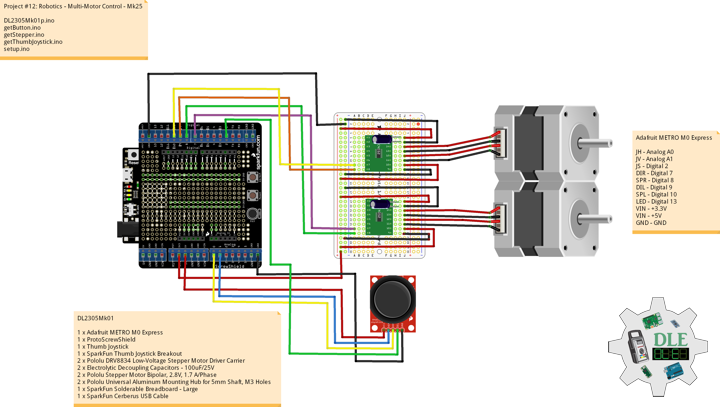
DL2305Mk01
1 x Adafruit METRO M0 Express
1 x ProtoScrewShield
1 x Thumb Joystick
1 x SparkFun Thumb Joystick Breakout
2 x Pololu DRV8834 Low-Voltage Stepper Motor Driver Carrier
2 x Electrolytic Decoupling Capacitors – 100uF/25V
2 x Pololu Stepper Motor Bipolar, 2.8V, 1.7 A/Phase
2 x Pololu Universal Aluminum Mounting Hub for 5mm Shaft, M3 Holes
1 x SparkFun Solderable Breadboard – Large
1 x SparkFun Cerberus USB Cable
Adafruit METRO M0 Express
JH – Analog A0
JV – Analog A1
JS – Digital 2
DIR – Digital 7
SPR – Digital 8
DIL – Digital 9
SPL – Digital 10
LED – Digital 13
VIN – +3.3V
VIN – +5V
GND – GND
——
DL2305Mk01p.ino
/* ***** Don Luc Electronics © ***** Software Version Information Project #12: Robotics - Multi-Motor Control - Mk25 12-25 DL2305Mk01p.ino 1 x Adafruit METRO M0 Express 1 x ProtoScrewShield 1 x Thumb Joystick 1 x SparkFun Thumb Joystick Breakout 2 x Pololu DRV8834 Low-Voltage Stepper Motor Driver Carrier 2 x Electrolytic Decoupling Capacitors - 100uF/25V 2 x Pololu Stepper Motor Bipolar, 2.8V, 1.7 A/Phase 2 x Pololu Universal Aluminum Mounting Hub for 5mm Shaft, M3 Holes 1 x SparkFun Solderable Breadboard - Large 1 x SparkFun Cerberus USB Cable */ // Include the Library Code // Arduino #include <Arduino.h> // DRV8834 Stepper Motor Driver #include <BasicStepperDriver.h> #include <MultiDriver.h> // DRV8834 Stepper Motor Driver // Stepper motor steps per revolution. // Most steppers are 200 steps or 1.8 degrees/step #define MOTOR_STEPS 200 // Target RPM for X axis stepper motor #define MOTOR_X_RPM 800 // Target RPM for Y axis stepper motor #define MOTOR_Y_RPM 800 // Since microstepping is set externally, // make sure this matches the selected mode // If it doesn't, the motor will move at a // different RPM than chosen // 1=full step, 2=half step etc. #define MICROSTEPS 1 // X Stepper motor #define DIR_X 7 #define STEP_X 8 // Y Stepper motor #define DIR_Y 9 #define STEP_Y 10 // BasicStepperDriver BasicStepperDriver stepperX(MOTOR_STEPS, DIR_X, STEP_X); BasicStepperDriver stepperY(MOTOR_STEPS, DIR_Y, STEP_Y); // Pick one of the two controllers below // each motor moves independently MultiDriver controller(stepperX, stepperY); // Joystick #define JH A0 #define JV A1 #define JS 2 // Variable for reading the button int JSState = 0; // Adjusted Value int adjustedValue = 0; int adjustedValue2 = 0; // LED Yellow int iLED = 13; // Software Version Information String sver = "12-25"; void loop() { // Button isButton(); // Joystick isThumbJoystick(); // Stepper isStepper(); }
getButton.ino
// Button // Button Setup void isButtonSetup() { // Make the button line an input pinMode(JS, INPUT_PULLUP); // Initialize digital pin iLED as an output pinMode(iLED, OUTPUT); } // Button void isButton(){ // Read the state of the button JSState = digitalRead(JS); // Check if the button is pressed. // If it is, the JSState is HIGH: if (JSState == HIGH) { // Button // Turn the LED on HIGH digitalWrite(iLED, HIGH); } else { // Button // Turn the LED on LOW digitalWrite(iLED, LOW); } }
getStepper.ino
// Stepper // isStepperSetup void isStepperSetup() { // Set stepper target motors RPM. stepperX.begin(MOTOR_X_RPM, MICROSTEPS); stepperY.begin(MOTOR_Y_RPM, MICROSTEPS); } // Stepper void isStepper() { // Stepper => Controller rotate controller.rotate(adjustedValue, adjustedValue2); }
getThumbJoystick.ino
// Thumb Joystick void isThumbJoystick() { // Joystick JH // Horizontal // Joystick Pot Values JH int potValue = analogRead(JH); int potValues = 0; // Adjusted Value potValues = map(potValue, 0, 1023, 1000, -1000); if (potValues > 300) { adjustedValue = potValues; } else if (potValues < -300) { adjustedValue = potValues; } else { adjustedValue = 0; } // Joystick JV // Vertical // Joystick Pot Values JV int potValue2 = analogRead(JV); int potValues2 = 0; // Adjusted Value2 potValues2 = map(potValue2, 0, 1023, 1000, -1000); if (potValues2 > 300) { adjustedValue2 = potValues2; } else if (potValues2 < -300) { adjustedValue2 = potValues2; } else { adjustedValue2 = 0; } }
setup.ino
// Setup void setup() { // Button Setup isButtonSetup(); // DRV8834 Stepper Motor Driver isStepperSetup(); }
——
People can contact us: https://www.donluc.com/?page_id=1927
Technology Experience
- Programming Language
- Single-Board Microcontrollers (PIC, Arduino, Raspberry Pi,Espressif, etc…)
- IoT
- Wireless (Radio Frequency, Bluetooth, WiFi, Etc…)
- Robotics
- Camera and Video Capture Receiver Stationary, Wheel/Tank and Underwater Vehicle
- Unmanned Vehicles Terrestrial and Marine
- Machine Learning
- RTOS
- Research & Development (R & D)
Instructor, E-Mentor, STEAM, and Arts-Based Training
- Programming Language
- IoT
- PIC Microcontrollers
- Arduino
- Raspberry Pi
- Espressif
- Robotics
Follow Us
Luc Paquin – Curriculum Vitae – 2023
https://www.donluc.com/luc/
Web: https://www.donluc.com/
Facebook: https://www.facebook.com/neosteam.labs.9/
YouTube: https://www.youtube.com/@thesass2063
Twitter: https://twitter.com/labs_steam
Pinterest: https://www.pinterest.com/NeoSteamLabs/
Instagram: https://www.instagram.com/neosteamlabs/
Don Luc
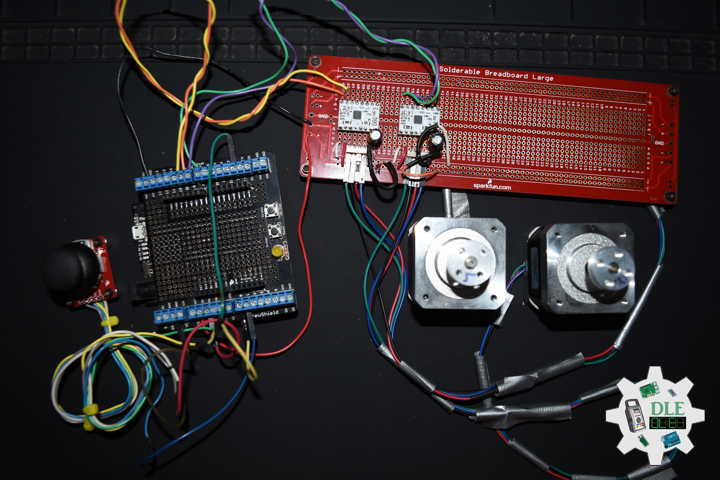
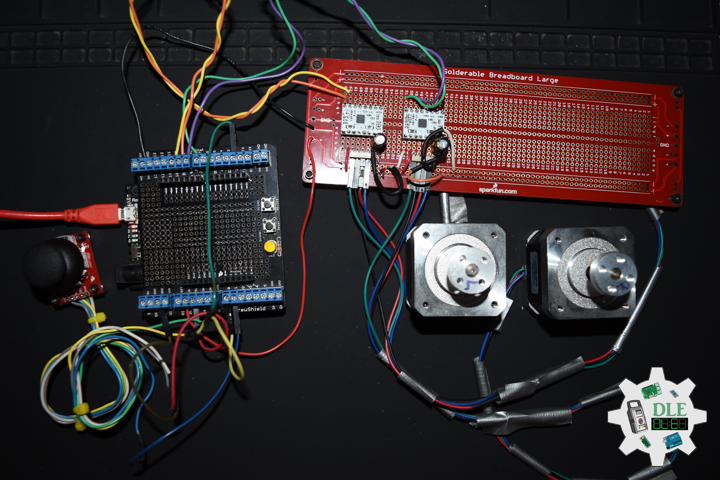
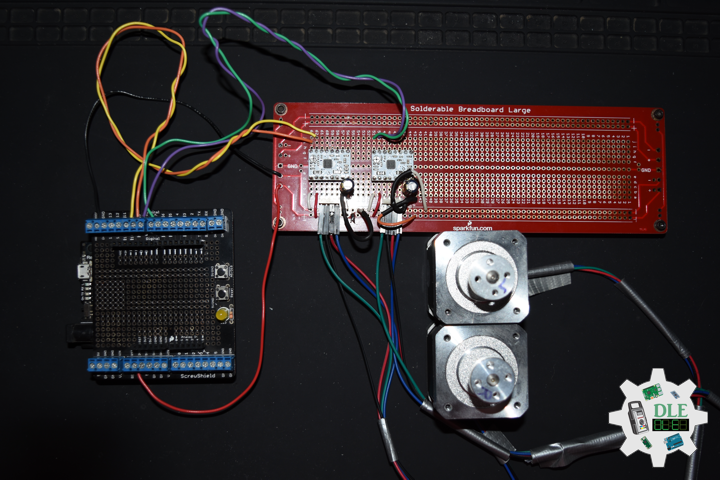
Project #12: Robotics – ProtoScrewShield – Mk24
——
#DonLucElectronics #DonLuc #Robotics #AdafruitMETROM0Express #Arduino #Project #Fritzing #Programming #Electronics #Microcontrollers #Consultant
——
——
——
——
ProtoScrewShield
The ProtoScrewShield extends all pins of the Arduino out to 3.5mm pitch screw terminals. It also has a lot of the utility provided including: a large prototyping space of both connected and unconnected 0.1″ spaced through-holes, a couple 5V and GND busses, a reset button, general use push button, and a 5mm yellow LED. This product includes all the parts shown and comes in kit form and must be soldered together by the end user.
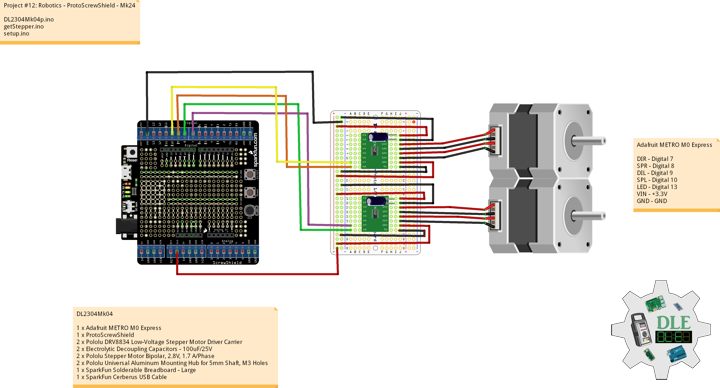
DL2304Mk04
1 x Adafruit METRO M0 Express
1 x ProtoScrewShield
2 x Pololu DRV8834 Low-Voltage Stepper Motor Driver Carrier
2 x Electrolytic Decoupling Capacitors – 100uF/25V
2 x Pololu Stepper Motor Bipolar, 2.8V, 1.7 A/Phase
2 x Pololu Universal Aluminum Mounting Hub for 5mm Shaft, M3 Holes
1 x SparkFun Solderable Breadboard – Large
1 x SparkFun Cerberus USB Cable
Adafruit METRO M0 Express
DIR – Digital 7
SPR – Digital 8
DIL – Digital 9
SPL – Digital 10
LED – LED_BUILTIN
VIN – +3.3V
GND – GND
——
DL2304Mk04p.ino
/* ***** Don Luc Electronics © ***** Software Version Information Project #12: Robotics - ProtoScrewShield - Mk24 12-24 DL2304Mk04p.ino 1 x Adafruit METRO M0 Express 1 x ProtoScrewShield 2 x Pololu DRV8834 Low-Voltage Stepper Motor Driver Carrier 2 x Electrolytic Decoupling Capacitors - 100uF/25V 2 x Pololu Stepper Motor Bipolar, 2.8V, 1.7 A/Phase 2 x Pololu Universal Aluminum Mounting Hub for 5mm Shaft, M3 Holes 1 x SparkFun Solderable Breadboard - Large 1 x SparkFun Cerberus USB Cable */ // Include the Library Code // Arduino #include <Arduino.h> // DRV8834 Stepper Motor Driver #include <BasicStepperDriver.h> #include <MultiDriver.h> // DRV8834 Stepper Motor Driver // Stepper motor steps per revolution. // Most steppers are 200 steps or 1.8 degrees/step #define MOTOR_STEPS 200 // Target RPM for X axis stepper motor #define MOTOR_X_RPM 800 // Target RPM for Y axis stepper motor #define MOTOR_Y_RPM 800 // Since microstepping is set externally, // make sure this matches the selected mode // If it doesn't, the motor will move at a // different RPM than chosen // 1=full step, 2=half step etc. #define MICROSTEPS 1 // X Stepper motor #define DIR_X 7 #define STEP_X 8 // Y Stepper motor #define DIR_Y 9 #define STEP_Y 10 // BasicStepperDriver BasicStepperDriver stepperX(MOTOR_STEPS, DIR_X, STEP_X); BasicStepperDriver stepperY(MOTOR_STEPS, DIR_Y, STEP_Y); // Pick one of the two controllers below // each motor moves independently MultiDriver controller(stepperX, stepperY); // LED Yellow int iLED = 13; // Software Version Information String sver = "12-24"; void loop() { // Stepper isStepper(); }
getStepper.ino
// Stepper // isStepperSetup void isStepperSetup() { // Set stepper target motors RPM. stepperX.begin(MOTOR_X_RPM, MICROSTEPS); stepperY.begin(MOTOR_Y_RPM, MICROSTEPS); } // Stepper void isStepper() { // Stepper => Controller rotate controller.rotate(360, 360); }
setup.ino
// Setup void setup() { // Initialize digital pin iLED as an output. pinMode(iLED, OUTPUT); // Turn the LED on HIGH digitalWrite(iLED, HIGH); // DRV8834 Stepper Motor Driver isStepperSetup(); }
——
People can contact us: https://www.donluc.com/?page_id=1927
Technology Experience
- Programming Language
- Single-Board Microcontrollers (PIC, Arduino, Raspberry Pi,Espressif, etc…)
- IoT
- Wireless (Radio Frequency, Bluetooth, WiFi, Etc…)
- Robotics
- Camera and Video Capture Receiver Stationary, Wheel/Tank and Underwater Vehicle
- Unmanned Vehicles Terrestrial and Marine
- Machine Learning
- RTOS
- Research & Development (R & D)
Instructor, E-Mentor, STEAM, and Arts-Based Training
- Programming Language
- IoT
- PIC Microcontrollers
- Arduino
- Raspberry Pi
- Espressif
- Robotics
Follow Us
Luc Paquin – Curriculum Vitae – 2023
https://www.donluc.com/luc/
Web: https://www.donluc.com/
Facebook: https://www.facebook.com/neosteam.labs.9/
YouTube: https://www.youtube.com/@thesass2063
Twitter: https://twitter.com/labs_steam
Pinterest: https://www.pinterest.com/NeoSteamLabs/
Instagram: https://www.instagram.com/neosteamlabs/
Don Luc
Instructor, E-Mentor, STEAM, and Arts-Based Training
——
#DonLucElectronics #DonLuc #Instructor #E-Mentor #STEAM #ArtsBasedTraining #Arduino #Project #Fritzing #Programming #Electronics #Microcontrollers #Consultant
——
——
——
——
——
What do remote controllers, routers, and robots all have in common? These beginner-friendly microcontrollers are easy to use and program with just a computers or laptop, a USB cable, and some open-source software. All the projects, here we come. Whether you are looking to build some cool electronic projects, learn programming, or wanting to teach others about electronics, this a teaching session will help you figure out what microcontroller is right for your needs, goals, and budgets. Here is some helpful content to start you on your electronics journey. There are different microcontrollers and it can be daunting to get started, especially if you’re just getting into electronics.
- Arduino Uno – R3, SparkFun RedBoard, Arduino Fio, LilyPad Arduino, FLORA, Adafruit METRO 328, Arduino Pro Mini 328, Adafruit Metro Mini 328, Adafruit Pro Trinket, Adafruit Feather 328P, Moteino, etcetera, is a microcontroller board based on the ATmega328 (5V/16MHz, 3.3V/8MHz).
- SparkFun Pro Micro, SparkFun Fio V3, Adafruit ItsyBitsy 32u4, Adafruit Feather 32u4, Circuit Playground Classic, etcetera, is a microcontroller board based on the ATmega32U4 (5V/16MHz, 3.3V/8MHz).
- Arduino Mega 2560 R3 is a microcontroller board based on the ATmega2560 (5V/16MHz).
- Arduino Nano Every is a microcontroller board based on the ATMega 4809 (5V/20MHz).
- Arduino Due is a microcontroller board based on the AT91SAM3X8E (3.3V/84MHz).
- SparkFun RedBoard Turbo, SparkFun SAMD21 Mini Breakout, Adafruit METRO M0 Express, LilyPad Simblee BLE, etcetera, is a microcontroller board based on the ATSAMD21G18 ARM Cortex M0+ (3.3V/48MHz).
- SparkFun Thing Plus – SAMD51, Adafruit Metro M4 Express, Adafruit Feather M4 Express, etcetera, is a microcontroller board based on the ATSAMD51 Cortex M4 (3.3V/120MHz).
- SparkFun Thing Plus – ESP32 WROOM, Adafruit HUZZAH32 – ESP32 Feather Board, etcetera, is a microcontroller board based on the Espressif Xtensa® dual-core 32-bit LX6 (3.3V/240MHz).
- Raspberry Pi 4 Model B is a microcontroller board based on the Broadcom BCM2711, quad-core Cortex-A72 (ARM v8) 64-bit SoC (5.1V/1.5GHz).
- Raspberry Pi Zero W is a microcontroller board based on the Broadcom BCM2837B0 64-bit ARM Cortex-A53 Quad Core Processor SoC (5.1V/1GHz). Etcetera…
At Don Luc Electronics I believe that an understanding of electronics is a core literacy that opens up a world of opportunities in the fields of robotics, Internet of Things (IoT), machine learning, engineering, fashion, medical industries, environmental sciences, performing arts and more. This guide is designed to explore the connection between software and hardware, introducing code and parts as they are used in the context of building engaging projects. The circuits in this guide progress in difficulty as new concepts and components are introduced. Completing each circuit means much more than just experimenting you will walk away with a fun project you can use and a sense of accomplishment that is just the beginning of your electronics journey. At the end of each circuit, you’ll find coding challenges that extend your learning and fuel ongoing innovation.
People can contact us: https://www.donluc.com/?page_id=1927
Technology Experience
- Single-Board Microcontrollers (PIC, Arduino, Raspberry Pi,Espressif, etc…)
- IoT
- Wireless (Radio Frequency, Bluetooth, WiFi, Etc…)
- Robotics
- Camera and Video Capture Receiver Stationary, Wheel/Tank and Underwater Vehicle
- Unmanned Vehicles Terrestrial and Marine
- Machine Learning
- RTOS
- Research & Development (R & D)
Instructor and E-Mentor
- IoT
- PIC Microcontrollers
- Arduino
- Raspberry Pi
- Espressif
- Robotics
Follow Us
Luc Paquin – Curriculum Vitae – 2023
https://www.donluc.com/luc/
Web: https://www.donluc.com/
Facebook: https://www.facebook.com/neosteam.labs.9/
YouTube: https://www.youtube.com/channel/UC5eRjrGn1CqkkGfZy0jxEdA
Twitter: https://twitter.com/labs_steam
Pinterest: https://www.pinterest.com/NeoSteamLabs/
Instagram: https://www.instagram.com/neosteamlabs/
Don Luc
Project #25 – Movement – IMU – Mk05
——
#DonLucElectronics #DonLuc #SparkFunRedBoard #Movement #Magnetometer #Accelerometer #Gyroscope #9DOF #Barometer #Arduino #Project #Fritzing #Programming #Electronics #Microcontrollers #Consultant
——
——
——
——
Inertial Measurement Unit
An inertial measurement unit (IMU) is an electronic device that measures and reports a body’s specific force, angular rate, and sometimes the orientation of the body, using a combination of accelerometers, gyroscopes, and sometimes magnetometers. When the magnetometer is included, IMUs are referred to as IMMUs. IMUs are typically used to maneuver modern vehicles including motorcycles, missiles, aircraft, including unmanned aerial vehicles, among many others, and spacecraft, including satellites and landers. Recent developments allow for the production of IMU-enabled GPS devices. An IMU allows a GPS receiver to work when GPS-signals are unavailable, such as in tunnels, inside buildings, or when electronic interference is present.
AltIMU-10 v5 Gyro, Accelerometer, Compass, and Altimeter (LSM6DS33, LIS3MDL, and LPS25H Carrier)
The Pololu AltIMU-10 v5 is an inertial measurement unit (IMU) and altimeter that features the same LSM6DS33 gyro and accelerometer and LIS3MDL magnetometer as the MinIMU-9 v5, and adds an LPS25H digital barometer. An I²C interface accesses ten independent pressure, rotation, acceleration, and magnetic measurements that can be used to calculate the sensor’s altitude and absolute orientation. The board operates from 2.5 to 5.5 V and has a 0.1″ pin spacing.
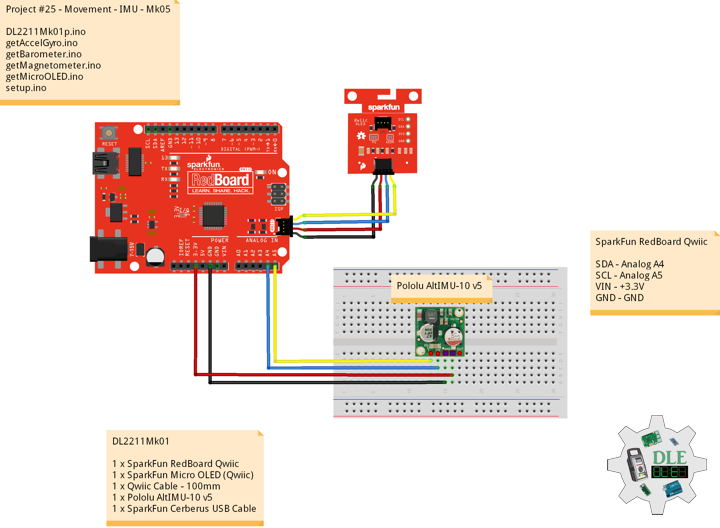
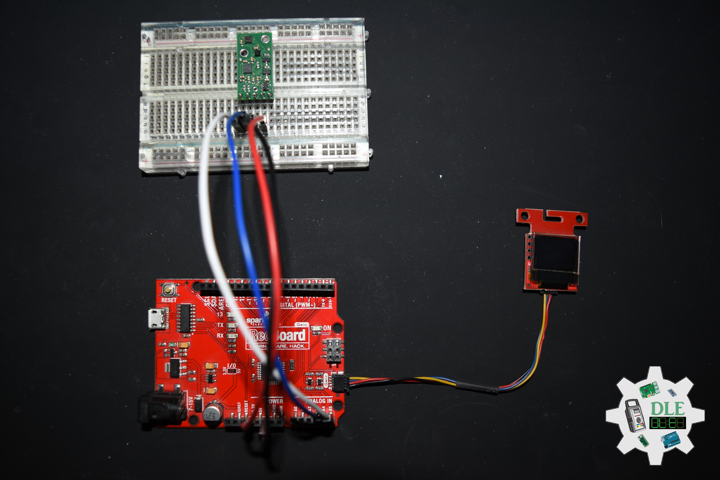
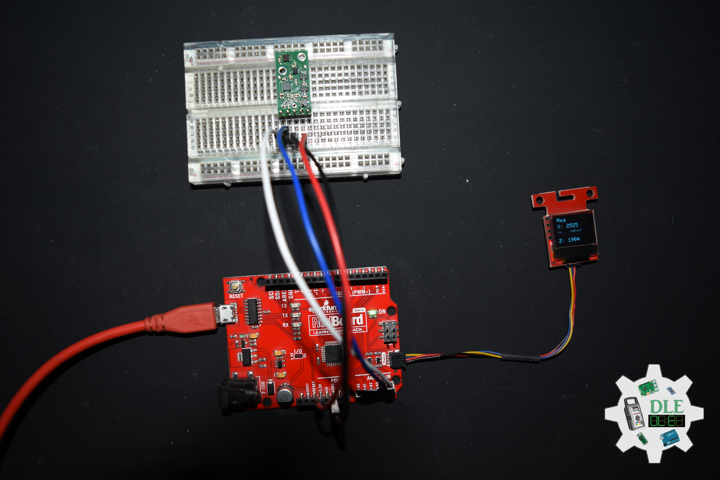
DL2211Mk01
1 x SparkFun RedBoard Qwiic
1 x SparkFun Micro OLED (Qwiic)
1 x Qwiic Cable – 100mm
1 x Pololu AltIMU-10 v5
1 x SparkFun Cerberus USB Cable
SparkFun RedBoard Qwiic
SDA – Analog A4
SCL – Analog A5
VIN – +3.3V
GND – GND
——
DL2211Mk01p.ino
/* ***** Don Luc Electronics © ***** Software Version Information Project #25 - Movement - IMU - Mk05 25-05 DL2211Mk01p.ino 1 x SparkFun RedBoard Qwiic 1 x SparkFun Micro OLED (Qwiic) 1 x Qwiic Cable - 100mm 1 x Pololu AltIMU-10 v5 1 x SparkFun Cerberus USB Cable */ // Include the Library Code // Two Wire Interface (TWI/I2C) #include <Wire.h> // SparkFun Micro OLED #include <SFE_MicroOLED.h> // Includes and variables for IMU integration // STMicroelectronics LSM6DS33 gyroscope and accelerometer #include <LSM6.h> // STMicroelectronics LIS3MDL magnetometer #include <LIS3MDL.h> // STMicroelectronics LPS25H digital barometer #include <LPS.h> // 9DoF IMU // STMicroelectronics LSM6DS33 gyroscope and accelerometer LSM6 imu; // Accelerometer and Gyroscopes // Accelerometer int imuAX; int imuAY; int imuAZ; // Gyroscopes int imuGX; int imuGY; int imuGZ; // STMicroelectronics LIS3MDL magnetometer LIS3MDL mag; // Magnetometer int magX; int magY; int magZ; // STMicroelectronics LPS25H digital barometer LPS ps; // Digital Barometer float pressure; float altitude; float temperature; // SparkFun Micro OLED #define PIN_RESET 9 #define DC_JUMPER 1 // I2C declaration MicroOLED oled(PIN_RESET, DC_JUMPER); // Software Version Information String sver = "25-05"; void loop() { // Accelerometer and Gyroscopes isIMU(); // Magnetometer isMag(); // Barometer isBarometer(); // Micro OLED isMicroOLED(); }
getAccelGyro.ino
// Accelerometer and Gyroscopes // Setup IMU void setupIMU() { // Setup IMU imu.init(); // Default imu.enableDefault(); } // Accelerometer and Gyroscopes void isIMU() { // Accelerometer and Gyroscopes imu.read(); // Accelerometer x, y, z imuAX = imu.a.x; imuAY = imu.a.y; imuAZ = imu.a.z; // Gyroscopes x, y, z imuGX = imu.g.x; imuGY = imu.g.y; imuGZ = imu.g.z; }
getBarometer.ino
// STMicroelectronics LPS25H digital barometer // Setup Barometer void isSetupBarometer(){ // Setup Barometer ps.init(); // Default ps.enableDefault(); } // Barometer void isBarometer(){ // Barometer pressure = ps.readPressureMillibars(); // Altitude Meters altitude = ps.pressureToAltitudeMeters(pressure); // Temperature Celsius temperature = ps.readTemperatureC(); }
getMagnetometer.ino
// Magnetometer // Setup Magnetometer void setupMag() { // Setup Magnetometer mag.init(); // Default mag.enableDefault(); } // Magnetometer void isMag() { // Magnetometer mag.read(); // Magnetometer x, y, z magX = mag.m.x; magY = mag.m.y; magZ = mag.m.z; }
getMicroOLED.ino
// SparkFun Micro OLED // Setup Micro OLED void isSetupMicroOLED() { // Initialize the OLED oled.begin(); // Clear the display's internal memory oled.clear(ALL); // Display what's in the buffer (splashscreen) oled.display(); // Delay 1000 ms delay(1000); // Clear the buffer. oled.clear(PAGE); } // Micro OLED void isMicroOLED() { // Text Display Accelerometer // Clear the display oled.clear(PAGE); // Set cursor to top-left oled.setCursor(0, 0); // Set font to type 0 oled.setFontType(0); // Accelerometer oled.print("Acceler"); oled.setCursor(0, 12); // X oled.print("X: "); oled.print(imuAX); oled.setCursor(0, 25); // Y oled.print("Y: "); oled.print(imuAY); oled.setCursor(0, 39); // Z oled.print("Z: "); oled.print(imuAZ); oled.display(); // Delay delay(3000); // Text Display Gyroscopes // Clear the display oled.clear(PAGE); // Set cursor to top-left oled.setCursor(0, 0); // Set font to type 0 oled.setFontType(0); // Gyroscopes oled.print("Gyro"); oled.setCursor(0, 12); // X oled.print("X: "); oled.print(imuGX); oled.setCursor(0, 25); // Y oled.print("Y: "); oled.print(imuGY); oled.setCursor(0, 39); // Z oled.print("Z: "); oled.print(imuGZ); oled.display(); // Delay delay(3000); // Text Display Magnetometer // Clear the display oled.clear(PAGE); // Set cursor to top-left oled.setCursor(0, 0); // Set font to type 0 oled.setFontType(0); // Magnetometer oled.print("Mag"); oled.setCursor(0, 12); // X oled.print("X: "); oled.print(magX); oled.setCursor(0, 25); // Y oled.print("Y: "); oled.print(magY); oled.setCursor(0, 39); // Z oled.print("Z: "); oled.print(magZ); oled.display(); // Delay delay(3000); // Text Display Barometer // Clear the display oled.clear(PAGE); // Set cursor to top-left oled.setCursor(0, 0); // Set font to type 0 oled.setFontType(0); // Barometer oled.print("Baro"); oled.setCursor(0, 12); // Pressure oled.print("P: "); oled.print(pressure); oled.setCursor(0, 25); // Altitude Meters oled.print("A: "); oled.print(altitude); oled.setCursor(0, 39); // Temperature Celsius oled.print("T: "); oled.print(temperature); oled.display(); // Delay delay(3000); }
setup.ino
// Setup void setup() { // Give display time to power on delay(100); // Set up I2C bus Wire.begin(); // Setup Micro OLED isSetupMicroOLED(); // Setup IMU setupIMU(); // Setup Magnetometer setupMag(); // Setup Barometer isSetupBarometer(); }
——
People can contact us: https://www.donluc.com/?page_id=1927
Technology Experience
- Single-Board Microcontrollers (PIC, Arduino, Raspberry Pi,Espressif, etc…)
- IoT
- Wireless (Radio Frequency, Bluetooth, WiFi, Etc…)
- Robotics
- Camera and Video Capture Receiver Stationary, Wheel/Tank and Underwater Vehicle
- Unmanned Vehicles Terrestrial and Marine
- Machine Learning
- RTOS
- Research & Development (R & D)
Instructor and E-Mentor
- IoT
- PIC Microcontrollers
- Arduino
- Raspberry Pi
- Espressif
- Robotics
Follow Us
Luc Paquin – Curriculum Vitae – 2022
https://www.donluc.com/luc/
Web: https://www.donluc.com/
Facebook: https://www.facebook.com/neosteam.labs.9/
YouTube: https://www.youtube.com/channel/UC5eRjrGn1CqkkGfZy0jxEdA
Twitter: https://twitter.com/labs_steam
Pinterest: https://www.pinterest.com/NeoSteamLabs/
Instagram: https://www.instagram.com/neosteamlabs/
Don Luc
Project #12: Robotics – Pololu Wheel – Mk23
——
#DonLucElectronics #DonLuc #Robotics #Arduino #Fio #ArduinoProMini #XBee #DCMotor #MotorDriver #Project #Fritzing #Programming #Electronics #Microcontrollers #Consultant
——
——
——
——
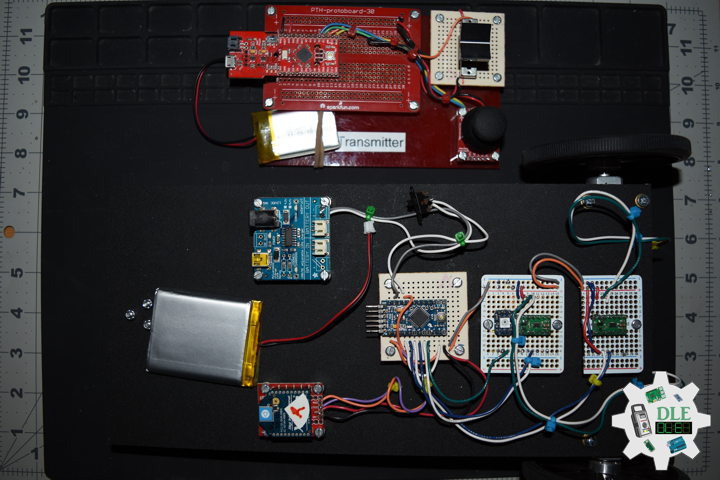
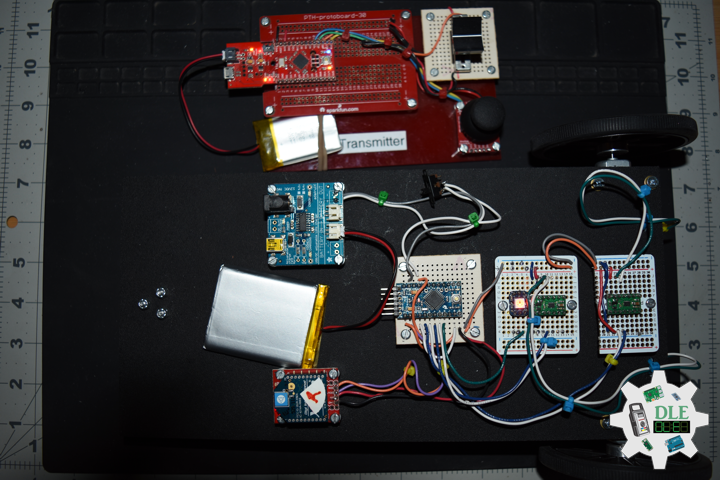
Pololu Wheel 90 mm × 10 mm – Black
These black plastic wheels have silicone tires and measure 90 mm (3.54 inches) in diameter, and they press-fit onto the 3mm D shafts on many of our motors, including our micro metal gearmotors and our mini plastic gearmotors. Additionally, this wheel is compatible with several of our universal mounting hubs, which can serve as adapters for motors with different shafts. Six mounting holes for #4 or M3 screws make it possible to use the wheel with any of our universal mounting hubs for those screw sizes, enabling these wheels to be used with our larger metal gearmotors and stepper motors. The included silicone tires, which feature horizontal treads for improved traction.
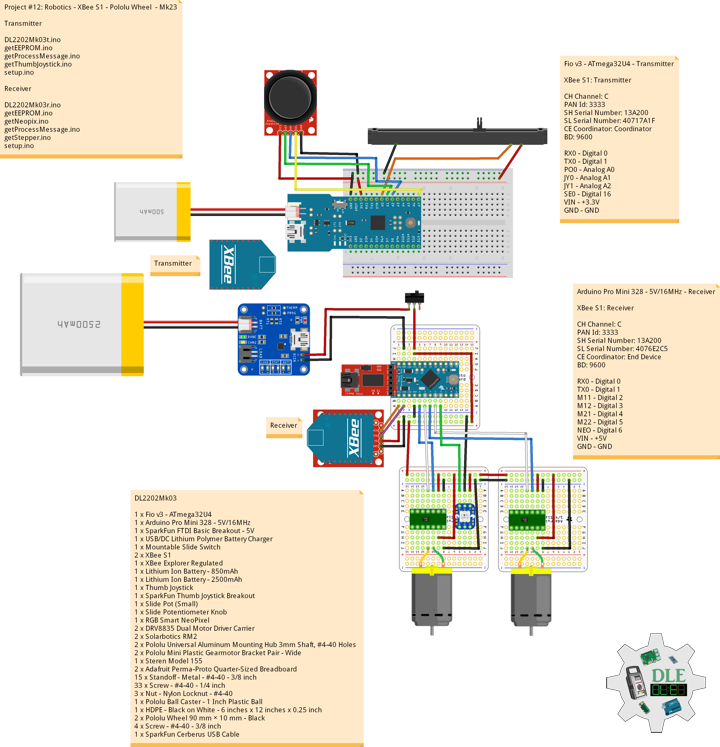
DL2202Mk03
1 x Fio v3 – ATmega32U4
1 x Arduino Pro Mini 328 – 5V/16MHz
1 x SparkFun FTDI Basic Breakout – 5V
1 x USB/DC Lithium Polymer Battery Charger
1 x Mountable Slide Switch
2 x XBee S1
1 x XBee Explorer Regulated
1 x Lithium Ion Battery – 850mAh
1 x Lithium Ion Battery – 2500mAh
1 x Thumb Joystick
1 x SparkFun Thumb Joystick Breakout
1 x Slide Pot (Small)
1 x Slide Potentiometer Knob
1 x RGB Smart NeoPixel
2 x DRV8835 Dual Motor Driver Carrier
2 x Solarbotics RM2
2 x Pololu Universal Aluminum Mounting Hub 3mm Shaft, #4-40 Holes
2 x Pololu Mini Plastic Gearmotor Bracket Pair – Wide
1 x Steren Model 155
2 x Adafruit Perma-Proto Quarter-Sized Breadboard
15 x Standoff – Metal – #4-40 – 3/8 inch
33 x Screw – #4-40 – 1/4 inch
3 x Nut – Nylon Locknut – #4-40
1 x Pololu Ball Caster – 1 Inch Plastic Ball
1 x HDPE – Black on White – 6 inches x 12 inches x 0.25 inch
2 x Pololu Wheel 90 mm × 10 mm – Black
4 x Screw – #4-40 – 3/8 inch
1 x SparkFun Cerberus USB Cable
Fio v3 – ATmega32U4 – Transmitter
XBee S1: Transmitter
CH Channel: C
PAN Id: 3333
SH Serial Number: 13A200
SL Serial Number: 40717A1F
CE Coordinator: Coordinator
BD: 9600
RX0 – Digital 0
TX0 – Digital 1
PO0 – Analog A0
JY0 – Analog A1
JY1 – Analog A2
SE0 – Digital 16
VIN – +3.3V
GND – GND
DL2202Mk03t.ino
/* ***** Don Luc Electronics © ***** Software Version Information Project #12: Robotics - Pololu Wheel - Mk23 02-03 Transmitter DL2202Mk03t.ino 1 x Fio v3 - ATmega32U4 1 x XBee S1 1 x Lithium Ion Battery - 850mAh 1 x Thumb Joystick 1 x SparkFun Thumb Joystick Breakout 1 x Slide Pot (Small) 1 x Slide Potentiometer Knob 1 x SparkFun Cerberus USB Cable */ // Include the Library Code // EEPROM library to read and write EEPROM with unique ID for unit #include <EEPROM.h> // Communication unsigned long dTime = 200; // Slide Pot (Small) // Select the input pin for the slide pot // Power const int iSP1 = A0; // Power to store the value int iPower = 0; // Connections to joystick // Vertical const int VERT = A1; // Horizontal const int HORIZ = A2; // Pushbutton const int SEL = 16; // Initialize variables for analog and digital values int vertical; int horizontal; int select; // Software Version Information // Version String sver = "12-23t"; // Unit ID Information // UID String uid = ""; void loop() { // Thumb Joystick isThumbJoystick(); // Process Message isProcessMessage(); delay( dTime ); }
getEEPROM.ino
// EEPROM // is UID void isUID() { // Is Unit ID // UID uid = ""; for (int x = 0; x < 5; x++) { uid = uid + char(EEPROM.read(x)); } }
getProcessMessage.ino
// Process Message // isProcessMessage void isProcessMessage() { // Loop through serial buffer // Print = "<" + vertical + "|" + horizontal + "|" + select + "|" + iValue + "|" + sver + "|" + uid + "*" Serial1.print( '<' ); Serial1.print( vertical ); Serial1.print( '|' ); Serial1.print( horizontal ); Serial1.print( '|' ); Serial1.print( select ); Serial1.print( '|' ); Serial1.print( iPower ); Serial1.print( '|' ); Serial1.print( sver ); Serial1.print( '|' ); Serial1.print( uid ); Serial1.println( '*' ); }
getThumbJoystick.ino
// Thumb Joystick void isThumbJoystick() { // Read all values from the joystick // Joystick was sitting around 520 for the vertical and horizontal values // Will be 0-1023 vertical = analogRead(VERT); // Will be 0-1023 horizontal = analogRead(HORIZ); // Will be HIGH (1) if not pressed, and LOW (0) if pressed select = digitalRead(SEL); // Read the value // Power be 0-1023 iPower = analogRead( iSP1 ); }
setup.ino
// Setup void setup() { // EEPROM Unit ID isUID(); // Pause delay(5); // Make the SEL line an input pinMode(SEL, INPUT_PULLUP); // Open Serial1 port at 9600 baud Serial1.begin( 9600 ); // Pause delay(5); }
——
Arduino Pro Mini 328 – 5V/16MHz – Receiver
XBee S1: Receiver
CH Channel: C
PAN Id: 3333
SH Serial Number: 13A200
SL Serial Number: 4076E2C5
CE Coordinator: End Device
BD: 9600
RX0 – Digital 0
TX0 – Digital 1
M11 – Digital 2
M12 – Digital 3
M21 – Digital 4
M22 – Digital 5
NEO – Digital 6
VIN – +5V
GND – GND
DL2202Mk03r.ino
/* ***** Don Luc Electronics © ***** Software Version Information Project #12: Robotics - Pololu Wheel - Mk23 02-03 Receiver DL2202Mk03r.ino 1 x Arduino Pro Mini 328 - 5V/16MHz 1 x SparkFun FTDI Basic Breakout - 5V 1 x XBee S1 1 x XBee Explorer Regulated 1 x USB/DC Lithium Polymer Battery Charger 1 x Mountable Slide Switch 1 x Lithium Ion Battery - 2500mAh 1 x RGB Smart NeoPixel 2 x DRV8835 Dual Motor Driver Carrier 2 x Solarbotics RM2 2 x Pololu Universal Aluminum Mounting Hub 3mm Shaft, #4-40 Holes 2 x Pololu Mini Plastic Gearmotor Bracket Pair - Wide 1 x Steren Model 155 2 x Adafruit Perma-Proto Quarter-Sized Breadboard 15 x Standoff - Metal - #4-40 - 3/8 inch 33 x Screw - #4-40 - 1/4 inch 3 x Nut - Nylon Locknut - #4-40 1 x Pololu Ball Caster - 1 Inch Plastic Ball 1 x HDPE - Black on White - 6 inches x 12 inches x 0.25 inch 2 x Pololu Wheel 90 mm × 10 mm - Black 4 x Screw - #4-40 - 3/8 inch 1 x SparkFun Cerberus USB Cable */ // Include the library code: // EEPROM library to read and write EEPROM with unique ID for unit #include <EEPROM.h> // NeoPixels #include <Adafruit_NeoPixel.h> // Solarbotics RM2 -> 1 #define MOTOR1_IN1 2 #define MOTOR1_IN2 3 // Solarbotics RM2 -> 2 #define MOTOR2_IN1 4 #define MOTOR2_IN2 5 // Power be 0-1023 int iPower = 0; String POW = ""; // Joystick was sitting around 520 for the vertical and horizontal values // Will be 0-1023 // Vertical int vertical; String VER = ""; // Horizontal // Will be 0-1023 int horizontal; String HOR = ""; // Select // Will be HIGH (1) if not pressed, and LOW (0) if pressed int select1 = 0; String SEL = ""; int firstClosingBracket = 0; // Map Vertical and Horizontal int mapVer = 0; int mapHor = 0; int iVer = 1; int iHor = 0; // NeoPixels // On digital pin 6 #define PIN 6 // NeoPixels NUMPIXELS = 1 #define NUMPIXELS 1 // Pixels Adafruit_NeoPixel pixels = Adafruit_NeoPixel(NUMPIXELS, PIN, NEO_GRB + NEO_KHZ800); // Red int red = 0; // Green int green = 0; // Blue int blue = 0; // Neopix int iNeo = 0; // Value int zz = 0; // Process Message // Start bool bStart = false; // End bool bEnd = false; // Variable to store the incoming byte int incb = 0; // Message String msg = ""; // Index byte in = 0; int x = 0; // Software Version Information String sver = "12-23r"; // Unit ID information String uid = ""; void loop() { // Check for serial messages isProcessMessage(); }
getEEPROM.ino
// EEPROM // isUID void isUID() { // Is Unit ID uid = ""; for (int x = 0; x < 5; x++) { uid = uid + char(EEPROM.read(x)); } }
getNeopix.ino
// NeoPixels // Neopix void isNeopix() { // Pixels pixels.setBrightness( 130 ); // Pixels color takes RGB values, from 0,0,0 up to 255,255,255 pixels.setPixelColor( iNeo, pixels.Color(red,green,blue) ); // This sends the updated pixel color to the hardware pixels.show(); // Delay for a period of time (in milliseconds) delay(50); } // isNUMPIXELS void isNUMPIXELS() { // Neopix Value switch ( zz ) { case 0: // NeoPixels Green // Red red = 0; // Green green = 255; // Blue blue = 0; // Neopix iNeo = 0; isNeopix(); break; case 1: // NeoPixels Blue // Red red = 0; // Green green = 0; // Blue blue = 255; // Neopix iNeo = 0; isNeopix(); break; case 2: // NeoPixels Red // Red red = 255; // Green green = 0; // Blue blue = 0; // Neopix iNeo = 0; isNeopix(); break; case 3: // NeoPixels Yellow // Red red = 255; // Green green = 255; // Blue blue = 0; // Neopix iNeo = 0; isNeopix(); break; case 4: // NeoPixels Magenta // Red red = 255; // Green green = 0; // Blue blue = 255; // Neopix iNeo = 0; isNeopix(); break; case 5: // NeoPixels Cyan // Red red = 0; // Green green = 255; // Blue blue = 255; // Neopix iNeo = 0; isNeopix(); break; case 6: // NeoPixels White // Red red = 255; // Green green = 255; // Blue blue = 255; // Neopix iNeo = 0; isNeopix(); break; } } // isNUMPIXELSoff void isNUMPIXELSoff() { // Black Off // NeoPixels // Red red = 0; // Green green = 0; // Blue blue = 0; isNeopix(); }
getProcessMessage.ino
// ProcessMessage // isProcessMessage void isProcessMessage() { // Loop through serial buffer one byte at a time until you reach * which will be end of message while ( Serial.available() > 0 ) { // Read the incoming byte: incb = Serial.read(); // Start the message when the '<' symbol is received if(incb == '<') { // Start bStart = true; in = 0; msg = ""; } // End the message when the '*' symbol is received else if(incb == '*') { // End bEnd = true; x = msg.length(); msg.remove( x , 1); // Done reading break; } // Read the message else { // Message msg = msg + char(incb); in++; } } // Start - End if( bStart && bEnd) { // isRM2Motor => Message isRM2Motor(); // Start - End in = 0; msg = ""; bStart = false; bEnd = false; vertical; horizontal; iPower; } }
getRM2Motor.ino
// RM2 Motor // Setup RM2 Motor void isSetupRM2Motor() { // Solarbotics RM2 -> 1 pinMode(MOTOR1_IN1, OUTPUT); pinMode(MOTOR1_IN2, OUTPUT); // Solarbotics RM2 -> 2 pinMode(MOTOR2_IN1, OUTPUT); pinMode(MOTOR2_IN2, OUTPUT); } // isRM2Motor void isRM2Motor() { // msg = vertical + "|" + horizontal + "|" + select + "|" + iValue + "|" + sver + "|" + uid firstClosingBracket = 0; // Vertical firstClosingBracket = msg.indexOf('|'); VER = msg; VER.remove(firstClosingBracket); vertical = VER.toInt(); // Horizontal firstClosingBracket = firstClosingBracket + 1; msg.remove(0, firstClosingBracket ); firstClosingBracket = msg.indexOf('|'); HOR = msg; HOR.remove(firstClosingBracket); horizontal = HOR.toInt(); // Select firstClosingBracket = firstClosingBracket + 1; msg.remove(0, firstClosingBracket ); firstClosingBracket = msg.indexOf('|'); SEL = msg; SEL.remove(firstClosingBracket); select1 = SEL.toInt(); // Power firstClosingBracket = firstClosingBracket + 1; msg.remove(0, firstClosingBracket ); firstClosingBracket = msg.indexOf('|'); POW = msg; POW.remove(firstClosingBracket); iPower = POW.toInt(); // Set the direction // Joystick was sitting around 520 for the vertical and horizontal values // Will be 0-1023 mapVer = map(vertical, 0, 1023, -512, 512); mapHor = map(horizontal, 0, 1023, -512, 512); // Power iPower = map(iPower, 0, 1023, 80, 200); // Vertical and Horizontal if ( mapVer == -512 ) { // Backward // NeoPixels Blue zz = 1; isNUMPIXELS(); iVer = 1; } else if ( mapVer == 512 ) { // Forward // NeoPixels Green zz = 0; isNUMPIXELS(); iVer = 2; } else if ( mapHor == -512 ) { // Left // NeoPixels Yellow zz = 3; isNUMPIXELS(); iVer = 3; } else if ( mapHor == 512 ) { // Right // NeoPixels Magenta zz = 4; isNUMPIXELS(); iVer = 4; } else { // Stop // NeoPixels Red zz = 2; isNUMPIXELS(); iVer = 5; } // XBee Car switch ( iVer ) { case 1: // Solarbotics RM2 -> 1 Forward digitalWrite(MOTOR1_IN1, LOW); analogWrite(MOTOR1_IN2, iPower); delay(10); // Solarbotics RM2 -> 2 Forward digitalWrite(MOTOR2_IN2, LOW); analogWrite(MOTOR2_IN1, iPower); delay(10); break; case 2: // Solarbotics RM2 -> 1 Backward digitalWrite(MOTOR1_IN2, LOW); analogWrite(MOTOR1_IN1, iPower); delay(10); // Solarbotics RM2 -> 2 Backward digitalWrite(MOTOR2_IN1, LOW); analogWrite(MOTOR2_IN2, iPower); delay(10); break; case 3: // Right // Solarbotics RM2 -> 1 Forward digitalWrite(MOTOR1_IN1, LOW); analogWrite(MOTOR1_IN2, iPower); delay(10); // Solarbotics RM2 -> 2 Forward digitalWrite(MOTOR2_IN1, LOW); analogWrite(MOTOR2_IN2, iPower); delay(10); break; case 4: // Left // Solarbotics RM2 -> 1 Backward digitalWrite(MOTOR1_IN2, LOW); analogWrite(MOTOR1_IN1, iPower); delay(10); // Solarbotics RM2 -> 2 Backward digitalWrite(MOTOR2_IN2, LOW); analogWrite(MOTOR2_IN1, iPower); delay(10); break; case 5: // Stop // NeoPixels Red //zz = 2; //isNUMPIXELS(); // Solarbotics RM2 -> 1 digitalWrite(MOTOR1_IN1, LOW); analogWrite(MOTOR1_IN2, 0); delay(10); // Solarbotics RM2 -> 2 digitalWrite(MOTOR2_IN1, LOW); analogWrite(MOTOR2_IN2, 0); delay(10); break; } }
setup.ino
// Setup void setup() { // Open the serial port at 9600 bps: Serial.begin( 9600 ); // Pause delay(5); // EEPROM Unit ID isUID(); // Pause delay(5); // Setup Solarbotics RM2 Motor isSetupRM2Motor(); // Pause delay(5); // NeoPixels // This initializes the NeoPixel library pixels.begin(); // Delay for a period of time (in milliseconds) delay(50); // isNUMPIXELS Off isNUMPIXELSoff(); }
——
People can contact us: https://www.donluc.com/?page_id=1927
Technology Experience
- Single-Board Microcontrollers (PIC, Arduino, Raspberry Pi,Espressif, etc…)
- IoT
- Robotics
- Camera and Video Capture Receiver Stationary, Wheel/Tank and Underwater Vehicle
- Unmanned Vehicles Terrestrial and Marine
- Research & Development (R & D)
- Desktop Applications (Windows, OSX, Linux, Multi-OS, Multi-Tier, etc…)
- Mobile Applications (Android, iOS, Blackberry, Windows Mobile, Windows CE, etc…)
- Web Applications (LAMP, Scripting, Java, ASP, ASP.NET, RoR, Wakanda, etc…)
- Social Media Programming & Integration (Facebook, Twitter, YouTube, Pinterest, etc…)
- Content Management Systems (WordPress, Drupal, Joomla, Moodle, etc…)
- Bulletin Boards (phpBB, SMF, Vanilla, jobberBase, etc…)
- eCommerce (WooCommerce, OSCommerce, ZenCart, PayPal Shopping Cart, etc…)
Instructor and E-Mentor
- IoT
- PIC Microcontrollers
- Arduino
- Raspberry Pi
- Espressif
- Robotics
- DOS, Windows, OSX, Linux, iOS, Android, Multi-OS
- Linux-Apache-PHP-MySQL
Follow Us
J. Luc Paquin – Curriculum Vitae – 2022 English & Español
https://www.jlpconsultants.com/luc/
Web: https://www.donluc.com/
Web: https://www.jlpconsultants.com/
Facebook: https://www.facebook.com/neosteam.labs.9/
YouTube: https://www.youtube.com/channel/UC5eRjrGn1CqkkGfZy0jxEdA
Twitter: https://twitter.com/labs_steam
Pinterest: https://www.pinterest.com/NeoSteamLabs/
Instagram: https://www.instagram.com/neosteamlabs/
Don Luc