RHT03 Humidity and Temperature Sensor
The RHT03 (also known by DHT-22) is a low cost humidity and temperature sensor with a single wire digital interface. The sensor is calibrated and doesn’t require extra components so you can get right to measuring relative humidity and temperature.
Features
* 3.3-6V Input
* 1-1.5mA measuring current
* 40-50 uA standby current
* Humidity from 0-100% RH
* -40 – 80 degrees C temperature range
* +-2% RH accuracy
* +-0.5 degrees C
Technical Specification
Model: RHT03
Power supply: 3.3-6V DC
Output signal: Digital signal via MaxDetect 1-wire bus
Sensing element: Polymer humidity capacitor
Operating range: Humidity 0-100%RH; Temperature -40~80C
Accuracy: humidity +-2%RH(Max +-5%RH); Temperature +-0.5C
Resolution or sensitivity: Humidity 0.1%RH; Temperature 0.1C
Repeatability: Humidity +-1%RH; Temperature +-0.2C – Humidity hysteresis – +-0.3%RH
Long-term Stability: +-0.5%RH/year
Interchangeability: Fully interchangeable
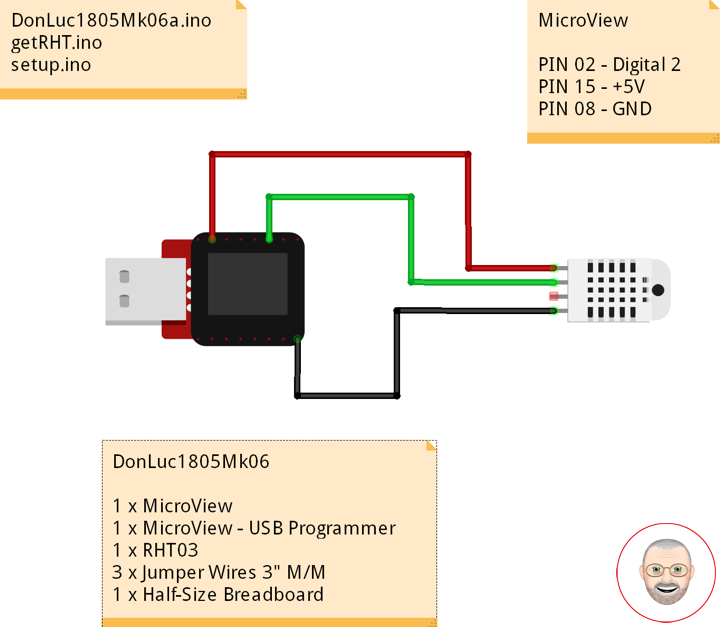
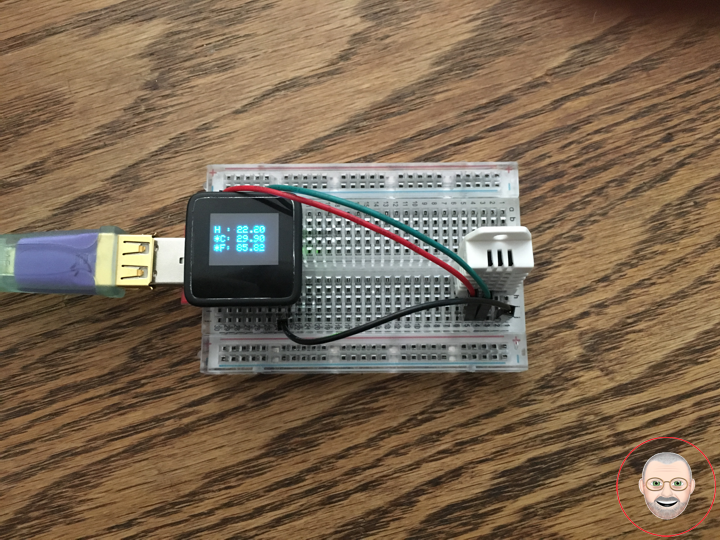
DonLuc1805Mk06
1 x MicroView
1 x MicroView – USB Programmer
1 x RHT03
3 x Jumper Wires 3″ M/M
1 x Half-Size Breadboard
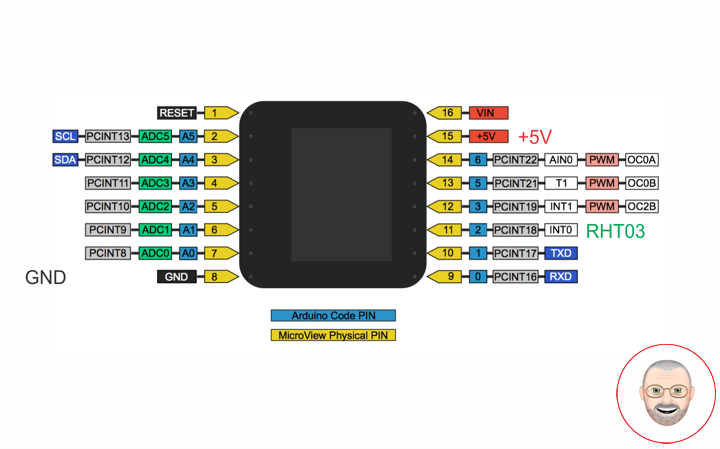
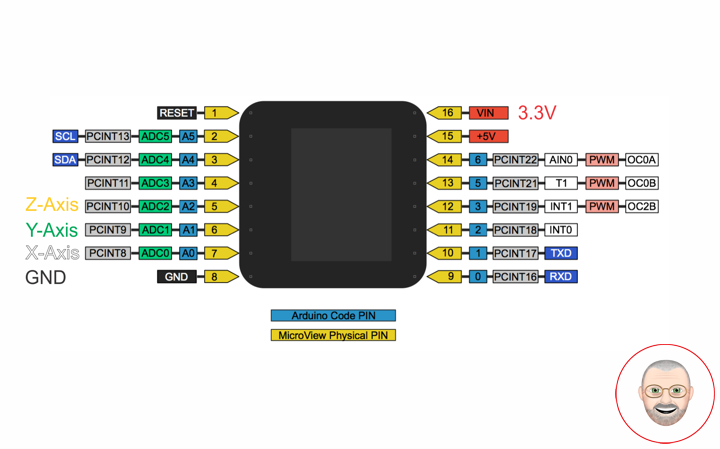
MicroView
RHT – PIN 11 – Digital 2
VIN – PIN 15 – +5V
GND – PIN 08 – GND
DonLuc1805Mk06a.ino
// ***** Don Luc *****
// Software Version Information
// 7.01
// DonLuc1804Mk07 7.01
// MicroView
// RHT03 Humidity and Temperature Sensor

// include the library code:
#include <MicroView.h>
#include <SparkFun_RHT03.h>

// RHT Humidity and Temperature Sensor
const int RHT03_DATA_PIN = 2;           // RHT03 data pin Digital 2
RHT03 rht;                              // This creates a RTH03 object, which we'll use to interact with the sensor

void loop() {

  // RHT03 Humidity and Temperature Sensor
  isRHT03();

  delay(1000);

  uView.clear(PAGE);  // Erase the memory buffer, the OLED will be cleared

}
getRHT.ino
// RHT03 Humidity and Temperature Sensor
void isRHT03(){

  // Call rht.update() to get new humidity and temperature values from the sensor.
  int updateRet = rht.update();

  // The humidity(), tempC(), and tempF() functions can be called -- after
  // a successful update() -- to get the last humidity and temperature
  // value
  float latestHumidity = rht.humidity();
  float latestTempC = rht.tempC();
  float latestTempF = rht.tempF();

  uView.setFontType(0);  // Set font type 0: Numbers and letters. 10 characters per line (6 lines)

  uView.setCursor(0,10); // Humidity
  uView.print( "H : " );
  uView.print( latestHumidity );

  uView.setCursor(0,20); // Temperature *C
  uView.print( "*C: " );
  uView.print( latestTempC );

  uView.setCursor(0,30); // "Temperature *F
  uView.print( "*F: " );
  uView.print( latestTempF );

  uView.display();       // Display

}
setup.ino
void setup() {

  uView.begin();           // Begin of MicroView
  uView.clear(ALL);        // Erase hardware memory inside the OLED controller
  uView.display();         // Display the content in the buffer memory, by default it is the MicroView logo

  delay(1000);

  uView.clear(PAGE);       // Erase the memory buffer, the OLED will be cleared.

  uView.setFontType(1);    // Set font type 1: Numbers and letters. 7 characters per line (3 lines)
  uView.setCursor(0,20);
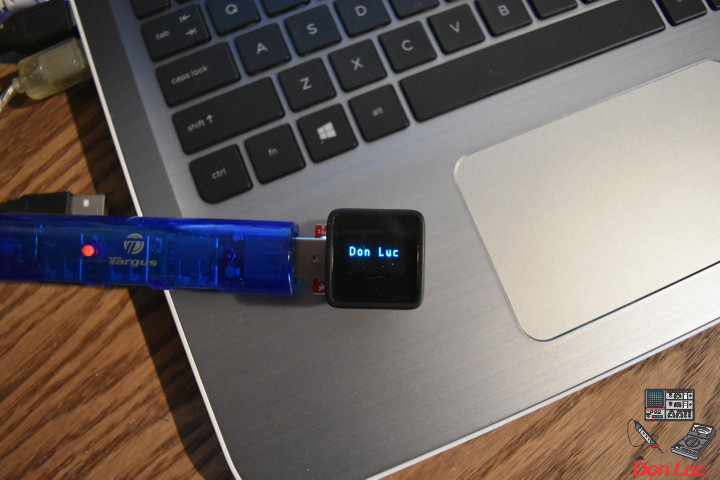
  uView.print("Don Luc");  // Don Luc
  uView.display();         // Display

  delay(5000);

  uView.clear(PAGE);       // Erase the memory buffer, the OLED will be cleared.

  uView.setFontType(1);    // Set font type 1: Numbers and letters. 7 characters per line (3 lines)
  uView.setCursor(0,20);
  uView.print("RHT03");    // RHT03
  uView.display();         // Display

  delay(5000);

  uView.clear(PAGE);       // Erase the memory buffer, the OLED will be cleared

  // RHT03 Humidity and Temperature Sensor
  // Call rht.begin() to initialize the sensor and our data pin
  rht.begin(RHT03_DATA_PIN);

}
Don Luc

