#28 – Sensors
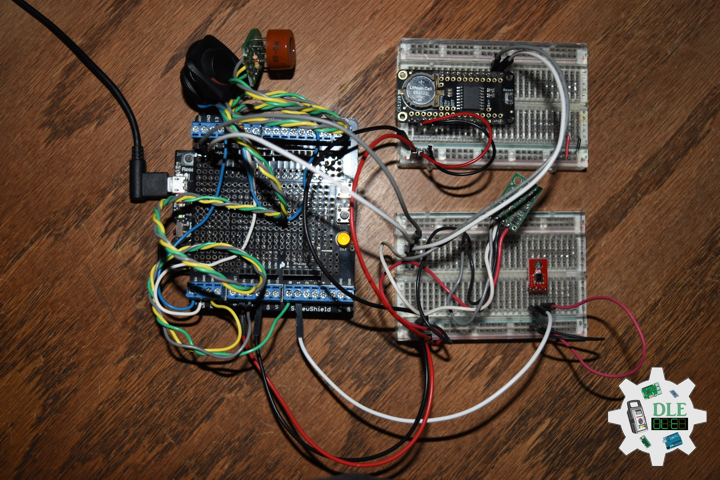
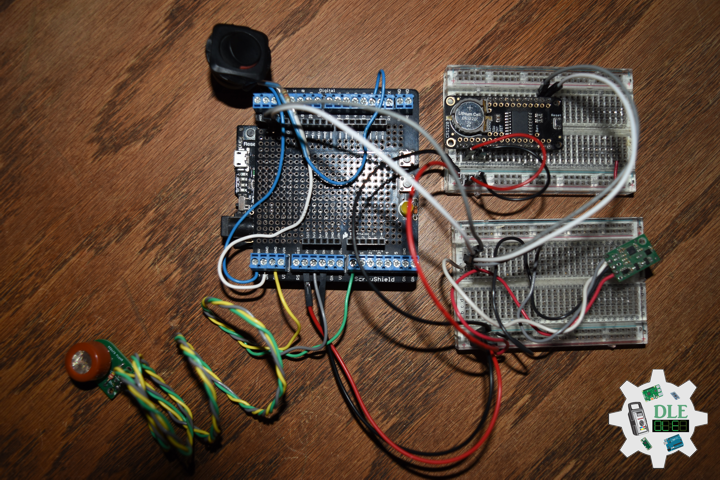
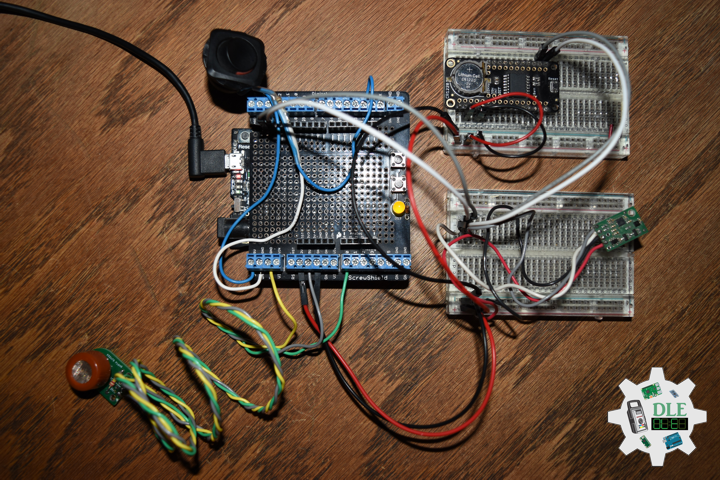
Project #28 – Sensors – Pololu MinIMU-9 v5 – Mk04
——
#DonLucElectronics #DonLuc #Sensors #MinIMU9 #Pololu #Adafruit #SparkFun #Arduino #Project #Fritzing #Programming #Electronics #Microcontrollers #Consultant
——
——
——
——
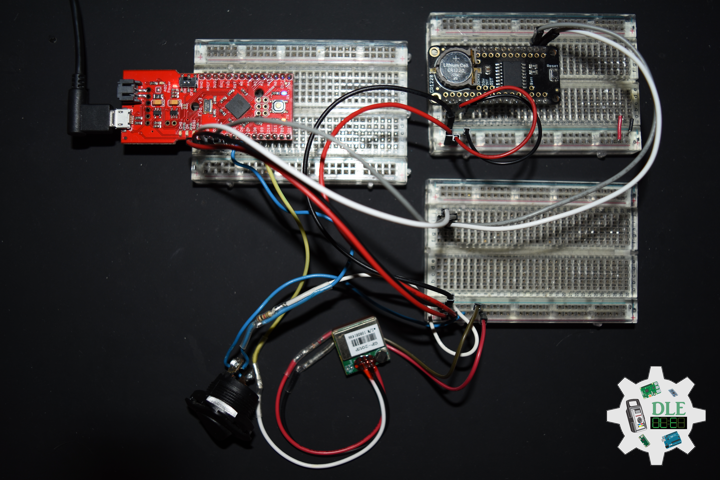
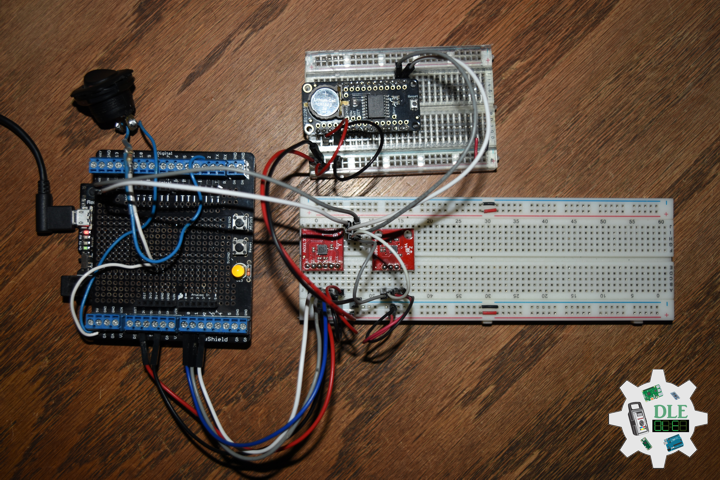
Pololu MinIMU-9 v5 Gyro, Accelerometer, and Compass (LSM6DS33 and LIS3MDL Carrier)
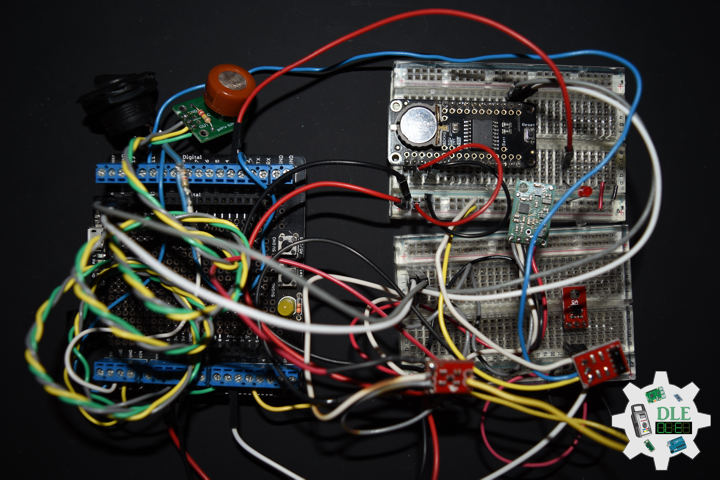
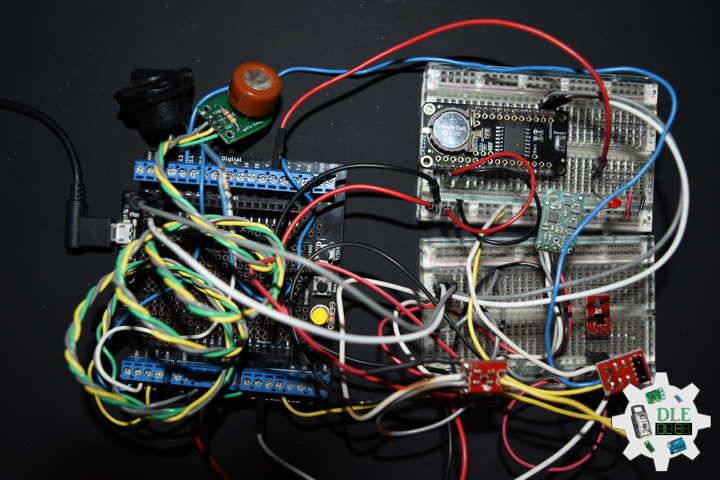
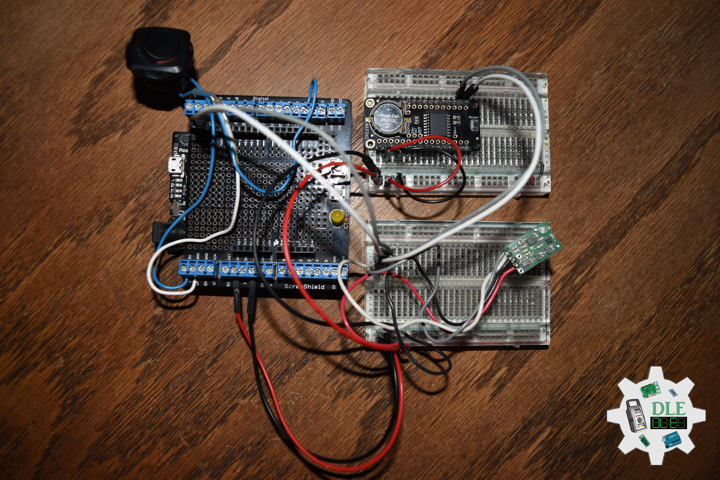
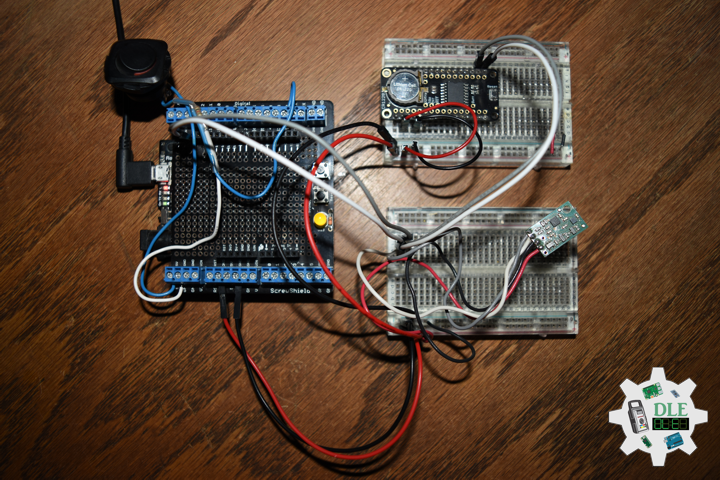
The Pololu MinIMU-9 v5 is an inertial measurement unit (IMU) that packs an LSM6DS33 3-axis gyro and 3-axis accelerometer and an LIS3MDL 3-axis magnetometer onto a tiny 0.8″ × 0.5″ board. An I²C interface accesses nine independent rotation, acceleration, and magnetic measurements that can be used to calculate the sensor’s absolute orientation. The MinIMU-9 v5 board includes a voltage regulator and a level-shifting circuit that allow operation from 2.5 to 5.5 Volt.
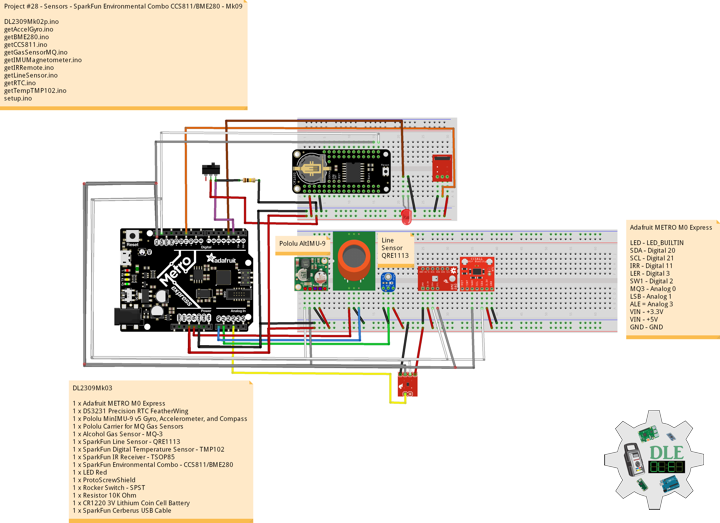
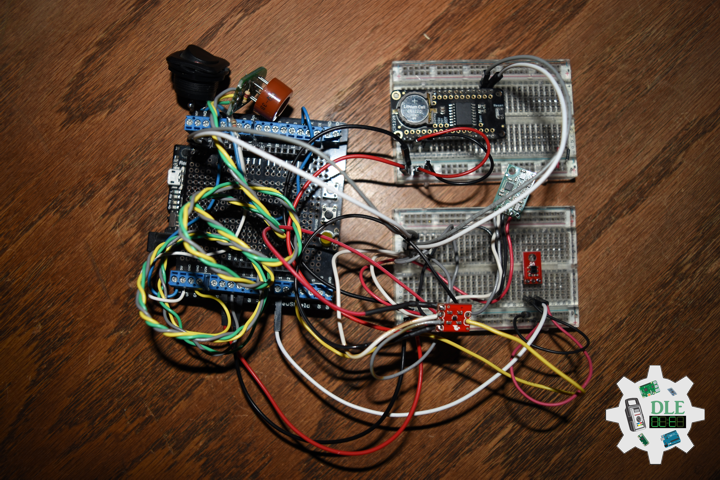
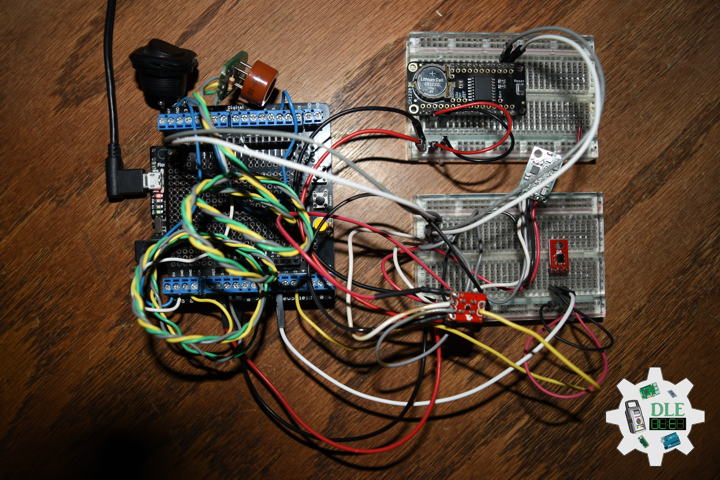
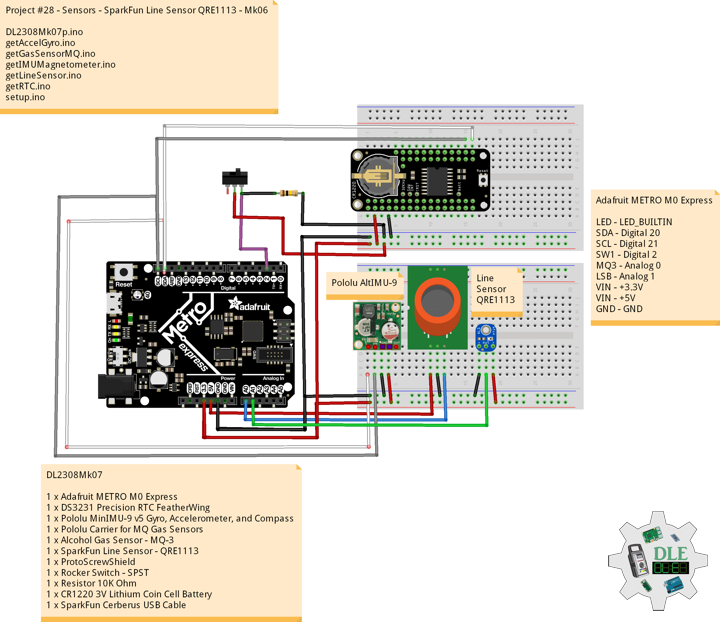
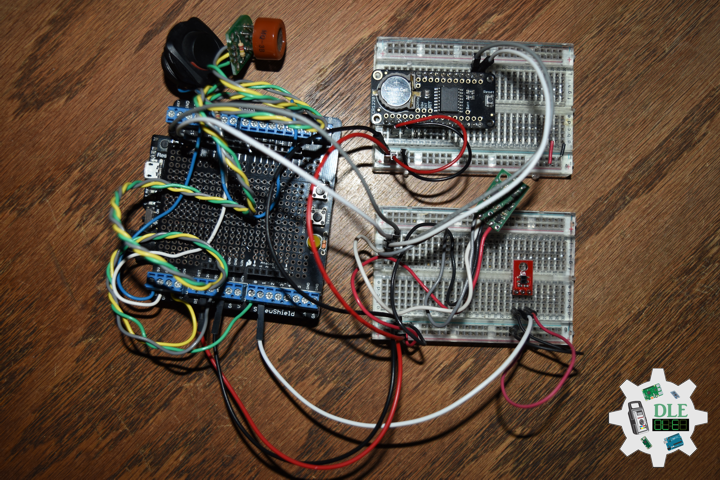
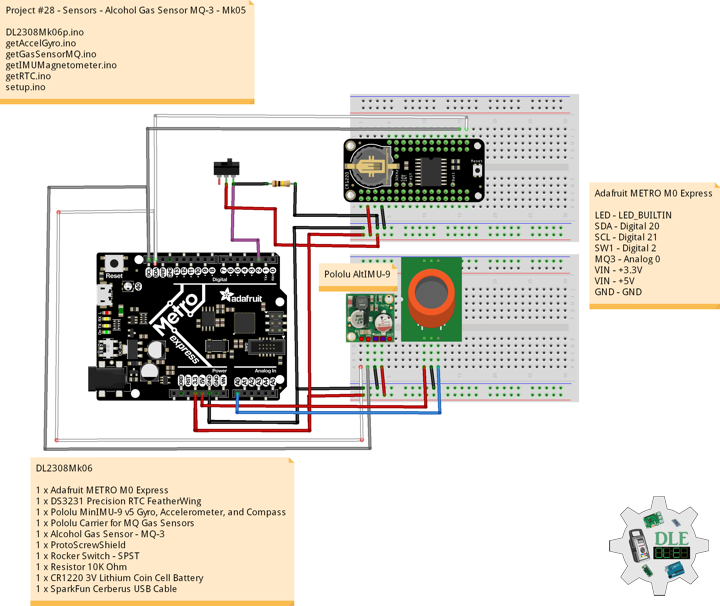
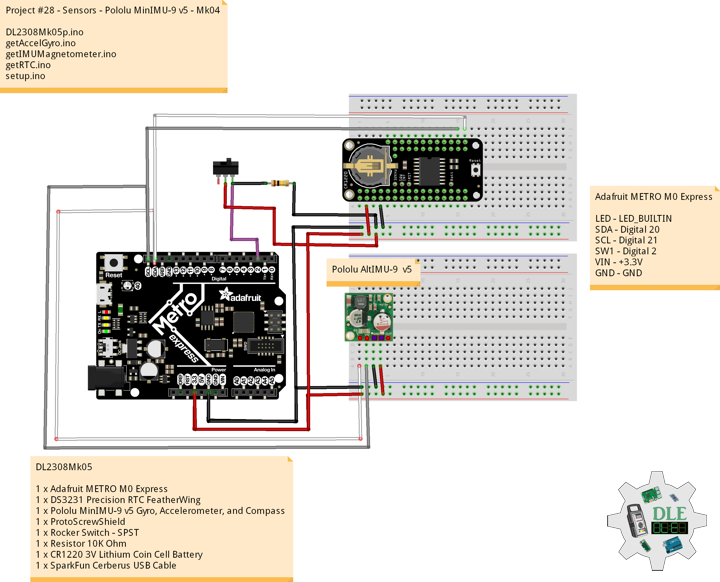
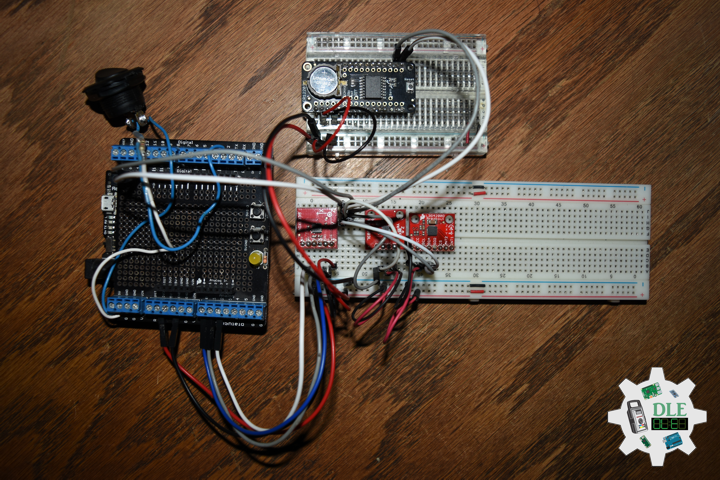
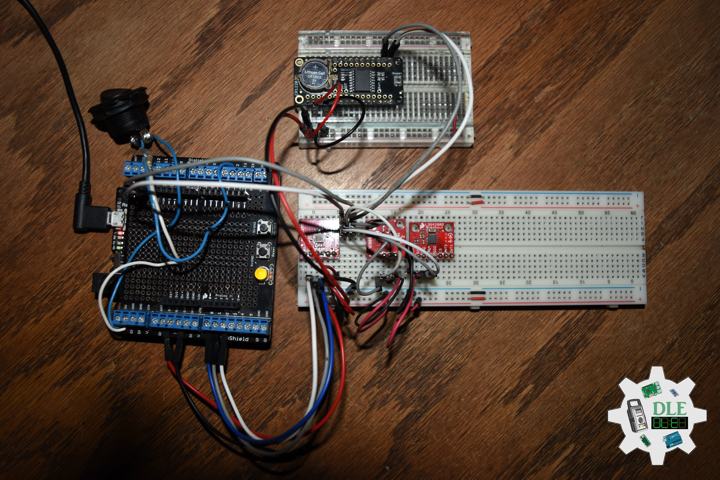
DL2308Mk05
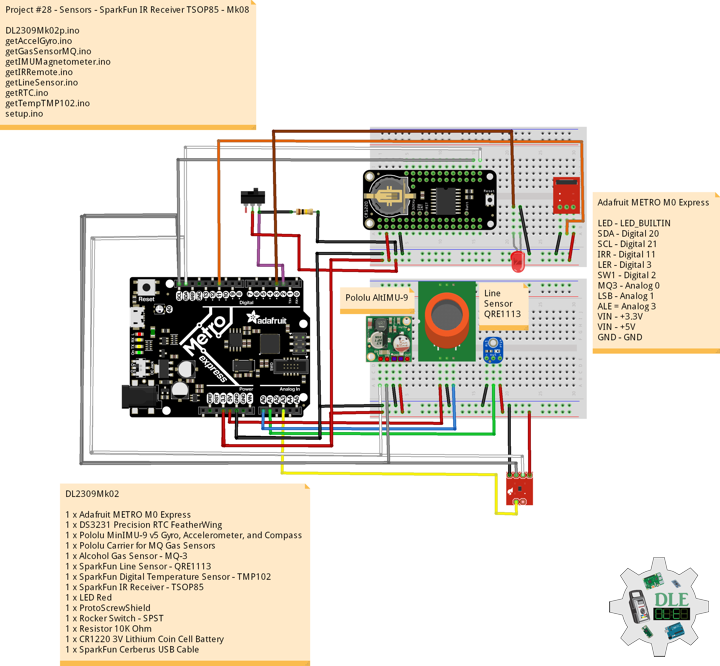
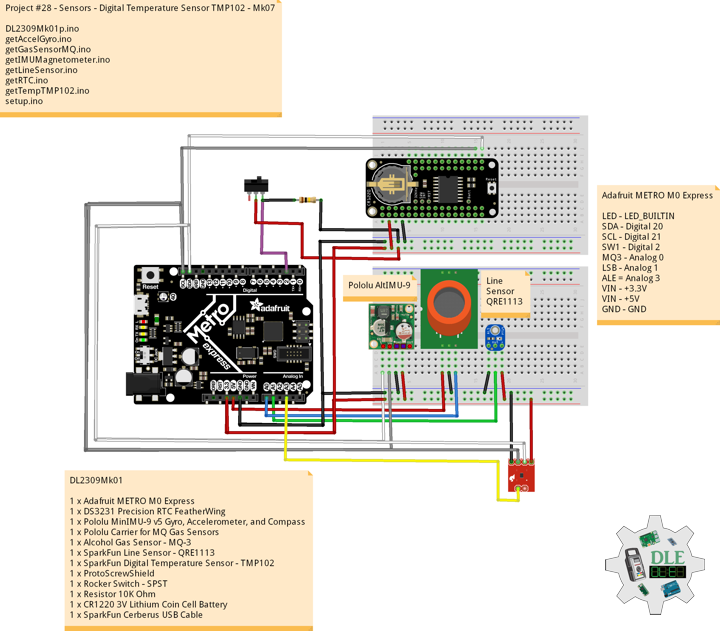
1 x Adafruit METRO M0 Express
1 x DS3231 Precision RTC FeatherWing
1 x Pololu MinIMU-9 v5 Gyro, Accelerometer, and Compass
1 x ProtoScrewShield
1 x Rocker Switch – SPST
1 x Resistor 10K Ohm
1 x CR1220 3V Lithium Coin Cell Battery
1 x SparkFun Cerberus USB Cable
Adafruit METRO M0 Express
LED – LED_BUILTIN
SDA – Digital 20
SCL – Digital 21
SW1 – Digital 2
VIN – +3.3V
GND – GND
——
DL2308Mk05p.ino
/****** Don Luc Electronics © ****** Software Version Information Project #28 - Sensors - Pololu MinIMU-9 v5 - Mk04 28-04 DL2308Mk05p.ino 1 x Adafruit METRO M0 Express 1 x DS3231 Precision RTC FeatherWing 1 x Pololu MinIMU-9 v5 Gyro, Accelerometer, and Compass 1 x ProtoScrewShield 1 x Rocker Switch - SPST 1 x Resistor 10K Ohm 1 x CR1220 3V Lithium Coin Cell Battery 1 x SparkFun Cerberus USB Cable */ // Include the Library Code // DS3231 Precision RTC #include <RTClib.h> // Two Wire Interface (TWI/I2C) #include <Wire.h> // Keyboard #include <Keyboard.h> // Includes and variables for IMU integration // STMicroelectronics LSM6DS33 Gyroscope and Accelerometer #include <LSM6.h> // STMicroelectronics LIS3MDL Magnetometer #include <LIS3MDL.h> // Keyboard String sKeyboard = ""; // DS3231 Precision RTC RTC_DS3231 rtc; String dateRTC = ""; String timeRTC = ""; // Pololu 9DoF IMU // STMicroelectronics LSM6DS33 Gyroscope and Accelerometer LSM6 imu; // Accelerometer and Gyroscopes // Accelerometer int imuAX; int imuAY; int imuAZ; // Gyroscopes int imuGX; int imuGY; int imuGZ; // STMicroelectronics LIS3MDL Magnetometer LIS3MDL mag; // Magnetometer int magX; int magY; int magZ; // The number of the pushbutton pin int iButton = 2; // Variable for reading the button status int buttonState = 0; // Software Version Information String sver = "28-04"; void loop() { // Date and Time RTC isRTC (); // Pololu Accelerometer and Gyroscopes isIMU(); // Pololu Magnetometer isMag(); // Read the state of the button value: buttonState = digitalRead(iButton); // Check if the button is pressed. If it is, the buttonState is HIGH: if (buttonState == HIGH) { Keyboard.println(sKeyboard); } // Delay 1 Second delay(1000); }
getAccelGyro.ino
// Accelerometer and Gyroscopes // Setup IMU void setupIMU() { // Setup IMU imu.init(); // Default imu.enableDefault(); } // Accelerometer and Gyroscopes void isIMU() { // Accelerometer and Gyroscopes imu.read(); // Accelerometer x, y, z imuAX = imu.a.x; imuAY = imu.a.y; imuAZ = imu.a.z; // Gyroscopes x, y, z imuGX = imu.g.x; imuGY = imu.g.y; imuGZ = imu.g.z; sKeyboard = sKeyboard + String(imuAX) + "|" + String(imuAY) + "|" + String(imuAZ) + "|"; sKeyboard = sKeyboard + String(imuGX) + "|" + String(imuGY) + "|" + String(imuGZ) + "|"; }
getIMUMagnetometer.ino
// IMU Magnetometer // Setup Magnetometer void setupMag() { // Setup Magnetometer mag.init(); // Default mag.enableDefault(); } // Magnetometer void isMag() { // Magnetometer mag.read(); // Magnetometer x, y, z magX = mag.m.x; magY = mag.m.y; magZ = mag.m.z; sKeyboard = sKeyboard + String(magX) + "|" + String(magY) + "|" + String(magZ) + "|*"; }
getRTC.ino
// Date & Time // DS3231 Precision RTC void setupRTC() { // DS3231 Precision RTC if (! rtc.begin()) { //Serial.println("Couldn't find RTC"); //Serial.flush(); while (1) delay(10); } if (rtc.lostPower()) { //Serial.println("RTC lost power, let's set the time!"); // When time needs to be set on a new device, or after a power loss, the // following line sets the RTC to the date & time this sketch was compiled rtc.adjust(DateTime(F(__DATE__), F(__TIME__))); // This line sets the RTC with an explicit date & time, for example to set // January 21, 2014 at 3am you would call: //rtc.adjust(DateTime(2023, 8, 10, 11, 0, 0)); } } // Date and Time RTC void isRTC () { // Date and Time dateRTC = ""; timeRTC = ""; DateTime now = rtc.now(); // Date dateRTC = now.year(), DEC; dateRTC = dateRTC + "/"; dateRTC = dateRTC + now.month(), DEC; dateRTC = dateRTC + "/"; dateRTC = dateRTC + now.day(), DEC; // Time timeRTC = now.hour(), DEC; timeRTC = timeRTC + ":"; timeRTC = timeRTC + now.minute(), DEC; timeRTC = timeRTC + ":"; timeRTC = timeRTC + now.second(), DEC; sKeyboard = "SEN|" + sver + "|" + String(dateRTC) + "|" + String(timeRTC) + "|"; }
setup.ino
// Setup void setup() { // Give display time to power on delay(100); // Wire - Inialize I2C Hardware Wire.begin(); // Give display time to power on delay(100); // Date & Time RTC // DS3231 Precision RTC setupRTC(); // Initialize control over the keyboard: Keyboard.begin(); // Pololu Setup IMU setupIMU(); // Pololu Setup Magnetometer setupMag(); // Initialize the button pin as an input pinMode(iButton, INPUT); // Initialize digital pin LED_BUILTIN as an output pinMode(LED_BUILTIN, OUTPUT); // Turn the LED on HIGH digitalWrite(LED_BUILTIN, HIGH); // Delay 5 Second delay( 5000 ); }
——
People can contact us: https://www.donluc.com/?page_id=1927
Technology Experience
- Programming Language
- Single-Board Microcontrollers (PIC, Arduino, Raspberry Pi,Espressif, etc…)
- IoT
- Wireless (Radio Frequency, Bluetooth, WiFi, Etc…)
- Robotics
- Camera and Video Capture Receiver Stationary, Wheel/Tank and Underwater Vehicle
- Unmanned Vehicles Terrestrial and Marine
- Machine Learning
- RTOS
- Research & Development (R & D)
Instructor, E-Mentor, STEAM, and Arts-Based Training
- Programming Language
- IoT
- PIC Microcontrollers
- Arduino
- Raspberry Pi
- Espressif
- Robotics
Follow Us
Luc Paquin – Curriculum Vitae – 2023
https://www.donluc.com/luc/
Web: https://www.donluc.com/
Facebook: https://www.facebook.com/neosteam.labs.9/
YouTube: https://www.youtube.com/@thesass2063
Twitter: https://twitter.com/labs_steam
Pinterest: https://www.pinterest.com/NeoSteamLabs/
Instagram: https://www.instagram.com/neosteamlabs/
Don Luc
Project #28 – Sensors – Gyroscope L3G4200D – Mk03
——
#DonLucElectronics #DonLuc #Sensors #L3G4200D #HMC5883L #ADXL335 #Adafruit #SparkFun #Arduino #Project #Fritzing #Programming #Electronics #Microcontrollers #Consultant
——
——
——
——
SparkFun Tri-Axis Gyroscope – L3G4200D
This is a breakout board for the L3G4200D low-power three-axis angular rate sensor. The L3G4200D is a MEMS motion sensor and has a full scale of dps and is capable of measuring rates with a user-selectable bandwidth. These work great in gaming and virtual reality input devices, motion control with MMI, GPS navigation systems, appliances and robotics. The L3G4200D is a low-power three-axis angular rate sensor able to provide unprecedented stablility of zero rate level and sensitivity over temperature and time. It includes a sensing element and an IC interface capable of providing the measured angular rate to the external world through a digital interface.
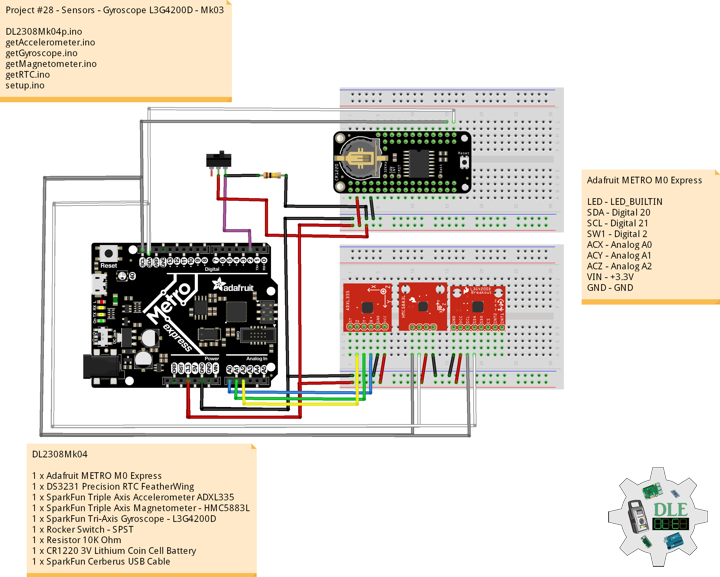
DL2308Mk04
1 x Adafruit METRO M0 Express
1 x DS3231 Precision RTC FeatherWing
1 x SparkFun Triple Axis Accelerometer ADXL335
1 x SparkFun Triple Axis Magnetometer – HMC5883L
1 x SparkFun Tri-Axis Gyroscope – L3G4200D
1 x Rocker Switch – SPST
1 x Resistor 10K Ohm
1 x CR1220 3V Lithium Coin Cell Battery
1 x SparkFun Cerberus USB Cable
Adafruit METRO M0 Express
LED – LED_BUILTIN
SDA – Digital 20
SCL – Digital 21
SW1 – Digital 2
ACX – Analog A0
ACY – Analog A1
ACZ – Analog A2
VIN – +3.3V
GND – GND
——
DL2308Mk04p.ino
/****** Don Luc Electronics © ****** Software Version Information Project #28 - Sensors - Gyroscope L3G4200D - Mk03 28-03 DL2308Mk04p.ino 1 x Adafruit METRO M0 Express 1 x DS3231 Precision RTC FeatherWing 1 x SparkFun Triple Axis Accelerometer ADXL335 1 x SparkFun Tri-Axis Gyroscope - L3G4200D 1 x Rocker Switch - SPST 1 x Resistor 10K Ohm 1 x CR1220 3V Lithium Coin Cell Battery 1 x SparkFun Cerberus USB Cable */ // Include the Library Code // DS3231 Precision RTC #include <RTClib.h> // Two Wire Interface (TWI/I2C) #include <Wire.h> // Keyboard #include <Keyboard.h> // Triple Axis Magnetometer #include <HMC5883L.h> // Gyroscope #include <L3G4200D.h> // Keyboard String sKeyboard = ""; // DS3231 Precision RTC RTC_DS3231 rtc; String dateRTC = ""; String timeRTC = ""; // Accelerometer int iX = A0; int iY = A1; int iZ = A2; // Accelerometer int X = 0; int Y = 0; int Z = 0; // Triple Axis Magnetometer HMC5883L compass; // Triple Axis Magnetometer int mX = 0; int mY = 0; int mZ = 0; // Gyroscope L3G4200D gyroscope; // Timers unsigned long timer = 0; float timeStep = 0.01; // Pitch, Roll and Yaw values float pitch = 0; float roll = 0; float yaw = 0; // The number of the pushbutton pin int iButton = 2; // Variable for reading the button status int buttonState = 0; // Software Version Information String sver = "28-03"; void loop() { // Date and Time RTC isRTC (); // Accelerometer isAccelerometer(); // Magnetometer isMagnetometer(); // Gyroscope isGyroscope(); // Read the state of the button value: buttonState = digitalRead(iButton); // Check if the button is pressed. If it is, the buttonState is HIGH: if (buttonState == HIGH) { Keyboard.println(sKeyboard); } // Delay 1 Second delay(1000); }
getAccelerometer.ino
// Accelerometer // Accelerometer void isAccelerometer(){ // Accelerometer X, Y, Z // X X = analogRead(iX); // Y Y = analogRead(iY); // Z Z = analogRead(iZ); sKeyboard = sKeyboard + String(X) + "|" + String(Y) + "|" + String(Z) + "|"; }
getGyroscope.ino
// L3G4200D Triple Axis Gyroscope // Setup Gyroscope void isSetupGyroscope() { // Setup Gyroscope // Set scale 2000 dps and 400HZ Output data rate (cut-off 50) while(!gyroscope.begin(L3G4200D_SCALE_2000DPS, L3G4200D_DATARATE_400HZ_50)) { // Could not find a valid L3G4200D sensor, check wiring! delay(500); } // Calibrate gyroscope. The calibration must be at rest. // If you don't want calibrate, comment this line. gyroscope.calibrate(100); } // L3G4200D Gyroscope void isGyroscope(){ // Timer timer = millis(); // Read normalized values Vector norm = gyroscope.readNormalize(); // Calculate Pitch, Roll and Yaw pitch = pitch + norm.YAxis * timeStep; roll = roll + norm.XAxis * timeStep; yaw = yaw + norm.ZAxis * timeStep; sKeyboard = sKeyboard + String(pitch) + "|" + String(roll) + "|" + String(yaw) + "|*"; }
getMagnetometer.ino
// Magnetometer // Setup Magnetometer void isSetupMagnetometer(){ // Magnetometer Serial // Initialize HMC5883L while (!compass.begin()) { delay(500); } // Set measurement range // +/- 1.30 Ga: HMC5883L_RANGE_1_3GA (default) compass.setRange(HMC5883L_RANGE_1_3GA); // Set measurement mode // Continuous-Measurement: HMC5883L_CONTINOUS (default) compass.setMeasurementMode(HMC5883L_CONTINOUS); // Set data rate // 15.00Hz: HMC5883L_DATARATE_15HZ (default) compass.setDataRate(HMC5883L_DATARATE_15HZ); // Set number of samples averaged // 1 sample: HMC5883L_SAMPLES_1 (default) compass.setSamples(HMC5883L_SAMPLES_1); } // Magnetometer void isMagnetometer(){ // Vector Norm Vector norm = compass.readNormalize(); // Vector X, Y, Z // X Normalize mX = norm.XAxis; // Y Normalize mY = norm.YAxis; // Z Normalize mZ = norm.ZAxis; sKeyboard = sKeyboard + String(mX) + "|" + String(mY) + "|" + String(mZ) + "|"; }
getRTC.ino
// Date & Time // DS3231 Precision RTC void setupRTC() { // DS3231 Precision RTC if (! rtc.begin()) { //Serial.println("Couldn't find RTC"); //Serial.flush(); while (1) delay(10); } if (rtc.lostPower()) { //Serial.println("RTC lost power, let's set the time!"); // When time needs to be set on a new device, or after a power loss, the // following line sets the RTC to the date & time this sketch was compiled rtc.adjust(DateTime(F(__DATE__), F(__TIME__))); // This line sets the RTC with an explicit date & time, for example to set // January 21, 2014 at 3am you would call: //rtc.adjust(DateTime(2023, 8, 10, 11, 0, 0)); } } // Date and Time RTC void isRTC () { // Date and Time dateRTC = ""; timeRTC = ""; DateTime now = rtc.now(); // Date dateRTC = now.year(), DEC; dateRTC = dateRTC + "/"; dateRTC = dateRTC + now.month(), DEC; dateRTC = dateRTC + "/"; dateRTC = dateRTC + now.day(), DEC; // Time timeRTC = now.hour(), DEC; timeRTC = timeRTC + ":"; timeRTC = timeRTC + now.minute(), DEC; timeRTC = timeRTC + ":"; timeRTC = timeRTC + now.second(), DEC; sKeyboard = "SEN|" + sver + "|" + String(dateRTC) + "|" + String(timeRTC) + "|"; }
setup.ino
// Setup void setup() { // Give display time to power on delay(100); // Wire - Inialize I2C Hardware Wire.begin(); // Give display time to power on delay(100); // Date & Time RTC // DS3231 Precision RTC setupRTC(); // Initialize control over the keyboard: Keyboard.begin(); // Setup Triple Axis Magnetometer isSetupMagnetometer(); // L3G4200D Gyroscope isSetupGyroscope(); // Initialize the button pin as an input pinMode(iButton, INPUT); // Initialize digital pin LED_BUILTIN as an output pinMode(LED_BUILTIN, OUTPUT); // Turn the LED on HIGH digitalWrite(LED_BUILTIN, HIGH); // Delay 5 Second delay( 5000 ); }
——
People can contact us: https://www.donluc.com/?page_id=1927
Technology Experience
- Programming Language
- Single-Board Microcontrollers (PIC, Arduino, Raspberry Pi,Espressif, etc…)
- IoT
- Wireless (Radio Frequency, Bluetooth, WiFi, Etc…)
- Robotics
- Camera and Video Capture Receiver Stationary, Wheel/Tank and Underwater Vehicle
- Unmanned Vehicles Terrestrial and Marine
- Machine Learning
- RTOS
- Research & Development (R & D)
Instructor, E-Mentor, STEAM, and Arts-Based Training
- Programming Language
- IoT
- PIC Microcontrollers
- Arduino
- Raspberry Pi
- Espressif
- Robotics
Follow Us
Luc Paquin – Curriculum Vitae – 2023
https://www.donluc.com/luc/
Web: https://www.donluc.com/
Facebook: https://www.facebook.com/neosteam.labs.9/
YouTube: https://www.youtube.com/@thesass2063
Twitter: https://twitter.com/labs_steam
Pinterest: https://www.pinterest.com/NeoSteamLabs/
Instagram: https://www.instagram.com/neosteamlabs/
Don Luc
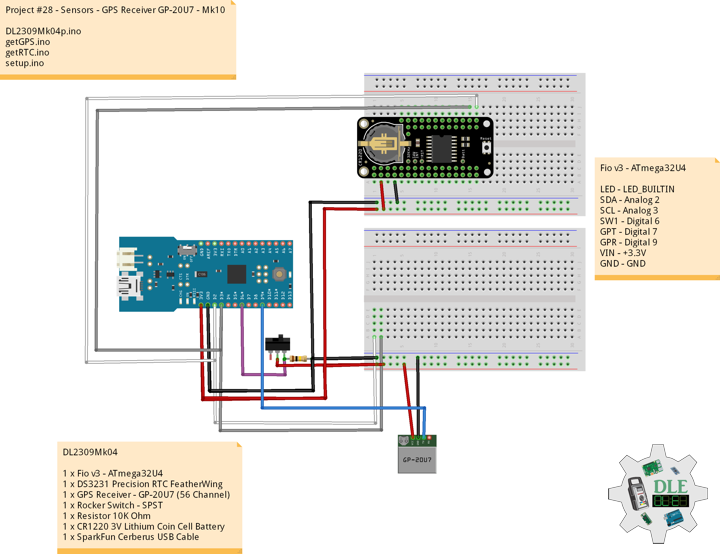
Project #28 – Sensors – Magnetometer HMC5883L – Mk02
——
#DonLucElectronics #DonLuc #Sensors #HMC5883L #ADXL335 #Adafruit #SparkFun #Arduino #Project #Fritzing #Programming #Electronics #Microcontrollers #Consultant
——
——
——
——
SparkFun Triple Axis Magnetometer – HMC5883L
This is a breakout board for Honeywell’s HMC5883L, a 3-axis digital compass. Communication with the HMC5883L is simple and all done through an I2C interface. There is no on-board regulator, so a regulated voltage of 2.16-3.6VDC should be supplied. The Honeywell HMC5883L is a surface-mount, multi-chip module designed for low-field magnetic sensing with a digital interface for applications such as low-cost compassing and magnetometry. Applications for the HMC5883L include Mobile Phones, Netbooks, Consumer Electronics, Auto Navigation Systems, and Personal Navigation Devices.
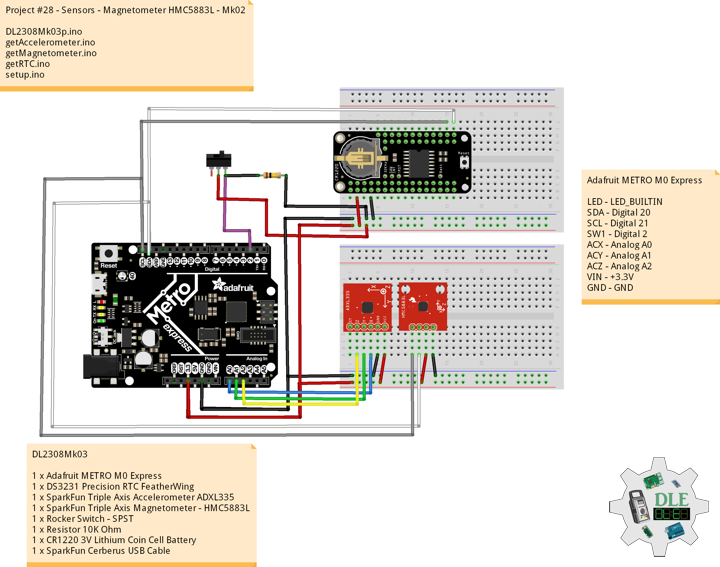
DL2308Mk03
1 x Adafruit METRO M0 Express
1 x DS3231 Precision RTC FeatherWing
1 x SparkFun Triple Axis Accelerometer ADXL335
1 x SparkFun Triple Axis Magnetometer – HMC5883L
1 x Rocker Switch – SPST
1 x Resistor 10K Ohm
1 x CR1220 3V Lithium Coin Cell Battery
1 x SparkFun Cerberus USB Cable
Adafruit METRO M0 Express
LED – LED_BUILTIN
SDA – Digital 20
SCL – Digital 21
SW1 – Digital 2
ACX – Analog A0
ACY – Analog A1
ACZ – Analog A2
VIN – +3.3V
GND – GND
——
DL2308Mk03p.ino
/****** Don Luc Electronics © ****** Software Version Information Project #28 - Sensors - Magnetometer HMC5883L - Mk02 28-02 DL2308Mk03p.ino 1 x Adafruit METRO M0 Express 1 x DS3231 Precision RTC FeatherWing 1 x SparkFun Triple Axis Accelerometer ADXL335 1 x Rocker Switch - SPST 1 x Resistor 10K Ohm 1 x CR1220 3V Lithium Coin Cell Battery 1 x SparkFun Cerberus USB Cable */ // Include the Library Code // DS3231 Precision RTC #include <RTClib.h> // Two Wire Interface (TWI/I2C) #include <Wire.h> // Keyboard #include <Keyboard.h> // Triple Axis Magnetometer #include <HMC5883L.h> // Keyboard String sKeyboard = ""; // DS3231 Precision RTC RTC_DS3231 rtc; String dateRTC = ""; String timeRTC = ""; // Accelerometer int iX = A0; int iY = A1; int iZ = A2; // Accelerometer int X = 0; int Y = 0; int Z = 0; // Triple Axis Magnetometer HMC5883L compass; // Triple Axis Magnetometer int mX = 0; int mY = 0; int mZ = 0; // The number of the pushbutton pin int iButton = 2; // Variable for reading the pushbutton status int buttonState = 0; // Software Version Information String sver = "28-02"; void loop() { // Date and Time RTC isRTC (); // Accelerometer isAccelerometer(); // Magnetometer isMagnetometer(); // Read the state of the button value: buttonState = digitalRead(iButton); // Check if the button is pressed. If it is, the buttonState is HIGH: if (buttonState == HIGH) { Keyboard.println(sKeyboard); } // Delay 1 sec delay(1000); }
getAccelerometer.ino
// Accelerometer // Accelerometer void isAccelerometer(){ // Accelerometer X, Y, Z // X X = analogRead(iX); // Y Y = analogRead(iY); // Z Z = analogRead(iZ); sKeyboard = sKeyboard + String(X) + "|" + String(Y) + "|" + String(Z) + "|"; }
getMagnetometer.ino
// Magnetometer // Setup Magnetometer void isSetupMagnetometer(){ // Magnetometer Serial // Initialize HMC5883L while (!compass.begin()) { delay(500); } // Set measurement range // +/- 1.30 Ga: HMC5883L_RANGE_1_3GA (default) compass.setRange(HMC5883L_RANGE_1_3GA); // Set measurement mode // Continuous-Measurement: HMC5883L_CONTINOUS (default) compass.setMeasurementMode(HMC5883L_CONTINOUS); // Set data rate // 15.00Hz: HMC5883L_DATARATE_15HZ (default) compass.setDataRate(HMC5883L_DATARATE_15HZ); // Set number of samples averaged // 1 sample: HMC5883L_SAMPLES_1 (default) compass.setSamples(HMC5883L_SAMPLES_1); } // Magnetometer void isMagnetometer(){ // Vector Norm Vector norm = compass.readNormalize(); // Vector X, Y, Z // X Normalize mX = norm.XAxis; // Y Normalize mY = norm.YAxis; // Z Normalize mZ = norm.ZAxis; sKeyboard = sKeyboard + String(mX) + "|" + String(mY) + "|" + String(mZ) + "|*"; }
getRTC.ino
// Date & Time // DS3231 Precision RTC void setupRTC() { // DS3231 Precision RTC if (! rtc.begin()) { //Serial.println("Couldn't find RTC"); //Serial.flush(); while (1) delay(10); } if (rtc.lostPower()) { //Serial.println("RTC lost power, let's set the time!"); // When time needs to be set on a new device, or after a power loss, the // following line sets the RTC to the date & time this sketch was compiled rtc.adjust(DateTime(F(__DATE__), F(__TIME__))); // This line sets the RTC with an explicit date & time, for example to set // January 21, 2014 at 3am you would call: //rtc.adjust(DateTime(2023, 8, 10, 11, 0, 0)); } } // Date and Time RTC void isRTC () { // Date and Time dateRTC = ""; timeRTC = ""; DateTime now = rtc.now(); // Date dateRTC = now.year(), DEC; dateRTC = dateRTC + "/"; dateRTC = dateRTC + now.month(), DEC; dateRTC = dateRTC + "/"; dateRTC = dateRTC + now.day(), DEC; Serial.print("Date: "); Serial.println(dateRTC); // Time timeRTC = now.hour(), DEC; timeRTC = timeRTC + ":"; timeRTC = timeRTC + now.minute(), DEC; timeRTC = timeRTC + ":"; timeRTC = timeRTC + now.second(), DEC; Serial.print("Time: "); Serial.println(timeRTC); sKeyboard = "SEN|" + sver + "|" + String(dateRTC) + "|" + String(timeRTC) + "|"; }
setup.ino
// Setup void setup() { // Give display time to power on delay(100); // Wire - Inialize I2C Hardware Wire.begin(); // Give display time to power on delay(100); // Date & Time RTC // DS3231 Precision RTC setupRTC(); // Initialize control over the keyboard: Keyboard.begin(); // Setup Triple Axis Magnetometer isSetupMagnetometer(); // Initialize the button pin as an input pinMode(iButton, INPUT); // Initialize digital pin LED_BUILTIN as an output pinMode(LED_BUILTIN, OUTPUT); // Turn the LED on HIGH digitalWrite(LED_BUILTIN, HIGH); delay( 5000 ); }
——
People can contact us: https://www.donluc.com/?page_id=1927
Technology Experience
- Programming Language
- Single-Board Microcontrollers (PIC, Arduino, Raspberry Pi,Espressif, etc…)
- IoT
- Wireless (Radio Frequency, Bluetooth, WiFi, Etc…)
- Robotics
- Camera and Video Capture Receiver Stationary, Wheel/Tank and Underwater Vehicle
- Unmanned Vehicles Terrestrial and Marine
- Machine Learning
- RTOS
- Research & Development (R & D)
Instructor, E-Mentor, STEAM, and Arts-Based Training
- Programming Language
- IoT
- PIC Microcontrollers
- Arduino
- Raspberry Pi
- Espressif
- Robotics
Follow Us
Luc Paquin – Curriculum Vitae – 2023
https://www.donluc.com/luc/
Web: https://www.donluc.com/
Facebook: https://www.facebook.com/neosteam.labs.9/
YouTube: https://www.youtube.com/@thesass2063
Twitter: https://twitter.com/labs_steam
Pinterest: https://www.pinterest.com/NeoSteamLabs/
Instagram: https://www.instagram.com/neosteamlabs/
Don Luc
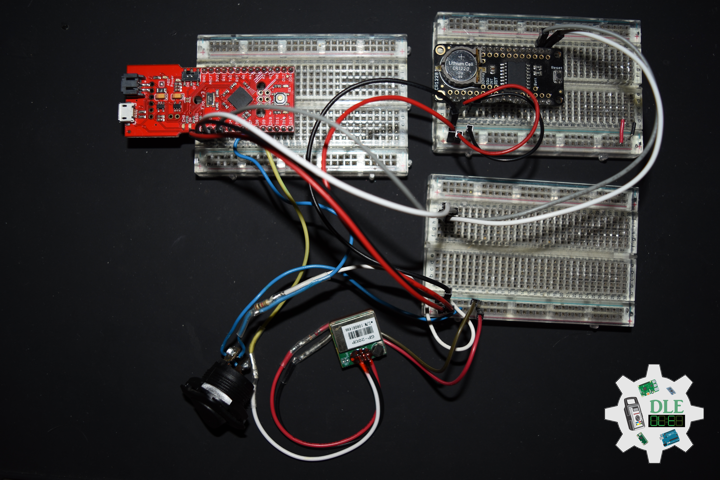
Project #28 – Sensors – Accelerometer ADXL335 – Mk01
——
#DonLucElectronics #DonLuc #Sensors #ADXL335 #Adafruit #SparkFun #Arduino #Project #Fritzing #Programming #Electronics #Microcontrollers #Consultant
——
——
——
——
Sensor
A sensor is a device that produces an output signal for the purpose of sensing a physical phenomenon. In the broadest definition, a sensor is a device, module, machine, or subsystem that detects events or changes in its environment and sends the information to other electronics, frequently a computer processor.
- Acoustic, sound, vibration
- Automotive
- Chemical
- Electric current, electric potential, magnetic, radio
- Environment, weather, moisture, humidity
- Flow, fluid velocity
- Ionizing radiation, subatomic particles
- Navigation instruments
- Position, angle, displacement, distance, speed, acceleration
- Optical, light, imaging, photon
- Pressure
- Force, density, level
- Thermal, heat, temperature
- Proximity, presence
- Sensor technology
- Speed sensor
- Others
- Etc…
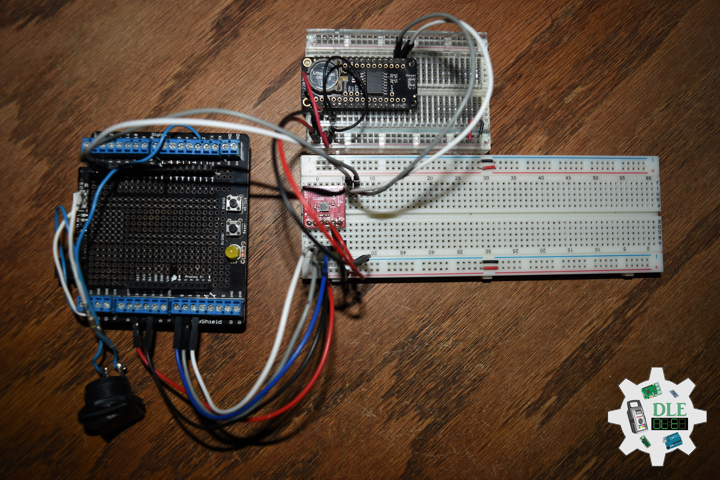
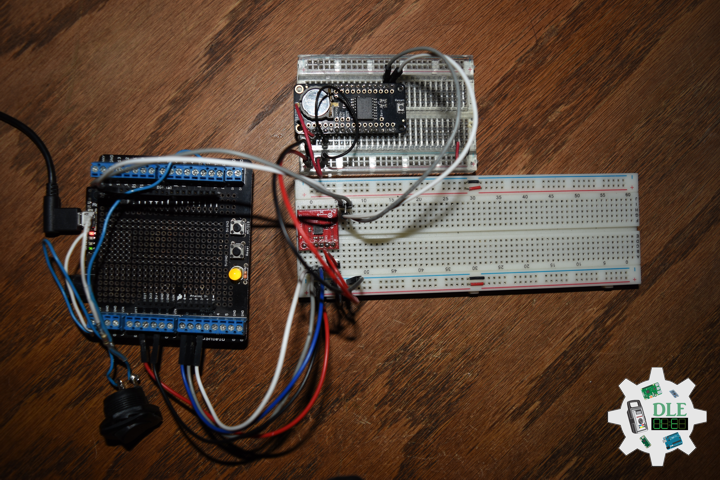
SparkFun Triple Axis Accelerometer Breakout – ADXL335
Breakout board for the 3 axis ADXL335 from Analog Devices. This is the latest in a long, proven line of analog sensors, the holy grail of accelerometers. The ADXL335 is a triple axis MEMS accelerometer with extremely low noise and power consumption.
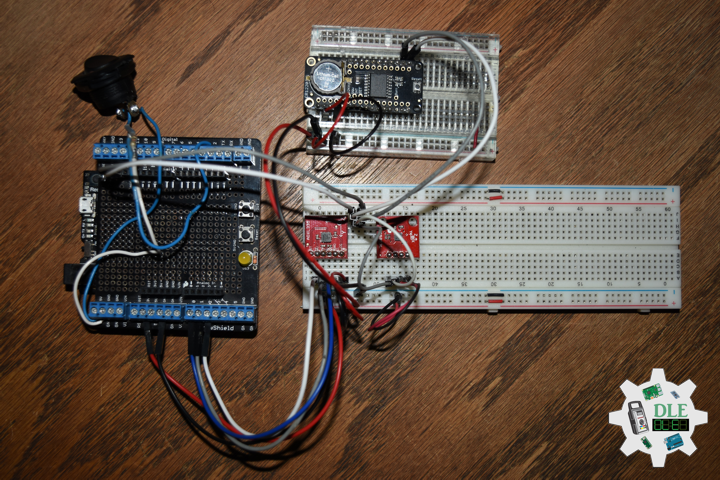
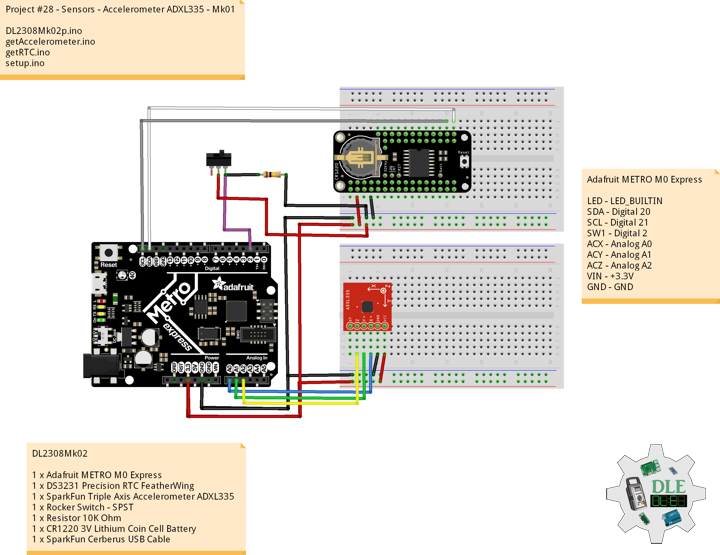
DL2308Mk02
1 x Adafruit METRO M0 Express
1 x DS3231 Precision RTC FeatherWing
1 x SparkFun Triple Axis Accelerometer ADXL335
1 x Rocker Switch – SPST
1 x Resistor 10K Ohm
1 x CR1220 3V Lithium Coin Cell Battery
1 x SparkFun Cerberus USB Cable
Adafruit METRO M0 Express
LED – LED_BUILTIN
SDA – Digital 20
SCL – Digital 21
SW1 – Digital 2
ACX – Analog A0
ACY – Analog A1
ACZ – Analog A2
VIN – +3.3V
GND – GND
——
DL2308Mk02p.ino
/****** Don Luc Electronics © ****** Software Version Information Project #28 - Sensors - Accelerometer ADXL335 - Mk01 28-01 DL2308Mk02p.ino 1 x Adafruit METRO M0 Express 1 x DS3231 Precision RTC FeatherWing 1 x SparkFun Triple Axis Accelerometer ADXL335 1 x Rocker Switch - SPST 1 x Resistor 10K Ohm 1 x CR1220 3V Lithium Coin Cell Battery 1 x SparkFun Cerberus USB Cable */ // Include the Library Code // DS3231 Precision RTC #include <RTClib.h> // Two Wire Interface (TWI/I2C) #include <Wire.h> // Keyboard #include <Keyboard.h> // Keyboard String sKeyboard = ""; // DS3231 Precision RTC RTC_DS3231 rtc; String dateRTC = ""; String timeRTC = ""; // Accelerometer int iX = A0; int iY = A1; int iZ = A2; // Accelerometer int X = 0; int Y = 0; int Z = 0; // The number of the pushbutton pin int iButton = 2; // Variable for reading the pushbutton status int buttonState = 0; // Software Version Information String sver = "28-01"; void loop() { // Date and Time RTC isRTC (); // Accelerometer isAccelerometer(); // Read the state of the pushbutton value: buttonState = digitalRead(iButton); // Check if the pushbutton is pressed. If it is, the buttonState is HIGH: if (buttonState == HIGH) { Keyboard.println(sKeyboard); } // Delay 1 sec delay(1000); }
getAccelerometer.ino
// Accelerometer // Accelerometer void isAccelerometer(){ // Accelerometer X, Y, Z // X X = analogRead(iX); Serial.print("X: "); Serial.println(X); // Y Y = analogRead(iY); Serial.print("Y: "); Serial.println(Y); // Z Z = analogRead(iZ); Serial.print("Z: "); Serial.println(Z); sKeyboard = sKeyboard + String(X) + "|" + String(Y) + "|" + String(Z) + "|*"; }
getRTC.ino
// Date & Time // DS3231 Precision RTC void setupRTC() { // DS3231 Precision RTC if (! rtc.begin()) { Serial.println("Couldn't find RTC"); Serial.flush(); while (1) delay(10); } if (rtc.lostPower()) { Serial.println("RTC lost power, let's set the time!"); // When time needs to be set on a new device, or after a power loss, the // following line sets the RTC to the date & time this sketch was compiled rtc.adjust(DateTime(F(__DATE__), F(__TIME__))); // This line sets the RTC with an explicit date & time, for example to set // January 21, 2014 at 3am you would call: //rtc.adjust(DateTime(2023, 8, 10, 11, 0, 0)); } } // Date and Time RTC void isRTC () { // Date and Time dateRTC = ""; timeRTC = ""; DateTime now = rtc.now(); // Date dateRTC = now.year(), DEC; dateRTC = dateRTC + "/"; dateRTC = dateRTC + now.month(), DEC; dateRTC = dateRTC + "/"; dateRTC = dateRTC + now.day(), DEC; Serial.print("Date: "); Serial.println(dateRTC); // Time timeRTC = now.hour(), DEC; timeRTC = timeRTC + ":"; timeRTC = timeRTC + now.minute(), DEC; timeRTC = timeRTC + ":"; timeRTC = timeRTC + now.second(), DEC; Serial.print("Time: "); Serial.println(timeRTC); sKeyboard = "SEN|" + sver + "|" + String(dateRTC) + "|" + String(timeRTC) + "|"; }
setup.ino
// Setup void setup() { // Serial Begin Serial.begin(115200); Serial.println("Starting Serial work!"); // Give display time to power on delay(100); // Wire - Inialize I2C Hardware Wire.begin(); // Give display time to power on delay(100); // Date & Time RTC // DS3231 Precision RTC setupRTC(); // Initialize control over the keyboard: Keyboard.begin(); // Initialize the pushbutton pin as an input pinMode(iButton, INPUT); // Initialize digital pin LED_BUILTIN as an output pinMode(LED_BUILTIN, OUTPUT); // Turn the LED on HIGH digitalWrite(LED_BUILTIN, HIGH); delay( 5000 ); }
——
People can contact us: https://www.donluc.com/?page_id=1927
Technology Experience
- Programming Language
- Single-Board Microcontrollers (PIC, Arduino, Raspberry Pi,Espressif, etc…)
- IoT
- Wireless (Radio Frequency, Bluetooth, WiFi, Etc…)
- Robotics
- Camera and Video Capture Receiver Stationary, Wheel/Tank and Underwater Vehicle
- Unmanned Vehicles Terrestrial and Marine
- Machine Learning
- RTOS
- Research & Development (R & D)
Instructor, E-Mentor, STEAM, and Arts-Based Training
- Programming Language
- IoT
- PIC Microcontrollers
- Arduino
- Raspberry Pi
- Espressif
- Robotics
Follow Us
Luc Paquin – Curriculum Vitae – 2023
https://www.donluc.com/luc/
Web: https://www.donluc.com/
Facebook: https://www.facebook.com/neosteam.labs.9/
YouTube: https://www.youtube.com/@thesass2063
Twitter: https://twitter.com/labs_steam
Pinterest: https://www.pinterest.com/NeoSteamLabs/
Instagram: https://www.instagram.com/neosteamlabs/
Don Luc