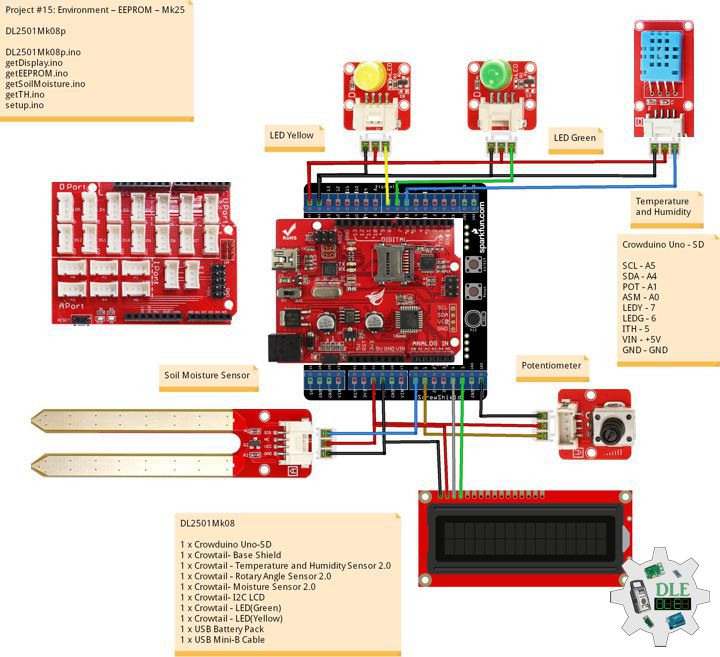
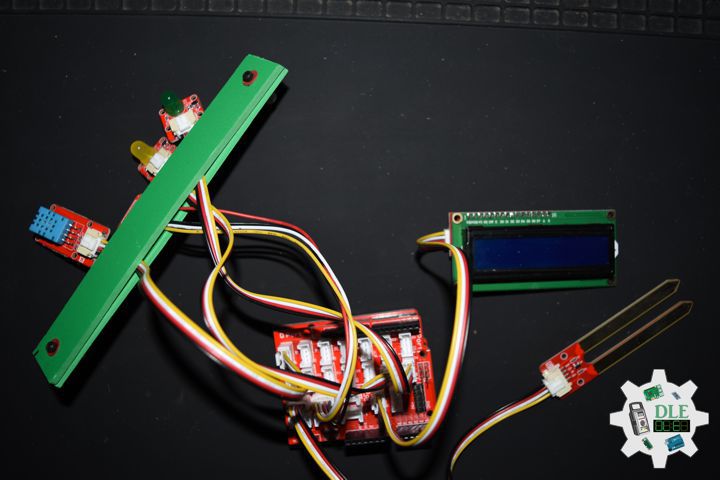
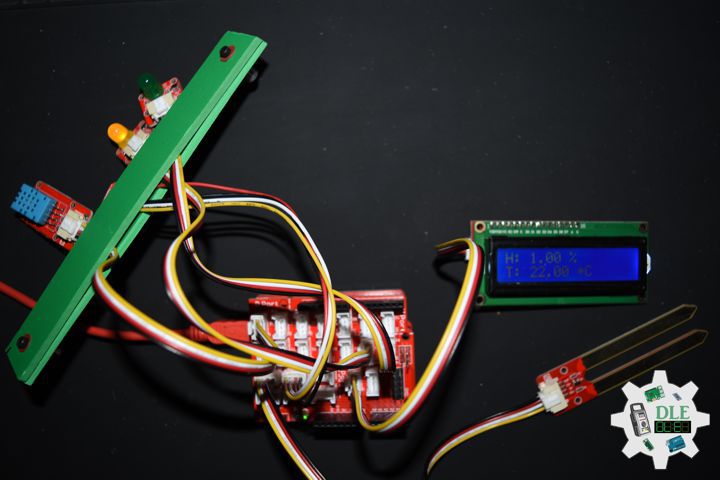
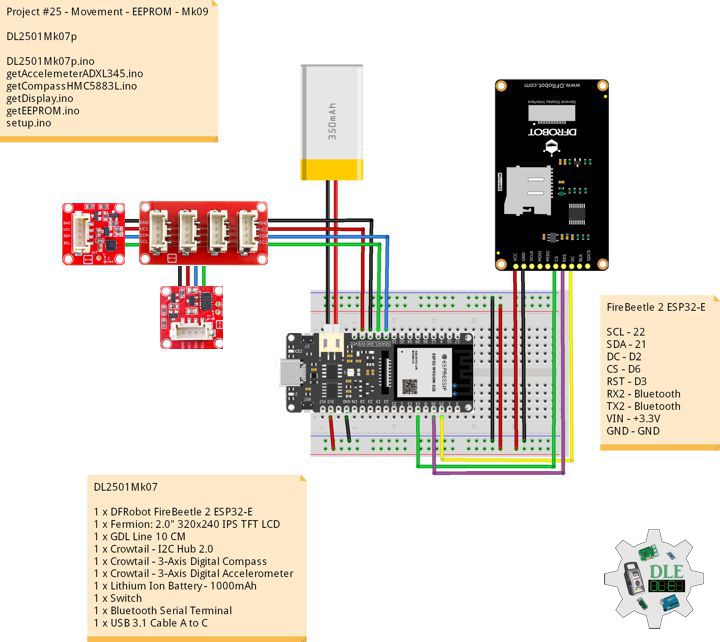
The Alpha Geek – Geeking Out

Instructor

Project #8: Servo – Moteino R2 (RFM12B) – Mk02

——

#DonLucElectronics #DonLuc #Servo #Moteino #Transceiver #RadioFrequency #Pololu #Arduino #Project #Fritzing #Programming #Electronics #Microcontrollers #Consultant

——

Moteino R2 (RFM12B)

——

Moteino R2 (RFM12B)

——

Moteino R2 (RFM12B)

——

Moteino

Moteino began as a low power wireless Arduino compatible development platform based on the popular ATmega328p chip used in the Arduino UNO. There are now several Moteino development boards including MoteinoMEGA based on the Atmega1284P and MoteinoM0 based on the SAMD21G18 Cortex M0+. For programming you will need an external FTDI-Adapter to load sketches, the advantages being lower cost, smaller size.

Servo Motor

A servo motor is a rotary actuator or linear actuator that allows for precise control of angular or linear position, velocity and acceleration. It consists of a suitable motor coupled to a sensor for position feedback. It also requires a relatively sophisticated controller, often a dedicated module designed specifically for use with servo motors.

Servo motors have been around for a long time and are utilized in many applications. They are small in size but pack a big punch and are very energy-efficient. These features allow them to be used to operate remote-controlled or radio-controlled toy cars, robots and airplanes. Servo motors are also used in industrial applications, robotics, in-line manufacturing, pharmaceutics and food services.

Pololu Adjustable Boost Regulator 2.5-9.5 Volt

This powerful, adjustable boost regulator can generate an output voltage as high as 9.5 Volt from an input voltage as low as 1.5 Volt, all in a compact. A trimmer potentiometer lets you set the boost regulator’s output voltage to a value between 2.5 and 9.5 Volt.

DL2310Mk03

2 x Moteino R2 (Transceiver RFM12B)
1 x Pololu Adjustable Boost Regulator 2.5-9.5V
2 x Lithium Ion Battery – 1Ah
1 x Sub-Micro Servo 3.7g
1 x LED Green
1 x Tactile Button
1 x Resistor 10K Ohm
1 x SparkFun FTDI Basic Breakout – 5V
1 x SparkFun Cerberus USB Cable

Moteino R2 (Send)

TR0 – Digital 2
TBI – Digital 6
LED – Digital 9
TR1 – Digital 10
TR2 – Digital 11
TR3 – Digital 12
TR4 – Digital 13
VIN – +5V
VIN – +3.3V
GND – GND

——

DL2310Mk03ps.ino

/* ***** Don Luc Electronics © *****
Software Version Information
Project #8: Servo - Radio Frequency - Mk02
6-02
Send
DL2310Mk03ps.ino
2 x Moteino R2 (Transceiver RFM12B)
1 x Pololu Adjustable Boost Regulator 2.5-9.5V
2 x Lithium Ion Battery - 1Ah
1 x Sub-Micro Servo 3.7g
1 x LED Green
1 x Tactile Button
1 x Resistor 10K Ohm
1 x SparkFun FTDI Basic Breakout - 5V
1 x SparkFun Cerberus USB Cable
*/

// Include the Library Code
// RFM12B Radio
#include <RFM12B.h>
// Sleep
#include <avr/sleep.h>

// You will need to initialize the radio by telling it what ID
// it has and what network it's on
// The NodeID takes values from 1-127, 0 is reserved for sending 
// broadcast messages (send to all nodes)
// The Network ID takes values from 0-255
// By default the SPI-SS line used is D10 on Atmega328. 
// You can change it by calling .SetCS(pin) where pin can be {8,9,10}
// Network ID used for this unit
#define NODEID        2
// The network ID we are on
#define NETWORKID    99
// The node ID we're sending to
#define GATEWAYID     1
// # of ms to wait for an ack
#define ACK_TIME     50
// Serial
#define SERIAL_BAUD  115200

// Encryption is OPTIONAL
// to enable encryption you will need to:
// - provide a 16-byte encryption KEY (same on all nodes that talk encrypted)
// - to call .Encrypt(KEY) to start encrypting
// - to stop encrypting call .Encrypt(NULL)
uint8_t KEY[] = "ABCDABCDABCDABCD";

// Wait this many ms between sending packets
int interPacketDelay = 50;
// Input
char input = 0;

// Need an instance of the RFM12B Radio Module
RFM12B radio;
// Send Size
byte sendSize = 0;
// Payload
char payload[100];
// Request ACK
bool requestACK = false;

// LED
int iLED = 9;

// The number of the Tactile Button pin
int iTButton = 6;
// Variable for reading the button status
int TButtonState = 0;
// The previous reading from the input pin
int lastTButtonState = LOW;
// The following variables are unsigned longs 
// because the time, measured in
// milliseconds, will quickly become a bigger 
// number than can be stored in an int.
// The last time the output pin was toggled
unsigned long lastDebounceTime = 0;
// The debounce time; increase if the output flickers
unsigned long debounceDelay = 50;

// String
String zzzzzz = "";
int iSER = 0;

// Software Version Information
String sver = "8-02";

void loop()
{

  // Tactile Button
  isTButton();
  
  // is RFM12B Radio
  isRFM12BRadio();

  // Inter Packet Delay
  delay(interPacketDelay);
  
}

getRFM12BRadio.ino

// RFM12B Radio
void isSetupRFM12BRadio(){

  // RFM12B Radio
  radio.Initialize(NODEID, RF12_433MHZ, NETWORKID);
  // Encryption
  radio.Encrypt(KEY);
  // Sleep right away to save power
  radio.Sleep();
  // Transmitting
  Serial.println("Transmitting...\n\n");
  
}
// is RFM12 BRadio
void isRFM12BRadio(){

  // zzzzzz ""
  zzzzzz = "";
  
  // zzzzz = "<SER|" + iSER + "|*";
  zzzzzz = "<SER|";
  zzzzzz = zzzzzz + iSER;
  zzzzzz = zzzzzz + "|*";
  
  // sendSize Length
  sendSize = zzzzzz.length();

  // sendSize
  payload[sendSize];

  // sendSize, charAt
  for(byte i = 0; i < sendSize+1; i++){

    payload[i] = zzzzzz.charAt(i);
    
  }
    
  // payload
  Serial.print(payload);
  
  // Request ACK
  requestACK = sendSize;
  
  // Wakeup
  radio.Wakeup();
  
  // Turn the LED on HIGH
  digitalWrite( iLED , HIGH);
  
  // Send
  radio.Send(GATEWAYID, payload, sendSize, requestACK);

  // Request ACK
  if (requestACK)
  {
    
    Serial.print(" - waiting for ACK...");
    if (waitForAck()){
      
      Serial.print("Ok!");
      
    }
    else Serial.print("nothing...");
    
  }

  // Turn the LED on LOW
  digitalWrite( iLED , LOW);

  // Sleep
  radio.Sleep();

  // Serial
  Serial.println();

}
// Wait a few milliseconds for proper ACK, return true if received
static bool waitForAck(){
  
  // Now
  long now = millis();

  // ACK
  while (millis() - now <= ACK_TIME){
    

    if (radio.ACKReceived(GATEWAYID)){
      
      return true;

    }

  }
  
  return false;
  
}

getTButton.ino

// Tactile Button
void isTButton(){

  // Read the state of the Button value:
  int reading = digitalRead(iTButton);

  // Check to see if you just pressed the TButton
  // (i.e. the input went from LOW to HIGH), and you've waited long enough
  // since the last press to ignore any noise:

  // If the TButton changed, due to noise or pressing:
  if (reading != lastTButtonState) {
    
    // Reset the debouncing timer
    lastDebounceTime = millis();
    
  }

  if ((millis() - lastDebounceTime) > debounceDelay) {
    
    // Whatever the reading is at, it's been there for 
    // longer than the debounce
    // delay, so take it as the actual current state:

    // if the button state has changed:
    if (reading != TButtonState) {
      
      TButtonState = reading;

      // Check if the TButton is pressed. If it is, the TButtonState is HIGH:
      if (TButtonState == HIGH) {

        iSER = 1;

      } else {

        iSER = 0;
    
      }


    }
  }
  
  // Save the reading. Next time through the loop, 
  // it'll be the lastTButtonState:
  lastTButtonState = reading;
  
}

setup.ino

// Setup
void setup(){

  // Serial
  Serial.begin(SERIAL_BAUD);

  // LED
  pinMode( iLED , OUTPUT);

  // Initialize the Button pin as an input
  pinMode(iTButton, INPUT);

  // Setup RFM12B Radio
  isSetupRFM12BRadio();

}

Moteino R2 (Receive)

TR0 – Digital 2
LED – Digital 9
TR1 – Digital 10
TR2 – Digital 11
TR3 – Digital 12
TR4 – Digital 13
VIN – +5V
VIN – +3.3V
GND – GND

DL2310Mk03Mkpr.ino

/* ***** Don Luc Electronics © *****
Software Version Information
Project #8: Servo - Radio Frequency - Mk02
6-02
Receive
DL2310Mk03pr.ino
2 x Moteino R2 (RFM12B)
1 x Pololu Adjustable Boost Regulator 2.5-9.5V
2 x Lithium Ion Battery - 1Ah
1 x Sub-Micro Servo 3.7g
1 x LED Green
1 x Tactile Button
1 x Resistor 10K Ohm
1 x SparkFun FTDI Basic Breakout - 5V
1 x SparkFun Cerberus USB Cable
*/

// Include the Library Code
// RFM12B Radio
#include <RFM12B.h>
// Servo
#include <Servo.h>

// You will need to initialize the radio by telling it what ID
// it has and what network it's on
// The NodeID takes values from 1-127, 0 is reserved for sending 
// broadcast messages (send to all nodes)
// The Network ID takes values from 0-255
// By default the SPI-SS line used is D10 on Atmega328. 
// You can change it by calling .SetCS(pin) where pin can be {8,9,10}
// Network ID used for this unit
#define NODEID        1
// The network ID we are on
#define NETWORKID    99
// Serial
#define SERIAL_BAUD  115200

// Encryption is OPTIONAL
// to enable encryption you will need to:
// - provide a 16-byte encryption KEY (same on all nodes that talk encrypted)
// - to call .Encrypt(KEY) to start encrypting
// - to stop encrypting call .Encrypt(NULL)
uint8_t KEY[] = "ABCDABCDABCDABCD";

// Need an instance of the RFM12B Radio Module
RFM12B radio;

// Message
String msg = "";

// Servo
int iSER = 0;
String sSER = "";
int firstClosingBracket = 0;

// LED
int iLED = 9;
int iLEDG = 7;

// Servo control
Servo serv;
const int pinServo = 6;

// Software Version Information
String sver = "8-02";

void loop() {

  // is RFM12B Radio
  isRFM12BRadio();

}

getRFM12BRadio.ino

// RFM12B Radio
void isSetupRFM12BRadio()
{

  // RFM12B Radio
  radio.Initialize(NODEID, RF12_433MHZ, NETWORKID);
  // Encryption
  radio.Encrypt(KEY);
  // Transmitting
  Serial.println("Listening...");
  
}
// is RFM12 BRadio
void isRFM12BRadio()
{

  // Receive
  if (radio.ReceiveComplete())
  {
    
    // CRC Pass
    if (radio.CRCPass())
    {
      
      // Serial
      Serial.print('[');
      Serial.print(radio.GetSender());
      Serial.print("] ");

      // Message
      msg = "";
      
      // Can also use radio.GetDataLen() if you don't like pointers
      for (byte i = 0; i < *radio.DataLen; i++)
      {
        
        Serial.print((char)radio.Data[i]);
        msg = msg + (char)radio.Data[i];
        
      }

      // Turn the LED on HIGH
      digitalWrite( iLED , HIGH);

      // Servo
      isServo();
  
      // ACK Requested
      if (radio.ACKRequested())
      {
        
        // Send ACK
        radio.SendACK();
        Serial.print(" - ACK Sent");
        
      }

      // Turn the LED on LOW
      digitalWrite( iLED , LOW);
    
    }
    else
    {
      
      // BAD-CRC
      Serial.print("BAD-CRC");

    }

    // Serial
    Serial.println();

  } 
  
}

getServo.ino

// Servo
void isServo(){

  // Message
  //Serial.println( msg );
  // msg = "<SER|0|*";
  firstClosingBracket = 0;
  // "<SER|"
  firstClosingBracket = msg.indexOf('|');
  //Serial.println( msg );
  msg.remove(0, 5);
  //Serial.println( msg );
  // Servo
  firstClosingBracket = msg.indexOf('|');     
  sSER = msg;
  sSER.remove(firstClosingBracket);
  //Serial.println( sSER );
  iSER = sSER.toInt();
  //Serial.println( iSER );
  int x = iSER;

  if (x == 1) {

    digitalWrite(iLEDG, HIGH);
    // Set servo to unlock
    serv.write( 0 );
    delay(15);
    
  } else {

    digitalWrite(iLEDG, LOW);
    // Set servo to lock
    serv.write( 90 );
    delay(15);
    
  }

}

setup.ino

// Setup
void setup()
{

  // Serial
  Serial.begin(SERIAL_BAUD);

  // LED
  pinMode( iLED , OUTPUT);
  pinMode( iLEDG , OUTPUT);

  // Attach Servo
  serv.attach( pinServo );

  // RFM12B Radio
  isSetupRFM12BRadio();

}

——

People can contact us: https://www.donluc.com/?page_id=1927

Teacher, Instructor, E-Mentor, R&D and Consulting

  • Programming Language
  • Single-Board Microcontrollers (PIC, Arduino, Raspberry Pi, Arm, Silicon Labs, Espressif, Etc…)
  • IoT
  • Wireless (Radio Frequency, Bluetooth, WiFi, Etc…)
  • Robotics
  • Automation
  • Camera and Video Capture Receiver Stationary, Wheel/Tank and Underwater Vehicle
  • Unmanned Vehicles Terrestrial and Marine
  • Machine Learning
  • Artificial Intelligence (AI)
  • RTOS
  • eHealth Sensors, Biosensor, and Biometric
  • Research & Development (R & D)
  • Consulting

Follow Us

Luc Paquin – Curriculum Vitae – 2023
https://www.donluc.com/luc/

Web: https://www.donluc.com/
Facebook: https://www.facebook.com/neosteam.labs.9/
YouTube: https://www.youtube.com/@thesass2063
Twitter: https://twitter.com/labs_steam
Pinterest: https://www.pinterest.com/NeoSteamLabs/
Instagram: https://www.instagram.com/neosteamlabs/

Don Luc
Project #26 – Radio Frequency – Bluetooth Server and Client – Mk26

——

#DonLucElectronics #DonLuc #RadioFrequency #Bluetooth #Display #SparkFun #BME280 #CCS811 #Arduino #Project #Fritzing #Programming #Electronics #Microcontrollers #Consultant

——

Bluetooth Server and Client

——

Bluetooth Server and Client

——

Bluetooth Server and Client

——-

Bluetooth Server and Client

Connect the SparkFun BME280 and CCS811 this is the “Server” board. Upload SparkFun Thing Plus the Server code to the board using the USB cable. When uploading is complete, disconnect this board from the computer. Now, connect the Lithium Ion battery to the “Server”. Next, connect the second SparkFun Thing Plus to your computer and upload the Client code to the board. We have two Arduino sketches to upload to the SparkFun Thing Plus boards. Upload the first sketch to the Server SparkFun Thing Plus and the second sketch to the Client SparkFun Thing Plus.

DL2307Mk07

2 x SparkFun Thing Plus – ESP32 WROOM
1 x SparkFun BME280 – Temperature, Humidity, Barometric Pressure, and Altitude
1 x SparkFun Air Quality Breakout – CCS811
1 x Adafruit SHARP Memory Display Breakout
2 x Lithium Ion Battery – 850mAh
2 x SparkFun Cerberus USB Cable

SparkFun Thing Plus – ESP32 WROOM (Server)

LED – LED_BUILTIN
SDA – Digital 23
SCL – Digital 22
RX2 – Bluetooth
TX2 – Bluetooth
VIN – +3.3V
GND – GND

——

DL2307Mk07ps.ino

/* ***** Don Luc Electronics © *****
Software Version Information
Project #26 - Radio Frequency - Bluetooth Server and Client - Mk26
26-26
DL2307Mk07ps.ino
2 x SparkFun Thing Plus - ESP32 WROOM
1 x SparkFun BME280 - Temperature, Humidity, Barometric Pressure, and Altitude
1 x SparkFun Air Quality Breakout - CCS811
1 x Adafruit SHARP Memory Display Breakout
2 x Lithium Ion Battery - 850mAh
2 x SparkFun Cerberus USB Cable
*/

// Include the Library Code
// BLE Device
#include <BLEDevice.h>
// BLE Utils
#include <BLEUtils.h>
// BLE Serve
#include <BLEServer.h>
// Two Wire Interface (TWI/I2C)
#include <Wire.h>
// SparkFun BME280 - Temperature, Humidity, Barometric Pressure, and Altitude
#include <SparkFunBME280.h>
// SparkFun CCS811 - eCO2 & tVOC
#include <SparkFunCCS811.h>

// See the following for generating UUIDs:
// https://www.uuidgenerator.net/
#define SERVICE_UUID            "7c394dc4-49a8-4c22-8a5b-b1612d8c13c1"
#define CHARACTERISTIC_UUID     "a4c4cec2-f394-4f7a-b9de-89047feca74b"
#define CHARACTERISTIC_TEM_UUID "74bd92c6-89d0-4387-823e-97e7e0fb7a2b"
#define CHARACTERISTIC_HUM_UUID "1b63f246-b97f-4d2e-b8eb-f69e20a23a34"
#define CHARACTERISTIC_BAR_UUID "43788175-37a7-4280-93c6-c690324d088e"
#define CHARACTERISTIC_ALT_UUID "609deed9-a72d-45c3-aaba-14a73b0d8fda"
#define CHARACTERISTIC_ECO_UUID "ab17aace-c0b9-4bd3-bb93-7715d9afaeea"
#define CHARACTERISTIC_VOC_UUID "6a8bf86a-9d40-457c-9f7f-f13a3d6803f1"
// Makes the chracteristic globlal
static BLECharacteristic *pCharacteristicTEM;
static BLECharacteristic *pCharacteristicHUM;
static BLECharacteristic *pCharacteristicBAR;
static BLECharacteristic *pCharacteristicALT;
static BLECharacteristic *pCharacteristicECO;
static BLECharacteristic *pCharacteristicVOC;

// SparkFun BME280 - Temperature, Humidity, Barometric Pressure, and Altitude
BME280 myBME280;
float BMEtempC = 0;
float BMEhumid = 0;
float BMEpressure = 0;
float BMEaltitudeM = 0;
String FullString = "";

// SparkFun CCS811 - eCO2 & tVOC
// Default I2C Address
#define CCS811_ADDR 0x5B 
CCS811 myCCS811(CCS811_ADDR);
float CCS811CO2 = 0;
float CCS811TVOC = 0;
String FullStringA = "";

// Software Version Information
String sver = "26-26";

void loop() {

  // SparkFun BME280 - Temperature, Humidity, Barometric Pressure, and Altitude
  isBME280();

  // SparkFun CCS811 - eCO2 & tVOC
  isCCS811();

  // Delay 1 sec
  delay(1000);

}

getBME280.ino

// SparkFun BME280 - Temperature, Humidity, Barometric Pressure, and Altitude
// isBME280 - Temperature, Humidity, Barometric Pressure, and Altitude
void isBME280(){

  // Temperature Celsius
  BMEtempC = myBME280.readTempC();
  // Humidity
  BMEhumid = myBME280.readFloatHumidity();
  // Barometric Pressure
  BMEpressure = myBME280.readFloatPressure();
  // Altitude Meters
  BMEaltitudeM = (myBME280.readFloatAltitudeMeters(), 2);

  // setValue takes uint8_t, uint16_t, uint32_t, int, float, double and string
  pCharacteristicTEM->setValue(BMEtempC);
  pCharacteristicHUM->setValue(BMEhumid);
  pCharacteristicBAR->setValue(BMEpressure);
  pCharacteristicALT->setValue(BMEaltitudeM);

  // FullString
  FullString = "Temperature = " + String(BMEtempC,2) + " Humidity = "
  + String(BMEhumid,2) + " Barometric = " + String(BMEpressure,2) 
  + " Altitude Meters = " + String(BMEaltitudeM,2) + "\r\n";

  // FullString Bluetooth Serial + Serial
  for(int i = 0; i < FullString.length(); i++)
  {

    // Serial
    Serial.write(FullString.c_str()[i]);
    
  }

}

getCCS811.ino

// CCS811 - eCO2 & tVOC
// isCCS811 - eCO2 & tVOC
void isCCS811(){

  // This sends the temperature & humidity data to the CCS811
  myCCS811.setEnvironmentalData(BMEhumid, BMEtempC);

  // Calling this function updates the global tVOC and eCO2 variables
  myCCS811.readAlgorithmResults();

  // eCO2 Concentration
  CCS811CO2 = myCCS811.getCO2();
  
  // tVOC Concentration
  CCS811TVOC = myCCS811.getTVOC();

  // setValue takes uint8_t, uint16_t, uint32_t, int, float, double and string
  pCharacteristicECO->setValue(CCS811CO2);
  pCharacteristicVOC->setValue(CCS811TVOC);

  // FullStringA
  FullStringA = "TVOCs = " + String(CCS811TVOC,2) + " eCO2 = "
  + String(CCS811CO2,2) + "\r\n";

  // FullStringA Bluetooth Serial + Serial
  for(int i = 0; i < FullStringA.length(); i++)
  {

    // Serial
    Serial.write(FullStringA.c_str()[i]);
    
  }


}

setup.ino

// Setup
void setup()
{
  
  // Serial Begin
  Serial.begin(115200);
  Serial.println("Starting BLE work!");

  // Give display time to power on
  delay(100);
  
  // Wire - Inialize I2C Hardware
  Wire.begin();

  // Give display time to power on
  delay(100);

  // SparkFun BME280 - Temperature, Humidity, Barometric Pressure, and Altitude 
  myBME280.begin();

  // CCS811 - eCO2 & tVOC
  myCCS811.begin();

  // Initialize digital pin LED_BUILTIN as an output
  pinMode(LED_BUILTIN, OUTPUT);
  // Turn the LED on HIGH
  digitalWrite(LED_BUILTIN, HIGH);

  // BLE Device Init
  BLEDevice::init("Don Luc Electronics Server");
  BLEServer *pServer = BLEDevice::createServer();
  BLEService *pService = pServer->createService(SERVICE_UUID);
  BLECharacteristic *pCharacteristic = pService->createCharacteristic(
                                         CHARACTERISTIC_UUID,
                                         BLECharacteristic::PROPERTY_READ |
                                         BLECharacteristic::PROPERTY_WRITE
                                       );

  pCharacteristicTEM = pService->createCharacteristic(
                                         CHARACTERISTIC_TEM_UUID,
                                         BLECharacteristic::PROPERTY_READ |
                                         BLECharacteristic::PROPERTY_WRITE
                                       );
                                       
  pCharacteristicHUM = pService->createCharacteristic(
                                         CHARACTERISTIC_HUM_UUID,
                                         BLECharacteristic::PROPERTY_READ |
                                         BLECharacteristic::PROPERTY_WRITE
                                       );
  
  pCharacteristicBAR = pService->createCharacteristic(
                                         CHARACTERISTIC_BAR_UUID,
                                         BLECharacteristic::PROPERTY_READ |
                                         BLECharacteristic::PROPERTY_WRITE
                                       );
  
  pCharacteristicALT = pService->createCharacteristic(
                                         CHARACTERISTIC_ALT_UUID,
                                         BLECharacteristic::PROPERTY_READ |
                                         BLECharacteristic::PROPERTY_WRITE
                                       );
  
  pCharacteristicVOC = pService->createCharacteristic(
                                         CHARACTERISTIC_VOC_UUID,
                                         BLECharacteristic::PROPERTY_READ |
                                         BLECharacteristic::PROPERTY_WRITE
                                       );
  
  pCharacteristicECO = pService->createCharacteristic(
                                         CHARACTERISTIC_ECO_UUID,
                                         BLECharacteristic::PROPERTY_READ |
                                         BLECharacteristic::PROPERTY_WRITE
                                       );
  
  pCharacteristic->setValue("Luc Paquin");
  pService->start();

  // This still is working for backward compatibility
  // BLEAdvertising *pAdvertising = pServer->getAdvertising();
  // BLE Advertising
  BLEAdvertising *pAdvertising = BLEDevice::getAdvertising();
  pAdvertising->addServiceUUID(SERVICE_UUID);
  pAdvertising->setScanResponse(true);
  // Functions that help with iPhone connections issue
  pAdvertising->setMinPreferred(0x06);
  pAdvertising->setMinPreferred(0x12);
  BLEDevice::startAdvertising();

}

——

SparkFun Thing Plus – ESP32 WROOM (Client)

LED – Digital 21
SCK – Digital 13
MOSI – Digital 12
SS – Digital 27
RX2 – Bluetooth
TX2 – Bluetooth
VIN – +3.3V
GND – GND

——

DL2307Mk07pr.ino

/* ***** Don Luc Electronics © *****
Software Version Information
Project #26 - Radio Frequency - Bluetooth Server and Client - Mk26
26-26
DL2307Mk07pr.ino
2 x SparkFun Thing Plus - ESP32 WROOM
1 x SparkFun BME280 - Temperature, Humidity, Barometric Pressure, and Altitude
1 x SparkFun Air Quality Breakout - CCS811
1 x Adafruit SHARP Memory Display Breakout
2 x Lithium Ion Battery - 850mAh
2 x SparkFun Cerberus USB Cable
*/

// Include the Library Code
// Bluetooth BLE Device
#include "BLEDevice.h"
// SHARP Memory Display
#include <Adafruit_SharpMem.h>
// Adafruit GFX Library
#include <Adafruit_GFX.h>

// SHARP Memory Display
// any pins can be used
#define SHARP_SCK  13
#define SHARP_MOSI 12
#define SHARP_SS   27
// Set the size of the display here, e.g. 144x168!
Adafruit_SharpMem display(SHARP_SCK, SHARP_MOSI, SHARP_SS, 144, 168);
// The currently-available SHARP Memory Display (144x168 pixels)
// requires > 4K of microcontroller RAM; it WILL NOT WORK on Arduino Uno
// or other <4K "classic" devices.
#define BLACK 0
#define WHITE 1
// 1/2 of lesser of display width or height
int minorHalfSize;

// The remote service we wish to connect to.
static BLEUUID serviceUUID("7c394dc4-49a8-4c22-8a5b-b1612d8c13c1");
// The characteristic of the remote service we are interested in.
static BLEUUID    charUUID("a4c4cec2-f394-4f7a-b9de-89047feca74b");
// Use the same UUID as on the server
static BLEUUID    charTEMUUID("74bd92c6-89d0-4387-823e-97e7e0fb7a2b");
static BLEUUID    charHUMUUID("1b63f246-b97f-4d2e-b8eb-f69e20a23a34");
static BLEUUID    charBARUUID("43788175-37a7-4280-93c6-c690324d088e");
static BLEUUID    charALTUUID("609deed9-a72d-45c3-aaba-14a73b0d8fda");
static BLEUUID    charECOUUID("ab17aace-c0b9-4bd3-bb93-7715d9afaeea");
static BLEUUID    charVOCUUID("6a8bf86a-9d40-457c-9f7f-f13a3d6803f1");
static boolean doConnect = false;
static boolean connected = false;
static boolean doScan = false;
static BLERemoteCharacteristic* pRemoteCharacteristic;
static BLERemoteCharacteristic* pRemoteCharacteristicTEM;
static BLERemoteCharacteristic* pRemoteCharacteristicHUM;
static BLERemoteCharacteristic* pRemoteCharacteristicBAR;
static BLERemoteCharacteristic* pRemoteCharacteristicALT;
static BLERemoteCharacteristic* pRemoteCharacteristicECO;
static BLERemoteCharacteristic* pRemoteCharacteristicVOC;

static BLEAdvertisedDevice* myDevice;
float TEMValue;
float HUMValue;
float BARValue;
float ALTValue;
float ECOValue;
float VOCValue;

int iLED = 21;

// Software Version Information
String sver = "26-26";

void loop() {

  isBluetoothBLE();

  isDisplayEnvironmental();
 
}

getBluetoothBLE.ino

// Bluetooth BLE
void isBluetoothBLE(){

  // If the flag "doConnect" is true then we have scanned for 
  // and found the desired
  // BLE Server with which we wish to connect.  Now we connect to it.
  // Once we are connected we set the connected flag to be true.
  if (doConnect == true) {
    if (connectToServer()) {
      Serial.println("We are now connected to the BLE Server.");
    } else {
      Serial.println("We have failed to connect to the server; there is nothin more we will do.");
    }
    doConnect = false;
  }

  // If we are connected to a peer BLE Server, update the characteristic each time we are reached
  // with the current time since boot.
  if (connected) {
    String newValue = "Time since boot: " + String(millis()/1000);
    //Serial.println("Setting new characteristic value to \"" + newValue + "\"");

    // Set the characteristic's value to be the array of bytes that is actually a string.
   // pRemoteCharacteristic->writeValue(newValue.c_str(), newValue.length());//***********JKO
  }else if(doScan){
    BLEDevice::getScan()->start(0);  // this is just example to start scan after disconnect, most likely there is better way to do it in arduino
  }

  // read the Characteristics and store them in a variable
  // This also makes the print command do float handling
  TEMValue = pRemoteCharacteristicTEM->readFloat();
  HUMValue = pRemoteCharacteristicHUM->readFloat();
  BARValue = pRemoteCharacteristicBAR->readFloat();
  ALTValue = pRemoteCharacteristicALT->readFloat();
  ECOValue = pRemoteCharacteristicECO->readFloat();
  VOCValue = pRemoteCharacteristicVOC->readFloat();
  
}
// Notify Callback
static void notifyCallback(
  BLERemoteCharacteristic* pBLERemoteCharacteristic,
  uint8_t* pData,
  size_t length,
  bool isNotify) {
    Serial.print("Notify callback for characteristic ");
    Serial.print(pBLERemoteCharacteristic->getUUID().toString().c_str());
    Serial.print(" of data length ");
    Serial.println(length);
    Serial.print("data: ");
    Serial.println((char*)pData);
}
// My Client Callback
class MyClientCallback : public BLEClientCallbacks {
  void onConnect(BLEClient* pclient) {
  }

  void onDisconnect(BLEClient* pclient) {
    connected = false;
    Serial.println("onDisconnect");
  }
};
// Connect To Server
bool connectToServer() {
    Serial.print("Forming a connection to ");
    Serial.println(myDevice->getAddress().toString().c_str());

    BLEClient*  pClient  = BLEDevice::createClient();
    Serial.println(" - Created client");

    pClient->setClientCallbacks(new MyClientCallback());

    // Connect to the remove BLE Server.
    // if you pass BLEAdvertisedDevice instead of address,
    //it will be recognized type of peer device address (public or private)
    pClient->connect(myDevice);  
    Serial.println(" - Connected to server");
    //set client to request maximum MTU from server (default is 23 otherwise)
    pClient->setMTU(517); 

    // Obtain a reference to the service we are after in the remote BLE server.
    BLERemoteService* pRemoteService = pClient->getService(serviceUUID);
    if (pRemoteService == nullptr) {
      Serial.print("Failed to find our service UUID: ");
      Serial.println(serviceUUID.toString().c_str());
      pClient->disconnect();
      return false;
    }
    Serial.println(" - Found our service");

    // Obtain a reference to the characteristic in the service of the remote BLE server.
    pRemoteCharacteristic = pRemoteService->getCharacteristic(charUUID);
    if (pRemoteCharacteristic == nullptr) {
      Serial.print("Failed to find our characteristic UUID: ");
      Serial.println(charUUID.toString().c_str());
      pClient->disconnect();
      return false;
    }
    Serial.println(" - Found our characteristic");
    // Temperature Obtain a reference to the characteristic in the service
    // of the remote BLE server.
    pRemoteCharacteristicTEM = pRemoteService->getCharacteristic(charTEMUUID);
    if (pRemoteCharacteristicTEM == nullptr) {
      Serial.print("Failed to find our characteristic UUID Temperature: ");
      Serial.println(charTEMUUID.toString().c_str());
      pClient->disconnect();
      return false;
    }
    // Humidity Obtain a reference to the characteristic in the service
    // of the remote BLE server.
    pRemoteCharacteristicHUM = pRemoteService->getCharacteristic(charHUMUUID);
    if (pRemoteCharacteristicHUM == nullptr) {
      Serial.print("Failed to find our characteristic UUID Temperature: ");
      Serial.println(charHUMUUID.toString().c_str());
      pClient->disconnect();
      return false;
    }

    Serial.println(" - Found our characteristic");

    // Barometric Obtain a reference to the characteristic in the service
    // of the remote BLE server.
    pRemoteCharacteristicBAR = pRemoteService->getCharacteristic(charBARUUID);
    if (pRemoteCharacteristicBAR == nullptr) {
      Serial.print("Failed to find our characteristic UUID Barometric: ");
      Serial.println(charBARUUID.toString().c_str());
      pClient->disconnect();
      return false;
    }

    Serial.println(" - Found our characteristic");
    
    // Altitude Obtain a reference to the characteristic in the service
    // of the remote BLE server.
    pRemoteCharacteristicALT = pRemoteService->getCharacteristic(charALTUUID);
    if (pRemoteCharacteristicALT == nullptr) {
      Serial.print("Failed to find our characteristic UUID Altitude: ");
      Serial.println(charALTUUID.toString().c_str());
      pClient->disconnect();
      return false;
    }

    // eCO2 Concentration Obtain a reference to the characteristic in the service
    // of the remote BLE server.
    pRemoteCharacteristicECO = pRemoteService->getCharacteristic(charECOUUID);
    if (pRemoteCharacteristicECO == nullptr) {
      Serial.print("Failed to find our characteristic UUID eCO2 Concentration: ");
      Serial.println(charECOUUID.toString().c_str());
      pClient->disconnect();
      return false;
    }

    Serial.println(" - Found our characteristic");
    
    // tVOC Concentration Obtain a reference to the characteristic in the service
    // of the remote BLE server.
    pRemoteCharacteristicVOC = pRemoteService->getCharacteristic(charVOCUUID);
    if (pRemoteCharacteristicVOC == nullptr) {
      Serial.print("Failed to find our characteristic UUID tVOC Concentration: ");
      Serial.println(charVOCUUID.toString().c_str());
      pClient->disconnect();
      return false;
    }
    
    
    Serial.println(" - Found our characteristic");
    // Read the value of the characteristic.
    if(pRemoteCharacteristic->canRead()) {
      std::string value = pRemoteCharacteristic->readValue();
      Serial.print("The characteristic value was: ");
      Serial.println(value.c_str());
    }

    if(pRemoteCharacteristic->canNotify())
      pRemoteCharacteristic->registerForNotify(notifyCallback);

    connected = true;
    return true;
    
}
/**
 * Scan for BLE servers and find the first one that advertises the service we are looking for.
 */
class MyAdvertisedDeviceCallbacks: public BLEAdvertisedDeviceCallbacks {
 /**
   * Called for each advertising BLE server.
   */
  void onResult(BLEAdvertisedDevice advertisedDevice) {
    Serial.print("BLE Advertised Device found: ");
    Serial.println(advertisedDevice.toString().c_str());

    // We have found a device, let us now see if it contains the service we are looking for.
    if (advertisedDevice.haveServiceUUID() && advertisedDevice.isAdvertisingService(serviceUUID)) {

      BLEDevice::getScan()->stop();
      myDevice = new BLEAdvertisedDevice(advertisedDevice);
      doConnect = true;
      doScan = true;

    } // Found our server
  } // onResult
}; // MyAdvertisedDeviceCallbacks

getDisplay.ino

// Display
// SHARP Memory Display - UID
void isDisplayUID() {

    // Text Display 
    // Clear Display
    display.clearDisplay();
    display.setRotation(2);
    display.setTextSize(3);
    display.setTextColor(BLACK);
    // Don Luc Electronics
    display.setCursor(0,10);
    display.println( "Don Luc" );
    display.setTextSize(2);
    display.setCursor(0,40);
    display.println( "Electronics" );
    // Version
    display.setTextSize(3);
    display.setCursor(0,70);
    display.println( "Version" );
    display.setTextSize(2);
    display.setCursor(0,100);   
    display.println( sver );
    // Refresh
    display.refresh();
    delay( 5000 );
    
}
// Display Environmental
void isDisplayEnvironmental(){

    // Text Display Environmental
    // Clear Display
    display.clearDisplay();
    display.setRotation(2);
    display.setTextSize(2);
    display.setTextColor(BLACK);
    // Temperature Celsius
    display.setCursor(0,5);
    display.print( "T: " );
    display.print( TEMValue );    
    display.println( "C" );
    // Humidity
    display.setCursor(0,25);
    display.print( "H: " );
    display.print( HUMValue );
    display.println( "%" );
    // Pressure
    display.setCursor(0,45);
    display.print( "B: " );
    display.print( BARValue );
    display.println( "" );
    // Altitude Meters
    display.setCursor(0,65);
    display.print( "A: " );   
    display.print( ALTValue );
    display.println( "M" );
    // eCO2 Concentration
    display.setCursor(0,85);
    display.print( "C: " );
    display.print( ECOValue );
    display.println( "ppm" );
    // tVOC Concentration
    display.setCursor(0,105);
    display.print( "V: " );
    display.print( VOCValue );
    display.println( "ppb" );
    // Refresh
    display.refresh();
    delay( 100 );

}

setup.ino

// Setup
void setup()
{
  
  // Serial
  Serial.begin(115200);
  Serial.println("Starting Arduino BLE Client application...");

  // Initialize digital pin iLED as an output
  pinMode(iLED, OUTPUT);
  // Turn the LED on HIGH
  digitalWrite(iLED, HIGH);

  // SHARP Display start & clear the display
  display.begin();
  display.clearDisplay();

  // Display UID
  isDisplayUID();

  // Bluetooth BLE
  BLEDevice::init("");
  
  // Give display time to power on
  delay(100);
  
  BLEScan* pBLEScan = BLEDevice::getScan();
  pBLEScan->setAdvertisedDeviceCallbacks(new MyAdvertisedDeviceCallbacks());
  pBLEScan->setInterval(1349);
  pBLEScan->setWindow(449);
  pBLEScan->setActiveScan(true);
  pBLEScan->start(5, false);

}

——

People can contact us: https://www.donluc.com/?page_id=1927

Technology Experience

  • Programming Language
  • Single-Board Microcontrollers (PIC, Arduino, Raspberry Pi,Espressif, etc…)
  • IoT
  • Wireless (Radio Frequency, Bluetooth, WiFi, Etc…)
  • Robotics
  • Camera and Video Capture Receiver Stationary, Wheel/Tank and Underwater Vehicle
  • Unmanned Vehicles Terrestrial and Marine
  • Machine Learning
  • RTOS
  • Research & Development (R & D)

Instructor, E-Mentor, STEAM, and Arts-Based Training

  • Programming Language
  • IoT
  • PIC Microcontrollers
  • Arduino
  • Raspberry Pi
  • Espressif
  • Robotics

Follow Us

Luc Paquin – Curriculum Vitae – 2023
https://www.donluc.com/luc/

Web: https://www.donluc.com/
Facebook: https://www.facebook.com/neosteam.labs.9/
YouTube: https://www.youtube.com/@thesass2063
Twitter: https://twitter.com/labs_steam
Pinterest: https://www.pinterest.com/NeoSteamLabs/
Instagram: https://www.instagram.com/neosteamlabs/

Don Luc

Project #27 – Instructor – Microcontroller – Mk02

——

#DonLucElectronics #DonLuc #Instructor #Arduino #Project #Fritzing #Programming #Electronics #Microcontrollers #Consultant

——

Microcontroller

——

Microcontroller

A microcontroller is a small computer on a single Metal-Oxide-Semiconductor (MOS) integrated circuit (IC) chip. A microcontroller contains one or more CPUs (Processor Cores) along with memory and programmable input/output peripherals. Program memory in the form of ferroelectric RAM, NOR flash or OTP ROM is also often included on chip, as well as a small amount of RAM. Microcontrollers are designed for embedded applications, in contrast to the microprocessors used in personal computers or other general purpose applications consisting of various discrete chips.

A microcontroller is a “Simple Computer” that runs one program in a loop. They are designed to perform a single, specific task. In this guide, we’ll be focusing on microcontrollers that have breakout boards, or a board that makes it easier to connect to and program the microcontroller. On a breakout board, the microcontroller pins are soldered to a printed circuit board, headers or other connectors are added to the PCB, and some basic firmware, or permanent software, is loaded to prep the microcontroller to receive signals.

There are different microcontrollers and it can be daunting to get started, especially if you’re just getting into electronics.

  • Arduino Uno, etc, (5V/16MHz, 3.3V/8MHz) is a microcontroller board based on the ATmega328.
  • Arduino Micro, etc, (5V/16MHz, 3.3V/8MHz) is a microcontroller board based on the ATmega32U4.
  • Arduino Mega 2560, etc, (5V/16MHz) is a microcontroller board based on the ATmega2560.
  • Arduino Due, etc, (3.3V/84MHz) is a microcontroller board based on the AT91SAM3X8E.
  • Arduino Zero, etc, (3.3V/48MHz) is a microcontroller board based on the ATSAMD21G18 ARM Cortex M0+.
  • Arduino Nano 33, etc, (3.3V/120MHz) is a microcontroller board based on the ATSAMD51 Cortex M4.
  • Espressif ESP32 WROOM, etc, (3.3V/240MHz) is a microcontroller board based on the Espressif Xtensa® dual-core 32-bit LX6.
  • Raspberry Pi 4 Model B (5.1V/1.5GHz) is a microcontroller board based on the Broadcom BCM2711, quad-core Cortex-A72 (ARM v8) 64-bit SoC.
  • Raspberry Pi Zero W (5.1V/1GHz) is a microcontroller board based on the Broadcom BCM2837B0 64-bit ARM Cortex-A53 Quad Core Processor SoC.
  • Etc…

People can contact us: https://www.donluc.com/?page_id=1927

Technology Experience

  • Programming Language
  • Single-Board Microcontrollers (PIC, Arduino, Raspberry Pi,Espressif, etc…)
  • IoT
  • Wireless (Radio Frequency, Bluetooth, WiFi, Etc…)
  • Robotics
  • Camera and Video Capture Receiver Stationary, Wheel/Tank and Underwater Vehicle
  • Unmanned Vehicles Terrestrial and Marine
  • Machine Learning
  • RTOS
  • Research & Development (R & D)

Instructor, E-Mentor, STEAM, and Arts-Based Training

  • Programming Language
  • IoT
  • PIC Microcontrollers
  • Arduino
  • Raspberry Pi
  • Espressif
  • Robotics

Follow Us

Luc Paquin – Curriculum Vitae – 2023
https://www.donluc.com/luc/

Web: https://www.donluc.com/
Facebook: https://www.facebook.com/neosteam.labs.9/
YouTube: https://www.youtube.com/@thesass2063
Twitter: https://twitter.com/labs_steam
Pinterest: https://www.pinterest.com/NeoSteamLabs/
Instagram: https://www.instagram.com/neosteamlabs/

Don Luc

#27 – Instructor – Instructor, E-Mentor, STEAM, and Arts-Based Training – Mk01

——

#DonLucElectronics #DonLuc #Instructor #Arduino #Project #Fritzing #Programming #Electronics #Microcontrollers #Consultant

——

Instructor

——

Instructor, E-Mentor, STEAM, and Arts-Based Training

What do remote controllers, routers, and robots all have in common? These beginner-friendly microcontrollers are easy to use and program with just a computers or laptop, a USB cable, and some open-source software. All the projects, here we come. Whether you are looking to build some cool electronic projects, learn programming, or wanting to teach others about electronics, this a teaching session will help you figure out what microcontroller is right for your needs, goals, and budgets. Here is some helpful content to start you on your electronics journey. There are different microcontrollers and it can be daunting to get started, especially if you’re just getting into electronics.

  • Arduino Uno, etc, is a microcontroller board based on the ATmega328 (5V/16MHz, 3.3V/8MHz).
  • Arduino Micro, etc, is a microcontroller board based on the ATmega32U4 (5V/16MHz, 3.3V/8MHz).
  • Arduino Mega 2560, etc, is a microcontroller board based on the ATmega2560 (5V/16MHz).
  • Arduino Due, etc, is a microcontroller board based on the AT91SAM3X8E (3.3V/84MHz).
  • Arduino Zero, etc, is a microcontroller board based on the ATSAMD21G18 ARM Cortex M0+ (3.3V/48MHz).
  • Arduino Nano 33, etc, is a microcontroller board based on the ATSAMD51 Cortex M4 (3.3V/120MHz).
  • Espressif ESP32 WROOM, etc, is a microcontroller board based on the Espressif Xtensa® dual-core 32-bit LX6 (3.3V/240MHz).
  • Raspberry Pi 4 Model B is a microcontroller board based on the Broadcom BCM2711, quad-core Cortex-A72 (ARM v8) 64-bit SoC (5.1V/1.5GHz).
  • Raspberry Pi Zero W is a microcontroller board based on the Broadcom BCM2837B0 64-bit ARM Cortex-A53 Quad Core Processor SoC (5.1V/1GHz).
  • Etc…

At Don Luc Electronics I believe that an understanding of electronics is a core literacy that opens up a world of opportunities in the fields of robotics, Internet of Things (IoT), machine learning, engineering, fashion, medical industries, environmental sciences, performing arts and more. This guide is designed to explore the connection between software and hardware, introducing code and parts as they are used in the context of building engaging projects. The circuits in this guide progress in difficulty as new concepts and components are introduced. Completing each circuit means much more than just experimenting you will walk away with a fun project you can use and a sense of accomplishment that is just the beginning of your electronics journey. At the end of each circuit, you’ll find coding challenges that extend your learning and fuel ongoing innovation.

People can contact us: https://www.donluc.com/?page_id=1927

Technology Experience

  • Programming Language
  • Single-Board Microcontrollers (PIC, Arduino, Raspberry Pi,Espressif, etc…)
  • IoT
  • Wireless (Radio Frequency, Bluetooth, WiFi, Etc…)
  • Robotics
  • Camera and Video Capture Receiver Stationary, Wheel/Tank and Underwater Vehicle
  • Unmanned Vehicles Terrestrial and Marine
  • Machine Learning
  • RTOS
  • Research & Development (R & D)

Instructor, E-Mentor, STEAM, and Arts-Based Training

  • Programming Language
  • IoT
  • PIC Microcontrollers
  • Arduino
  • Raspberry Pi
  • Espressif
  • Robotics

Follow Us

Luc Paquin – Curriculum Vitae – 2023
https://www.donluc.com/luc/

Web: https://www.donluc.com/
Facebook: https://www.facebook.com/neosteam.labs.9/
YouTube: https://www.youtube.com/@thesass2063
Twitter: https://twitter.com/labs_steam
Pinterest: https://www.pinterest.com/NeoSteamLabs/
Instagram: https://www.instagram.com/neosteamlabs/

Don Luc

Instructor, E-Mentor, STEAM, and Arts-Based Training

——

#DonLucElectronics #DonLuc #Instructor #E-Mentor #STEAM #ArtsBasedTraining #Arduino #Project #Fritzing #Programming #Electronics #Microcontrollers #Consultant

——

Instructor, E-Mentor, STEAM, and Arts-Based Training

——

Instructor, E-Mentor, STEAM, and Arts-Based Training

——

Instructor, E-Mentor, STEAM, and Arts-Based Training

——

Instructor, E-Mentor, STEAM, and Arts-Based Training

——

What do remote controllers, routers, and robots all have in common? These beginner-friendly microcontrollers are easy to use and program with just a computers or laptop, a USB cable, and some open-source software. All the projects, here we come. Whether you are looking to build some cool electronic projects, learn programming, or wanting to teach others about electronics, this a teaching session will help you figure out what microcontroller is right for your needs, goals, and budgets. Here is some helpful content to start you on your electronics journey. There are different microcontrollers and it can be daunting to get started, especially if you’re just getting into electronics.

  • Arduino Uno – R3, SparkFun RedBoard, Arduino Fio, LilyPad Arduino, FLORA, Adafruit METRO 328, Arduino Pro Mini 328, Adafruit Metro Mini 328, Adafruit Pro Trinket, Adafruit Feather 328P, Moteino, etcetera, is a microcontroller board based on the ATmega328 (5V/16MHz, 3.3V/8MHz).
  • SparkFun Pro Micro, SparkFun Fio V3, Adafruit ItsyBitsy 32u4, Adafruit Feather 32u4, Circuit Playground Classic, etcetera, is a microcontroller board based on the ATmega32U4 (5V/16MHz, 3.3V/8MHz).
  • Arduino Mega 2560 R3 is a microcontroller board based on the ATmega2560 (5V/16MHz).
  • Arduino Nano Every is a microcontroller board based on the ATMega 4809 (5V/20MHz).
  • Arduino Due is a microcontroller board based on the AT91SAM3X8E (3.3V/84MHz).
  • SparkFun RedBoard Turbo, SparkFun SAMD21 Mini Breakout, Adafruit METRO M0 Express, LilyPad Simblee BLE, etcetera, is a microcontroller board based on the ATSAMD21G18 ARM Cortex M0+ (3.3V/48MHz).
  • SparkFun Thing Plus – SAMD51, Adafruit Metro M4 Express, Adafruit Feather M4 Express, etcetera, is a microcontroller board based on the ATSAMD51 Cortex M4 (3.3V/120MHz).
  • SparkFun Thing Plus – ESP32 WROOM, Adafruit HUZZAH32 – ESP32 Feather Board, etcetera, is a microcontroller board based on the Espressif Xtensa® dual-core 32-bit LX6 (3.3V/240MHz).
  • Raspberry Pi 4 Model B is a microcontroller board based on the Broadcom BCM2711, quad-core Cortex-A72 (ARM v8) 64-bit SoC (5.1V/1.5GHz).
  • Raspberry Pi Zero W is a microcontroller board based on the Broadcom BCM2837B0 64-bit ARM Cortex-A53 Quad Core Processor SoC (5.1V/1GHz).
  • Etcetera…

At Don Luc Electronics I believe that an understanding of electronics is a core literacy that opens up a world of opportunities in the fields of robotics, Internet of Things (IoT), machine learning, engineering, fashion, medical industries, environmental sciences, performing arts and more. This guide is designed to explore the connection between software and hardware, introducing code and parts as they are used in the context of building engaging projects. The circuits in this guide progress in difficulty as new concepts and components are introduced. Completing each circuit means much more than just experimenting you will walk away with a fun project you can use and a sense of accomplishment that is just the beginning of your electronics journey. At the end of each circuit, you’ll find coding challenges that extend your learning and fuel ongoing innovation.

People can contact us: https://www.donluc.com/?page_id=1927

Technology Experience

  • Single-Board Microcontrollers (PIC, Arduino, Raspberry Pi,Espressif, etc…)
  • IoT
  • Wireless (Radio Frequency, Bluetooth, WiFi, Etc…)
  • Robotics
  • Camera and Video Capture Receiver Stationary, Wheel/Tank and Underwater Vehicle
  • Unmanned Vehicles Terrestrial and Marine
  • Machine Learning
  • RTOS
  • Research & Development (R & D)

Instructor and E-Mentor

  • IoT
  • PIC Microcontrollers
  • Arduino
  • Raspberry Pi
  • Espressif
  • Robotics

Follow Us

Luc Paquin – Curriculum Vitae – 2023
https://www.donluc.com/luc/

Web: https://www.donluc.com/
Facebook: https://www.facebook.com/neosteam.labs.9/
YouTube: https://www.youtube.com/channel/UC5eRjrGn1CqkkGfZy0jxEdA
Twitter: https://twitter.com/labs_steam
Pinterest: https://www.pinterest.com/NeoSteamLabs/
Instagram: https://www.instagram.com/neosteamlabs/

Don Luc

E-Mentor

——

#DonLucElectronics #DonLuc #EMentor #Project #Programming #Electronics #Microcontrollers #Consultant #VideoBlog

——

Music Acoustics

——

Dayton Audio RS75T-8

——

NeoPixel Stick

——-

E-Mentoring

E-mentoring stemmed from mentoring programs with the invention of the Internet. Mentorship is a relationship in which a certain area of expertise. Mentoring is a process for the informal transmission of knowledge, social capital, and the psychosocial support perceived by the recipient as relevant to work, career, to have greater relevant knowledge, wisdom, or experience.

This is an up-and-coming, incredibly important position. Technology has been rapidly improving, and becoming more a part of day to day you must know how to get things done on the newest technology. A technology mentor will help with technical breakdowns, advise on systems that may work better than what you’re currently using, and coach you through new technology and how to best use it and implement it into your daily life.

Individuals around the world were in survival mode, experiencing various amounts of success and frustration in adopting legally enforced virtual work as they tried to maintain business continuity in a time of personal and professional uncertainty. Adaption was critical to the success of each organization and individual. And through it all we learned that work is something that we do, not somewhere that we go.

E-Mentor Over Zoom

Here’s how E-Mentor and E-Mentee can successfully spin up virtual classrooms, participate in online classes, and use Zoom for distance Technology E-Mentor microcontrollers and robotics.

Technology E-Mentor Microcontrollers and Robotics

In technology E-Mentor microcontrollers and robotics education program whose purpose is to assist users in learning how to use parts or any other application, operating system interface, or programming tool. There are three kinds of tutorials:

  • Webinars where users participate in real-time tutorial workshops remotely using web conferencing software (Zoom).
  • 1 E-Mentor <=> 1 E-Mentee.
  • 1 E-Mentor <=> Group E-Mentee.
  • A demonstration of a process, using examples to show how a workflow or process is completed.
  • Some method of review that reinforces or tests understanding of the content in the related module or section.
  • Written documents, audio file and microcontrollers programming downloadable.
  • Kit: Development Board, Solder Soldering Irons, Beginner Parts, Small Parts, Discrete Semiconductor, Sensor, Guidebook, Etc…

At Luc Paquin I believe that an understanding of electronics is a core literacy that opens up a world of opportunities in the fields of robotics, Internet of Things (IoT), engineering, fashion, medical industries, environmental sciences, performing arts and more. This guide is designed to explore the connection between software and hardware, introducing Arduino code and parts as they are used in the context of building engaging projects. The circuits in this guide progress in difficulty as new concepts and components are introduced. Completing each circuit means much more than just experimenting you will walk away with a fun project you can use and a sense of accomplishment that is just the beginning of your electronics journey. At the end of each circuit, you’ll find coding challenges that extend your learning and fuel ongoing innovation.

Schedule of Services E-Mentor

  • Beginner: These beginner-friendly microcontrollers are easy to use and program with just a computers or laptop, a USB cable, and some open-source software.
  • Intermediate: Internet of Things (IoT).
  • Advanced: Robotics, engineering, fashion, medical, environmental, performing arts, etc…
  • Projects: TBD
  • Consulting: TBD – https://www.jlpconsultants.com/

People can contact us: https://www.donluc.com/?page_id=1927

Technology Experience

  • Single-Board Microcontrollers (PIC, Arduino, Raspberry Pi,Espressif, etc…)
  • IoT
  • Robotics
  • Research & Development (R & D)
  • Desktop Applications (Windows, OSX, Linux, Multi-OS, Multi-Tier, etc…)
  • Mobile Applications (Android, iOS, Blackberry, Windows Mobile, Windows CE, etc…)
  • Web Applications (LAMP, Scripting, Java, ASP, ASP.NET, RoR, Wakanda, etc…)
  • Social Media Programming & Integration (Facebook, Twitter, YouTube, Pinterest, etc…)
  • Content Management Systems (WordPress, Drupal, Joomla, Moodle, etc…)
  • Bulletin Boards (phpBB, SMF, Vanilla, jobberBase, etc…)
  • eCommerce (WooCommerce, OSCommerce, ZenCart, PayPal Shopping Cart, etc…)

Instructor and E-Mentor

  • PIC Microcontrollers
  • Arduino
  • Raspberry Pi
  • Espressif
  • Robotics
  • DOS, Windows, OSX, Linux, iOS, Android, Multi-OS
  • Linux-Apache-PHP-MySQL

Follow Us

J. Luc Paquin – Curriculum Vitae – 2021 English & Español
https://www.jlpconsultants.com/luc/

Web: https://www.donluc.com/
Web: https://www.jlpconsultants.com/
Web: https://www.donluc.com/DLE/
Web: https://www.donluc.com/DLHackster/
Web: https://www.hackster.io/neosteam-labs
Web: https://zoom.us/
Patreon: https://www.patreon.com/DonLucElectronics
Facebook: https://www.facebook.com/neosteam.labs.9/
YouTube: https://www.youtube.com/channel/UC5eRjrGn1CqkkGfZy0jxEdA
Twitter: https://twitter.com/labs_steam
Pinterest: https://www.pinterest.com/NeoSteamLabs/
Instagram: https://www.instagram.com/neosteamlabs/

Don Luc

Categories
Archives