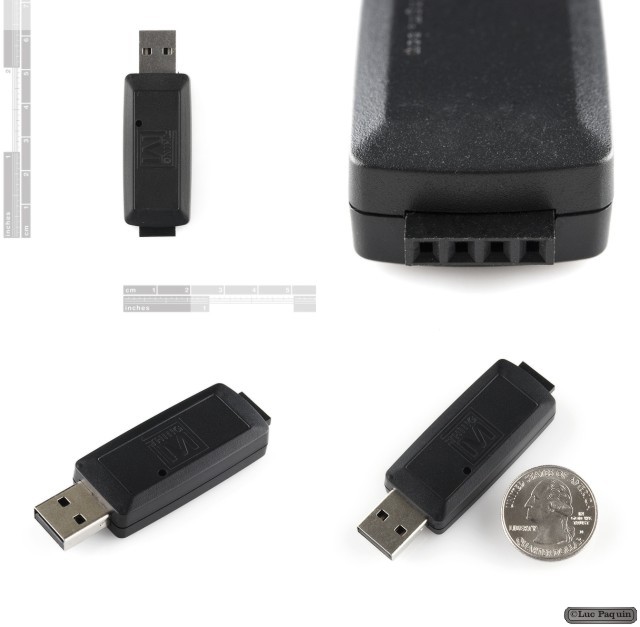
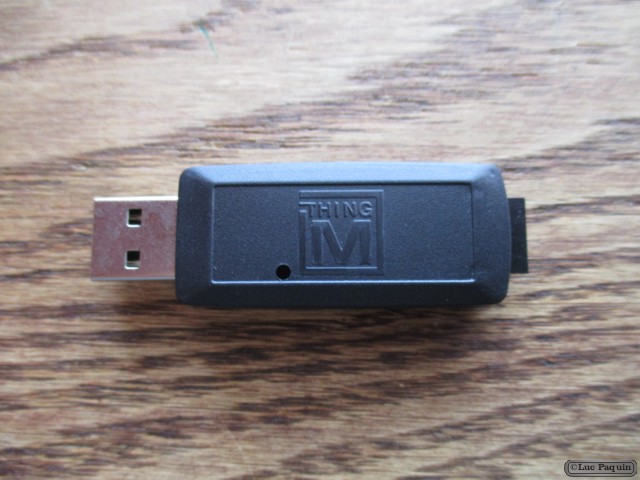
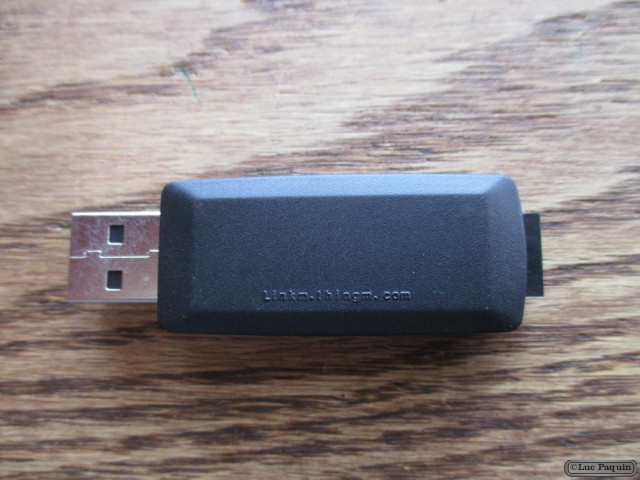
DonLuc
Project #2 – Lens – LED – Mk6
1 X Arduino Pro Mini 328 – 5V/16MHz
5 X Break Away Headers – Straight
1 X FTDI Basic Breakout – 5V
1 X USB LiPoly Charger – Single Cell
1 X Polymer Lithium Ion Battery – 400mAh
5 X Standoff – Nylon (3/8″, #4-40)
12 X Pan Head, Slotted Drive, #4-40 Thread Size, 1/4″ Length
2 X Nut – Nylon Locknut – #4-40
1 X SPDT Mini Power Switch
3 X Panel Mount 10K potentiometer (Breadboard Friendly) – 10K Linear
1 X Potentiometer Knob – Soft Touch T18 – Red
1 X Potentiometer Knob – Soft Touch T18 – Blue
1 X Potentiometer Knob – Soft Touch T18 – White
22 X Hook-Up Wire – Assortment (Solid Core, 22 AWG)
1 X Prototyping Board
1 X Project #2 – Lens – LED – Mk1
Don Luc
Project #2 – Lens – LED – Mk5
Project #2 – Lens – LED – Mk4
1 X Panel Mount 10K potentiometer (Breadboard Friendly) – 10K Linear
3 X Jumper Wires Premium 6″ M/M
1 X Project #2 – Lens – LED – Mk3
LensLEDMk4.3.ino
// ***** Don Luc ***** // Software Version Information // 4.1 - 4.2 - 4.3 // sensorNumber #include // Which pin on the Arduino is connected to the NeoPixels? #define PIN 6 // How many NeoPixels are attached to the Arduino? #define NUMPIXELS 2 Adafruit_NeoPixel pixels = Adafruit_NeoPixel(NUMPIXELS, PIN, NEO_GRB + NEO_KHZ800); // Panel Mount 1K potentiometer Brightneed const int sensorPin = A0; // Panel Mount 1K potentiometer const int sensorDelay = A1; // Panel Mount 1K potentiometer const int sensorNumber = A2; // variables: int sensorValue = 0; // the sensor value int sensorMin = 1023; // minimum sensor value int sensorMax = 0; // maximum sensor value int red = 0; int green = 0; int blue = 0; int x = 0; long delayVal = 0; long xp = 0; int y = 0; int z = 0; void loop() { z = analogRead(sensorNumber); y = (z / 127); // range value: switch (y) { case 0: // Blue red = 0; green = 102; blue = 204; neopix(); break; case 1: // Yellow red = 255; green = 255; blue = 0; neopix(); break; case 2: // Pink red = 255; green = 153; blue = 203; neopix(); break; case 3: // White red = 255; green = 255; blue = 255; neopix(); break; case 4: // Green red = 0; green = 255; blue = 0; neopix(); break; case 5: // Orange red = 255; green = 102; blue = 0; neopix(); break; case 6: // Violet red = 204; green = 102; blue = 204; neopix(); break; case 7: xp = analogRead(sensorDelay); delayVal = (1000 * xp); // range value: switch (x) { case 0: // Blue red = 0; green = 102; blue = 204; neopix(); delay(delayVal); // Delay for a period of time (in milliseconds). x = 1; break; case 1: // Yellow red = 255; green = 255; blue = 0; neopix(); delay(delayVal); // Delay for a period of time (in milliseconds). x = 2; break; case 2: // Pink red = 255; green = 153; blue = 203; neopix(); delay(delayVal); // Delay for a period of time (in milliseconds). x = 3; break; case 3: // White red = 255; green = 255; blue = 255; neopix(); delay(delayVal); // Delay for a period of time (in milliseconds). x = 4; break; case 4: // Green red = 0; green = 255; blue = 0; neopix(); delay(delayVal); // Delay for a period of time (in milliseconds). x = 5; break; case 5: // Orange red = 255; green = 102; blue = 0; neopix(); delay(delayVal); // Delay for a period of time (in milliseconds). x = 6; break; case 6: // Violet red = 204; green = 102; blue = 204; neopix(); delay(delayVal); // Delay for a period of time (in milliseconds). x = 0; break; } break; } }
neopin.ino
void neopix() { for(int i=0; i<NUMPIXELS; i++){ // read the sensor: sensorValue = analogRead(sensorPin); // apply the calibration to the sensor reading sensorValue = map(sensorValue, sensorMin, sensorMax, 0, 255); // in case the sensor value is outside the range seen during calibration sensorValue = constrain(sensorValue, 0, 255); // pixels.Color takes RGB values, from 0,0,0 up to 255,255,255 pixels.setBrightness( sensorValue ); pixels.setPixelColor(i, pixels.Color(red,green,blue)); pixels.show(); // This sends the updated pixel color to the hardware. delay(50); // Delay for a period of time (in milliseconds). } }
setup.ino
void setup() { pixels.begin(); // This initializes the NeoPixel library. }
Don Luc
Project #2 – Lens – LED – Mk3
1 X Arduino and Breadboard Holder
1 X Breadboard – Translucent Self-Adhesive (Clear)
1 X Arduino UNO Rev3
2 X Panel Mount 10K potentiometer (Breadboard Friendly) – 10K Linear
13 X Jumper Wires Premium 6″ M/M
1 X Cable
1 X Project #2 – Lens – LED – Mk1
LensLEDMk3.3.ino
// ***** Don Luc ***** // Software Version Information // 3.0 // Real // 3.1 // sensorValue // 3.2 // red, green, blue // 3.3 // delayVal #include <Adafruit_NeoPixel.h> // Which pin on the Arduino is connected to the NeoPixels? #define PIN 6 // How many NeoPixels are attached to the Arduino? #define NUMPIXELS 2 Adafruit_NeoPixel pixels = Adafruit_NeoPixel(NUMPIXELS, PIN, NEO_GRB + NEO_KHZ800); // Panel Mount 1K potentiometer Brightneed const int sensorPin = A0; // Panel Mount 1K potentiometer const int sensorDelay = A1; // variables: int sensorValue = 0; // the sensor value int sensorMin = 1023; // minimum sensor value int sensorMax = 0; // maximum sensor value int red = 0; int green = 0; int blue = 0; int x = 0; long delayVal = 0; long xp = 0; void loop() { xp = analogRead(sensorDelay); delayVal = (20000 + xp); // range value: switch (x) { case 0: // Blue red = 0; green = 102; blue = 204; neopix(); delay(delayVal); // Delay for a period of time (in milliseconds). x = 1; break; case 1: // Yellow red = 255; green = 255; blue = 0; neopix(); delay(delayVal); // Delay for a period of time (in milliseconds). x = 2; break; case 2: // Pink red = 255; green = 153; blue = 203; neopix(); delay(delayVal); // Delay for a period of time (in milliseconds). x = 3; break; case 3: // White red = 255; green = 255; blue = 255; neopix(); delay(delayVal); // Delay for a period of time (in milliseconds). x = 4; break; case 4: // Green red = 0; green = 255; blue = 0; neopix(); delay(delayVal); // Delay for a period of time (in milliseconds). x = 5; break; case 5: // Orange red = 255; green = 102; blue = 0; neopix(); delay(delayVal); // Delay for a period of time (in milliseconds). x = 6; break; case 6: // Violet red = 204; green = 102; blue = 204; neopix(); delay(delayVal); // Delay for a period of time (in milliseconds). x = 0; break; } }
neopin.ino
void neopix() { for(int i=0; isetup.ino
void setup() { pixels.begin(); // This initializes the NeoPixel library. }Don Luc
Project #2 – Lens – LED – Mk2
1 X Arduino UNO Rev3
1 X Cable
1 X Project #2 – Lens – LED – Mk1
LensLEDMk2.1.ino
// ***** Don Luc ***** // Software Version Information // 2.1 #include <Adafruit_NeoPixel.h> // Which pin on the Arduino is connected to the NeoPixels? #define PIN 6 // How many NeoPixels are attached to the Arduino? #define NUMPIXELS 2 Adafruit_NeoPixel pixels = Adafruit_NeoPixel(NUMPIXELS, PIN, NEO_GRB + NEO_KHZ800); int delayval = 500; // delay for half a second void loop() { for(int i=0;i<NUMPIXELS;i++){ // pixels.Color takes RGB values, from 0,0,0 up to 255,255,255 pixels.setBrightness(125); pixels.setPixelColor(i, pixels.Color(50,150,50)); // Moderately bright green color. pixels.show(); // This sends the updated pixel color to the hardware. delay(delayval); // Delay for a period of time (in milliseconds). } }
setup.ino
void setup() { pixels.begin(); // This initializes the NeoPixel library. }
Don Luc
Project #2 – Lens – LED – Mk1
Project #1 – The AcceleroSynth – Mk1
Apr 3, 2012 @ 15:03
We are finally ready for our first electronics project, The AcceleroSynth. It is an microcontroller-based (Arduino) music synth that is controller by a 3 axis analog accelerometer. It will be both a hardware and a software synth. This is the announcement for the project and in the coming days I will post the BOM (Bill of Material), schematics and Arduino code with the first assembly video. The project will first be assembled on a protoboard, then a soldered version will be built either on a perfboard or on an Arduino ProtoShield. If there is enough demand either a PCB or an Arduino Shield will be built for the project and sold here. More on that later. The first installment on the building of the project should be up on a few days.
Don Luc
A Video Introduction to Microcontrollers
Tomorrow’s Video – An Introduction to Microcontrollers
Mar 28, 2012 @ 22:12
I’m hard at work… Actually make that “I think” that tomorrow’s video post will be an introduction to microcontrollers. I will dig some stuff out of the drawers tomorrow and as usual make it up as I go and it will probably be about microcontrollers.
Sleep tight…
Don Luc